 Manage
Tablespaces Using EM Express
Manage
Tablespaces Using EM Express Before You Begin
This 15-minute tutorial shows you how to manage the tablespaces using EM Express.
Select the Oracle Database release:
Background
An Oracle database is made up of physical and logical structures. Physical structures are visible in the operating system. An example of a physical structure is an operating system file that stores data on a disk. Logical structures are defined and known to the Oracle Database server, but are not known to the operating system. An example of a logical structure is a tablespace. In this tutorial you will view logical structures in your database and understand how they relate to physical structures in the operating system.
What Do You Need?
- Oracle Database 18c19c
 View
Tablespace and Data File Information
View
Tablespace and Data File Information
- The pluggable database should be open for the Enterprise
Management Database Express to work. If the pluggable database
is open, skip to step 2. If not, open the pluggable database
by performing the steps below and proceed to step 2. Open a
terminal window, execute the oraenv command to set the
environment variables and connect to the multitenant container
database orcl.
$ . oraenv
ORACLE_SID = [oracle] ? orcl
The Oracle base has been set to /scratch/u01/app/oracle
$ $ sqlplus / as sysdba SQL*Plus: Release 19.0.0.0.0 - Production on Wed Mar 25 00:54:43 2019 Version 19.3.0.0.0 Copyright (c) 1982, 2019, Oracle. All rights reserved. Connected to: Oracle Database 19c Enterprise Edition Release 19.0.0.0.0 - Production Version 19.3.0.0.0 SQL>SQL*Plus: Release 18.0.0.0.0 - Production on Wed Mar 13 00:54:43 2019 Version 18.3.0.0.0 Copyright (c) 1982, 2018, Oracle. All rights reserved. Connected to: Oracle Database 18c Enterprise Edition Release 18.0.0.0.0 - Production Version 18.3.0.0.0 SQL>
Alter the session and set container as pdb (orclpdb in this case). Open the pluggable database and issue the SQL statement that returns the port that is configured for EM Express for PDB.$ SQL> alter session set container orclpdb; Session altered.SQL> alter pluggable database orclpdb open; Pluggable database altered.SQL> SELECT dbms_xdb_config.gethttpsport() from dual; DBMS_XDB_CONFIG.GETHTTPSPORT() ------------------------------ 5502 - Enter the URL for the Enterprise Manager Database Express
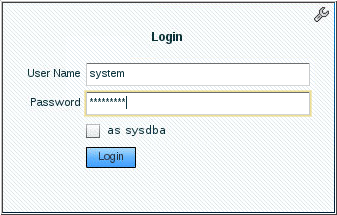
for PDB in your browser and log in as the SYSTEM user.
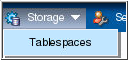
Description of the illustration a2 - Select Tablespaces
in the Storage menu.
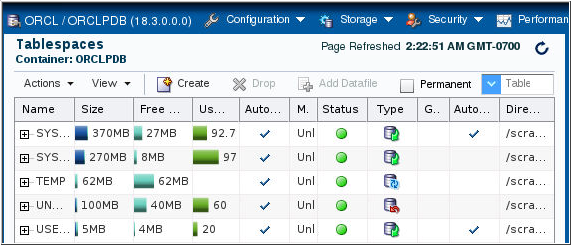
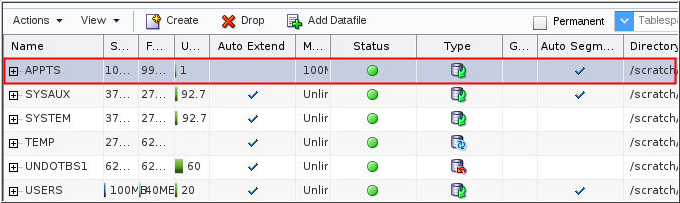
Description of the illustration a3 - The Tablespaces page is displayed.
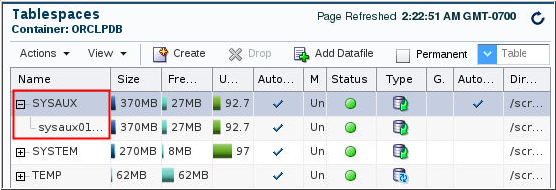
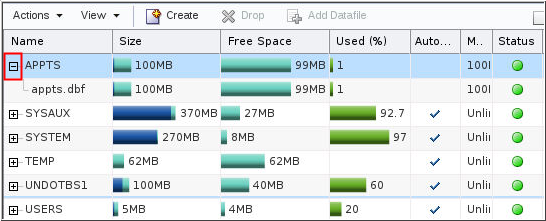
Description of the illustration a4 - Expand one of the tablespaces to view information about the
datafiles allocated to the tablespace.
Description of the illustration a5 - Click ORCL to return to the Database Home page.
 Create a Tablespace
A number of tablespaces are automatically created when you create the database. To create a new tablespace, perform the following steps:
- Select Tablespaces
in the Storage menu.
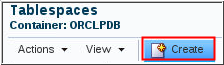
Description of the illustration b1 - On the Tablespaces page, click Create.
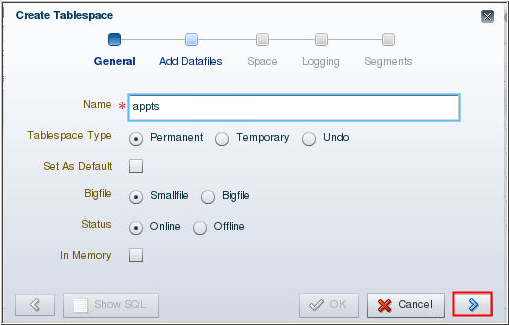
Description of the illustration b2 - Enter a name for the new tablespace in the Name field.
Accept the defaults for Tablespace type, Bigfile, and
Status. Click the right arrow.
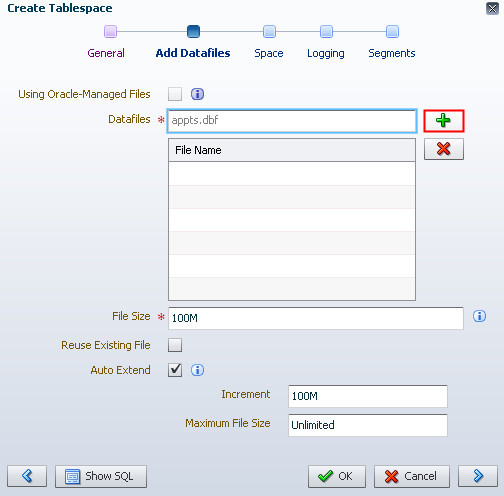
Description of the illustration b3 - Enter a file name in the Datafiles field and click the
green plus symbol.
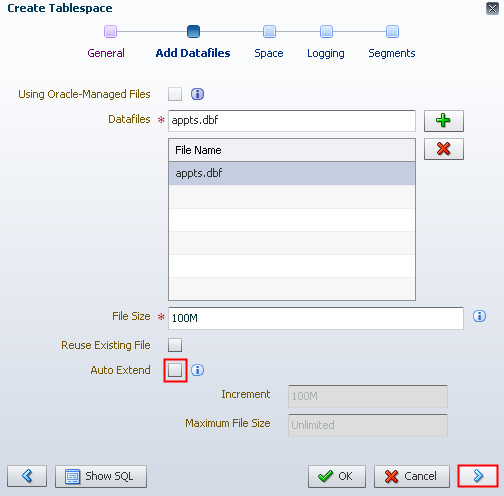
Description of the illustration b4 - The file appears in the File Name list. Deselect "Auto Extend" and click
the right arrow. Note: You will set the datafile to
autoextend in the Modifying a Tablespace section.
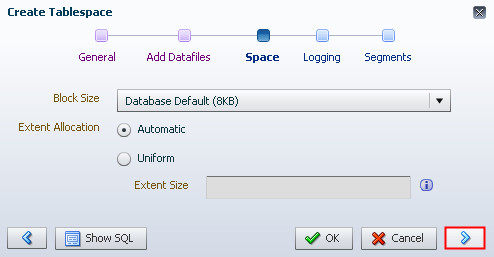
Description of the illustration b5 - Accept the default block size and automatic extent
allocation. Click the right arrow.
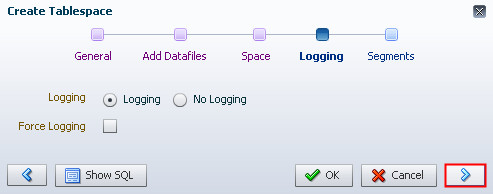
Description of the illustration b6 - Accept the default value for Logging. Click the right
arrow.
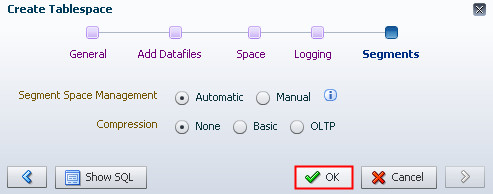
Description of the illustration b7 - Accept the default of Automatic for Segment Space
Management and None for Compression. Click OK.
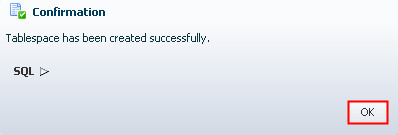
Description of the illustration b8 - Click OK on the
Confirmation page.
Description of the illustration b9 - The new tablespace is listed on the Tablespaces page.
Description of the illustration b10
 Modify a Tablespace
This section shows you how to configure a tablespace to automatically extend when it reaches the defined limit. To configure a tablespace to automatically extend, perform the following steps:
- If you are not on the Tablespaces page, select
Tablespaces in the Storage menu.
Description of the illustration c1 - Expand the tablespace name of the tablespace you want to
configure.
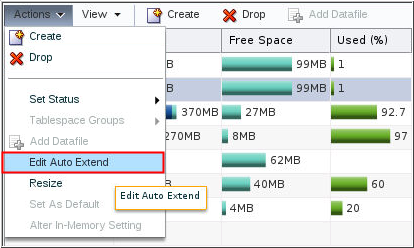
Description of the illustration c2 - Select the datafile. In the Actions menu, select "Edit Auto Extend."
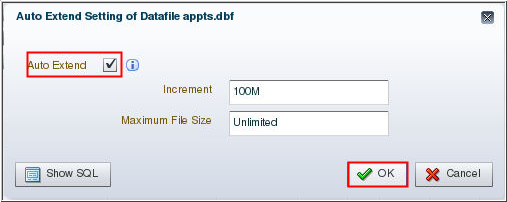
Description of the illustration c3 - Select "Auto Extend."
Click OK.
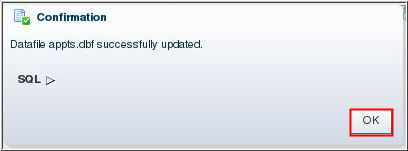
Description of the illustration c4 - Click OK on the
Confirmation page.
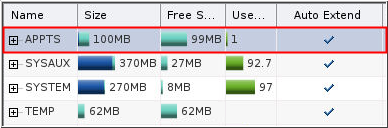
Description of the illustration c5 - The Tablespaces page indicates that the datafile for the
APPTS tablespace is set to automatically extend.
Description of the illustration c6 - Click ORCL / ORCLPDB to return to the Database Home page.