 Modify
a Resource Plan
Modify
a Resource Plan  Before You Begin
Select the Oracle Database release:
This 15-minute tutorial shows you how to modify a resource plan using Enterprise Manager Express.
What Do You Need?
- Oracle Database 18c19c
 Modify
a Plan
Modify
a Plan
In this section, you make the following modifications to the plan:
- Adding an Existing Consumer Group to a Plan
- Removing a Consumer Group from a Plan
- Setting Attributes for a Consumer Group in a Plan
- Setting a Plan as the Currently Active Plan
- Deleting a Plan
For more information about different ways that you can modify a plan, click here.
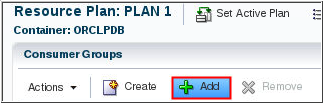
- First, you add an existing Consumer Group into this plan. In
the Resource Plan page for Plan 1, click the Add
button.
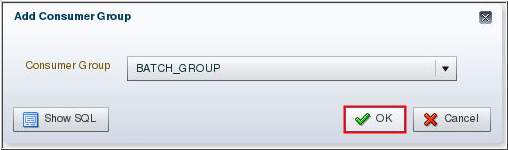
Description of the illustration a1 - Select the Consumer Group from the Add Consumer Group dialog
box and click OK.
Description of the illustration a2 - Click OK in the Confirmation dialog box. Notice that the consumer group name appears in the Consumer Groups section of the page.
- Now, you remove a consumer group from the plan. In this
example, the SYS_GROUP
is removed.
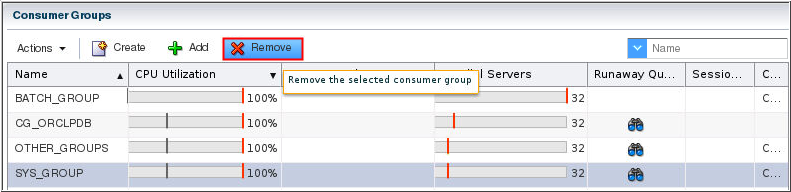
Description of the illustration a4 To remove the consumer group from the plan, select the group and click Remove.
- The Remove Consumer Group dialog box appears. Click OK
to remove the consumer group from the current plan.

Description of the illustration a5 - The Confirmation dialog box appears. Click OK.
- You now set attributes (CPU Directives, Parallel Server
Directives, and Runaway Query Directives) for the newly added
consumer group. In this example, you set it for the
BATCH_GROUP consumer group.
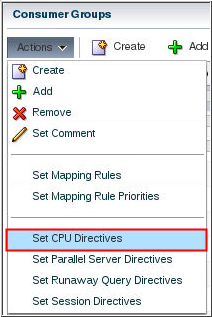
Description of the illustration a7 You now set attributes (CPU Directives, Parallel Server Directives, and Runaway Query Directives) for the newly added consumer group. In this example, you set it for the BATCH_GROUP consumer group.
- In the Set CPU Directive dialog box, enter values for Shares
and Limit (%), and click OK.
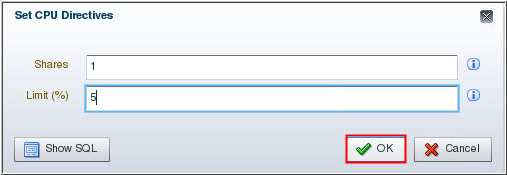
Description of the illustration a8 - The Confirmation dialog box appears. Click OK.
- Now you set the Parallel Server Directives. Select the BATCH_GROUP consumer group. Then, from the Actions menu, choose Set Parallel Server Directives.
- In the Set Parallel Sever Directives dialog box, enter
values for Parallel Server Limit (%), Max Degree of
Parallelism, Parallel Statement Queue Timeout (s), and Bypass
Queue, and click OK.
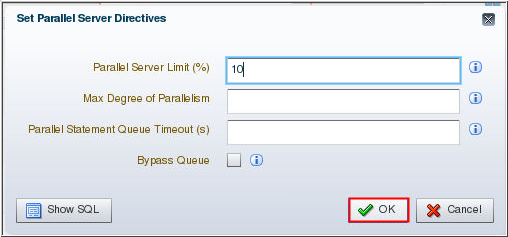
Description of the illustration a11 Note: In this example, the values for Max Degree of Parallelism and Parallel Statement Queue Timeout (s) is left blank. As it is blank, the default value will be used.
- The Confirmation dialog box appears. Click OK.
- Now you set the Runaway Query Directives. Select the BATCH_GROUP consumer group. Then, from the Actions menu, choose Set Runaway Query Directives.
- In the Set Runaway Query Directives dialog box, enter values
for Elapsed Time Limit (s), CPU Time Limit (s), I/O Limit
(MB), Logical I/O Limit, I/O Request Limit, and Action, and
click OK.
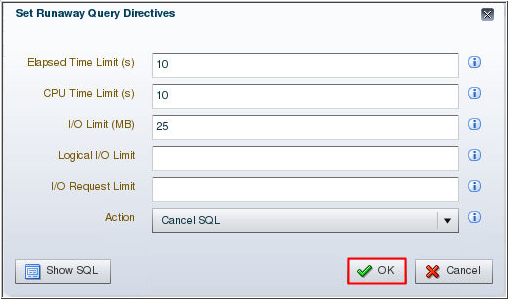
Description of the illustration a14 - The Confirmation dialog box appears. Click OK.
- Now you set this resource plan as the currently active plan. In the Resource Plan page for Plan 1, click Set Active Plan.
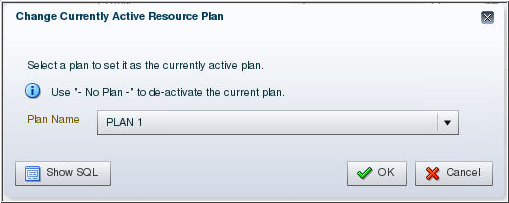
- In the Change Currently Active Resource Plan dialog box,
select the plan name that you want to set as the active plan,
and then click OK. In
this example, PLAN 1 is set as the active plan.
Description of the illustration a17 - The Confirmation dialog box appears. Click OK.
- You may verify that the plan is working and active by
performing the following steps. Open a terminal window and
enter the following command:
Note: In this example, the listener is using the port 1521. You may need to change the port number in the command based on your setup. Notice that the session gets terminated after 3 seconds. This is because the Runaway Query Directive for OTHER_GROUPS is set to Kill Session in 3 seconds. This confirms that the plan is active and working.
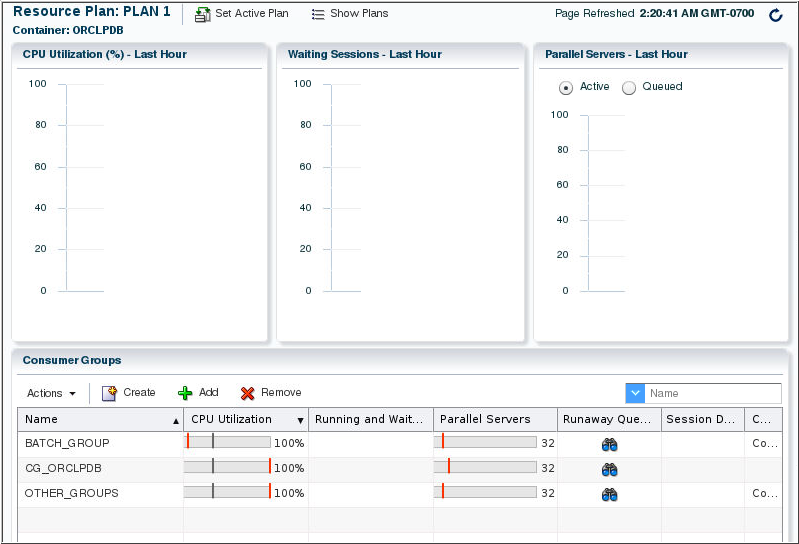
- Since the plan is active, the Resource Plan page now
displays information metric like CPU Utilization (%) - Last
Hour, Waiting Sessions - Last Hour, and Parallel Servers -
Last Hour for the plan.
Description of the illustration a20 - Now, you will delete the plan. Before deleting the plan, you
must make sure that the plan you are deleting is inactive. In
the Resource Plan page for Plan 1, click Set
Active Plan. Then, select - No
Plan - for Plan Name and click OK.
The Confirmation dialog box appears. Click OK.
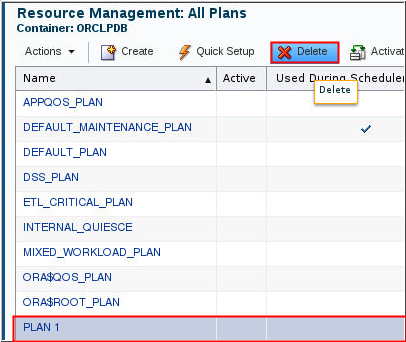
- In the Resource Plan page for Plan 1, click Show Plans.
- In the Resource Management All Plans page, select the plan
you wish to delete and click Delete.
Description of the illustration a23 - The Delete Resource Plan dialog box appears. Click OK to delete the plan. The Confirmation dialog box appears confirming that the plan is deleted. Click OK.