 Provision
a PDB Using EM Express
Provision
a PDB Using EM Express  Before You Begin
This 15-minute tutorial shows you how to provision pluggable databases (PDBs) in a multitenant container database (CDB) using Oracle Enterprise Manager Database Express (EM Express).
Select the Oracle Database release:
Background
You can provision PDBs by creating a new PDB within a CDB, by cloning an existing PDB, and by plugging an unplugged PDB into a CDB.
What Do You Need?
- Oracle Database 18c19c
 Create
a New PDB from the Seed
Create
a New PDB from the Seed
- In EM Express, ensure that you are in the Containers page for the ORCL CDB.
- In the Top Containers section of the Containers page, choose
Create.
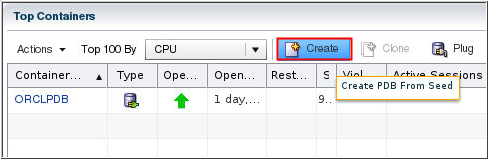
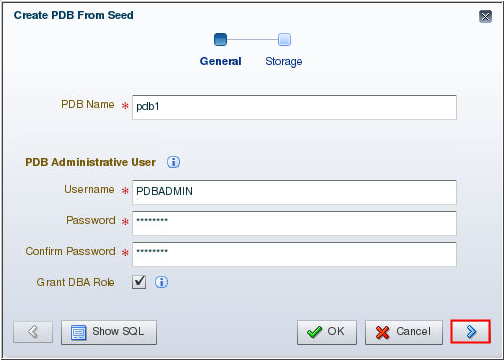
Description of the illustration a2 - The Create PDB From Seed wizard appears. On the General page of the wizard, supply values for these fields and click the Next button:
- PDB Name: In this example, the PDB Name is entered as pdb1. You may enter a different name.
- Username: Enter the name of the administrative user who would manage the PDB you are creating.
- Password: Enter the password for the administrative user.
- Confirm Password: Reenter the password for the administrative user.
- Grant DBA Role: Enable this option to grant the DBA role
to the administrative user you are creating.
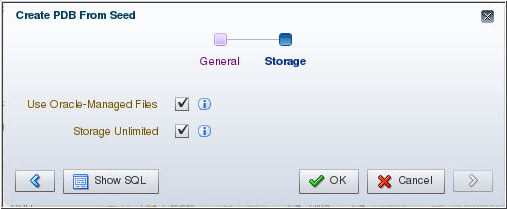
Description of the illustration a3 - On the Storage page, select the type of location where you
want to store the datafiles for the PDB. Since the ORCL
CDB is enabled with Oracle Managed Files, Use
Oracle-Managed Files is selected. Also, choose
whether or not to enable unlimited storage for the datafiles.
Click OK.
Description of the illustration a4 Note: If the CDB has a current active resource plan, the Resource Limits page appears. Supply values for these fields, or keep the default values for the PDB you are creating.
- The PDB is created and opened in read write mode. The Confirmation box appears and advises you that the PDB was successfully created. Click OK.
 Create
a PDB by Cloning a PDB in the Same CDB
Create
a PDB by Cloning a PDB in the Same CDB
- In EM Express, ensure that you are in the Containers page for the ORCL CDB.
- In the Top Containers section of the Containers page, click
the PDB that you want to clone and then choose Clone.
In this example, orclpdb is being cloned.

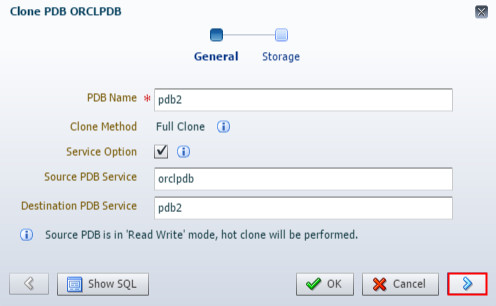
Description of the illustration b2 - he Clone wizard appears. On the General page of the Clone
wizard, enter values for these fields and click Next:
- PDB Name: Enter the name you want to use for the cloned PDB.
- Service Option: Enable this option so that the service name is unique and not the same as the source PDB.
- Source PDB Service: Specify the service name of the source PDB.
- Destination PDB Service: Specify the service name of the new PDB that will be created by the clone operation.
Note: Since the source PDB is in read write mode, a hot clone will be performed.
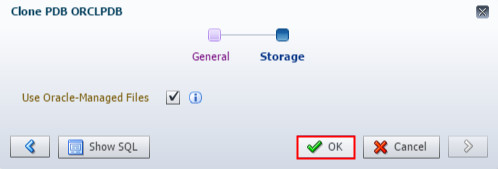
Description of the illustration b3 - On the Storage page, accept the default location to store
the datafiles for the PDB and click OK.
Description of the illustration b4 - The PDB is created and opened in read write mode. The Confirmation box appears and advises you that the PDB was created successfully through cloning. Click OK.
 Plug
in an Unplugged PDB
Plug
in an Unplugged PDB
- Before you plug in an unplugged PDB, you must have a PDB that is unplugged. To unplug a PDB, follow the steps in the next OBE "Remove PDBs Using EM Express."
- In EM Express, ensure that you are in the Containers page for the ORCL CDB.
- In the Top Containers section of the Containers page, click
Plug. In this example,
you plug PDB2.

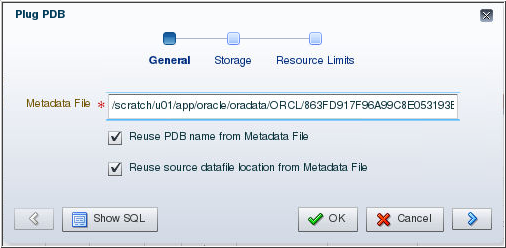
Description of the illustration c3 - On the General page of the Plug PDB wizard, supply values
for these fields and click the Next button:
- Metadata File: Enter the full path to the metadata XML file that was created when the PDB was unplugged.
- Reuse PDB name from Metadata File: Select this option so that the same name is used as the unplugged PDB when it is plugged into the CDB.
- Reuse source datafile location from Metadata File: Select this option so that the same datafile location is used as the unplugged PDB when it is plugged into the CDB.
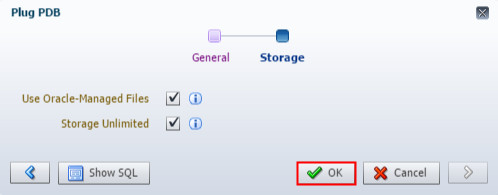
Description of the illustration c4 - On the Storage page, accept the default location to store
the datafiles for the PDB and click OK.
Description of the illustration c5 - The PDB is plugged in successfully. The Confirmation box appears and advises you that the PDB was plugged in successfully. Click OK.