25.2 Deploying Graph Server (PGX) Using OCI Load Balancer

You can deploy multiple graph servers (PGX) behind a load balancer using Oracle Cloud Infrastructure (OCI) Load Balancing Service.

You can enable cookie-based session persistence with a load balancer to direct all requests from a single client to a specific backend server.

You can you perform the following steps to deploy multiple graph servers using the OCI load balancer.

As a prerequisite requirement, you must ensure that two or more graph servers are running on different machines on the same port (7007 by default).
  1. Sign in to OCI console using your Oracle Cloud Account.
  2. Open the navigation menu, click Networking and then Load Balancers.
  3. Click Create Load Balancer.
    The Select Load Balancer Type window opens.
  4. Select Load Balancer and click Create Load Balancer.
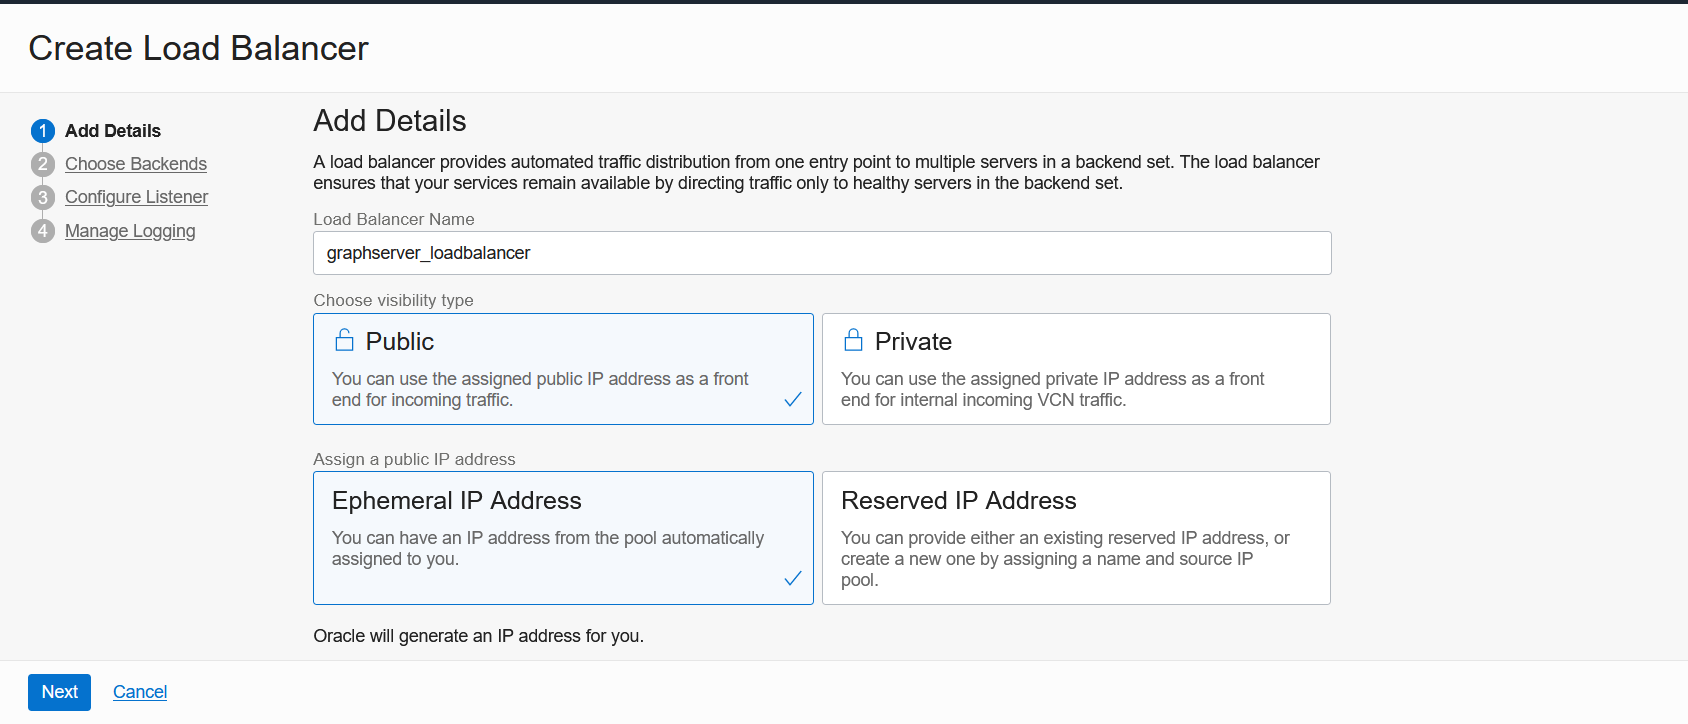
    The Add Details page opens as shown:

    Figure 25-1 Configuring Load Balancer Details

    Description of Figure 25-1 follows
    Description of "Figure 25-1 Configuring Load Balancer Details"
  5. Optionally, edit the following details:
    • Load Balancer Name
    • Choose visibility type
    • Choose IP address type
  6. Under Choose Networking section, select the Virtual Cloud Network where the graph server instances are running.
  7. Accept the default values for all other fields and click Next.
    The Choose Backends page opens.
  8. Select Weighted Round Robin as the Load Balancing Policy.
  9. Click Add Backends to add the backend servers.
    The Add Backends slider opens as shown.

    Figure 25-2 Adding Backends to Load Balancer

    Description of Figure 25-2 follows
    Description of "Figure 25-2 Adding Backends to Load Balancer"
  10. Select as many backend graph server instances as available and click Add Selected Backends.
    The selected backend set appear in the Select Backend Servers table.
  11. Specify the following values for the parameters under Specify Health Check Policy:
    • Protocol: HTTP
    • Port: backend port used by all the graph servers
    • Interval in milliseconds: default value
    • Timeout in milliseconds: default value
    • Number of Retries: default value
    • Status Code: 200
    • URL Path: /isReady

      See Health Check in the Load Balancer for supported health check endpoints.

    • Response Body RegEx: true
  12. Click Next.
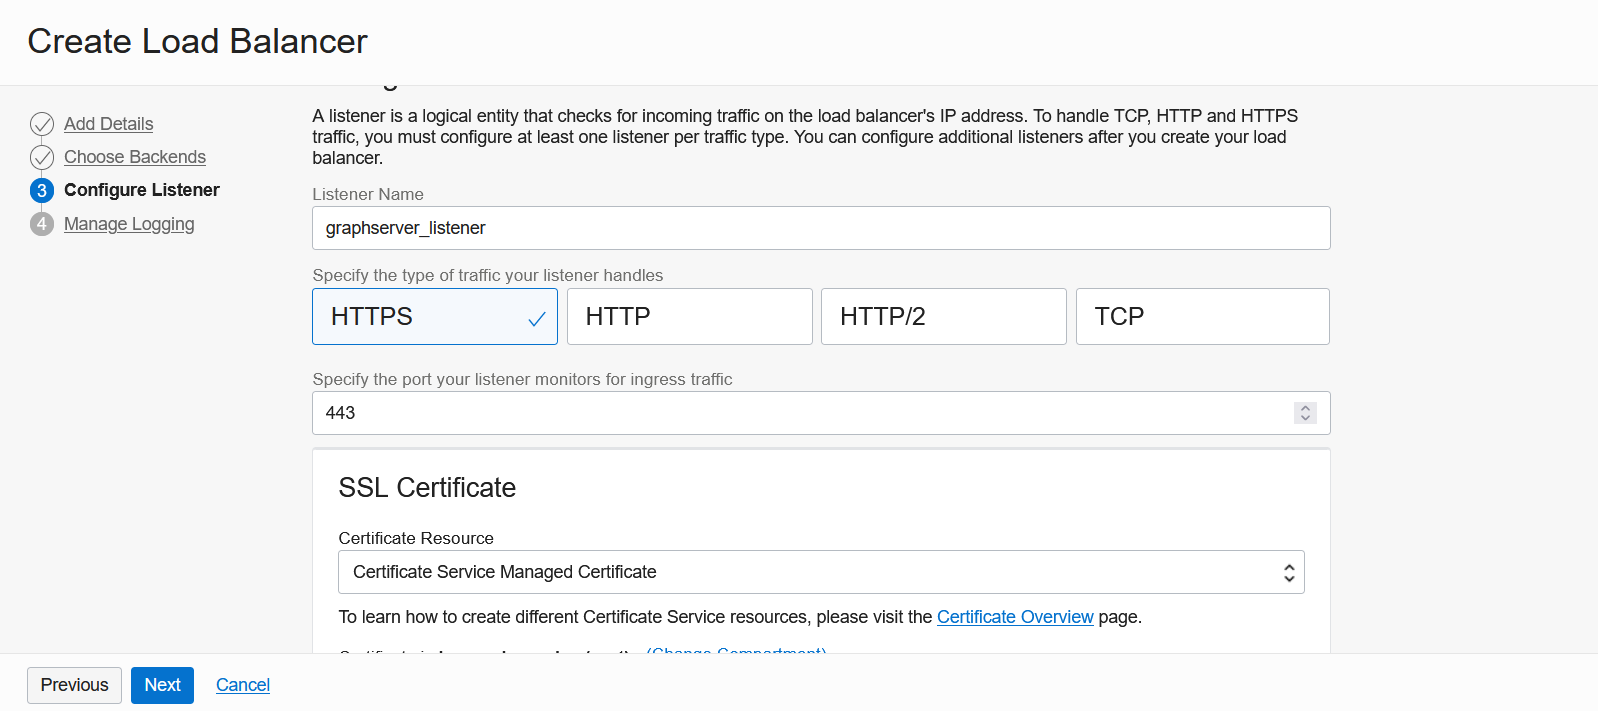
    The Configure Listener page opens as shown:

    Figure 25-3 Configuring a Listener for the Load Balancer

    Description of Figure 25-3 follows
    Description of "Figure 25-3 Configuring a Listener for the Load Balancer"
  13. Optionally, edit the Listener Name.
  14. Specify HTTPS or HTTP as the type of traffic handled by the listener.
  15. Specify the listener port value to either 443 or 80.
  16. Upload SSL Certificate if you specified HTTPS communication.
  17. Click Next.
    The Manage Logging page opens as shown.
  18. Accept all the default values on this page and click Submit.
    The load balancer is provisioned and it appears on the table in the Load Balancers page.
  19. Click on the provisioned load balancer to view the Load Balancer Details.
  20. Click Backend Sets under Resources.
  21. Click the backend set you want to edit.
    The Backend Set Details page opens.
  22. Click Edit.
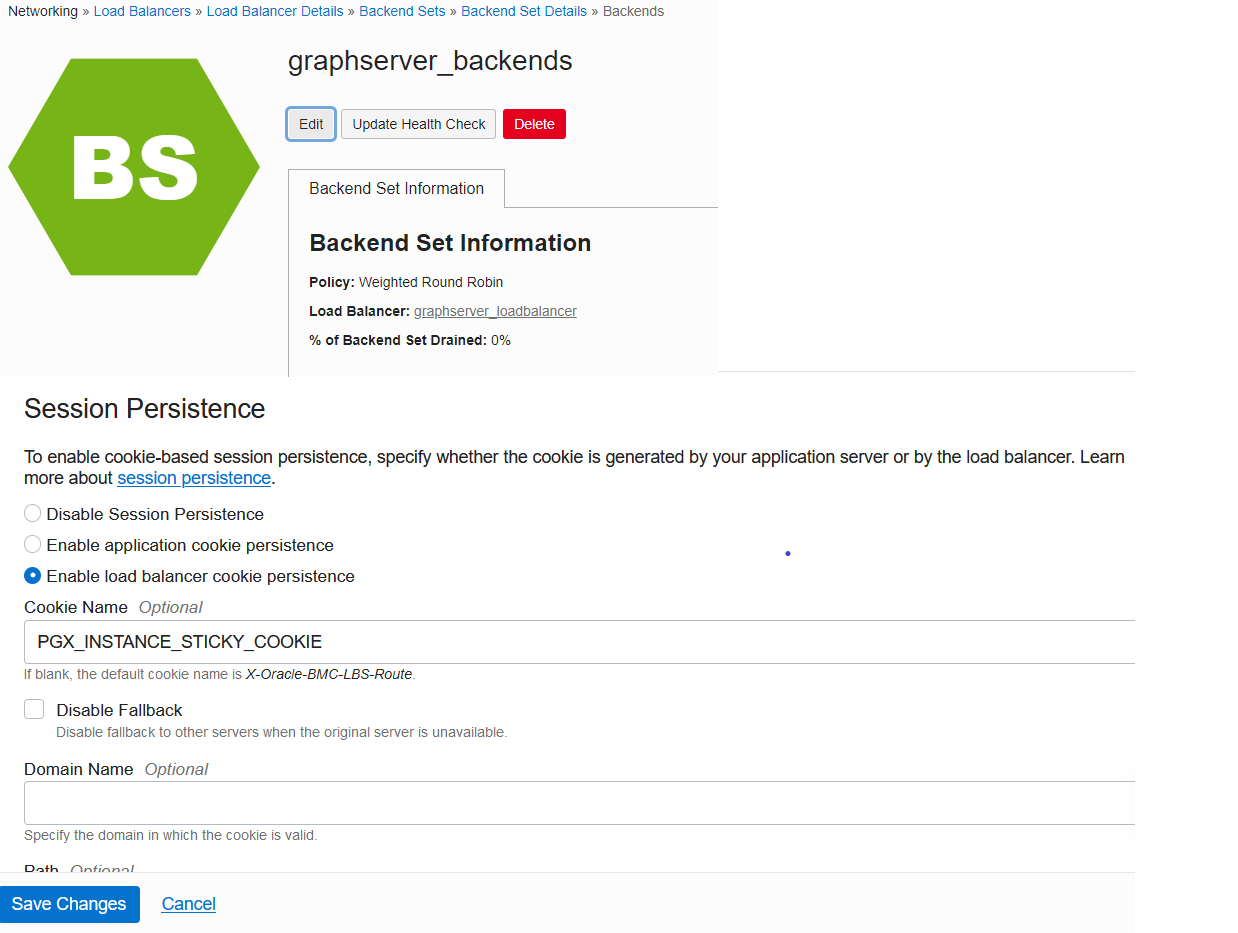
    The Edit Backend Set dialog opens as shown:

    Figure 25-4 Enabling Session Persistence

    Description of Figure 25-4 follows
    Description of "Figure 25-4 Enabling Session Persistence"
  23. Select Enable load balancer cookie persistence.
  24. Set the Cookie Name to PGX_INSTANCE_STICKY_COOKIE and click Save Changes.
    Your work request gets submitted.
You can now send requests to the load balancer and your session will be persisted on the respective server to which you are logged in.