Creating or Editing an Index
Use the Index Editor to create a new index or modify an existing index on a table. The editor helps you define index properties (name, type, tablespace), choose indexed columns or expressions, and preview the generated DDL before applying changes.
-
In the left navigator, expand Connections, expand your connection, and then expand Indexes.
-
Do one of the following:
-
Create a new index: Right-click the Indexes node and select Create Index or click the + (Add) icon next to Indexes.
-
Edit an existing index: Right-click an index and select Edit.
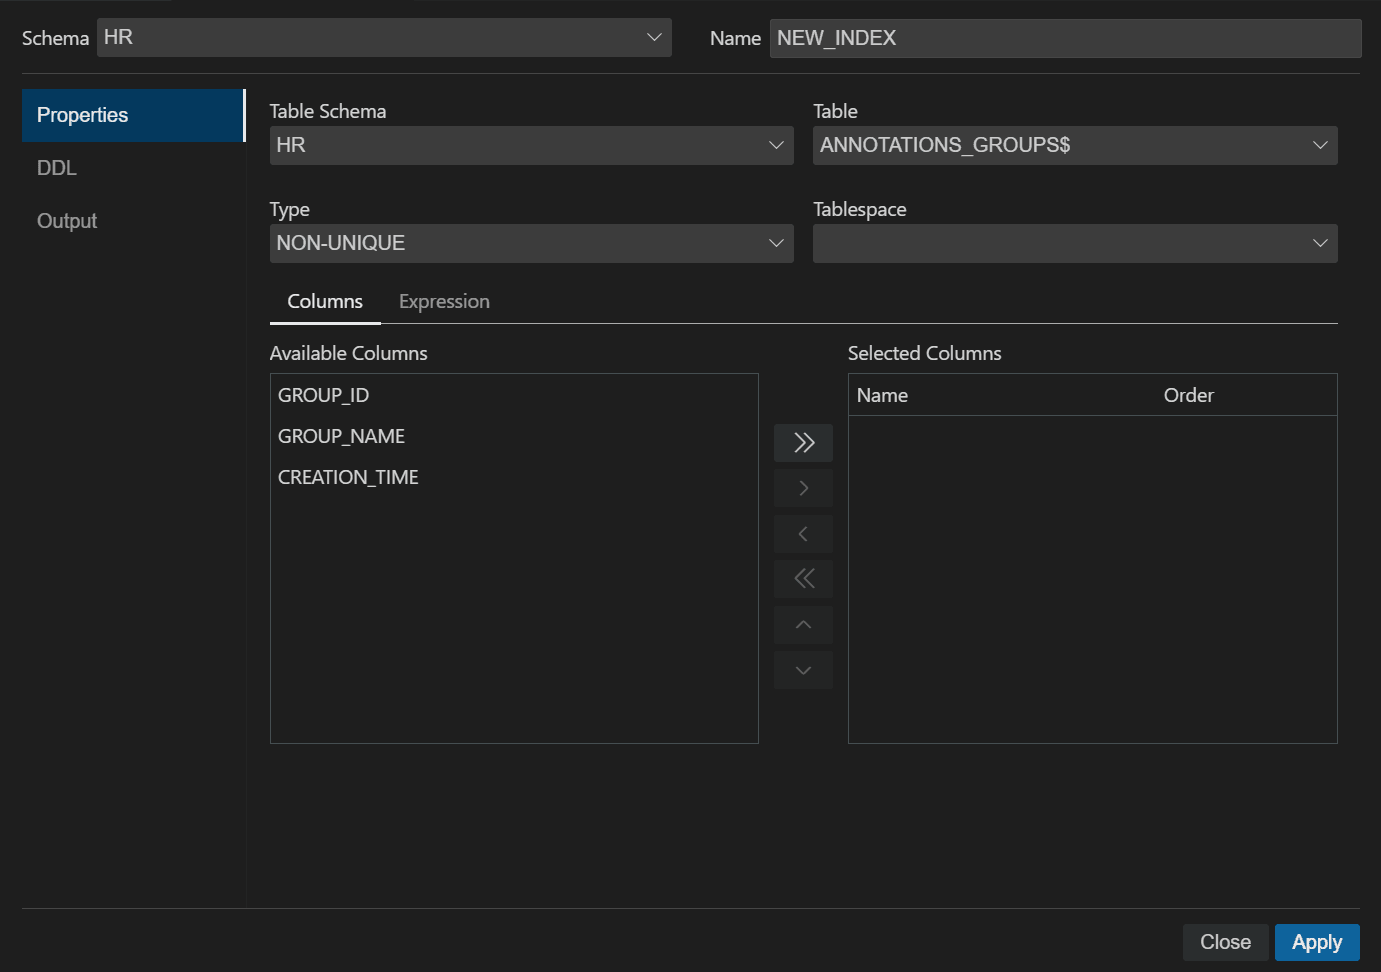
The Index Editor opens in the right pane, where you can enter or edit details. By default, the Properties tab is selected.
-
-
At the top of the editor, select the target Schema and enter the index name.
-
Define the index settings in the Properties tab:
-
Table Schema: The schema that owns the table being indexed.
-
Table: Select the target table. For example,
COUNTRIES -
Type: Select the index type. For example, UNIQUE, NON-UNIQUE, BITMAP
-
Tablespace: Select where the index will be stored.
-
For standard column-based indexes, select the Columns tab.
From Available Columns, select the column(s) and move them to Selected Columns using the arrow buttons. For each selected column, set Order: ASC or DESC
-
(Optional) For creating an indexed expression, select the Expression tab and enter the expression.
-
-
Select DDL and review the generated SQL statement.
-
Click Apply to save your changes. You are automatically navigated to the Output tab, where you can review success messages or error details.