DBA Roles
Database roles are named groups of privileges that can be granted to users or other roles. In Oracle SQL Developer for VS Code, use the Roles dashboard to view database roles, inspect role grants, create roles, edit roles, and delete roles.
To open the Roles dashboard:
-
Open SQL Developer for VS Code.
-
In the Connections panel, expand your database connection tree.
-
Expand DBA, and then expand Security.
-
Select Roles.
The Roles dashboard opens and displays a list of database roles with authentication information.
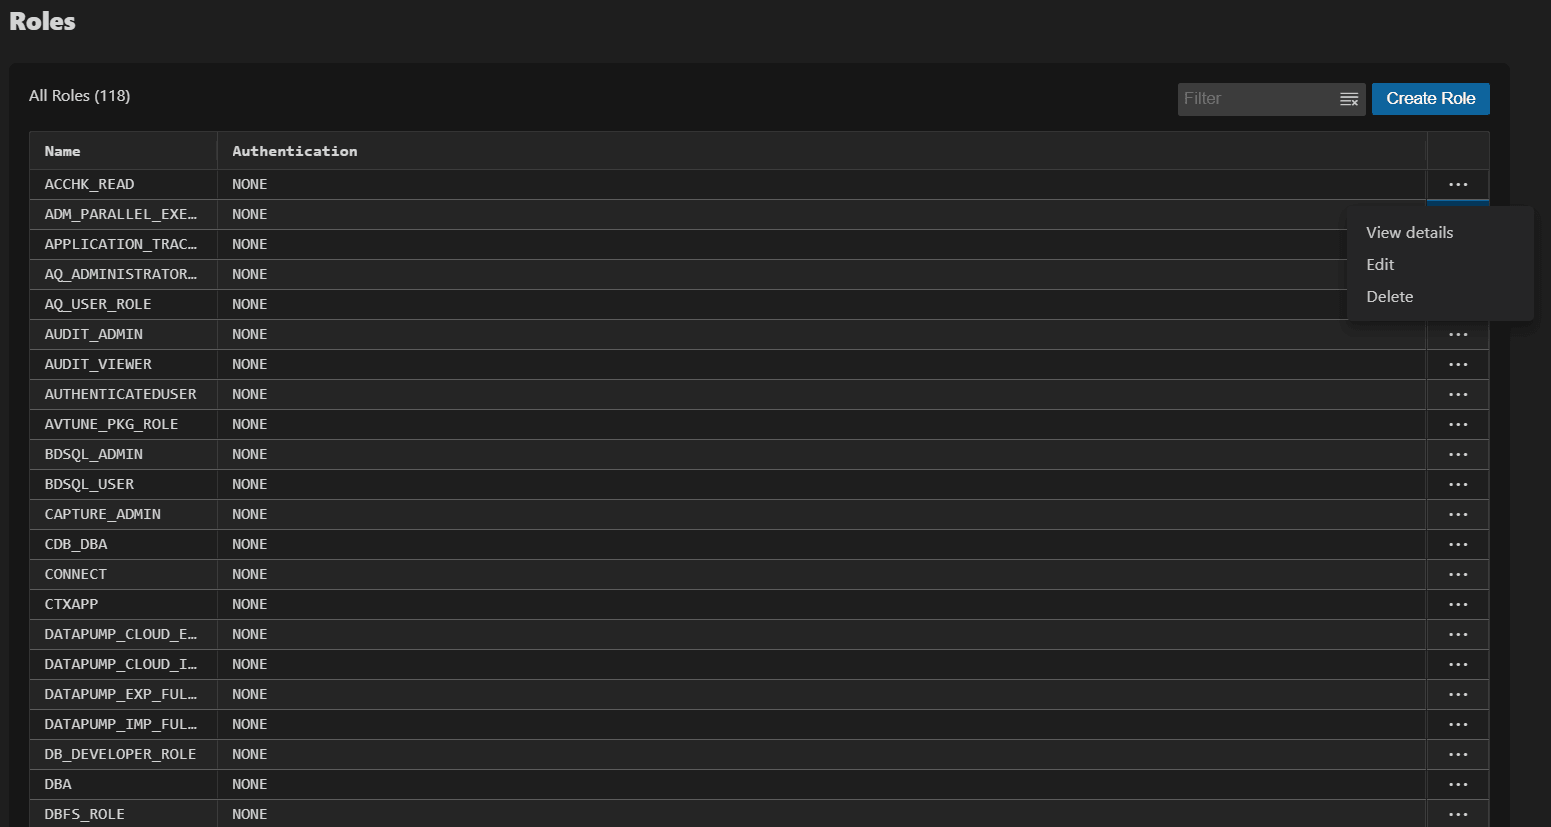
Description of the illustration dba_roles_dashboard.png
Manage Roles from the Dashboard
You can perform the following common operations from the dashboard:
-
Create Role: Opens the Role Editor with a blank role definition.
-
View details: Opens the role details pane and displays grant information for the selected role.
-
Edit: Opens the selected role in the Role Editor. Fields that cannot be changed are read-only.
-
Delete: Deletes the selected role after confirmation.
Viewing Role Details
You can view the grant information for the selected role:
-
Open the Roles dashboard.
-
Locate the role that you want to view.
-
Click the actions menu (…) for the role, and then select View details.
The role details panel opens and displays grant information for the selected role in the following tabs:
-
Granted privileges: Displays system privileges granted to the role and whether each privilege is granted with the Admin option.
-
Granted roles: Displays roles granted to the selected role.
-
User grantees: Displays users that have been granted the selected role.
-
Creating or Editing a Role
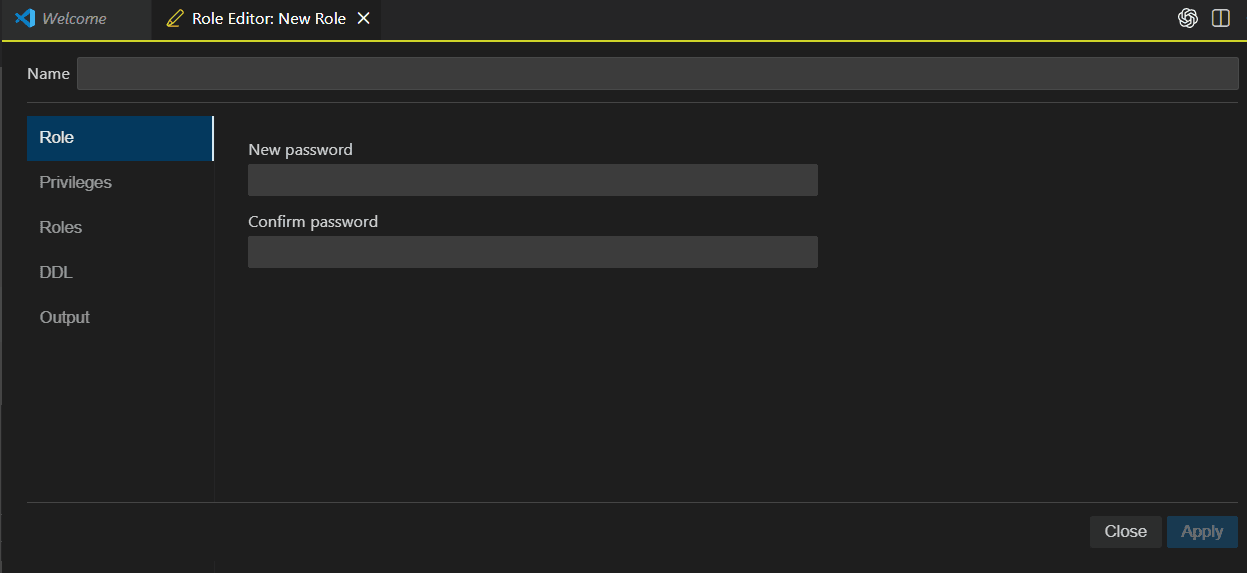
Use the Role Editor to create a role or modify an existing role. Editing a role uses the same editor as creating a role. When editing a role, fields that cannot be modified are displayed as read-only.
Perform the following steps to create or edit a role:
-
On the Roles dashboard, click Create Role.
Alternatively, in the Connections panel, click the + icon next to Roles. The Roles Editor opens. When creating a role, the editor opens with a blank role definition.
Note: To edit an existing role, locate the role in the Roles dashboard and select Edit from the actions menu (…) menu. The Role Editor opens and displays the current role definition. Modify the role details as required.
-
On the Role page, enter the role name and specify the authentication settings.
-
On the Privileges page, grant or revoke privileges for the role.
The page displays the available privileges in a grid. Use the Grant column to grant a privilege to the role. Use the Admin option column to allow the role to grant that privilege to other users or roles. The Selected privileges count shows the number of privileges currently selected.
You can use the following actions to update privileges in bulk:
-
Grant all: Grants all listed privileges to the role.
-
Revoke all: Revokes all listed privileges from the role.
-
Admin all: Enables the Admin option for all granted privileges.
-
Admin none: Removes the Admin option from all privileges.
-
-
On the Roles page, grant or revoke roles.
The page displays the available database roles in a grid. Use the Grant column to grant a role to the selected role. Use the Admin option column to allow the selected role to grant that role to other users or roles. The Selected roles count shows the number of roles currently selected.
You can use the following actions to update roles in bulk:
-
Grant all: Grants all listed roles.
-
Revoke all: Revokes all listed roles.
-
Admin all: Enables the Admin option for all granted roles.
-
Admin none: Removes the Admin option from all granted role.
-
-
On the DDL page, review the SQL statements before applying the change.
The Create tab shows the SQL statements used to create the role. The Update tab shows the SQL statements used to update an existing role. Review the generated SQL to confirm the role definition, privilege grants, and role grants.
-
Click Apply to create or update the role.
The Output page opens and displays status messages, errors, or operation results.
The new or updated role appears in the Roles dashboard.