Managing Table Groups
The table groups enables you to logically group related tables. With this, you can provide a common description for all the tables in the group, which in turn facilitates the enrichment functionality.
Creating a Table Group
Perform the following steps to create a new table group:
-
On the AI Enrichment dashboard, click Add group in the Table groups section.
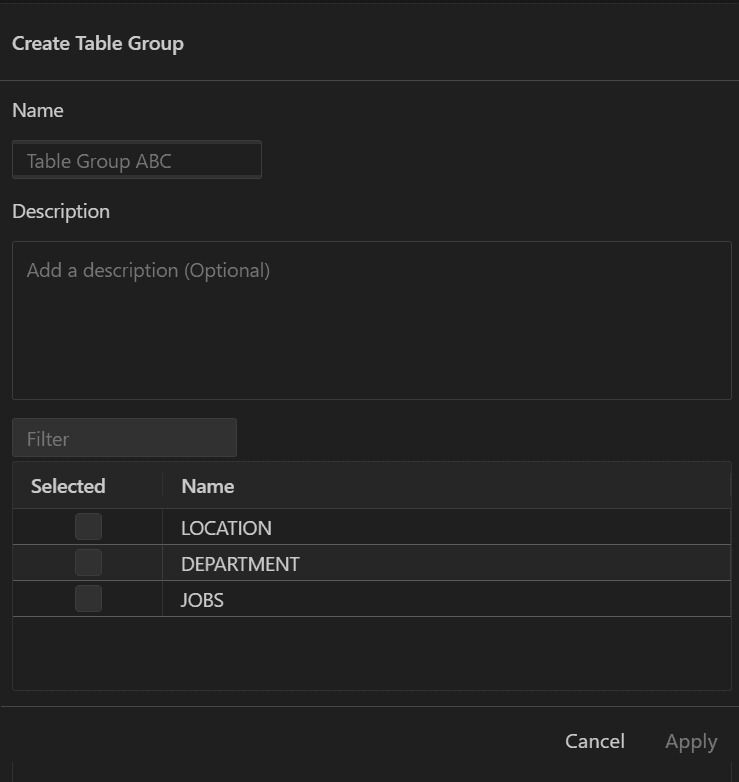
The Create Table Group slider appears:
-
Enter a name and description for the table group.
-
Select the checkboxes for the tables that you want to include in this group.
-
Click Apply.
The new group is now displayed under the Table group panel on the dashboard.
Adding a Description to a Table Group
You can add a summary to a table group to clarify the purpose of its tables.
Perform the following steps to add a natural language description to a table group:
-
In the AI Enrichment dashboard, locate the Table groups section.
-
Click the Description cell of a table group.
-
In the Set description slider, enter a description and click Save.
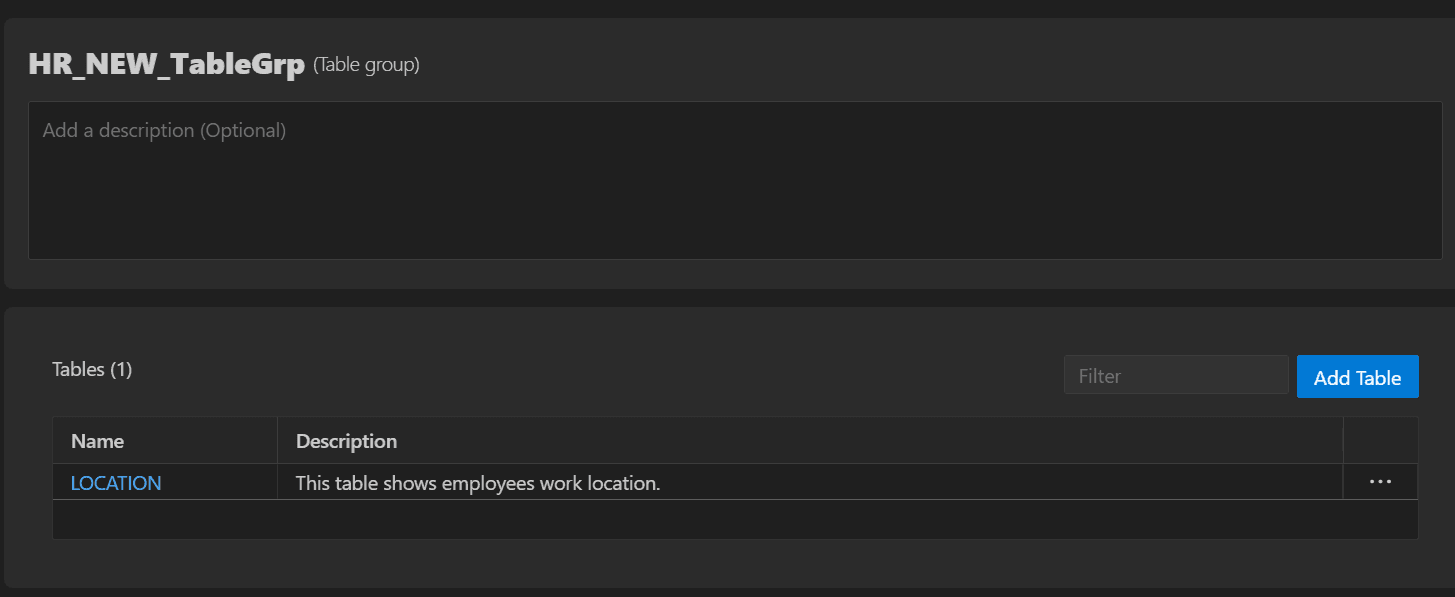
You can also add a description in the table group’s view by accessing it through any of these actions:
-
Click a table group link in the Table groups section of the AI Enrichment dashboard.
-
Select a table group under the AI Enrichment node in the Connections panel.
Adding Annotations for a Table Group
In addition to providing a description for a table group, you can also include additional annotations to further clarify the table group’s purpose.
Perform the following steps to add and edit annotations for a table group:
-
In the AI Enrichment dashboard, locate the Table groups section.
-
Click ... next to a table group name.
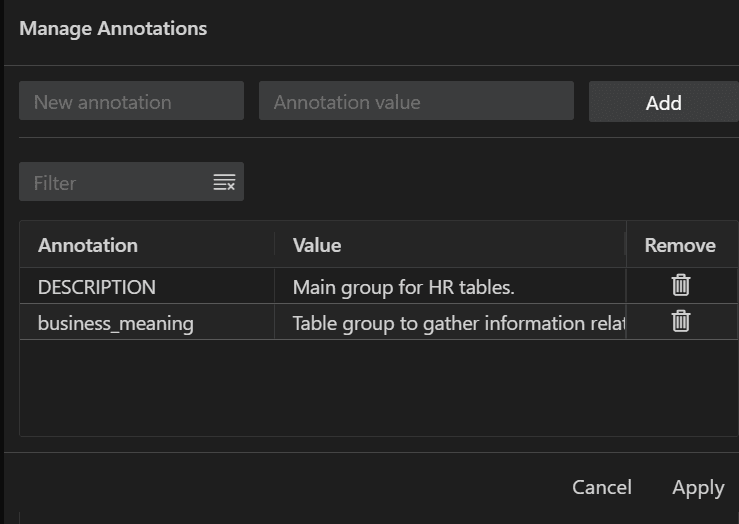
The Manage Annotations slider appears.
-
To define an annotation, enter a key-value pair in the New annotation and Annotation value fields respectively.
-
Click Add, and then click Apply.
The new annotation is added to the table.
To edit an annotation, re-open the Manage Annotations slider, edit the value, and then click Apply to save the changes.
Adding an Existing Table to a Table Group
From the table group view, you can also include new tables in the selected table group.
Perform the following steps to add an existing table to a table group:
-
On the AI Enrichment dashboard, click a table group link in the Table groups section.
Alternatively, select a table group under the AI Enrichment node in the Connections panel.
You are navigated to the table group view.
-
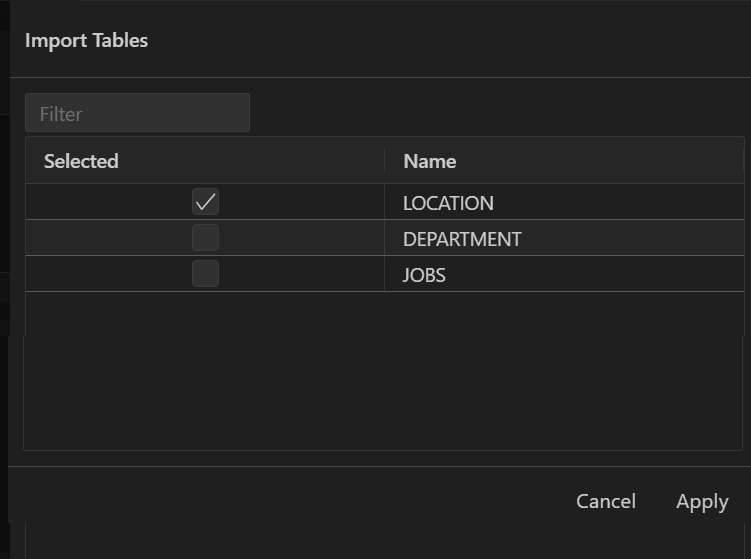
Click Add Table.
-
In the Import Tables slider, select the checkboxes next to the tables you want to include in the group.
-
Click Apply.
Assigning a Table to Multiple Groups
A single table can belong to multiple logical groups, reflecting its role in different business contexts.
Perform the following steps to add a table to different groups:
-
Navigate to the table’s view using any of the following actions:
-
On the AI Enrichment dashboard, click a table group link in the Table groups section, then click a table link in the Tables section.
-
Select a table under the AI Enrichment node in the Connections panel.
-
-
Select the Table Groups tab and click Add Table Group.
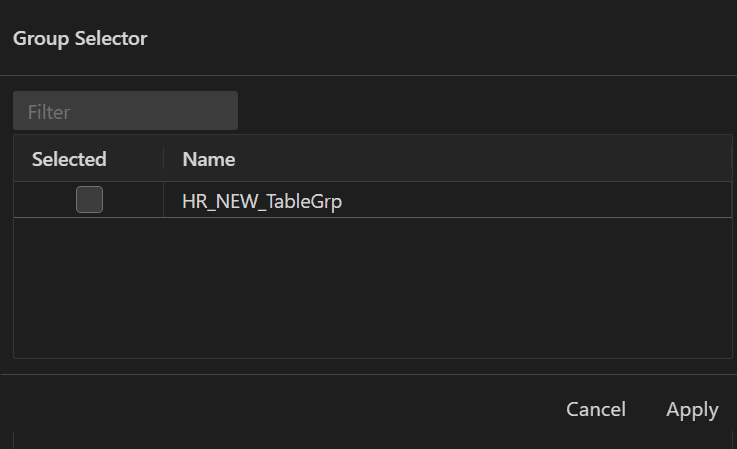
The Group Selector slider appears.
-
Select the checkboxes next to the table groups you wish to add your table to.
-
Click Apply.