Using the SQL Worksheet
You can use the SQL Worksheet to enter and execute SQL, PL/SQL, and SQLcl statements. You can specify any action that can be processed by the database connection associated with the worksheet, such as creating a table, inserting data, creating and editing a trigger, selecting data from a table, and saving that data to a file.
You can display a SQL Worksheet by right-clicking a connection name in the Connections panel and selecting Open SQL Worksheet.
When SQL Worksheet is open and if you also have existing SQL files open, you can attach a connection by clicking the connection icon in the lower right corner. Once a connection is associated with your editor or file, you see the name of your connection displayed in the lower right corner.
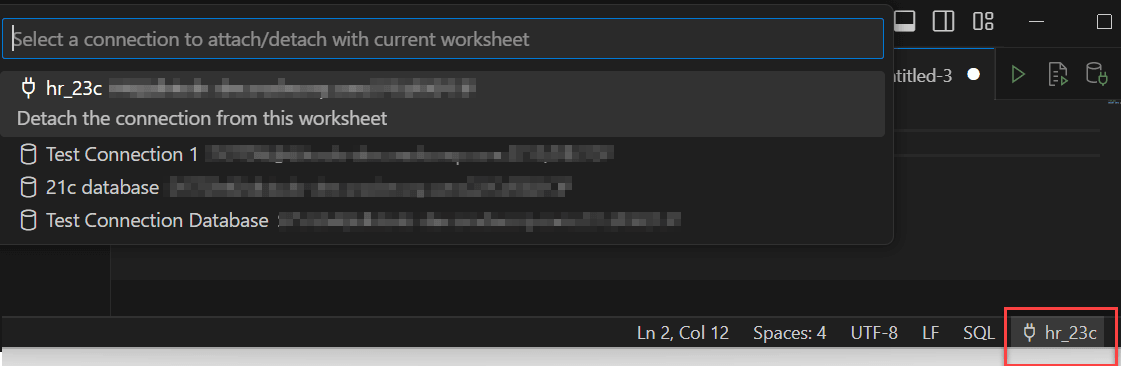
Description of the illustration attach_connection.png
In the editor, you can enter one or more SQL or statements that you intend to execute. For multiple statements, each non-PL/SQL statement must be terminated with either a semicolon or (on a new line) a slash (/), and each PL/SQL statement must be terminated with a slash (/) on a new line. SQL keywords are automatically highlighted.
You can drag some kinds of objects such as tables or views from the Connections navigator and drop them into the editor pane. When you do this, the following options appear: Object Name, Select, Insert, Delete, Update. If you select SELECT, a SELECT statement is constructed with all columns in the table or view. You can then edit the statement, for example, modifying the column list or adding a WHERE clause.
When you press Ctrl+Space, a context-sensitive popup window appears. This provides you with a list of possible completions at the insertion point that you can use to autocomplete code that you are editing. This list is based on the code context at the insertion point. To exit at any time, press Esc or continue typing.
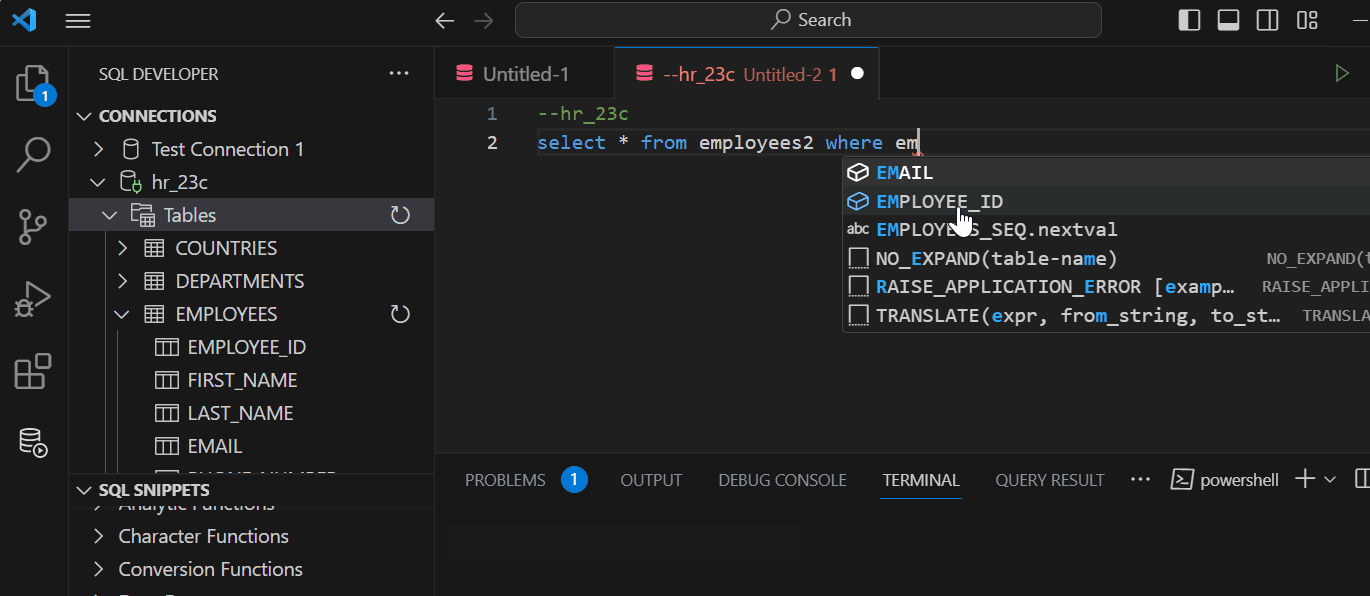
Description of the illustration worksheet.png
SQL Worksheet has the following icons at the top right corner:
-
Run Statement (Ctrl+Enter) executes the statement at the mouse pointer in the SQL Worksheet. The SQL statements can include bind variables and substitution variables of type VARCHAR2. A pop-up box is displayed for entering variable values. The output is displayed under the Query Result tab in the lower pane.
-
Run Script (F5) executes all statements in the SQL Worksheet using the Script Runner. The SQL statements can include substitution variables (but not bind variables) of type VARCHAR2. A pop-up box is displayed for entering substitution variable values. The output is displayed under the Script Output tab in the lower pane.
-
Run in SQLcl (Ctrl+Shift+Enter) executes the statement or script by opening a SQLcl command line session and displaying the output.
-
Explain Plan (F10) generates the execution plan for the statement (internally executing the EXPLAIN PLAN statement). The results appear under the Explain tab in the lower pane.
-
Attach/Detach Connection attaches a new connection or detaches the existing connection from the current worksheet.
-
Commit Changes (F11) commits the changes made to the database.
-
Rollback Changes (F12) rolls back the changes made to the database.