9.4 Creating a Self Service Schema

Note:

Available only if you have the DBA and PDB_DBA roles assigned.

The Self Service Schema page enables you to create a database schema on user request by generating a secure URL that is automatically sent by email to the user. Users can access a public page to request for a schema.

The steps are broken down into the following sections:

  • Activate the Self Service Schema in Oracle REST Data Services (ORDS)
  • Enable the Self Service Schema feature in Database Actions
  • Request database schema by user
  • Manage schema requests on the Self Service Schema Page

Activate the Self Service Schema in ORDS

  1. By default, this feature is not available unless activated. To activate, set the configuration property in ORDS by using the command line or by adding the property to the XML configuration file.
    • From the command line, use the following command:
      ords config set feature.sdw.selfServiceSchema true
    • In the configuration XML file, add the property as shown below:
      <?xml version="1.0" encoding="UTF-8"?>
      <!DOCTYPE properties SYSTEM "http://java.sun.com/dtd/properties.dtd">
      <properties>
      <comment>Saved on Wed Nov 23 16:57:17 UTC 2022</comment>
      <entry key="database.api.enabled">true</entry>
      <entry key="feature.sdw.selfServiceSchema">true</entry>
      <entry key="sdw.dev.doc.root">C:\Users\jsmith\Desktop\static-resources</entry>
      <entry key="standalone.context.path">/ords</entry>
      <entry key="standalone.http.port">8080</entry>
      </properties>

    After the ORDS configuration property is set to true, you can enable or disable the feature from the Database Users page in the Database Actions user interface.

Enable the Self Service Schema Feature in Database Actions

  1. In the Database Users screen, click self service schema settings iconSelf Service Schema Settings, which is located next to Create User.
  2. In the Self Service Schema settings slider:
    1. Select Enable Feature to enable the Self Service Schema feature.

      The URL to the Request Schema page appears, which can be shared with the user.

    2. In the Schema Prefix field, enter a prefix for the schemas created using this feature.
    3. Click Save.

    The Self Service Schema tab appears in the header next to User Management on the Database Users screen. Navigate to the Self Service Schema page using this tab.

    Self Service Schema tab on the Database Users page

Request Database Schema by User

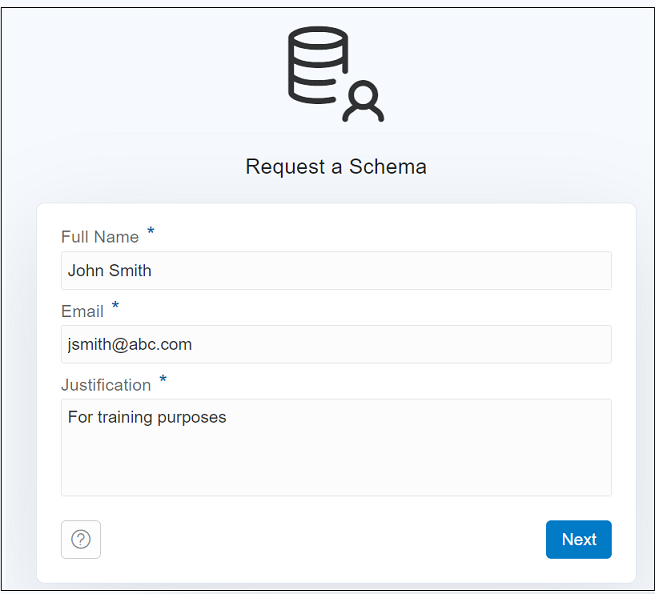
  1. In the Request a Schema page, a user has to enter details such as name, email, justification, click Next and then click Submit.

    Note:

    Click self service schema request page icontowards the top right corner in the Self Schema Service page to access the Request page URL.
    Request a Schema page

    A confirmation message appears.

Manage Schema Requests on the Self Service Schema Page
  1. You can see and manage user requests on the Schema Requests section in the Self Service Schema page.

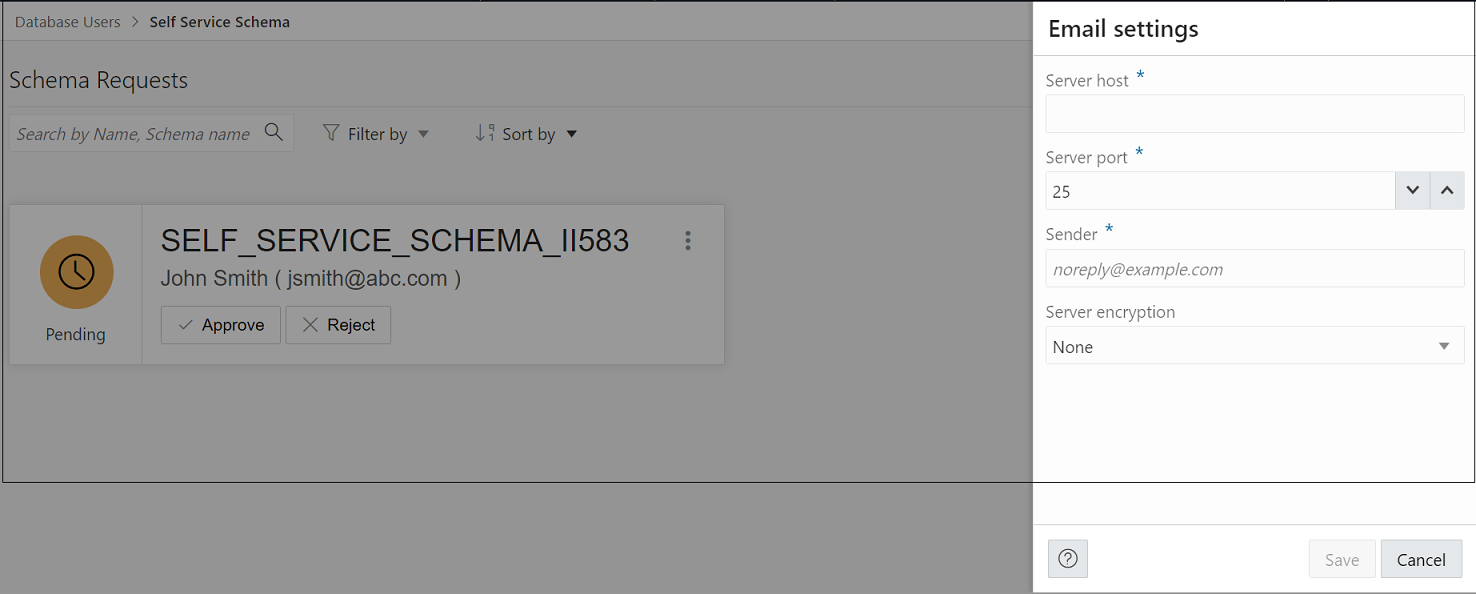
    You can set up an SMTP server to automatically send emails to users to notify whether the schema request has been approved or rejected. To define SMTP settings, click SMTP settings iconon the top right corner of the Schema Requests page. Enter fields such as Server Host, Server Port, Sender Name and Server Encryption to set up the server.

    Define SMTP settings
  2. After SMTP settings are set, you can approve or reject the request by clicking the appropriate button on the card.
    • If you click Approve, a slider with details of the request is shown. Click Approve again.

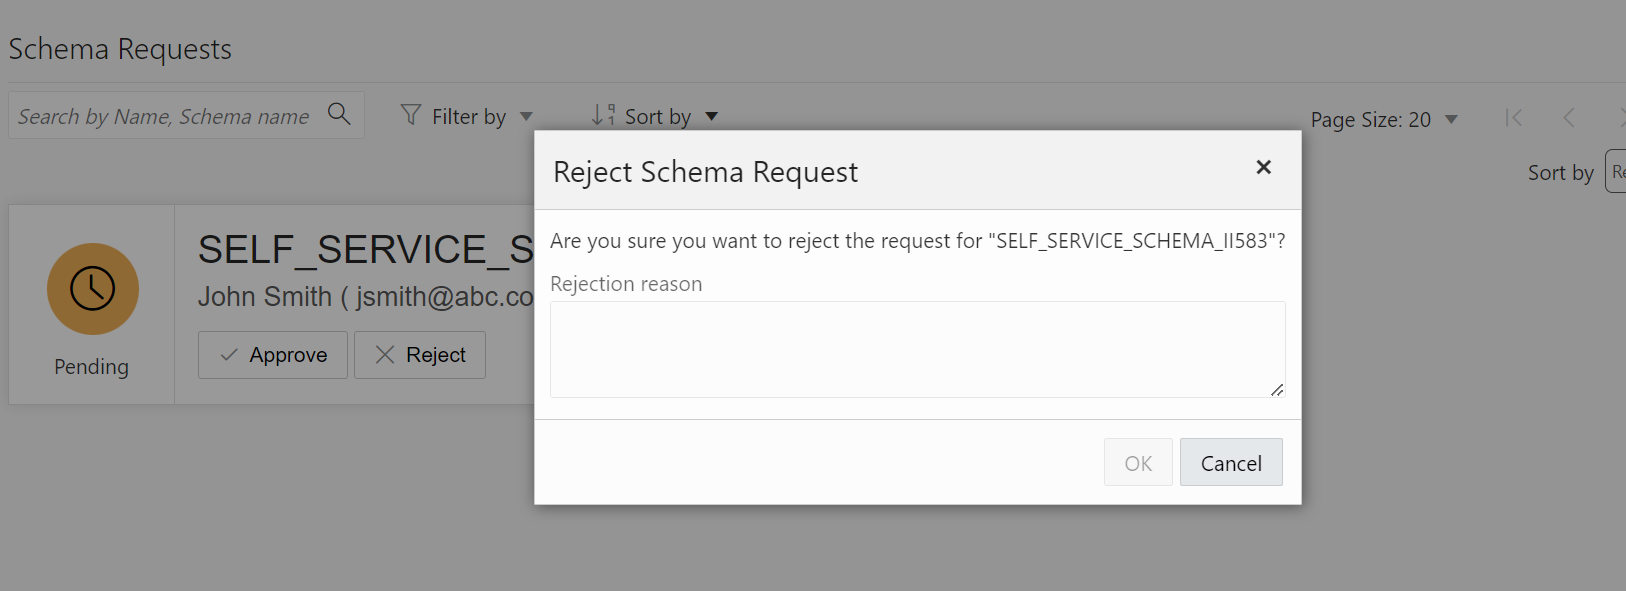
    • If you click Reject, you are prompted to specify a reason for rejection that will be sent to the user.

      Reject Schema Request reason

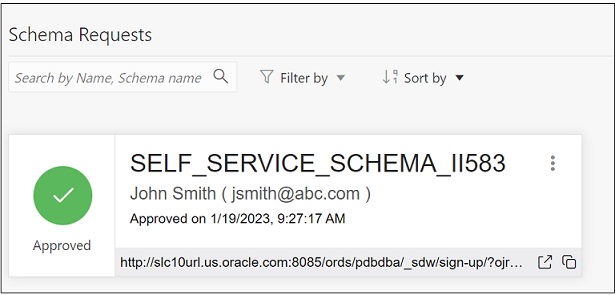
    The schema card is updated and shows the status of the request when it is approved or rejected.

    Schema approved status
  3. After you approve or reject the request, the user is notified with one of the following emails:
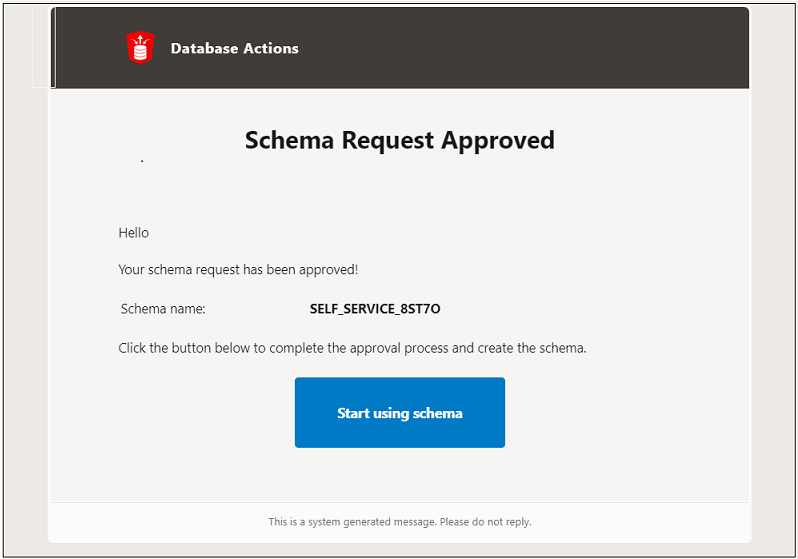
    • If the request is approved, the email contains a link that navigates to a public page where the user can set the password for the new schema. After the password is set, the user clicks Start Using Schema to directly go to the Database Actions Launchpad page and start using the schema.

      Schema approved through mail
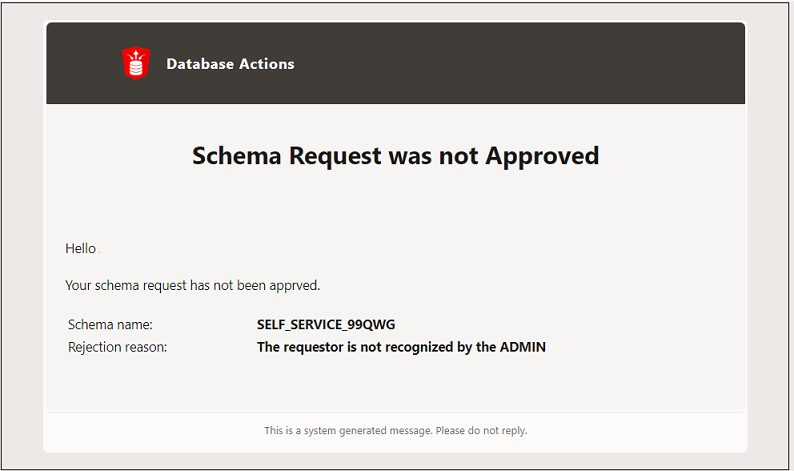
    • If the request is not approved, the user gets the following email:

      Schema not approved through mail