16.8 Manage Catalogs
You can now enable multiple catalogs using the Catalog Tool.
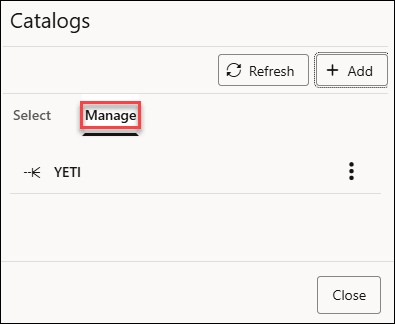
You can mount additional catalogs from other Autonomous AI Databases in the same tenancy, so that you can search for data across multiple databases. Select the Manage tab from Catalogs dialog box.
Mount Autonomous AI Database as Catalog
You will use an existing Autonomous AI Database to create a Database link and provide catalog name to mount it.
Note:
To mount an Autonomous AI Database as a Catalog, you must
have the CREATE DATABASE LINK and CREATE ANY DIRECTORY system privileges. The ADMIN user is granted CREATE DATABASE LINK and CREATE ANY
DIRECTORY system privileges. The ADMIN user can grant CREATE DATABASE LINK and CREATE ANY DIRECTORY
system privileges to other users.
- Store your object storage credentials in your Autonomous AI Database
- Create a database link or use an existing database link
- Mount the database link as a catalog
Refer to Connections to view the connections that are established from the Data Studio to the cloud, catalogs and shares.
-
On the Catalog page, select Manage Catalog. Click +Add.
- On the Add Catalog page, select Autonomous AI Database as Catalog Source.
- Select the Database name from the drop-down. For example, TESTING.
- You can view the following fields after you select the database name.
Specify the following field values:
- Catalog Name: Enter the name of the catalog you
want to mount the database link as. For example, TESTING.
Note:
While creating or updating a catalog, use only letters, numbers, and underscores to specify these properties -- catalog name, database link name, schema name, table name, and column name. These are case-insensitive and do not support multibyte characters.
- Database link name: Enter the name of the database link the tool creates using the existing database. For example, TESTING_LINK.
- Database credential: Select the credential from
the drop-down which is required to create the database link. For example,
AWSGLUE_CRED.
Click Create Credential in case there is no existing credentials.
- Under Show Advanced Options, select the
Wallet Directory name from the drop-down. You need to have
permission to access the directory. For example, WALLET_DIR-TESTING.
Note:
The wallet file, along with the Database user ID and password provide access to data in the target Oracle Autonomous AI Database. - Click Test to test the creation of the Database Link.
Click Create to create the Autonomous AI Database as Catalog.
- Catalog Name: Enter the name of the catalog you
want to mount the database link as. For example, TESTING.


After successful creation, you can view the Autonomous AI Database listed under Manage Catalog.
Mount an existing Database Link as Catalog
You can instantiate a catalog schema as a local database user. If a database link has already been set up, you can mount a catalog over the linked database in order to search and discover data sets in that database.
- Name of the database link
- Cloud credentials required to access the data
You can add a database link to one of the databases and mount its metadata as a new catalog.
- On the Catalog page, select Manage Catalog.
- Click +Add.
- On the Add Catalog page, select Database
Link from Catalog Source.
- Select the Database Link tab.
- Select the Database Link name from the drop-down. For example, AA-TESTING_LINK.
- Enter the name of the catalog in the Catalog name field. For example, AA-TESTING_LINK.
- Click Create.
You can view the newly mounted catalog in the Manage Catalogs dialog box.
After you have successfully mounted a new catalog over a database connected using a Database link, you can select the catalog in Catalog Explorer and search for data in it.


Mount either Live Share or Delta Share Provider as Catalog
You can mount catalogs from registered data shares. This enables the consumers to access tables defined by other providers in other databases. The external tables need to be defined just once.
- On the Catalog page, select Manage Catalog. Click +Add.
- On the Add Catalog page, select Data
Share from Catalog Source.
- Click Next to progress to the Share
provider settings tab.
Under Share Source, select any of the available options:
- Select from Live Share Providers
- Delta Share Provider JSON
In this example, you will select share source from Live Share Providers.
Under Share Provider Details, specify the following details:
- Provider Name: Enter the name of the share provider. For example, TEST-PROVIDER.
- Description: Enter any description. This field is optional.
- Click Next to progress to the Select shares tab.
- On the Share provider settings tab, drag and drop the share you want to mount as a catalog from the Available Shares to the Selected Shares.
- Click Next to progress to the Catalog details tab.
On the Catalog details tab, specify the following details:
- Catalog name: Enter a catalog name of your choice.
- Catalog description: Enter a description.
- Select Create to mount a Live Share or Delta Share as a catalog.


After you have successfully mounted a new catalog over a Share, you can select the catalog in Catalog Explorer and search for data in it.
Mount Amazon Glue as Catalog
You can mount catalogs from registered AWS Glue data connections.
- On the Catalog page, select Manage Catalog.
- Click +Add.
- On the Add Catalog page, select Amazon
Glue from Catalog Source.
- Click Next to proceed to the Amazon Glue Catalog tab.
- On the Amazon Glue Catalog tab, specify the
following details:
- Credential for Data Catalog Connection: Select a credential from the drop-down.
- Region: Select a region from the drop-down.
- Click Next to progress to the Catalog
details tab. Specify the following field values on the Catalog
details tab:
- Catalog Name: Enter the name that you want to use in Data Studio to refer to the catalog.
- Catalog Description: Enter a description of the catalog.
- Click Create to mount the AWS Glue Data Catalog region as a catalog.

After you have successfully mounted a new catalog over an AWS Glue Data Catalog region, you can select the catalog in Catalog Explorer and search for data in it.
Mount OCI Data Catalog as Catalog
You can mount catalogs from a registered OCI Data Catalog.
- On the Catalog page, select Manage Catalog. Click +Add.
- On the Add Catalog page, select OCI Data
Catalog from Catalog Source.
- Click Next to proceed to the OCI Data Catalog tab.
- On the OCI Data Catalog tab, specify the following field values:
-
Credential for Data Catalog Connection: Select a credential from the drop-down. This field is mandatory. For example, BASICOCICRED.
-
Region: Select a region from the drop-down. This field is mandatory. For example, us-phoenix-1.
-
Data Catalog ID: Select a Data Catalog ID from the drop-down. A Data Catalog ID is the ID of the account to which the data catalog belongs. For example, catalog1.
Select Use separate credential for Object Storage to use a different credential other than the selected one.
-
- Click Next to progress to the Catalog details tab.
- On the Catalog details tab, specify the following
field values:
- Catalog Name: Enter the name that you want to use in Data Studio to refer to the catalog. For example, TEST_CATALOG.
- Catalog Description: Enter a description of the catalog.
- Click Create to mount the OCI Data Catalog as catalog.


After you have successfully mounted a new catalog over an OCI Data Catalog, you can select the catalog in Catalog Explorer and search for data in it.
Mount a Catalog over an Iceberg REST Catalog
You can mount different types of Iceberg REST Catalogs, for example Polaris, Databricks Unity, and Snowflake Horizon. To integrate Iceberg REST Catalogs through Data Studio, ensure that your Iceberg catalog is properly configured and accessible.
Oracle's Offering for Iceberg Catalog
From Data Studio you can also connect to Oracle AI Data Catalog, which is an Oracle-managed Iceberg REST catalog service. Before mounting, ensure that the AI Data Catalog is enabled and configured. For more information, see Oracle AI Data Catalog.
-
Iceberg Endpoint: Enter the URL of the Iceberg REST Catalog service up to the catalog root. Appending
/namespacesto the URL must identify the List Namespaces endpoint.For example:
https://your-iceberg-catalog.com/api/v1/iceberg -
Catalog Credentials: You can specify these values.
-
Token Endpoint: The /v1/oauth/tokens endpoint is provided by Iceberg REST catalogs to issue Bearer Token.
-
Client ID & Client Secret: The OAuth server provides these values to identify your application. You can use these credentials to generate Bearer Token.
-
Bearer Token: To authenticate requests to the Iceberg REST endpoint, use OAuth with the Client Credentials. The Catalog tool calls the token endpoint to receive Bearer Token.
-
CREATE OR REPLACE CATALOG INTEGRATION tabular_catalog_int
  CATALOG_SOURCE = ICEBERG_REST
  TABLE_FORMAT = ICEBERG
  CATALOG_NAMESPACE = 'default'
  REST_CONFIG = (
    CATALOG_URI = 'https://api.tabular.io/ws'
    CATALOG_NAME = '<tabular_warehouse_name>'
  )
  REST_AUTHENTICATION = (
    TYPE = OAUTH
    OAUTH_TOKEN_URI = 'https://api.tabular.io/ws/v1/oauth/tokens'
    OAUTH_CLIENT_ID = '<oauth_client_id>'
    OAUTH_CLIENT_SECRET = '<oauth_secret>'
    OAUTH_ALLOWED_SCOPES = ('catalog')
  )
  ENABLED = TRUE;
Here, CATALOG_URI is the REST end point to
access the warehouse.
The REST_AUTHENTICATION procedure consists of
all the parameters you need to create the BEARER TOKEN and
use it to create the credential.
- On the Catalog page, select Manage Catalog. Click +Add.
- On the Add Catalog dialog, select
Iceberg catalog from the Catalog source
tab.
Click Next.
-
Specify the following field values on the Catalog source tab of the Add Catalog dialog:
- Catalog name: Enter the name of the Catalog
you want to mount the Iceberg Catalog as.
For example, Polaris.
-
Iceberg catalog type: Select the Iceberg catalog type. Supported options include Oracle, Unity, Polaris, and Custom.
Select Oracle to mount AI Data Catalog as an Iceberg catalog.
- Iceberg catalog endpoint: It specifies your Polaris Catalog account URL. The endpoint for Snowflake's Polaris Catalog is usually in the format of https://<account_locator>.snowflakecomputing.com/polaris/api/catalog. For more information about account identifier formats, see the Snowflake documentation.
- Iceberg catalog credential: Select a
credential from the list of available credentials in the drop-down list. If you do
not have a credential, you can create one. Select Create
Credential. On the Create Credential dialog, specify the following
field values:
- Credential Name: Enter the name of your credential. For example,
POLARIS_CRED.
Under Get New Bearer Token,
-
Access token end point: Enter the endpoint that handles the bearer token retrieval. This endpoint was designed to facilitate authentication by exchanging client credentials (client ID and secret) for an access token.
Note:
The/v1/oauth/tokensendpoint is deprecated in Iceberg version 1.6.0 and will be removed in version 2.0. You are encouraged to rely on external OAuth2 providers instead. See OAuth Authentication for more details. - Grant type: Select Client credentials.
- Client ID: Specify the Client ID.
- Client Secret: Specify the Client Secret.
- Scope:
PRINCIPAL_ROLE:ALL.
Click Get Token.
The Bearer token field gets populated.
Click Create Credential.
POLARIS_CRED is displayed as Iceberg catalog credential.
Note:
The credentials are stored using the procedure
DBMS_CLOUD.CREATE_CREDENTIALin the backend.For the sample example provided above, the procedure would be as follows:BEGIN dbms_cloud.create_credential( credential_name => 'POLARIS_CRED', username => 'BEARER_TOKEN', password => '<BEARER_TOKEN_VALUE This is generated using token endpoint, client id, client secret>' ); END; -
This credential allows the Oracle Autonomous AI Database to access the Iceberg table.
- Credential Name: Enter the name of your credential. For example,
POLARIS_CRED.
- Bucket credentials: This credential stores a
cloud storage volume to store your Iceberg tables in Parquet format. This field is
mandatory for Polaris catalogs.
Click Next to proceed to the Iceberg catalog tab.
- Catalog name: Enter the name of the Catalog
you want to mount the Iceberg Catalog as.
-
On the Iceberg catalog tab, you can specify the following field values:
- Iceberg catalog namespaces: This field displays the hierarchical organization of tables. The Iceberg catalog endpoint consists of the root namespace. Select the namespace on which you want to have the catalog mounted.
- Namespace separator style: Select
Polaris style. This is the default value. Select any value
based on the way your catalog is configured.
Note:
It is preferred that you retain the default value. - Bucket region: Enter the bucket region. For
example, us-west-2.
Iceberg catalog endpoints, serve as interfaces for managing Iceberg tables stored in cloud storage like S3. The bucket region refers to the geographical location where the S3 bucket is hosted.
This is mandatory field for Polaris catalogs.
Click Add.
After you have successfully mounted the new catalog, you can view Polaris Catalog on the Manage Catalogs page. You can disable or delete the catalog from this page.


View the mounted Polaris Catalog on the Catalog Explorer
- On the Catalog tool, click Select Catalogs....
- Click POLARIS _CATALOG filter on Catalogs and Schemas wizard to display the POLARIS_CATALOG catalogs.
- Click Apply to view the results on the Catalog
page.


- On the Catalog page, select Manage Catalog. Click +Add.
- On the Add Catalog dialog, select Iceberg Catalog.
- Click Next.
- Specify the following field values on the Catalog source tab of the Add
Catalog dialog:
- Catalog name: Enter the name of the Catalog
you want to mount the Iceberg Catalog as.
For example, Unity.
- Iceberg catalog type: Select Unity from the drop-down field.
- Iceberg catalog endpoint:
For Unity Catalog, you typically use the Databricks REST API. The endpoint for accessing Iceberg tables via Unity Catalog is usually in the format of https://<databricks-instance-url>/api/2.1/unity-catalog/iceberg.
Note:
See https://docs.databricks.com/aws/en/external-access/iceberg for more information. - Iceberg catalog credential: Select a
credential from the list of available credentials in the drop-down list. If you do
not have a credential, you can create one. Select Create
Credential.
On the Create Credential dialog, specify the following values:
- Credential Name: Enter the name of your credential. For example, UNITY_CRED.
- Bearer Token: Paste the Bearer Token
value.
Select Create Credential.
UNITY_CRED is displayed as Iceberg catalog credential.
Click Next to proceed to Iceberg catalog tab.
On the Iceberg catalog tab, you can specify the following field values:
- Iceberg catalog namespaces: Select any one of the schemas you need access to.
- Namespace separator style: The namespace separator style typically refers to how namespaces are structured and separated within the catalog. By default, Databricks style is selected.
- Bucket region: This field is not mandatory.
Click Add.
After you have successfully mounted a new catalog over an Iceberg Catalog, you can view the Unity Catalog on the Manage Catalogs page. You can disable and delete the catalog from this page.
- Catalog name: Enter the name of the Catalog
you want to mount the Iceberg Catalog as.


View the mounted Unity Catalog on the Catalog tool
- On the Catalog tool, click Select Catalogs….
- Click UNITY _CATALOG filter on the
Catalogs and Schemas wizard to display the
UNITY_CATALOG catalogs.
- Click Apply to view the results on the Catalog
page.

