How to Configure JD Edwards Roles to OGL Content
Oracle Guided Learning allows you to configure role-based access to ensure that users only see the content relevant to their roles. This helps develop Guided Learning content tailored to each user role. This content should be specific to the tasks and processes that each role needs to perform. To achieve user role segmentation in Oracle Guided Learning (OGL) for JD Edwards, you need to follow a series of steps to define the different user roles that will have access to the appropriate guided learning content. Here’s a high-level overview of the process.
- Fetch your list of JD Edwards Application Roles to be used for OGL
content.
In Oracle JD Edwards Application, from the Home Page Navigate to User Profiles as below.
Fastpath to Task GH0092 ->User Management->User Profiles
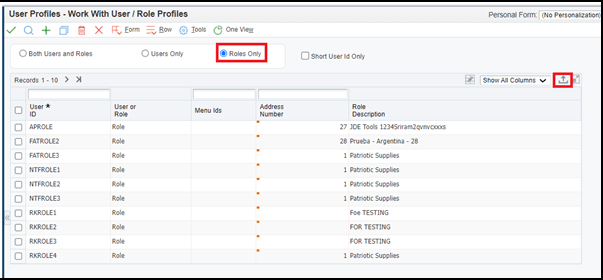
Select Roles Only option and click on Find button in the User Profiles. On the Grid click on Go to end to list all roles.
OGL Administrators may add applicable JDE roles as OGL values to their OGL application and create mapping list to achieve OGL role segmentation.
To have these roles in Excel file or CSV we can use Export feature

- Create mapping list for JDE Roles with OGL Roles.
OGL roles for JDE should be set up as per the roles set in Oracle JD Edwards Application. Navigate to OGL settings/OGL values.
- Go to the OGL console.
- On the Main Navigation Menu, select Settings > Application > OGL Values.
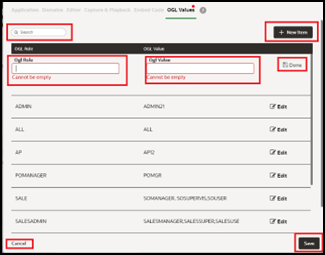
Table 6-1 OGL Values
Legend Name Comments 1 Search Box Provides dynamic search functionality. 2 New Item button Adds a new empty line to the list. 3 OGL Role Name field In the OGL Role Name field, enter the Role Name.
(This is the Role name for your role and will be displayed in the item activation condition.)
Note:
The name field cannot be empty, and duplicate values and special characters are not allowed.
4 OGL Value field In the OGL Value field, enter the Role Value.
(This is the value of the role as defined in your Oracle JD Edwards Application
Note:
The value field cannot be empty; duplicate values and special characters are not allowed(i.e., whitespace).
These values are role names in Oracle JD Edwards application, Corresponding OGL Role will be used in OGL Activation rules to display OGL Guides in OGL Widget.
For example:
If Oracle JD Edwards user has two roles namely SYS_Admin and SYS_UserOGL should have corresponding roles as belowOGL Role OGL Value AdminRole SYS Admin UserRole SYS User In this case names “AdminRole” and “UserRole” can be used in Activation rules for OGL to display OGL Guides in Widget
5 Cancel Discards any changes that were made and closes the interface.
6 Save Saves the changes made to the field. The button only becomes active when an acceptable value is entered in the field.
- Pass the OGL value into Activation condition.
Simple Condition Activation settings
- Locate the activation settings where you need to configure
conditions.
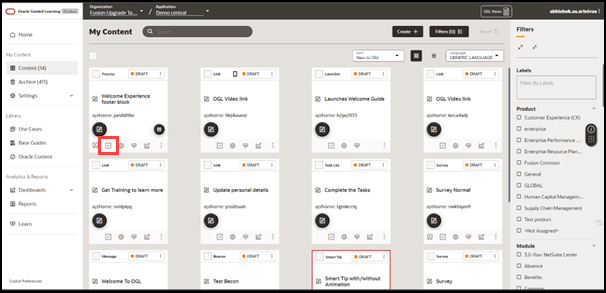
Click on Activation to enter the configuration page.
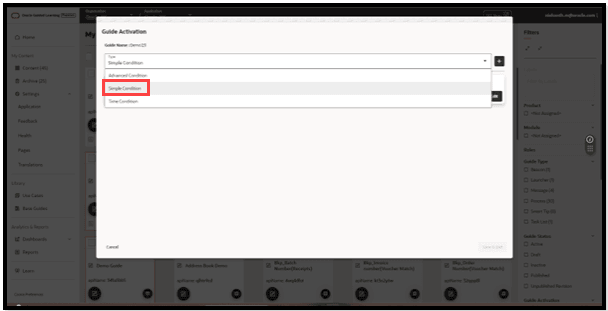
- Select Type as Simple Condition.
Choose Simple Condition from the available options from the dropdown.
- Add a New Condition.
Click on the (+) button to add a new condition.
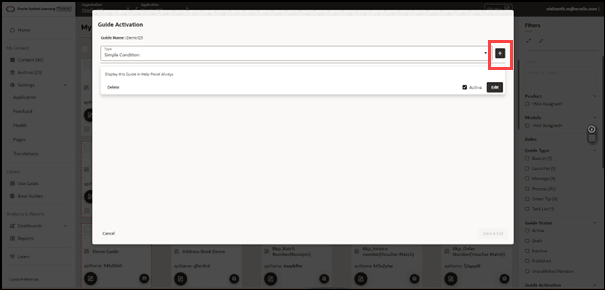
- Create Condition.
Select Create Condition Type and choose Role from the dropdown.
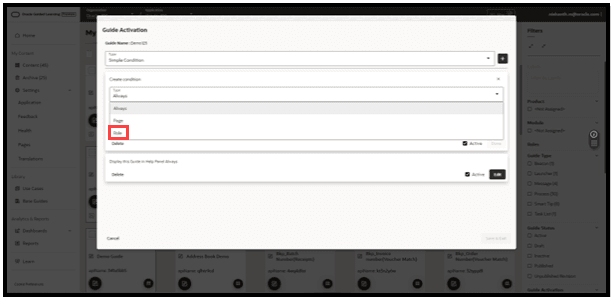
- Configure the Condition.
Set the Connector to (is) or (is Not). This typically means you are defining a condition where a role must be included in a specified set.
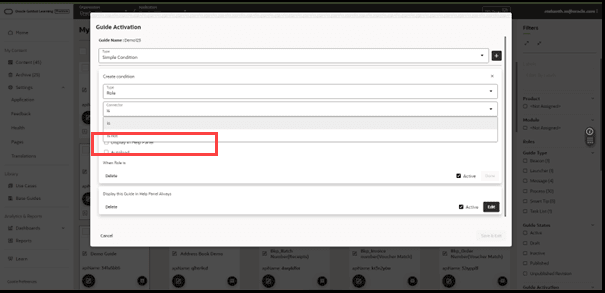
- Select the Role.
Choose the Role you want to add from the dropdown.
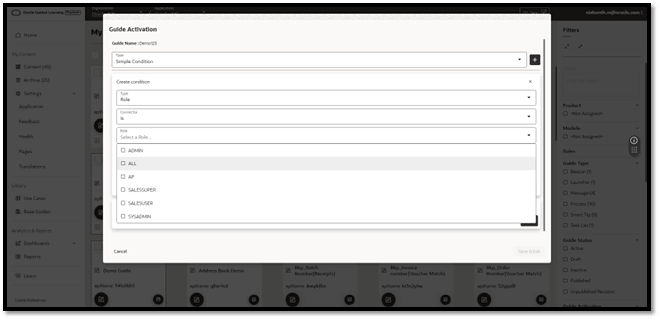
- Enable the checkbox.
Enable the Display in the Help Panel or Autoload checkboxes as needed.
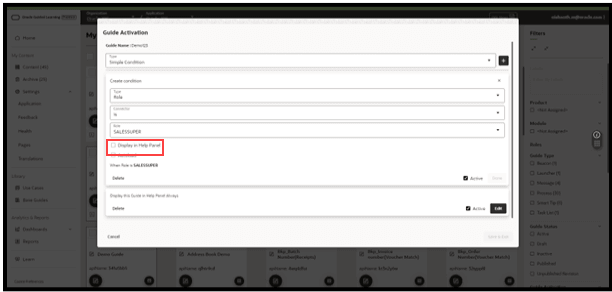
- Save & Exit.
Click on Save & Exit to close the configuration.

- Locate the activation settings where you need to configure
conditions.
- Locate the activation settings where you need to configure conditions.
Click on Activation to enter the configuration page.
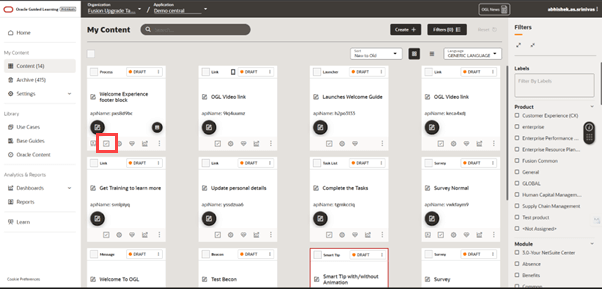
- Select Type as Advanced Condition.
Choose Advance Condition from the available options from the dropdown.

- Add a New Condition.
Click on the (+) button to add a new condition.

- Create Condition.
Select Create Condition Type and choose User from the dropdown.

- Configure the Condition.
Set the Connector to (has) or (has not). This typically means you are defining a condition where a condition must be included in a specified set.
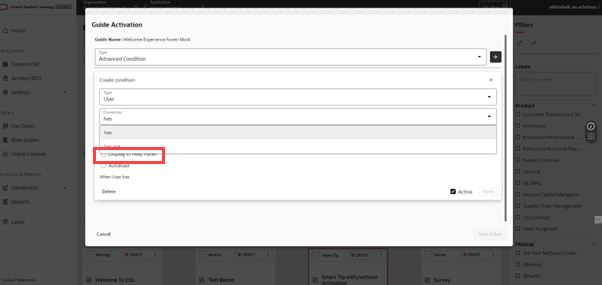
- Select the Field subtype.

- Select the user_role under Name dropdown.
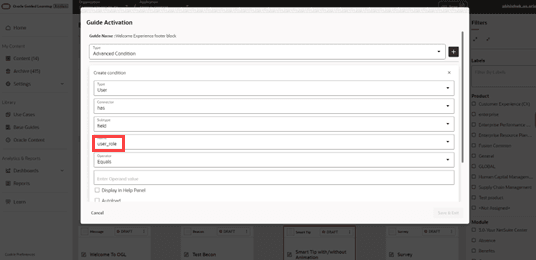
- Select the ‘Equals’ under operator dropdown.
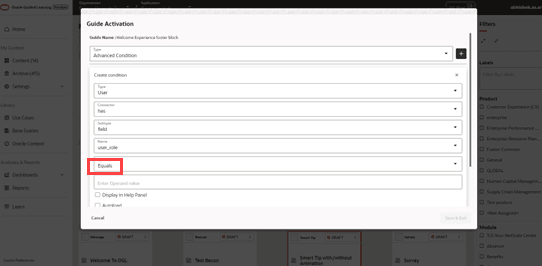
- Enter the operand value enclosed with square brackets if you have multiple roles use
Pipeline which works has OR condition.
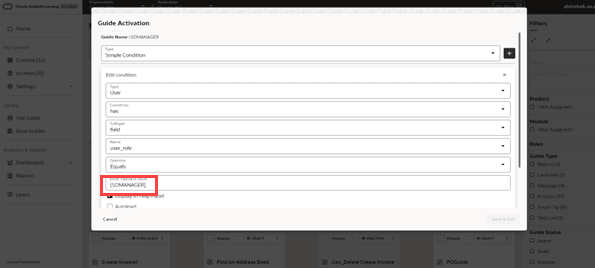
- Enable the checkbox.
Enable the Display in the Help Panel or Autoload checkbox as needed.
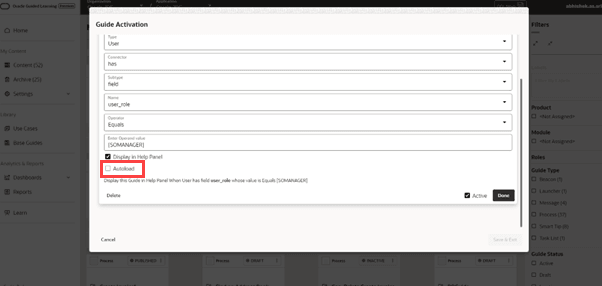
- Save & Exit.
Click on Save & Exit to close the configuration.
Before rolling out the segmented content to all users, conduct thorough testing to ensure that the role-based segmentation is working as expected. Have users from different roles log in and verify that they can only access the content intended for their role. After deployment, continuously monitor user feedback and usage analytics to ensure that the role-based segmentation is effective. Make adjustments as necessary to improve the user experience.
For more detailed instructions and best practices, refer to the official Oracle Guided Learning documentation or contact Oracle support for personalized assistance.