5 Organizing Content
This chapter contains OGL knowledge articles on organizing your content.
Can I change the order of the guides in the start panel?
Yes.
In Display Groups you can simply drag-and-drop content to place it in the desired sequence.
This feature allows you to reorder your OGL content.
Can I hide the help widget?
Yes.
There are 2 ways:
- In Help Widget Settings you can uncheck "Display help widget even if there are no guides in the list". If the help widget has no content to display it will hide itself automatically.
- You can change your embed code to force the help widget to not load
iridize.showStartPanel = false;
Filtering a Guide in the Guides Page
You can use the filter box in the guides page to create very fancy filters.

If you just type in the box Guided Learning will automatically search that text in the name and description and URL of all your guides.
But you can also use regular expressions.
For example if you want to find all guides that have wordA or wordB in their name or description all you need to do is
/wordA|wordB/
Here's a full regular expression reference
On top of that, there are Guided Learning specific search terms:
- :active - returns all guides that are in production
- :testing - returns all guides that are in testing
- :offline - returns all guides that are offline (inactive)
- :draft - returns all guides that have an unpublished draft
- :wal - return all walkthrough guides
- :lnk - returns all link guides
- :vid - return all video guides
- :widget - returns all guides that appear in the help widget
- :autoload - returns all guides that have autoload conditions
- :nocond - returns all guides that have no activation conditions
- create:[username] - returns all guides that were created by user
- edit:[username]- returns all guides that were last updated by user
Note: You can use these in conjunction while using their order. For example, if you want to search all video guides that are autoloaded.
Getting a Link to Display Correctly
Link size does not change with rest of text
If you resize the body text of a tool tip, and that text includes a link, the link will not resize with the surrounding text. (see screenshot)
In order to get around that, you need to add custom code to the <a> element. Here is code example that results in the bottom screenshot:
<p style="text-align: center;"><span style="font-size:20px">Please continue to access training through the <a href="https://learningexchange.ea.vanderbilt.edu/" style="color:#2f78cb; font-size:20px" target="_blank">Learning Exchange</a> until you receive detailed instructions from your instructor.</span></p>
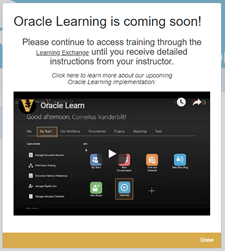
Example of link not resizing with surrounding text.
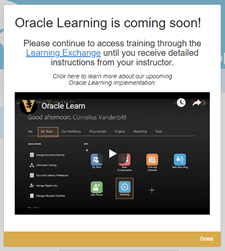
Example of link resizing with custom code applied.
Guide Feedback Widget does not Display
How to enable OGL Feedback in your environment:
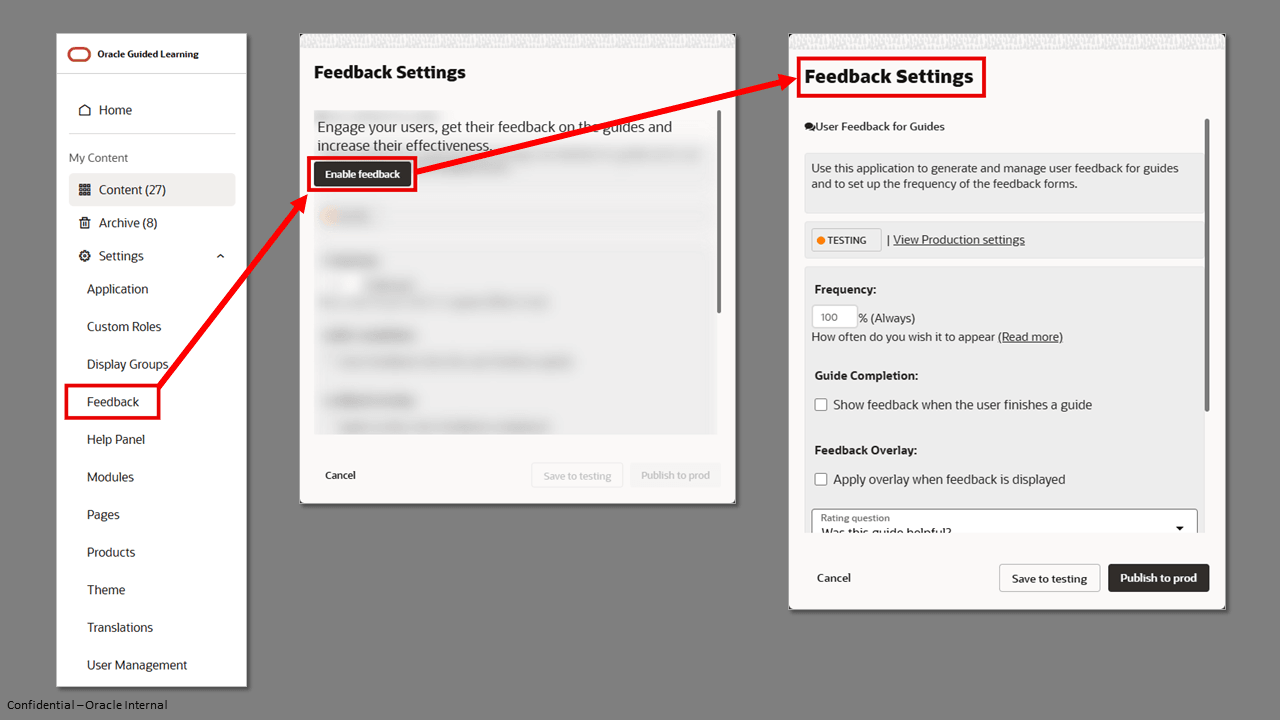
In order to avoid badly affecting the users' experience, Guided Learning runs several checks before displaying the feedback widget.
- Guided Learning will never display the widget twice for the same guide
- The widget will only display if more than 10 minutes passed since the last time the user saw the widget. That means that if the user provided feedback about a certain guide they will only see the widget again after more than 10 minutes.
- If the guide has just one tip, for example a 'Release Notes' notification, the widget will not display.
After all these conditions are met, Guided Learning will evaluate the frequency setting.
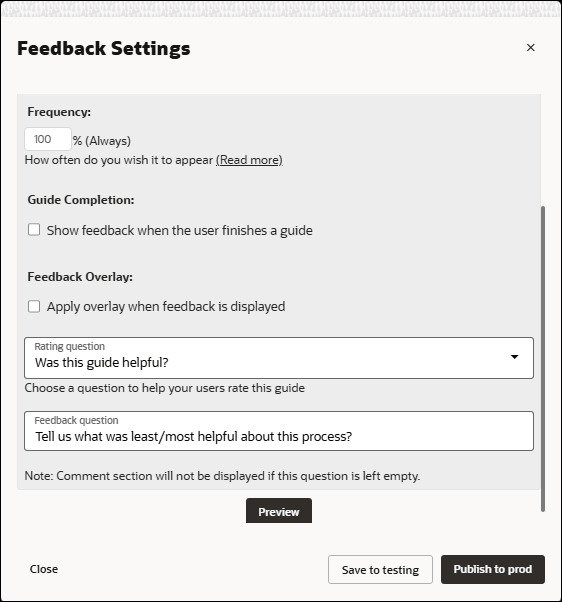
Frequency
Controls how frequently a user will be requested to provide feedback. Range 0% (Never) to 100% (Always). If set to 50%, this means there is a 50% probability that feedback will be requested from the user.
Key considerations:
Guided Learning runs several checks before displaying the request for feedback to the user, they are:
- OGL will never request feedback twice for the same guide, from the same user
- A request for feedback will only be displayed if more than 10 minutes have passed since the last time the user saw a request for feedback. That means if the user has provided feedback for Guide A, then they will see the request for Guide B only if 10 minutes have elapsed since they saw the request for Guide A
- If the guide has just one tip/step, for example, a 'Release Notes' notification, the request for feedback will not be shown to the user
- Only after all the above conditions have been met will frequency setting be evaluated
Guide Completion
If the "Show feedback when the user finishes a guide" checkbox is selected, the feedback dialog will be presented to users each time a user has completed the guide.
Note:
Enabling this setting will override any Frequency settings above. Do not enable this setting if you intend to set the frequency for feedback.Help Widget Footer Customization
Instructions
Add the steps involved:
- Go to Help Widget Settings on the left had side of your OGL Console.
- In the URLs section, enter the text you want to appear for the link in the "text" field.
In the "url" field, enter the url of the site you wish to link to.
- Follow this url pattern: http://google.com
- Select the "add URL" link
- After you click the "add URL" link, an entry for your link should appear with a garbage can next to it: You should end up with something that looks like this:
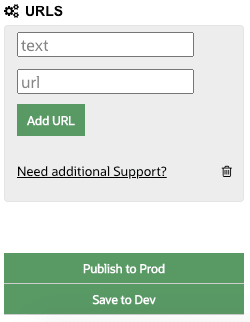
- After you click the "add URL" link, an entry for your link should appear with a garbage can next to it: You should end up with something that looks like this:
- Select the Save Settings button.
- The screen will refresh and you will be at the top of the Setup Help Widget page.
- Open the application with Guided Learning and open the Help Widget.
- You should now see a link at the bottom of the help widget like the one shown in the image below:
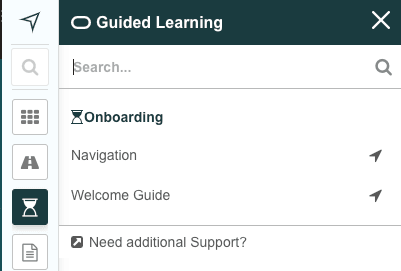
- You should now see a link at the bottom of the help widget like the one shown in the image below:
Retrofitting Base Content
This article outlines the key checks, updates, and best practices to be followed when importing a base content for Oracle Guided Learning (OGL). It is intended to guide content reviewers and developers through a structured validation process to ensure quality, accuracy, and alignment with customer-specific configurations.
Key areas covered are:
- Activation and step conditions
- Role and label verification
- Content editor validations
- Product/module alignment
- Selector validation for correct element tracking
This article serves as a reference to ensure consistency and completeness across all imported guides during the retrofitting process.
Validation Steps:
- Activation condition: Verify that all activation conditions are appropriate, including URL matching criteria and settings for the Always Help Panel or Autoload functionality.
- Role Condition: If a role condition is present within the imported guide, it
should be removed and replaced with the appropriate role as specified by the
customer.
Note:
Roles should be clearly defined and appropriately configured in the Custom Roles section of the console.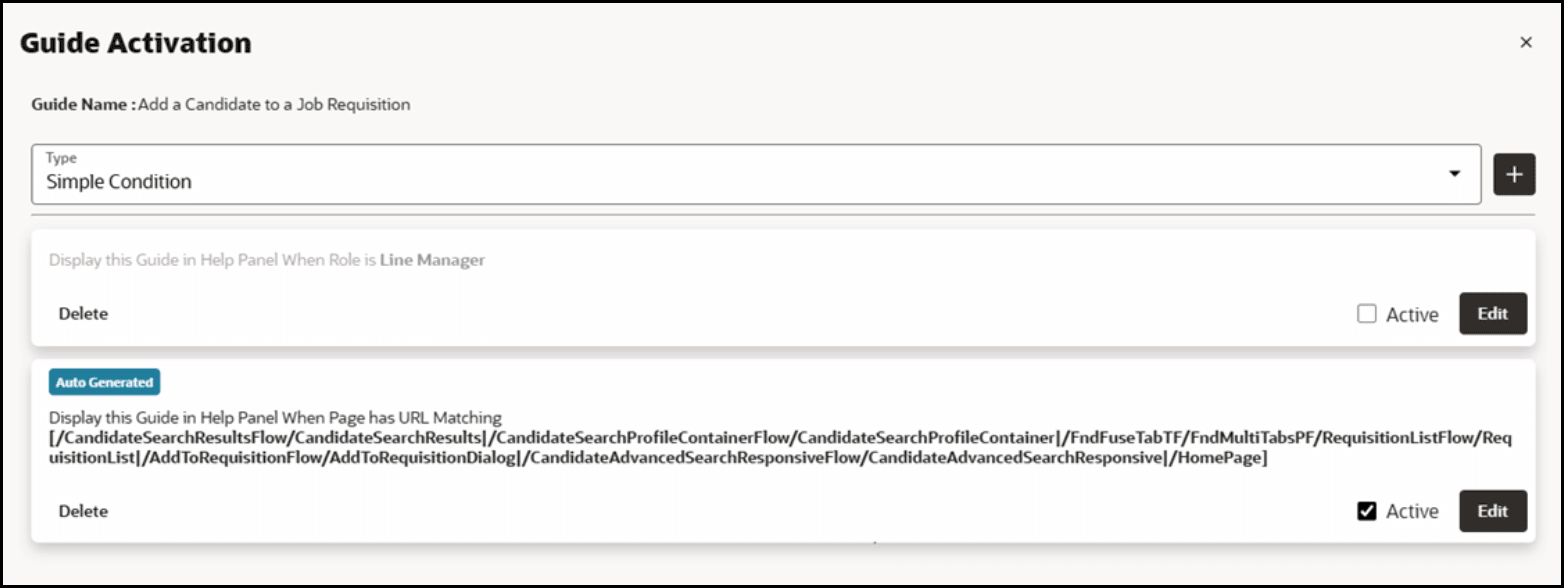
- Labels: Verify that the existing labels are relevant; if any are missing, add
the necessary labels accordingly.

- Product, Module and Display Group: Check if the right product, module and
display group are added. Change them if required.


- Quick glance on content editor: As part of the sanity testing, review the guide in the Content Editor to get an overview of the navigation flow.
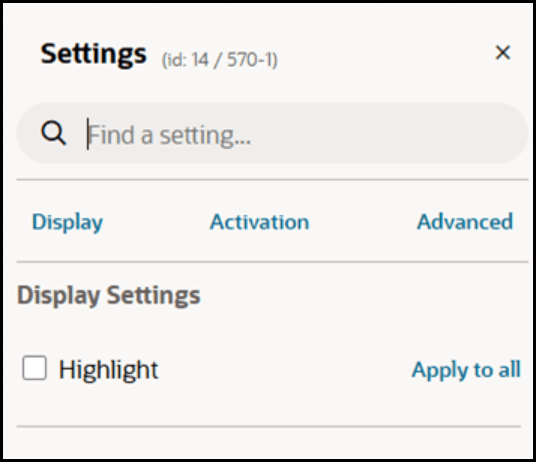
- Splash Tip Selector: If a splash tip includes a
body selector, it should be updated to html > body to enable extended
Highlight options.
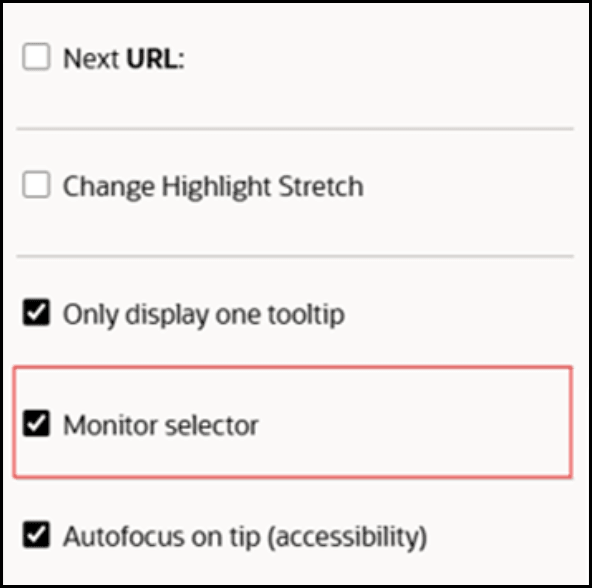
- Monitor Selector should be enabled: For many steps in a guide, this option is
often not enabled during import. However, it should be enabled to ensure accurate
element tracking.
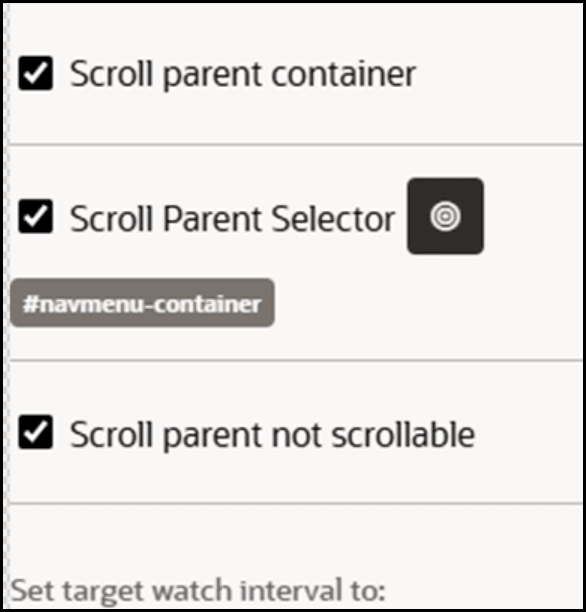
- Missing horizontal scroll condition: The horizontal scroll
condition for tips located within the homepage sections — such as Me, My
Team, My Client Groups, etc.— is typically not enabled upon import.
However, this setting is mandatory when multiple tabs exist within the homepage to
ensure accurate element tracking.
- Step conditions: Verify that all step conditions are appropriate and aligned with the guide’s intended functionality.
Quick Guide Builder
Quick Guide Builder – Create in-app guides efficiently
Digital Adoption Platforms allow you to create and deploy guides across your application pages and elements, providing a layer of guidance for your users just when they need it.
Traditionally, guides have been utilized to help users onboard onto new applications through tours and navigate successfully through processes. These are then documented and stored as Job Aids and produced into video content for training purposes.
As applications become more intuitive and apply different UI’s, elements becoming harder to select, the job of creating guides, documenting and amending changes can become challenging and cumbersome.
There has been a rise in the use of recorders to alleviate the process of selecting elements for guide building. Part of our core strategy is to improve our developers experience, by introducing automation into our platform, helping developers become more productive. Quick Guide Builder is just one example of this.
What is Quick Guide Builder? Why did we incorporate this into our product?Quick Guide Builder allows process experts and developers to quickly create process guides by simply recording a navigation process in the host application without the need to identify HTML element selectors. When completed, save the progress and transfer control over to an OGL content developer to further refine/finalize setting up their guide.
Content developers create process guides through a time-intensive step-by-step build process in which they select elements, add text/content, etc., one step at a time. In most cases, the content developer needs to have a working knowledge of the OGL editor to be able to successfully create and setup the guide. However, the same content developer may or may not be a subject matter expert on the host application (such as Fusion HCM). In these cases, the content developers would have to rely on the host application's SME to help with the workflow's navigation. The SME on the other hand would have little or no knowledge of using the OGL Console or editor.
Quick Guide Builder provides a solution to simplify process guide development.
What is available today and how is this being applied?
To view a live demo, please see our recorded webinar on Customer Connect.
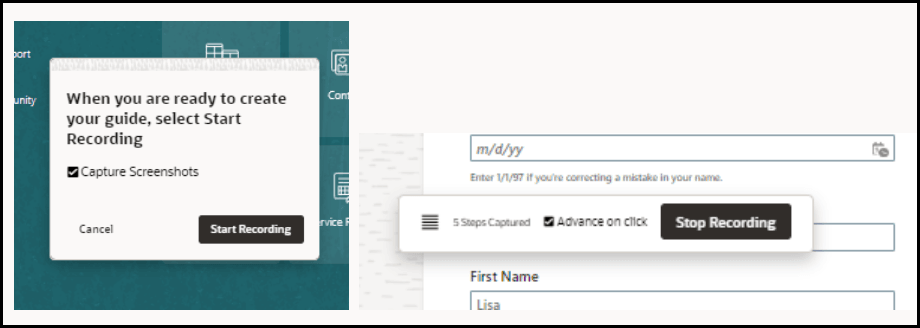
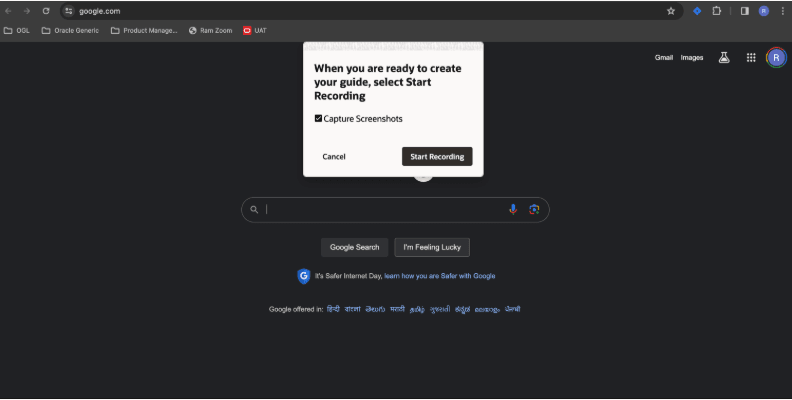
To get started, create a new content item and select 'Auto' from within the 'Process' guide type to launch.

Start the recording modal
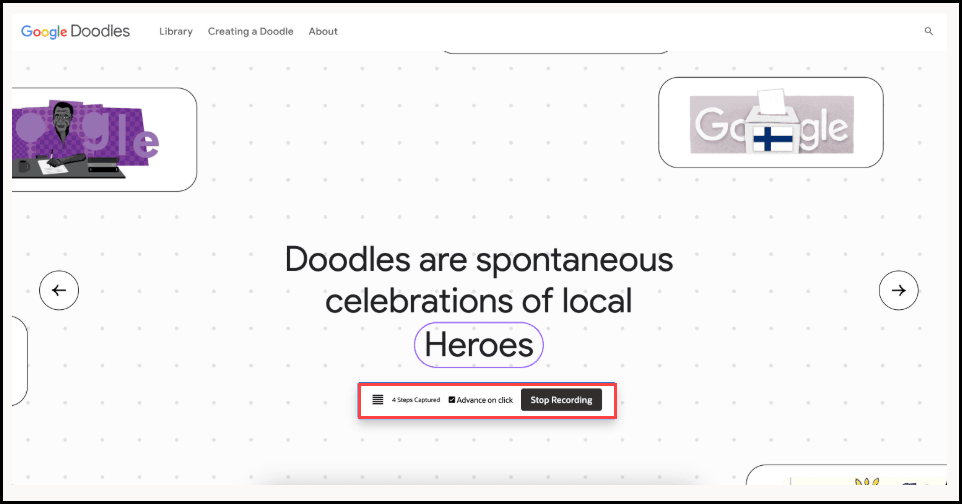
Recording in progress, 'Advance on click' is default. Uncheck if working through form elements that require user input. Stop Recording Modal when complete.
The guide will now appear in the console as a new Process Guide, which you’re now able to review, edit, and apply any activation conditions within your full editor.
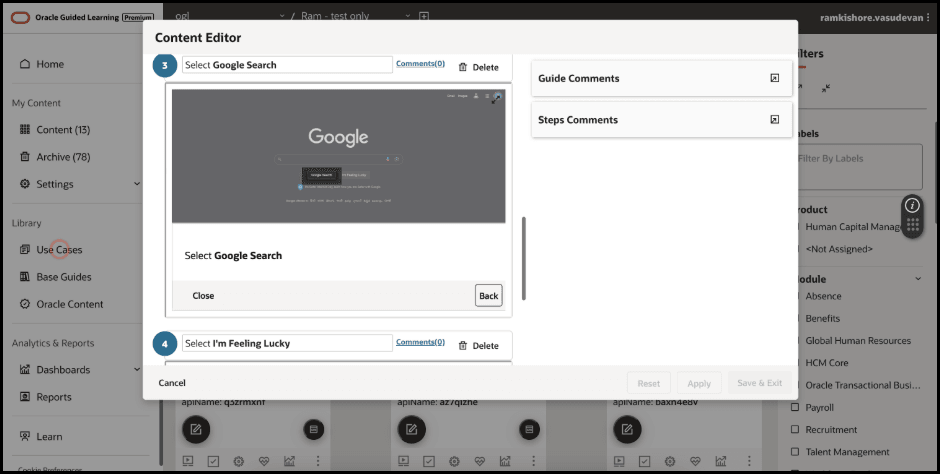
What have we noticed about the feature's adoption and use case from our customers?
Customers have been intrigued to try and utilize our functionality. We have seen customers deploy this to save time in their guide builds, and focus on editing and revising content post recording.
This has also helped customers build guides on elements that are harder to select, thereby helping them complete this guide.
What's next? Where are we going?
The future state of Quick Builder could bring in auto-segmentation capabilities like that of the full editor. We are also investing time in research to understand if the element selection process can be improved (good OFS selectors picked over bad ones in the case of Fusion as the host application).
