2.11.2 Recovering Oracle Linux Database Server with Uncustomized Partitions
You can recover the Oracle Linux database server from a snapshot-based backup when using uncustomized partitions.
This procedure is applicable when the layout of the partitions, logical volumes, file systems, and their sizes are equal to the layout when the database server was initially deployed.
Caution:
All existing data on the disks is lost during the procedure.- Prepare an NFS server to host the backup archive file
(
mybackup.tar.bz2).The NFS server must be accessible by IP address.
For example, on an NFS server with the IP address
nfs_ip, where the directory/exportis exported as an NFS mount, put the backup file (mybackup.tar.bz2) in the/exportdirectory. - Restart the recovery target system using the
diagnostics.isofile.See Booting a Server using the Diagnostic ISO File in Oracle Exadata System Software User's Guide. - Answer as indicated in these examples when prompted by the system. The responses are shown in bold.
Note that for Oracle Exadata System Software release 12.1.2.2.0 or later, DHCP is used and you do not have to manually set up the network.
-
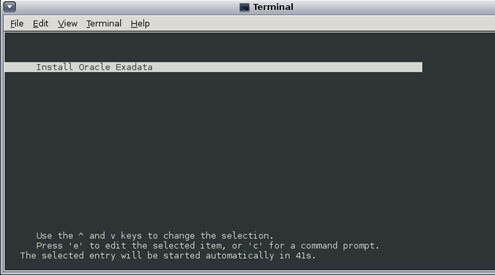
If you are using Oracle Exadata System Software release 18.1 or later, running on Oracle Exadata Database Machine X7 or later, then the prompt looks like the following:

Description of the illustration boot_screen_18.1.jpg -
If you are using Oracle Exadata System Software release 18.1 or later and restoring through one of the 10GbE Ethernet SFP+ ports on Oracle Exadata Database Machine X3-2 or later, then the prompt looks like the following:
------------------------------------------------------------------------------ Choose from the following by typing letter in '()': (e)nter interactive diagnostics shell. Use diagnostics shell password to login as root user (reboot or power cycle to exit the shell), (r)estore system from NFS backup archive, Select: r Continue (y/n) [n]: y Rescue password: [INFO ] Enter path to the backup file on the NFS server in format: Enter path to the backup file on the NFS server in format: <ip_address_of_the_NFS_share>:/<path>/<archive_file> For example, 10.124.1.15:/export/nfs/share/backup.2010.04.08.tar.bz2 NFS line: <nfs_ip>:/export/mybackup.tar.bz2 [INFO ] The backup file could be created either from LVM or non-LVM based COMPUTE node [INFO ] Versions below 11.2.1.3.0 do not support LVM based partitioning Use LVM based scheme. (y/n) [y]: y Configure network settings on host via DHCP. (y/n) [y]: n Configure bonded network interface. (y/n) [y]: y IP Address of bondeth0 on this host: <IP address of the DB host> Netmask of bondeth0 on this host: <netmask for the above IP address> Bonding mode:active-backup or 802.3ad [802.3ad]: active-backup Slave interface1 for bondeth0 (ethX) [eth4]: eth4 Slave interface2 for bondeth0 (ethX) [eth5]: eth5 ... [ 354.619610] bondeth0: first active interface up! [ 354.661427] ixgbe 0000:13:00.1 eth5: NIC Link is Up 10 Gbps, Flow Control: RX/TX [ 354.724414] bondeth0: link status definitely up for interface eth5, 10000 Mbps full duplex Default gateway: <Gateway for the above IP address> ------------------------------------------------------------------------------ -
If you are using Oracle Exadata System Software release 12.1.x or 12.2.x, then the prompts look like the following:
------------------------------------------------------------------------------ Use diagnostics shell password to login as root user (reboot or power cycle to exit the shell), (r)estore system from NFS backup archive. Select: r Continue (y/n) [n]: y Rescue password: [INFO: ] Enter path to the backup file on the NFS server in format: Enter path to the backup file on the NFS server in format: <ip_address_of_the_NFS_share>:/<path>/<archive_file> For example, 10.124.1.15:/export/nfs/share/backup.2010.04.08.tar.bz2 NFS line: <nfs_ip>:/export/mybackup.tar.bz2 [INFO: ] The backup file could be created either from LVM or non-LVM based COMPUTE node [INFO: ] Versions below 11.2.1.3.0 do not support LVM based partitioning Use LVM based scheme. (y/n) [y]: y ------------------------------------------------------------------------------ -
If you are using Oracle Exadata System Software release earlier than 12.1.2.2.0, then the prompts look like the following
------------------------------------------------------------------------------
      Choose from following by typing letter in '()':
   (e)nter interactive diagnostics shell. Must use credentials from Oracle
      support to login (reboot or power cycle to exit the shell),
   (r)estore system from NFS backup archive,
Select:r
Are you sure (y/n) [n]:y

The backup file could be created either from LVM or non-LVM based compute node
versions below 11.2.1.3.1 and 11.2.2.1.0 or higher do not support LVM based partitioning
use LVM based scheme(y/n):y

Enter path to the backup file on the NFS server in format:
ip_address_of_the_NFS_share:/path/archive_file
For example, 10.10.10.10:/export/operating_system.tar.bz2
NFS line:<nfs_ip>:/export/mybackup.tar.bz2
IP Address of this host:IP address of the DB host
Netmask of this host:netmask for the above IP address
Default gateway:Gateway for the above IP address. If there is no default gateway in your network, enter 0.0.0.0.
------------------------------------------------------------------------------
When the recovery completes, the log in screen appears.
-
- Log in as the
rootuser.If you do not have the password for therootuser, then contact Oracle Support Services. - Restart the system.
# shutdown -r nowThe restoration process is complete. - Verify that all Oracle software can start and function by logging in to the database server. The
/usr/local/bin/imagehistorycommand indicates that the database server was reconstructed.The following is an example of the output:
# imagehistory Version : 11.2.2.1.0 Image activation date : 2010-10-13 13:42:58 -0700 Imaging mode : fresh Imaging status : success Version : 11.2.2.1.0 Image activation date : 2010-10-30 19:41:18 -0700 Imaging mode : restore from nfs backup Imaging status : success - On systems with InfiniBand Network Fabric only, run
reclaimdisks.shon the restored database server./opt/oracle.SupportTools/reclaimdisks.sh -free -reclaimNote:
This command is not required on RoCE-based Exadata database servers.
- If the recovery was on Oracle Exadata Database Machine Eighth Rack, then perform the procedure described in Configuring Oracle Exadata Database Machine Eighth Rack Oracle Linux Database Server After Recovery.