Discover Oracle Private Cloud Appliance X8-2
Follow the below steps if you are discovering the Oracle Private Cloud Appliance X8-2:
-
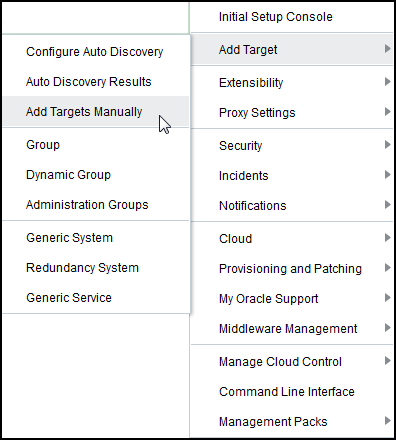
From the Setup menu, select Add Targets, and then select Add Targets Manually:
Figure 4-1 Add Targets Manually Menu
-
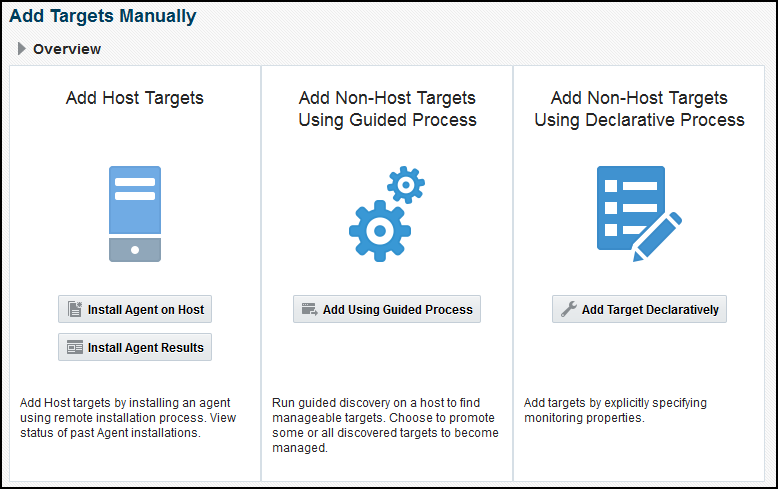
On the Add Targets Manually page, click Add Targets Using Guided Process.
Figure 4-2 Add Targets Manually
-
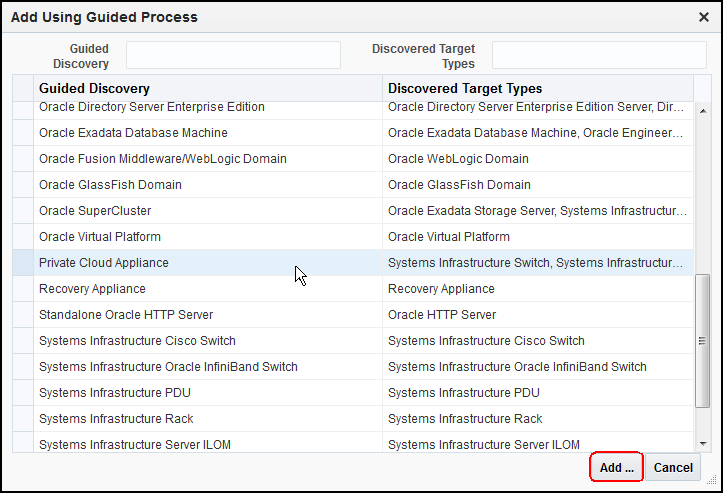
On the Add Using Guided Process window, select Private Cloud Appliance. Click Add to begin the discovery wizard.
Figure 4-3 Select Private Cloud Appliance
-
On the Discovery Inputs page, you will need to enter the Monitoring Agent host location.
Figure 4-4 PCA Discovery Wizard: Discovery Input

Click the Search icon to display the Select Discovery Agent pop-up window:
Figure 4-5 Select Discovery Agent
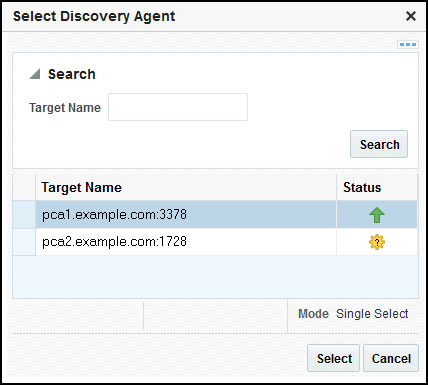
Select the URL from the available list. Once you select the URL, the Management Agent field on the Discovery Input page should auto-populate with the required information.
Click Next.
-
On the Discovery Prerequisites page, a series of checks are conducted automatically. Any errors returned must be resolved before continuing.
Figure 4-6 PCA Discovery Wizard: Discovery Prerequisites

Note:
If you get error severity messages, you must resolve the errors then click Reload to run the prerequisites check again.
Click Next.
A confirmation pop-up window will appear to show how many targets to be discovered:
Figure 4-7 Confirmation Window
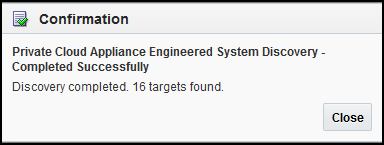
Click Close to continue.
-
On the Discovered Targets page, select the targets you want included in the discovered PCA rack. By default, all available targets are pre-selected.
Figure 4-8 PCA Discovery Wizard: Discovered Targets in X8-2
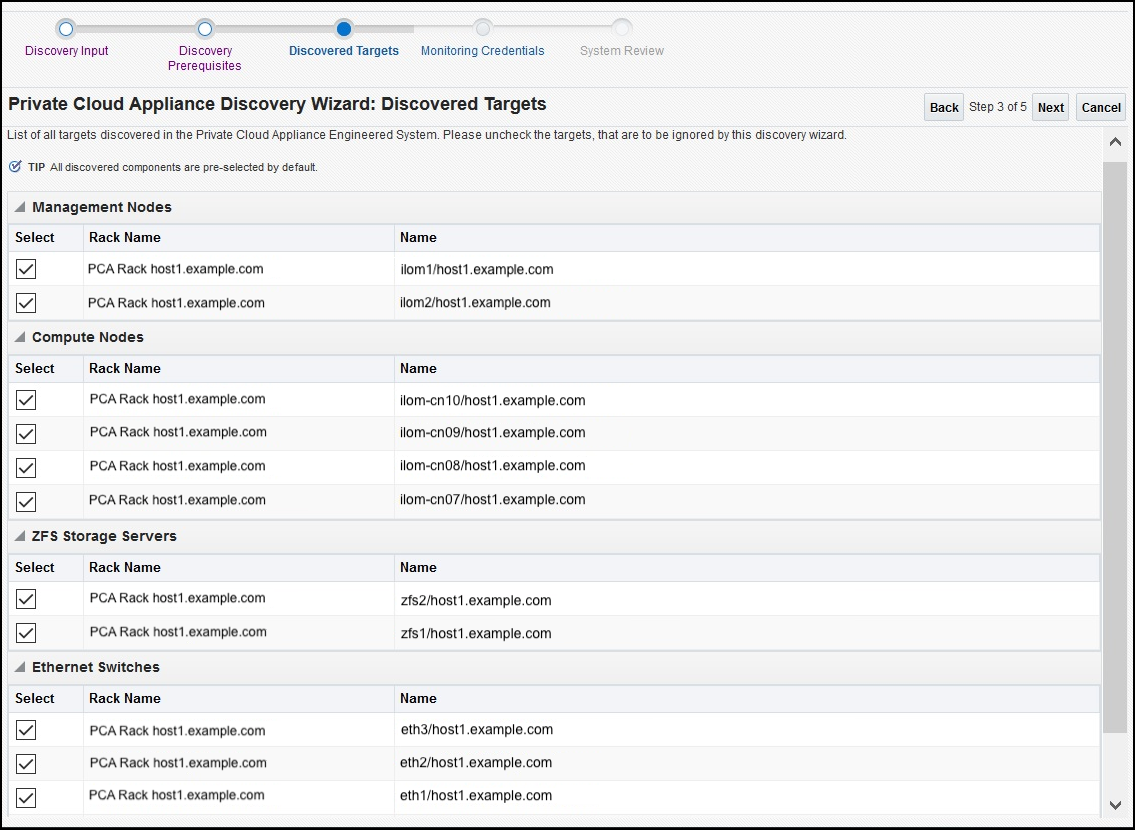
Click Next.
-
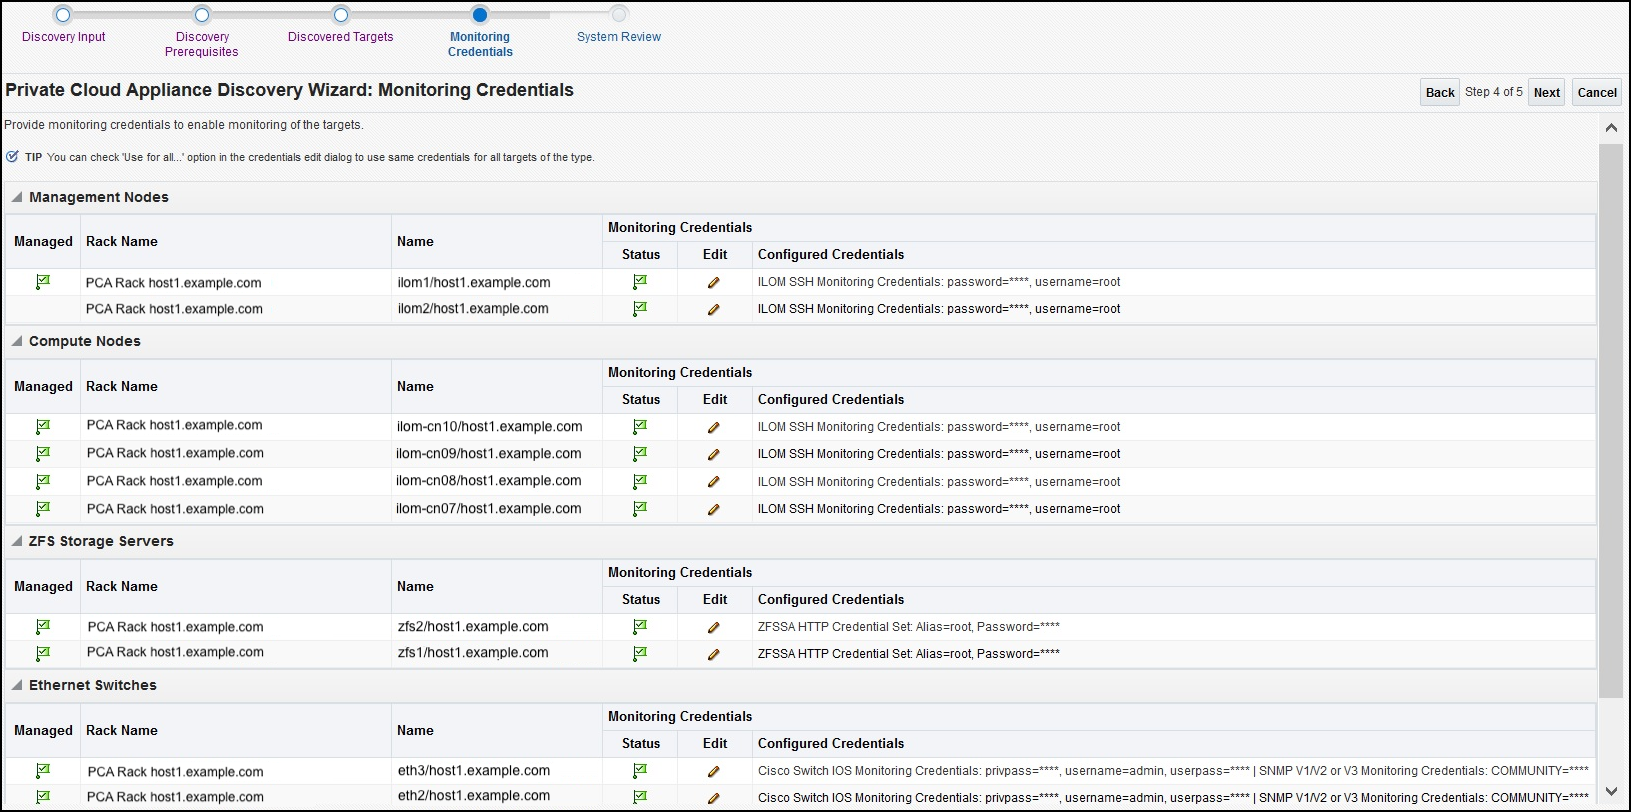
On the Monitoring Credentials page, the credentials must be set for each component in the Oracle PCA rack. A red status flag is shown for all components where the credentials are not set.
For each component type, click the Edit icon. In the Monitoring Credentials pop-up, enter the user name and password for each component in the Oracle PCA rack:
Figure 4-9 Component Monitoring Credentials
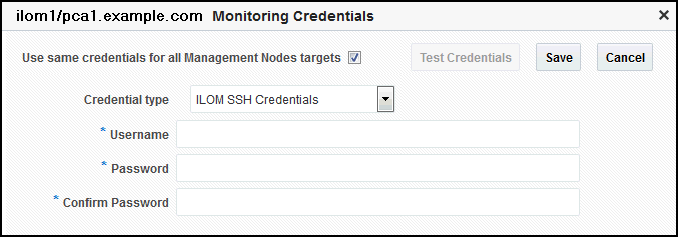
You can select Use same credentials for all in the credential's edit dialog to use the same credentials for all targets of the type. The images below show the examples of the Cisco Switch Credentials and the Monitoring Credentials pages with all credentials set:
Figure 4-10 PCA Discovery Wizard: Cisco Switch Credentials
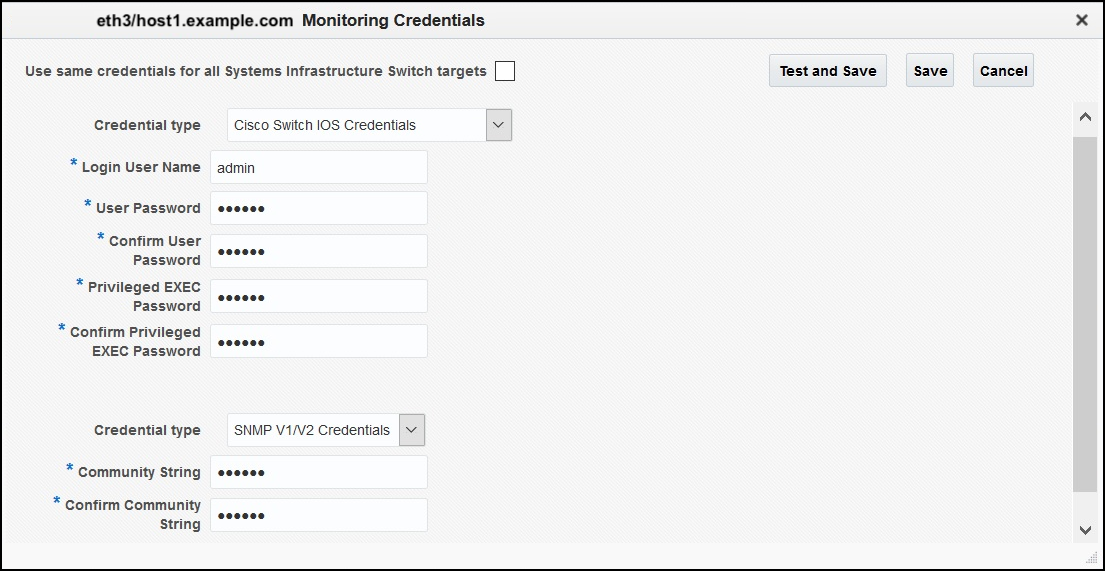
Figure 4-11 PCA Discovery Wizard: Monitoring Credentials for X8-2
Click Next.
-
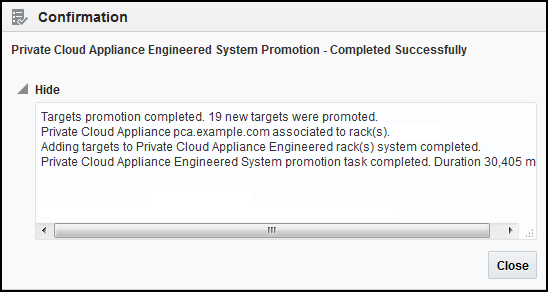
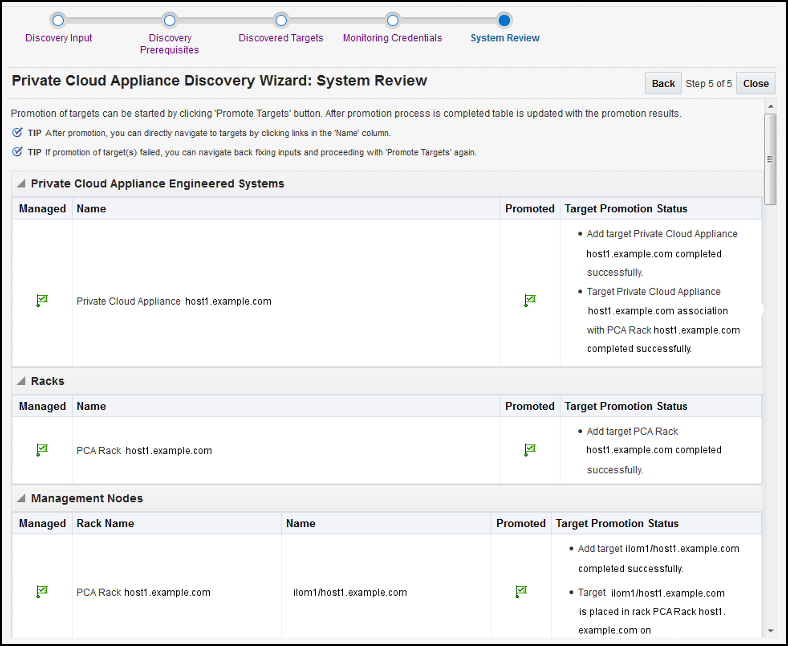
On the System Review page, click Promote Targets to promote all components of the Oracle PCA rack. If any component fails the promotion process, click Back to update the inputs for that component. A pop-up window will appear to show the progress. Once complete, click Close.
Figure 4-12 Target Promotion Confirmation
The image below shows an example of completed promotion of all components:
Figure 4-13 PCA Discovery Wizard: System Review
Click Close.