1 Discovering and Adding Host and Non-Host Targets
Enterprise Manager Cloud Control (Cloud Control) enables you to discover, promote, add, and then monitor software deployments across your network, using a single GUI-rich console. This chapter introduces you to the concepts of discovery and promotion, and describes how you can perform these tasks using Cloud Control.
In particular, this chapter covers the following:
Overview of Discovering and Adding Targets
This section introduces you to basic concepts of discovery, promotion, and monitoring. It familiarizes you with the different methods of discovering and monitoring targets using Enterprise Manager Cloud Control. In particular, this section covers the following:
Understanding Discovery Terminology
This section describes the following:
What are Targets and Managed Targets?
Targets are entities such as host machines, databases, Fusion Middleware components, server targets (hardware), that can be managed and monitored in Cloud Control.
Managed targets are entities that are actively being monitored and managed by Cloud Control.
What is Discovery?
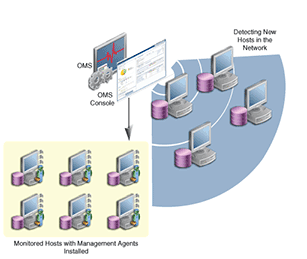
Discovery refers to the process of identifying unmanaged hosts and targets in your environment. You can discover hosts and targets automatically or manually.
Figure 1-1 illustrates the discovery process.
Figure 1-1 Discovery
What is Promotion?
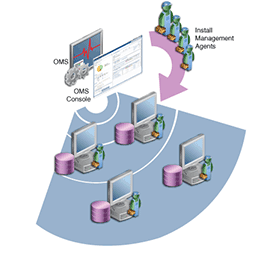
Promotion refers to the process of converting unmanaged hosts and targets, which have been discovered in your network, to managed hosts and targets in Cloud Control so that they can be monitored and managed efficiently. While conversion of unmanaged hosts to managed hosts involves deployment of a Management Agent on those hosts, conversion of unmanaged targets running on those hosts to managed targets involves only adding the targets as manageable entities in Cloud Control without deploying any additional component on the hosts.
Figure 1-2 illustrates the promotion process.
Figure 1-2 Promotion
Options for Discovering Targets
You can discover targets using either of the following methods:
Autodiscovery Process
For discovery of a host, the autodiscovery process enables a Management Agent running on the host to run an Enterprise Manager job that scans for unmanaged hosts. You then convert these unmanaged hosts to managed hosts by deploying Management Agents on these hosts. Next, you search for targets such as databases or other deployed components or applications on these managed hosts, and finally you promote these targets to managed status.
For discovery of targets, the autodiscovery process enables you to search for targets on the host and then add these targets using Enterprise Manager.
The benefit of using this process is that as new components are added to your infrastructure, they can be found and brought under management on a regularly-scheduled basis.
Guided Discovery Process
The guided discovery process enables you to explicitly add a target to bring under management. The discovery wizard guides you through the process and most of the specifications required are filled by default.
The benefits of using this process are as follows:
-
You can find targets with less effort.
-
You can find a new database that has been added recently even if autodiscovery has not been run.
-
You can find a non-promoted database that already exists in autodiscovery results, but has a change in details. For example, the port.
-
You eliminate unnecessary consumption of resources on the Management Agent when discovery is not needed.
Declarative Process
Declaring target monitoring properties enables you to manually specify all the details required to discover the database target, such as the host name and location, target name and location, and other specific information. This process is generally used when the autodiscovery process and guided discovery process fails to discover the target that you want to add.
Discovery and Monitoring in Enterprise Manager Lifecycle
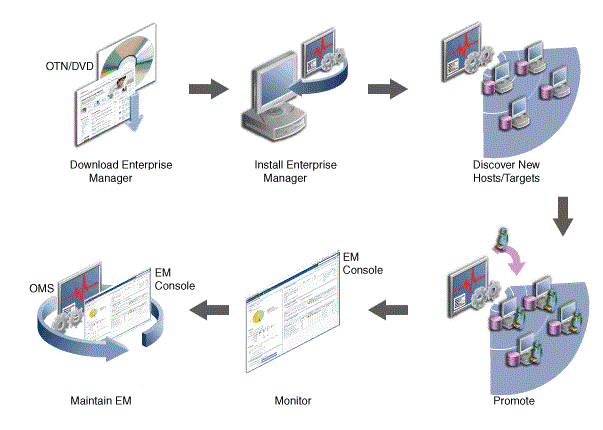
Figure 1-3 illustrates the lifecycle process of discovering and monitoring targets in Cloud Control.
Figure 1-3 Discovery and Monitoring in Enterprise Manager Lifecycle
Discovery and Monitoring Process
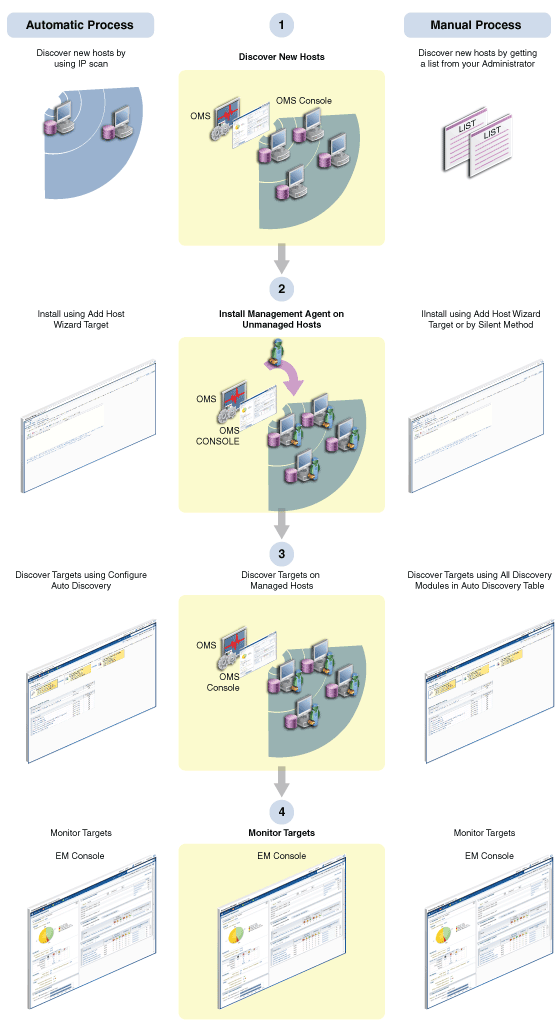
Figure 1-4 illustrates the high level process of discovering and monitoring targets:
Figure 1-4 Discovery and Monitoring Process
Discovering and Adding Host Targets
This section covers the following:
Adding Host Targets Using the Manual Guided Discovery Process
To add host targets manually, refer to the instructions outlined in the Oracle Enterprise Manager Cloud Control Basic Installation Guide.
Discovering and Adding Non-Host Targets
This section covers the following:
Configuring Autodiscovery of Non-Host Targets
To discover targets on managed hosts, follow these steps:
-
From the Setup menu, select Add Target, and then select Configure Auto Discovery.
-
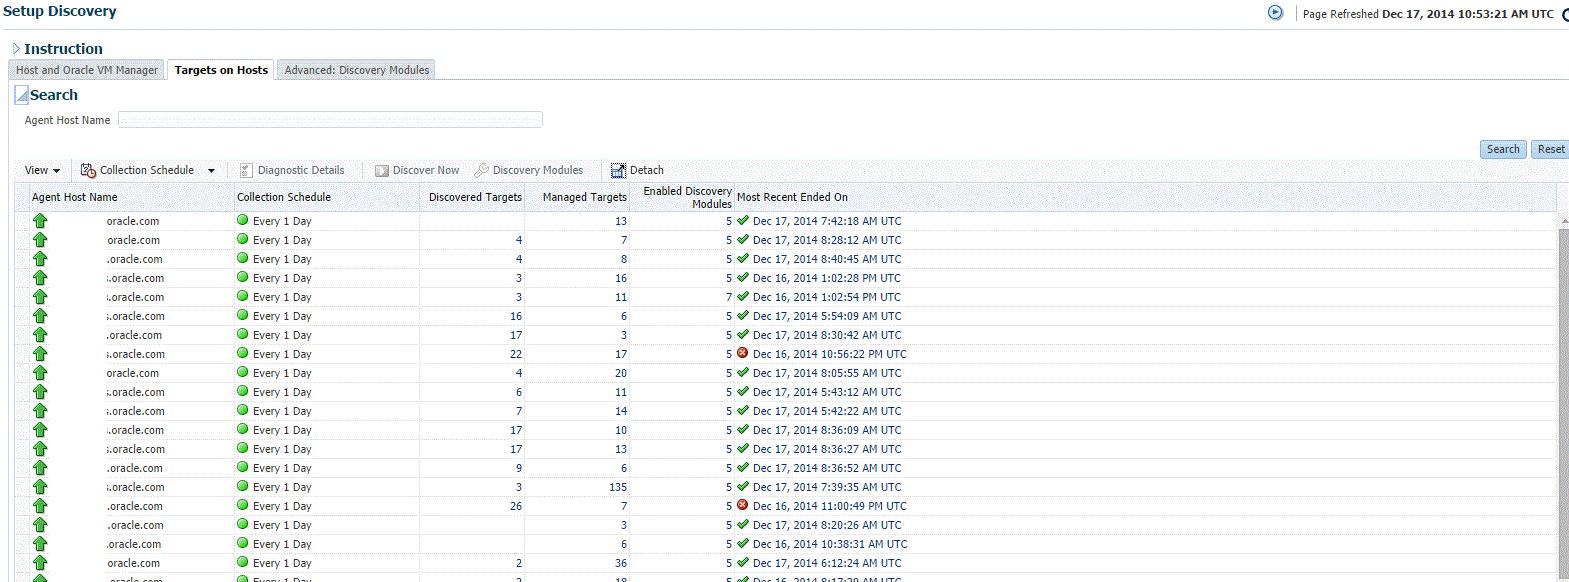
On the Setup Discovery page, in the Targets on Hosts tab, expand Search, then enter the hostname for the host you want to check for targets in the Agent Host Name field. The host must have a Management Agent installed on it.
-
On the Target Discovery (Agent-based) page, expand Search, then enter the hostname for the host you want to check for targets in the Agent Host Name field. The host must have a Management Agent installed on it.
-
To search for a specific Management Agent, click Search. The table lists all the Management Agents and filters the list based on what you search for.
-
Select the host in the table and click Discovery Modules.
-
On the Discovery Modules page, select the target types that you want to discover on the host. Note that you must supply search parameters for some target types. To specify a parameter, select the target type in the Discovery Module column and click Edit Parameters.
-
Oracle Cluster and High Availability Service: No parameters required.
-
Oracle Database, Listener and Automatic Storage Management: Specify the path to the Clusterware Home.
-
Oracle Home Discovery: No parameters required.
-
Oracle Secure Backup Domain: No parameters required.
-
Oracle Fusion Middleware: Specify * (the "star" character) to search all Middleware Homes, or specify the path to one or more Middleware Homes on the host, each separated by a comma.

Click OK when finished. Target discovery has been configured on this host.
-
-
On the Setup Discovery page, in the Targets on Host tab, select the hosts you want to set the schedule at which discovery will be run. Click Collection Schedule, and then select For all hosts, or For selected hosts. In the Collection Schedule dialog box, enable or disable collection for the hosts that you have selected. If you have enabled collection, then select the frequency of collection. This schedule will be applied to all selected hosts. By default the discovery will run every 24 hours. Click OK.
-
Repeat these steps for each additional host on which you want to configure discovery.
-
Click Discover Now to discover targets immediately. The discovery will also run at the scheduled interval.
-
To check for discovered targets from the Setup menu, select Add Target, then select Auto Discovery Results.
-
Select a target to promote, then click Promote. A wizard specific to the target type you are promoting opens. Supply the required values.

-
Click the Agent-based Targets tab.You can choose one or several targets to promote.
-
Note that you can optionally click Ignore for a discovered target. Ignoring a target puts it into a list of targets that you do not want to manage.
Ignored targets will be displayed in the Ignored Targets tab, and will remain in Cloud Control as un-managed targets until you decide to either promote or remove them. If you delete a target, it would be rediscovered the next time discovery runs.
-
Check the target type home page to verify that the target is promoted as an Cloud Control target. Once a target is successfully promoted, the Management Agent installed on the target host will begin collecting metric data on the target.
Note:
-
When you promote a discovered target to managed status, the plug-in required for the target is automatically deployed to the Management Agent, which monitors the host where the target has been discovered. For the plug-in to be deployed, the Management Agent must be secure. Therefore, before promoting the discovered targets to managed status, ensure that the Management Agent is secure. You can always unsecure it after the discovered target is promoted to managed status, that is, after the required plug-in is deployed.
To verify the secure status of a Management Agent, and to secure it if required, use any one of the following methods:
-
From the Setup menu, select Manage Cloud Control, and then click Agents. Click the required Management Agent. Verify whether the Management Agent is secure. If it is not secure, from the Agent menu, click Secure to secure it.
-
Run the following command to verify if the Management Agent is secure:
<EMSTATE>/bin/emctl status agentIf the Management Agent is secure, the Management Agent URL displayed in the output of the previous command is an HTTPS URL. However, if the Management Agent URL displayed is an HTTP URL, secure the Management Agent by running the following command:
<EMSTATE>/bin/emctl secure agent
-
-
Cloud Control supports simultaneous promotion of multiple targets only for some target types. Additionally, multiple selection of database targets has been disabled to avoid a user selecting RAC databases across clusters. This is similar to the user-guided discovery feature where a user cannot discover targets across a cluster in the same session.
-
Adding Non-Host Targets Using the Guided Discovery Process
To add non-host targets using the guided process, follow these steps:
Note:
When you add a target using the guided process, some scripts and automated processes are run that are particular for the target type that you select. You may have to input credentials in order to run the guided process.
-
From the Setup menu, select Add Target, then select Add Targets Manually. Cloud Control displays the Add Targets Manually page.
-
On the Add Targets Manually page, select Add Using Guided Process.
-
In the Add Using Guided Process dialog box, select the target type such as Exalogic Elastic Cloud, Oracle Cluster and High Availability Service, System Infrastructure server ILOM, or Oracle WebLogic Domain. Click Add...
-
After you select the target type, a wizard specific to the target type guides you through the process of manually adding the target.
Upon confirmation, the target becomes a managed target in Cloud Control. Cloud Control simply accepts the information, performs validation of the supplied data where possible and starts monitoring the target.
Note:
When you manually add a non-host target to Cloud Control, the plug-in required for the target is automatically deployed to the Management Agent, which monitors the host where the non-host target exists. For the plug-in to be deployed, the Management Agent must be secure. Therefore, before manually adding a non-host target to Cloud Control, ensure that the Management Agent is secure. You can always unsecure it after the target is added to Cloud Control, that is, after the required plug-in is deployed.
To verify the secure status of a Management Agent, and to secure it if required, use any one of the following methods:
-
From the Setup menu, select Manage Cloud Control and then, click Agents. Click the required Management Agent. Verify whether the Management Agent is secure. If it is not secure, from the Agent menu, click Secure to secure it.
-
Run the following command to verify if the Management Agent is secure:
<EMSTATE>/bin/emctl status agentIf the Management Agent is secure, the Management Agent URL displayed in the output of the previous command is an HTTPS URL. However, if the Management Agent URL displayed is an HTTP URL, secure the Management Agent by running the following command:
<EMSTATE>/bin/emctl secure agent
Adding Non-Host Targets By Using the Declarative Process
To add a target on a managed host by specifying the target monitoring properties, follow these steps:
-
From the Setup menu, select Add Target, then select Add Targets Manually. Cloud Control displays the Add Targets Manually page.
-
On the Add Targets Manually page, select Add Target Declaratively.
-
In the Add Target Declaratively dialog box, choose one of the target types to add from the Target Types list, such as ADF Business Components for Java, Cluster Database, or Oracle HTTP Server.
-
Specify the Management Agent that will be used to monitor the target, or click on the Search icon to search for and select the Management Agent. Click Add...
-
After you select the target type, a wizard specific to the target type guides you through the process of manually adding the target.
Upon confirmation, the target becomes a managed target in Cloud Control. Cloud Control simply accepts the information, performs validation of the supplied data where possible and starts monitoring the target.
Note:
When you manually add a non-host target to Cloud Control, the plug-in required for the target is automatically deployed to the Management Agent, which monitors the host where the non-host target exists. For the plug-in to be deployed, the Management Agent must be secure. Therefore, before manually adding a non-host target to Cloud Control, ensure that the Management Agent is secure. You can always unsecure it after the target is added to Cloud Control, that is, after the required plug-in is deployed.
To verify the secure status of a Management Agent, and to secure it if required, use any one of the following methods:
-
From the Setup menu, select Manage Cloud Control, and then, click Agents. Click the required Management Agent. Verify whether the Management Agent is secure. If it is not secure, from the Agent menu, click Secure to secure it.
-
Run the following command to verify if the Management Agent is secure:
<EMSTATE>/bin/emctl status agentIf the Management Agent is secure, the Management Agent URL displayed in the output of the previous command is an HTTPS URL. However, if the Management Agent URL displayed is an HTTP URL, secure the Management Agent by running the following command:
<EMSTATE>/bin/emctl secure agent
-
Discovering and Promoting Oracle Homes
When you deploy an Oracle software component outside of the deployment procedures provided by Enterprise Manager, the Oracle home is not automatically discovered and promoted as targets. You will have to manually discover and promote the Oracle home target.
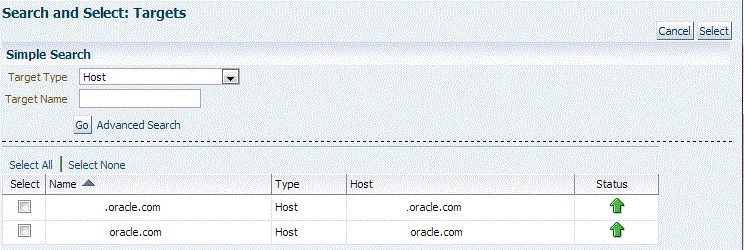
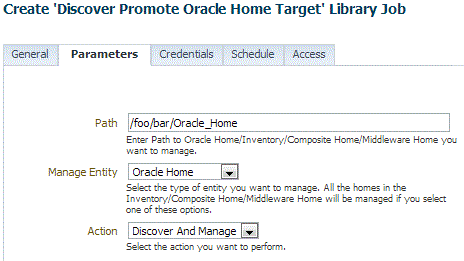
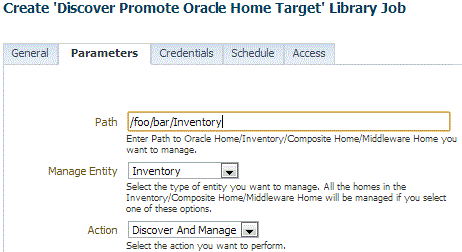
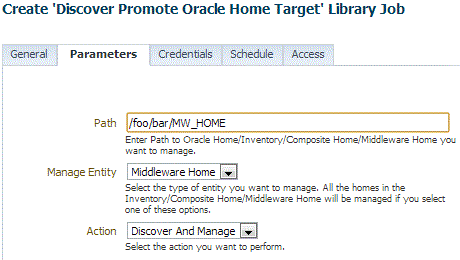
To discover and promote an Oracle home target, follow these steps:
Note:
If you submit the discovery job without specifying a path, a discovery of the whole host will be performed. In order for a Home to be discoverable by the Management Agent, it needs to be registered in an inventory that the Management Agent recognizes. The default inventory is the central inventory, which in Unix systems is found in /etc/oraInst.loc. Any Home registered here will automatically be discovered.
If there are other inventories in the host, they need to be added to the inventory list of the Management Agent. A line must be added to $EMSTATE/sysman/config/OUIinventories.add.
If the inventory is not found here, the Management Agent will not know of its existence, and hence any Home registered there will not be discovered.
Retrieving Deleted Targets
This sections covers the following:
Retrieving Deleted Target Types
If you have deleted one or more targets (such as a database target or a weblogic domain, or any other target), you can retrieve them and add them back to the Enterprise Manager Cloud Control Console. If autodiscovery is configured on the host where the targets were present, the targets are automatically discovered during the next scheduled autodiscovery operation. Once they are autodiscovered, you can promote them and add them to the console. If autodiscovery is not configured on the host where the targets were present, you have to discover the targets using one of the following methods:
-
By enabling autodiscovery as described in Configuring Autodiscovery of Non-Host Targets to automatically discover and promote the targets in the next scheduled autodiscovery operation.
-
By using the guided discovery process as described in Adding Non-Host Targets Using the Guided Discovery Process to manually discover and add the discovered targets to the console.
-
By specifying the target monitoring properties for each target as described in Adding Non-Host Targets By Using the Declarative Process to manually discover and add the discovered targets to the console.
-
By using the following EM CLI verb:
$ emcli add_target
      -name="name"
      -type="type"
      -host="hostname"
      [-properties="pname1:pval1;pname2:pval2;..."]
      [-separator=properties="sep_string"]
      [-subseparator=properties="subsep_string"]
      [-credentials="userpropname:username;pwdpropname:password;..."]
      [-input_file="parameter_tag:file_path"]
      [-display_name="display_name"]
      [-groups="groupname1:grouptype1;groupname2:grouptype2;..."]
      [-timezone_region="gmt_offset"]
      [-monitor_mode="monitor_mode"]
      [-instances="rac_database_instance_target_name1:target_type1;..."]
      [-force]
      [-timeout="time_in_seconds"]

[ ] indicates that the parameter is optional
For more information, see Verb Reference in the Oracle Enterprise Manager Cloud Control Command Line Interface Guide.
Retrieving Deleted Host and Corresponding Management Agent Targets
If you have deleted a host target and the corresponding Management Agent target, you can retrieve both of them. To do so, follow these steps:
Discover and add the host and the Management Agent by running the following command from the agent instance home of the corresponding host:
$ emctl config agent addInternalTargets
Once the host and the Management Agent are discovered and added to the console, add each target on that host as targets to be monitored in the console, by running the following EM CLI verb:
$ emcli add_target
      -name="name"
      -type="type"
      -host="hostname"
      [-properties="pname1:pval1;pname2:pval2;..."]
      [-separator=properties="sep_string"]
      [-subseparator=properties="subsep_string"]
      [-credentials="userpropname:username;pwdpropname:password;..."]
      [-input_file="parameter_tag:file_path"]
      [-display_name="display_name"]
      [-groups="groupname1:grouptype1;groupname2:grouptype2;..."]
      [-timezone_region="gmt_offset"]
      [-monitor_mode="monitor_mode"]
      [-instances="rac_database_instance_target_name1:target_type1;..."]
      [-force]
      [-timeout="time_in_seconds"]

[ ] indicates that the parameter is optional
For more information, see Verb Reference in the Oracle Enterprise Manager Cloud Control Command Line Interface Guide.


