Installing the Wall Brackets
The following procedure describes how to install wall brackets on the Acme Packet 1100 for use in mounting the chassis to a wall or other vertical surface.
Prerequisites
- To prevent overheating, ensure that there is enough room for appropriate airflow on either side of the chassis and that there is adequate ventilation in the room in which the chassis is being installed.
- Ensure that the wall or vertical surface on which you will mount the chassis is strong enough to support the weight of the Acme Packet 1100.
- Ensure that there is enough room to access the front and back panel of the chassis for purposes of reviewing front/back panel LEDs and inserting/removing cables from the back panel.
- Prepared surface on which
to install the wall bracket with pre-drilled holes for installation of screws.
To install wall brackets on the Acme Packet 1100:
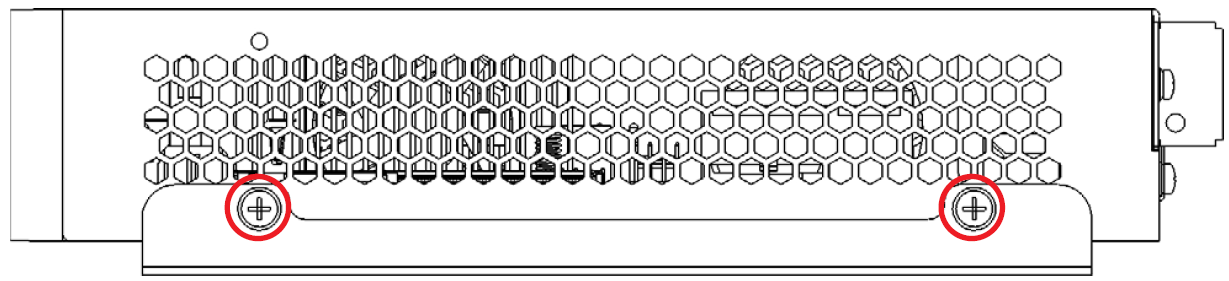
- On the right side of the chassis, align the holes in the wall
bracket with the holes at the base of the chassis as shown.
Figure 3-6 Wall Bracket Mount Points on the Right Side of the Acme Packet 1100
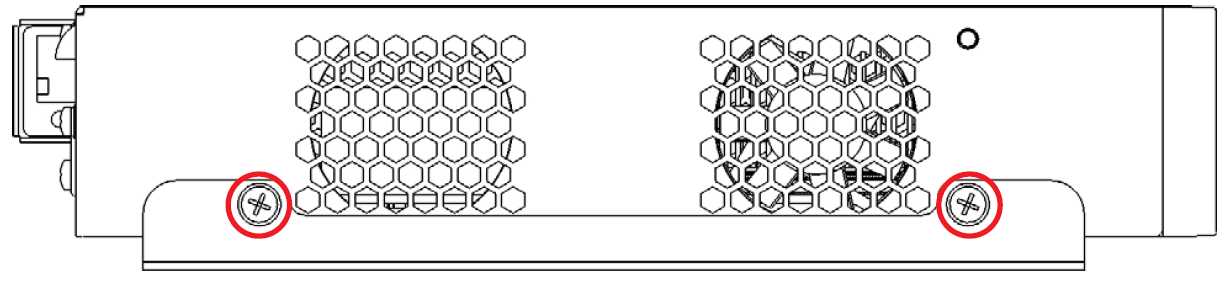
- On the left side of the chassis, align the holes in the wall
bracket with the holes at the base of the chassis as shown.
Figure 3-7 Wall Bracket Mount Points on the Left Side of the Acme Packet 1100
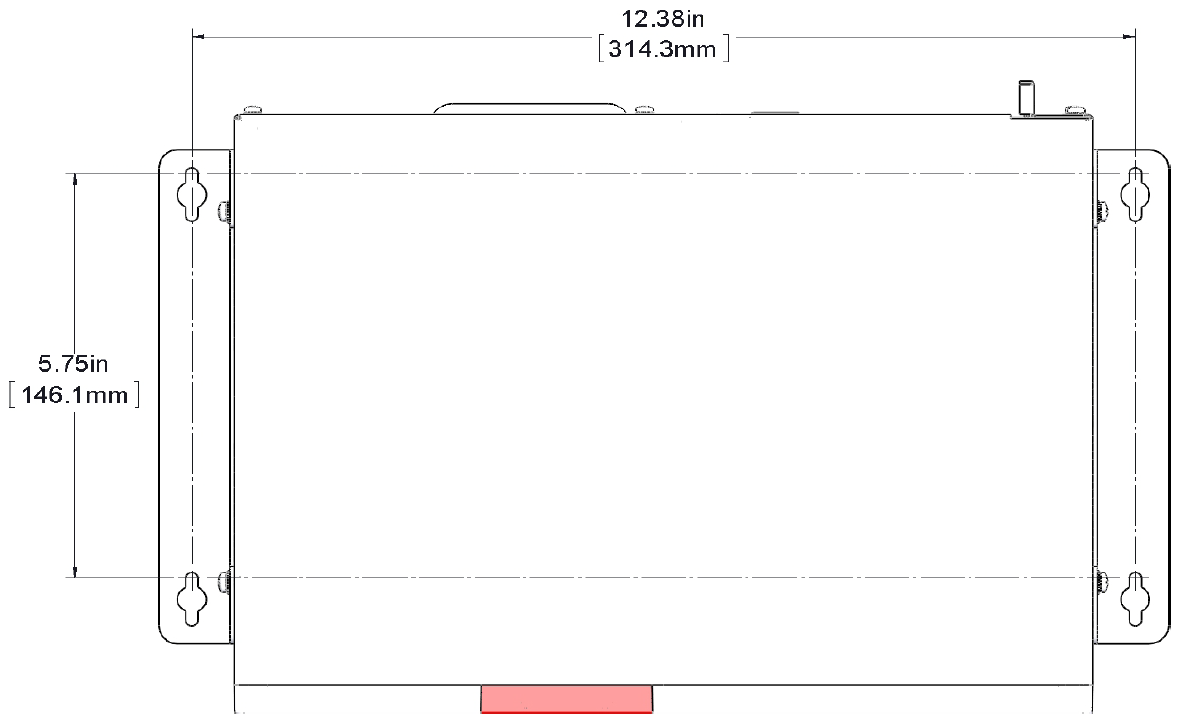
- Ensure that the wall bracket screws are tight and that the Acme
Packet 1100 is securely fastened to the wall.
Figure 3-8 Wall Bracket Mount Points for Wall Mounting of the Acme Packet 1100