9 Configuring OCNRF using CNC Console
This section provides information for configuring Oracle Communications Network Repository Function.
CNC Console Interface
CNC Console Login
Following is the procedure to login to CNC Console:
- Open any browser.
- Enter the URL: http://<host name>:<port number>.
- Enter valid credentials.
- Click Log in. The CNC Console interface is displayed.
Figure 9-1 CNC Console
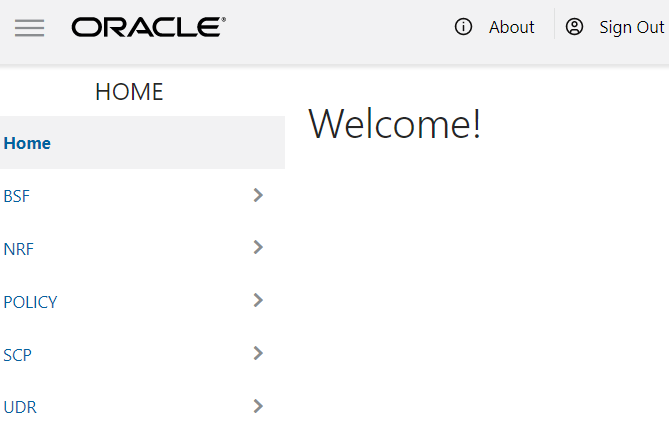
Top Ribbon
- About
- Sign Out
- Help
Note:
The Collapse button at the left side allows the user to collapse the left pane. Help navigates to the swagger.Left Pane - NFs and APIs
The left pane displays the list of Network Functions and respective APIs.
Right Pane - Details View
The right pane displays details of the parameters that can be updated in the selected API.
OCNRF Configuration
This section provides configuration steps for OCNRF parameters using CNC Console.
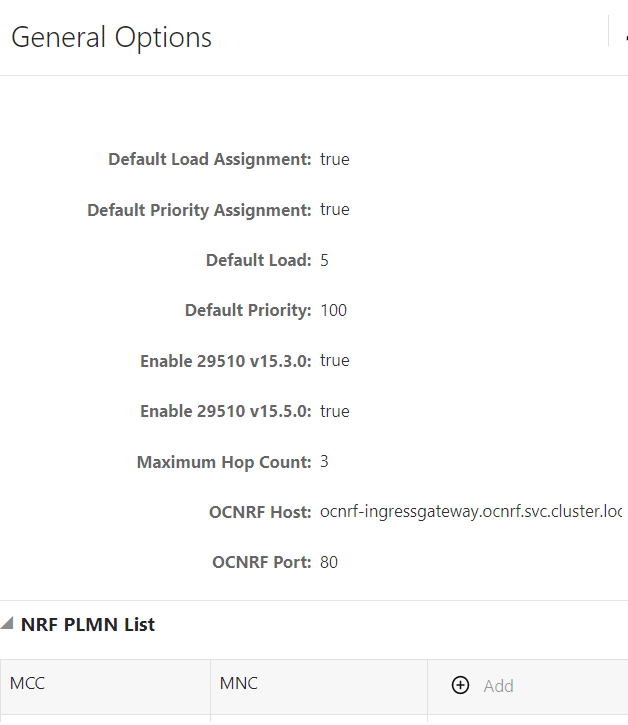
General Options
- From the left navigation menu, navigate to NRF and then General
Options. The General Options screen is displayed.
Figure 9-2 General Options
- Click Edit from the top right side to edit or update General Options parameter. The screen is enabled for modification.
- Provide the values for the attributes as described in General Options.
- Click Add provided under NRF PLMN List section to add MCC and MNC.
- Add MCC and MNC values in the field.
- Click Save on Add NRF PLMN List window.
- Click Save to save the general options.
Editing NRF PLMN List
To edit an existing NRF PLMN List:
- Click Edit from the top right side to edit or update General Options parameter. The screen is enabled for modification.
- Click Edit provided under NRF PLMN List section to edit the PLMN list.
- Modify the attribute values as per the requirement.
- Click Save on Edit NRF PLMN List window.
- Click Save to save the updated general options.
Deleting NRF PLMN List
To delete a NRF PLMN List Parameter:
- Click Edit from the top right side to edit or update General Options parameter. The screen is enabled for modification.
- Click Delete from the
action items of NRF PLMN List section under each Rules Data.
The " Do you want to delete the record?" message appears.
- Click OK to delete the parameter.
- Click Save to save the updated general options.
NF Management Options
- From the left navigation menu, navigate to NRF and then NF
Management Options. The NF Management Options screen is
displayed.
Figure 9-3 NF Management Options

- Click Edit from the top right side to edit or update NF Management Options parameter. The screen is enabled for modification.
- Provide the values for the attributes as described in NF Management Options.
- Click Add provided under NF Heartbeat Timers section to add the Heartbeat Timers parameters.
- Enter the values for heartbeat timers as described in NF Management Options.
- Click Save on Add NF Heartbeat Timers window.
- Click Save to save the NF Management Options.
Editing NF Heartbeat Timers
To edit an existing NF Heartbeat Timers:
- Click Edit from the top right side to edit or update NF Management Options parameter. The screen is enabled for modification.
- Click Edit provided under NF Heartbeat Timers section to edit the host information.
- Modify the attribute values as per the requirement.
- Click Save on Edit NF Heartbeat Timers window.
- Click Save to save the updated NF Management Options.
Deleting NF Heartbeat Timers
To delete a NF Heartbeat Timers Parameter:
- Click Edit from the top right side to edit or update NF Management Options parameter. The screen is enabled for modification.
- Click Delete from the
action items of Edit NF Heartbeat Timers section under each NF
Heartbeat Timers.
The " Do you want to delete the record?" message appears.
- Click OK to delete the parameter.
- Click Save to save the updated NF Management Options.
NF Discovery Options
To configure the NF Discovery Options follow the procedure:
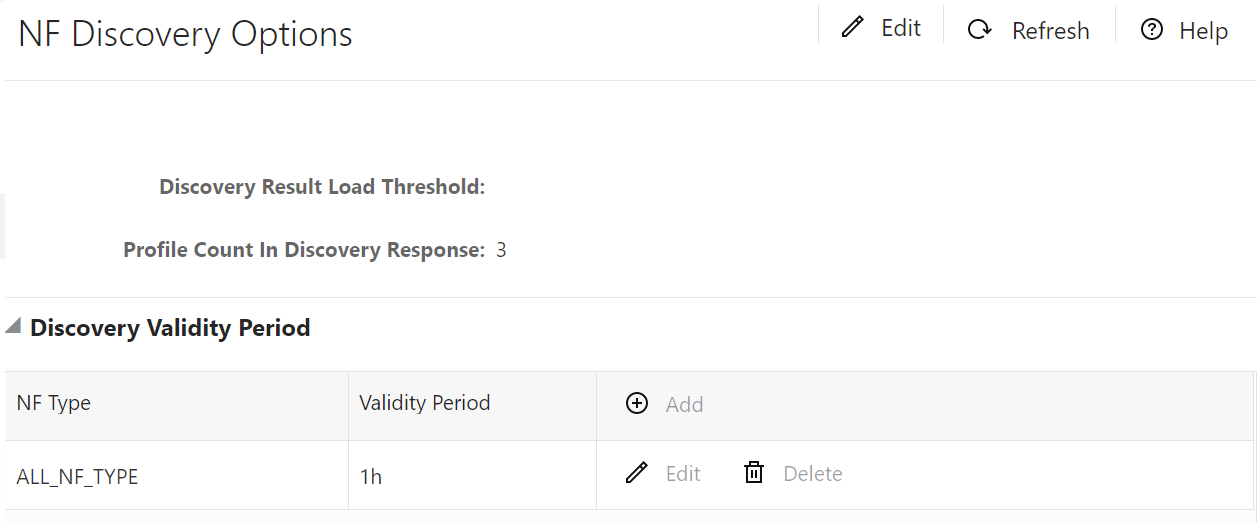
- From the left navigation menu, navigate to NRF and then NF Discovery
Options. The NF Discovery Options screen is displayed.
Figure 9-4 NF Discovery Options
- Click Edit from the top right side to edit or update NF Discovery Options parameter. The screen is enabled for modification.
- Provide the values for the attributes as described in NF Discovery Options:
- Increment or decrement the Discovery Result Load Threshold parameter using the arrow keys.
- Increment or decrement the Profiles Count In Discovery Response parameter using the arrow keys.
- Click Add provided under Discovery Validity Period section to add the validity information.
- Enter the values for rules configuration as described in NF Discovery Options.
- Click Save on Add Discovery Validity Period window.
- Click Save to save the NF Discovery Options.
Editing Discovery Validity Period
To edit an existing Discovery Validity Period:
- Click Edit from the top right side to edit or update NF Discovery Options parameter. The screen is enabled for modification.
- Click Edit provided under Discovery Validity Period section to edit the host information.
- Modify the attribute values as per the requirement.
- Click Save on Edit Discovery Validity Period window.
- Click Save to save the updated NF Discovery Options.
Deleting NF Type
To delete a NF type:
- Click Edit from the top right side to edit or update NF Discovery Options parameter. The screen is enabled for modification.
- Click Delete from the
action items of Discovery Validity Period section.
The " Do you want to delete the record?" message appears.
- Click OK to delete the NF type details.
- Click Save to save the updated NF Discovery Options.
NF Access Token Options
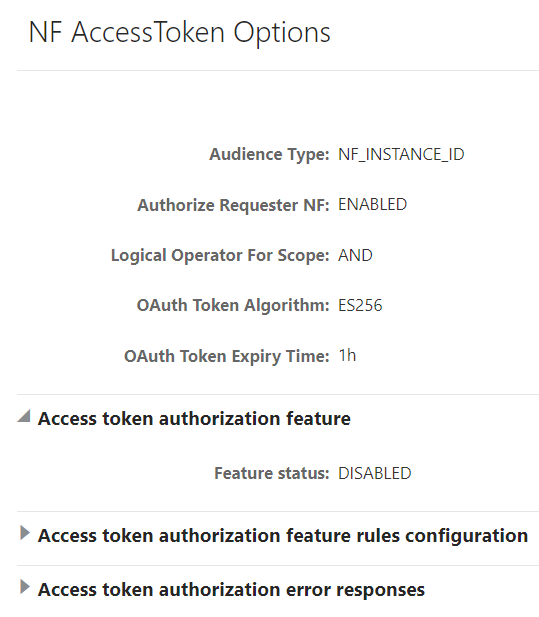
- From the left navigation menu, navigate to NRF and then NF Access
Token Options. The NF Access Token Options screen is
displayed.
Figure 9-5 NF Access Token Options
- Click Edit from the top right side to edit or update NF Access Token Options parameter. The screen is enabled for modification.
- Provide the values for the attributes as described in NF Access Token Options.
- Click Add provided under Access token authorization feature rules configuration section to add the rules.
- Enter the values for rules configuration as described in NF Access Token Options.
- Click Save on Add Access token authorization error responses window.
- Click Add provided under Access token authorization error responses section to add the error response details.
- Enter the values for rules configuration as described in NF Access Token Options.
- Click Save on Add Access token authorization error responses window.
- Click Save to save the NF Access Token Options.
Editing NF Access Token Options
To edit an existing NF Access Token Options:
- Click Edit from the top right side to edit or update NF Access Token Options parameter. The screen is enabled for modification.
- Modify the attribute values as per the requirement.
- Click Save on Edit NF Access Token Options window.
- Click Save to save the updated NF Access Token Options.
Deleting NF Access Token Options
To delete a NF Access Token Options:
- Click Edit from the top right side to edit or update NF Access Token Options parameter. The screen is enabled for modification.
- Click Delete from the
action items of Edit NF Access Token Options section under each
Access token authorization feature rules configuration.
The " Do you want to delete the record?" message appears.
- Click OK to delete the parameter.
- Click Save to save the updated NF Access Token Options.
Note:
Follow above procedures for editing or deleting Access token authorization error responses.Forwarding Options
- From the left navigation menu, navigate to NRF and then
Forwarding Options. The Forwarding Options screen is
displayed.
Figure 9-6 Forwarding Options

- Click Edit from the top right side to edit or update Forwarding Options parameter. The screen is enabled for modification.
- Provide the values for the attributes as described in NRF-NRF Forwarding Options.
- Click Add provided under NRF Host Config section to add the host information.
- Enter the values for rules configuration as described in NRF-NRF Forwarding Options.
- Click Save on Add NRF Host Config window.
- Click Add provided under Error Responses section to add the error response details.
- Enter the values for rules configuration as described in NRF-NRF Forwarding Options.
- Click Save on Add Error Responses window.
- Click Save to save the Forwarding Options.
Editing NRF Host Config
To edit an existing NRF Host Config:
- Click Edit from the top right side to edit or update Forwarding Options parameter. The screen is enabled for modification.
- Click Edit provided under NRF Host Config section to edit the host information.
- Modify the attribute values as per the requirement.
- Click Save on Edit NRF Host Config window.
- Click Save to save the updated Forwarding Options.
Deleting NRF Host Config
To delete a NRF Host Config:
- Click Edit from the top right side to edit or update Forwarding Options parameter. The screen is enabled for modification.
- Click Delete from the
action items of NRF Host Config section.
The " Do you want to delete the record?" message appears.
- Click OK to delete the host config details.
- Click Save to save the updated Forwarding Options.
Note:
Follow above procedures for editing or deleting the Error Responses.SLF Options
- From the left navigation menu, navigate to NRF and then
SLF Options. The SLF Options screen is displayed.
Figure 9-7 SLF Options

- Click Edit from the top right side to edit or update SLF Options parameter. The screen is enabled for modification.
- Provide the values for the attributes as described in SLF Options.
- In Edit mode, Add HTTP status code information under Reroute On Response HTTP Status Codes section.
- Enter the values for HTTP status codes as described in SLF Options.
- Click Add provided under SLF Host Config section to add the host information.
- Enter the values for rules configuration as described in SLF Options.
- Click Save on Add SLF Host Config window.
- Click Add provided under Error Responses section to add the error response details.
- Enter the values for rules configuration as described in SLF Options.
- Click Save on Add Error Responses window.
- Click Save to save the SLF Options.
Editing SLF Host Config
To edit an existing SLF Host Config:
- Click Edit from the top right side to edit or update SLF Options parameter. The screen is enabled for modification.
- Click Edit provided under SLF Host Config section to edit the host information.
- Modify the attribute values as per the requirement.
- Click Save on Edit SLF Host Config window.
- Click Save to save the updated SLF Options.
Deleting SLF Host Config
To delete a SLF Host Config:
- Click Edit from the top right side to edit or update SLF Options parameter. The screen is enabled for modification.
- Click Delete from the action items of SLF Host Config
section.
The " Do you want to delete the record?" message appears.
- Click OK to delete the host config details.
- Click Save to save the updated SLF Options.
Note:
Follow above procedures for editing or deleting the Error Responses.Geo Redundancy Options
To configure the Geo Redundancy Options follow the procedure:
- From the left navigation menu, navigate to NRF and then Geo
Redundancy Options. The Geo Redundancy Options screen is
displayed.
Figure 9-8 Geo Redundancy Options

- Click Edit from the top right side to edit or update Geo Redundancy Options parameter. The screen is enabled for modification.
- Provide the values for the attributes as described in Geo Redundancy Options:
- Select the Feature Status from the drop-down menu.
- Enter the values for Replication Latency, Monitor NRF Service Status Interval and Monitor DB Replication Status Interval.
- Click Save.
NF Authentication Options
- From the left navigation menu, navigate to NRF and then NF
Authentication Options. The NF Authentication Options screen is
displayed.
Figure 9-9 NF Authentication Options
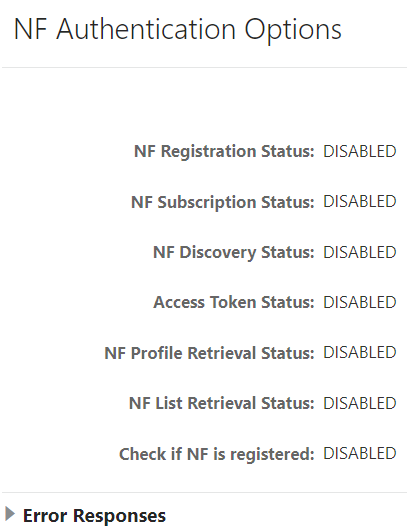
- Click Edit from the top right side to edit or update NF Authentication Options parameter. The screen is enabled for modification.
- Provide the values for the attributes as described in NF Authentication Options.
- Click Add provided under Error Responses section to add the error response details.
- Enter the values for rules configuration as described in NF Authentication Options.
- Click Save on Add Error Responses window.
- Click Save to save the NF Authentication Options.
Editing Error Responses
To edit an existing Error Responses:
- Click Edit from the top right side to edit or update NF Authentication Options parameter. The screen is enabled for modification.
- Click Edit provided under Error Responses section to edit the error response details.
- Modify the attribute values as per the requirement.
- Click Save on Edit Error Responses window.
- Click Save to save the updated NF Authentication Options.
Deleting Error Responses
To delete a Error Responses:
- Click Edit from the top right side to edit or update NF Authentication Options parameter. The screen is enabled for modification.
- Click Delete from the
action items of Error Responses section.
The " Do you want to delete the record?" message appears.
- Click OK to delete the error response details.
- Click Save to save the updated NF Authentication Options.
Log Level Options
To configure the Log Level Options follow the procedure:
- From the left navigation menu, navigate to NRF and then Log Level
Options. The Log Level Options screen is displayed.
Figure 9-10 Log Level Options

- Click Edit from the top right side to edit or update Log Level Options parameter. The screen is enabled for modification.
- Select the values for the following attributes from the drop-down
menu:
- NF Subscription Log Level
- NF Registration Log Level
- NF Discovery Log Level
- NF Access Token Log Level
- NRF Auditor Log Level
- NRF Configuration Log Level
- Click Save.
NF Screening Options
To configure the NF Screening Options follow the procedure:
- From the left navigation menu, navigate to NRF and then NF Screening
Options. The NF Screening Options screen is displayed.
Figure 9-11 NF Screening Options

- Click Edit from the top right side to edit or update NF Screening Options parameter. The screen is enabled for modification.
- Provide the values for the attributes as described in NF Screening Options:
- Enter the Response Code value in the field.
- Select the Feature Status from the drop-down menu.
- Click Save.
Screening Rules
NF Screening supports the functionality to screen the service requests received from 5G Network Functions (NFs) before allowing access to OCNRF services. In this feature, OCNRF screens the incoming service operations from NFs on the basis of some attributes against set of rules configured at OCNRF. OCNRF processes the required services only if screening is successful. This feature provides extra security by restricting the NF that can use the service of OCNRF.
Using the screening lists, operator can decide which NF can access the services provided by OCNRF by configuring attributes based on the requirement.
CALLBACK URI
Screening list type for callback URIs in NF Service and nfStatusNotificationUri in SubscriptionData.
NRF screens the callback URI present in the request before allowing access to management service. Host present in callback URI (FQDN+port or IP+port) must be used for screening. In CALLBACK URI, the attributes that can be modified are FQDN, Port and IP address.
Configuring Callback URI Parameters
To configure Callback URI parameters follow the procedure:
- From the left navigation menu, navigate to NRF and then
Screening Rules. Under Screening Rules select CALLBACK URI. The
CALLBACK URI screen is displayed.
Figure 9-12 Callback URI
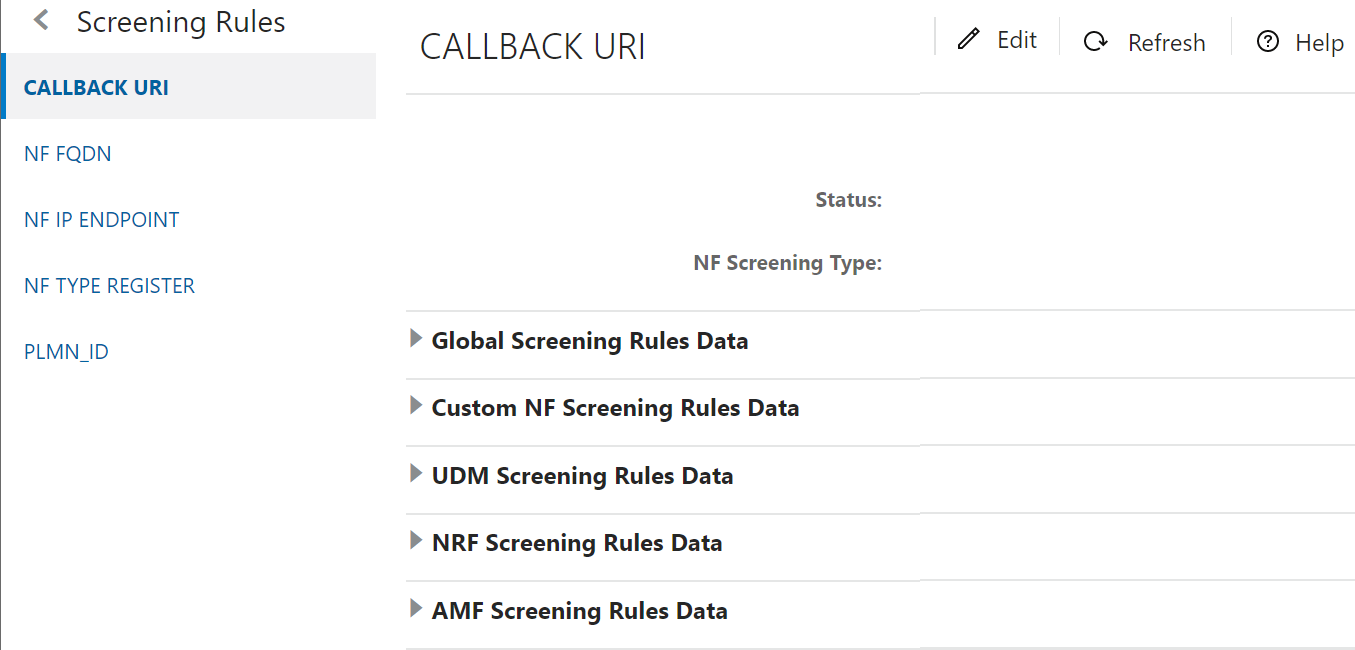
- Click Edit from the top right side to edit or update a CALLBACK URI parameter. The screen is enabled for modification.
- Provide the values for the attributes as follows:
- Select Status from drop-down menu.
- Select the required NF Screening Type from drop-down menu.
- Choose the Failure Action for specific Rules Data from drop-down menu.
- Click Add provided under NF Callback URIs section based on the requirement for each Rules Data to add NF Callback URIs. Refer to Callback URI parameters for more information in parameter values and description.
- Click Save.
Modifying NF Callback URIs
The user can edit and delete the NF Callback URIs.
Editing NF Callback URIs
To edit an existing NF Callback URIs:
- In the Edit Mode of Callback URI screen, click Edit from the NF Callback URIs section under each Rules Data. The Edit NF Callback URIs Screen appears.
- Modify the attribute values as per the requirement.
- Click Save.
Deleting NF Callback URIs
To delete a NF Callback URIs Parameter:
- Click Delete from the
action items of NF Callback URIs section under each Rules
Data.
The " Do you want to delete the record" message appears.
- Click OK to delete the parameter.
NF FQDN
NRF screens the Fully Qualified Domain Name (FQDN) present in the request before allowing access to management service.
In NF FQDN, the attributes that can be modified are pattern, fqdn in NFProfile and fqdn in NFService.
Configuring NF FQDN Parameters
Follow the procedure to configure NF FQDN parameters:
- From the left navigation menu,
navigate to NRF and then select Screening Rules. Under
Screening Rules, select NF FQDN. The NF FQDN screen
is displayed.
Figure 9-13 NF FQDN
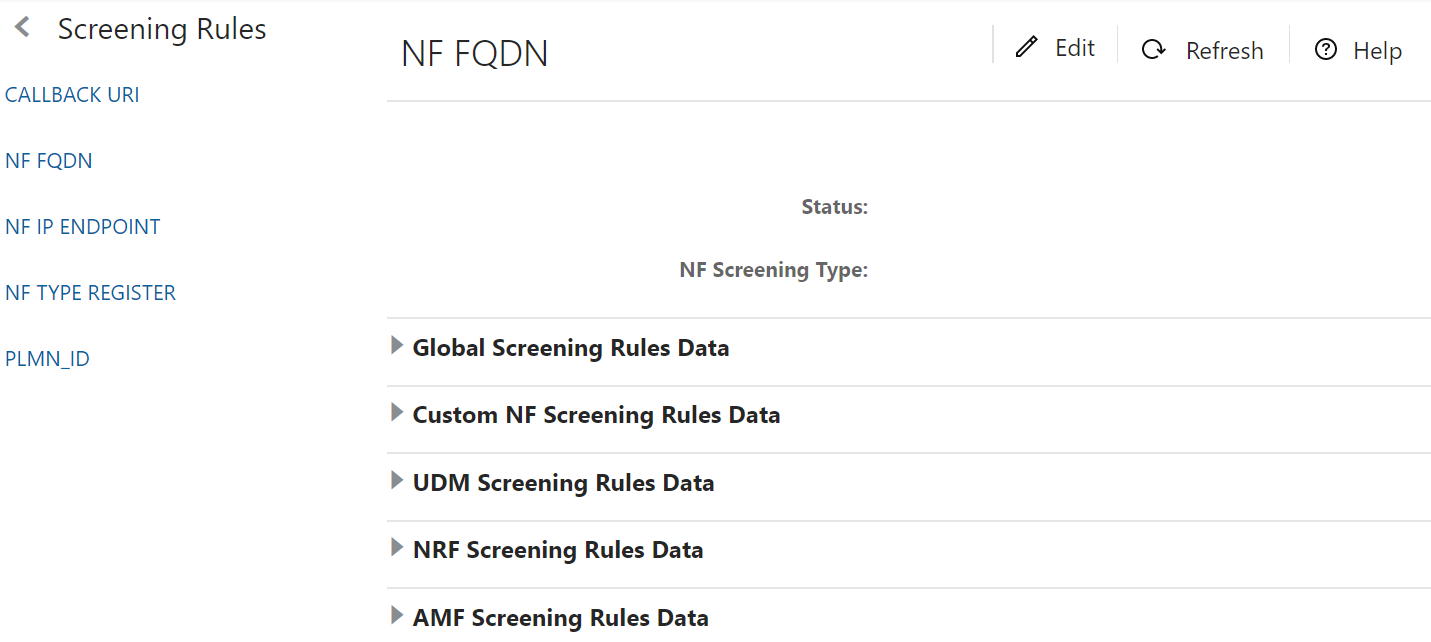
- Click Edit from the top right side to edit or update the NF FQDN parameter. The Edit NF FQDN screen is displayed.
- Provide the values for the
attributes as follows:
- Select Status from drop-down menu.
- Select the required NF Screening Type from drop-down menu.
- Choose the Failure Action for specific Rules Data from drop-down menu.
- Enter the Pattern and FQDN values under NF FQDN section based on the requirement for each Rules Data.
- Click Save.
Note:
Repeat the above steps for all the Rules Data.NF IP Endpoint
Configuring NF IP Endpoint parameters
To configure NF IP Endpoint parameters follow the procedure:
- From the left navigation menu, navigate to NRF and then
Screening Rules. Under Screening Rules select NF IP Endpoint. The
NF IP Endpoint screen is displayed.
Figure 9-14 NF IP Endpoints
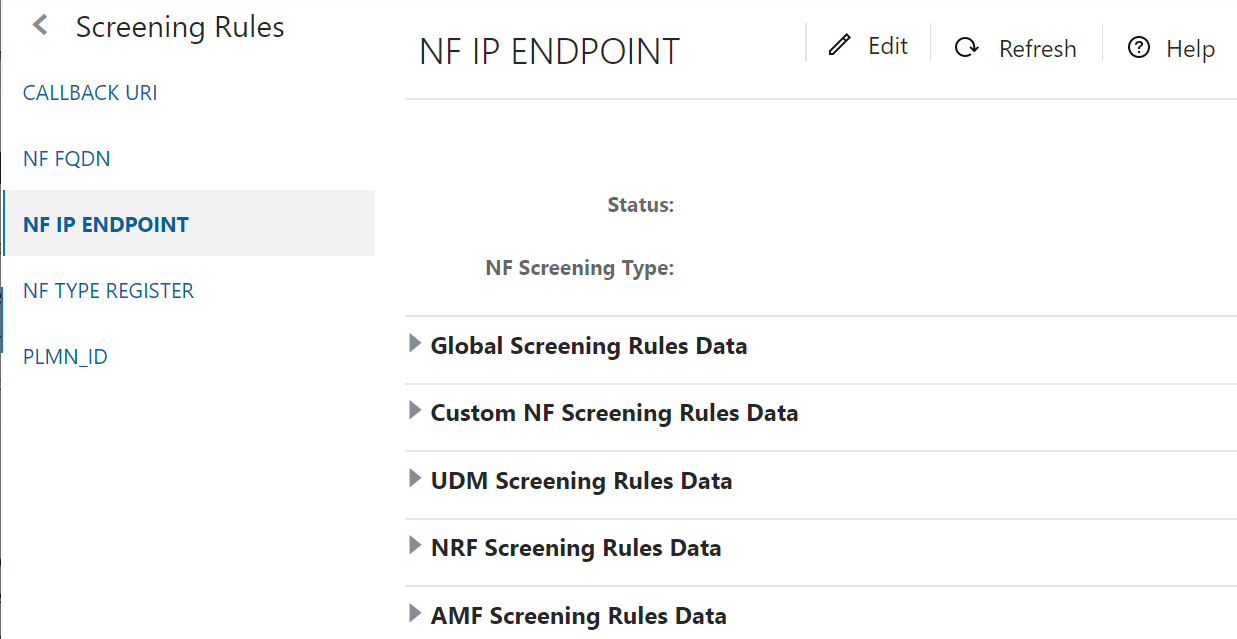
- Click Edit from the top right side to edit or update NF IP Endpoint parameters. The screen is enabled for modification.
- Provide the values for the
attributes as follows:
- Select Status from drop-down menu.
- Select the required NF Screening Type from drop-down menu.
- Choose the Failure Action for specific Rules Data from drop-down menu.
- Click Add provided under NF IP Endpoint section based on the requirement for each Rules Data to add NF IP Endpoint. Refer to NF IP Endpoint for more information in parameter values and description.
- Click Save.
Modifying NF IP Endpoint
The user can edit or delete the NF IP Endpoint.
Editing NF IP Endpoint
To edit an existing NF IP Endpoint:
- In the Edit Mode of NF IP Endpoint screen, click Edit from the NF IP Endpoint section under each Rules Data. The Edit NF IP Endpoint Screen appears.
- Modify the attribute values as per the requirement.
- Click Save.
Deleting NF IP Endpoint
To delete a NF IP Endpoint Parameters:
- Click Delete from the
action items of the NF IP Endpoint section under each Rules
Data.
The " Do you want to delete the record" message appears.
- Click OK to delete the parameter.
NF Type Register
Configuring NF IP Type Register parameters
Following is the procedure to configure NF IP Type Register parameters:
- From the left navigation menu, navigate to NRF and then
Screening Rules. Under Screening Rules select NF IP
Type Register. The NF IP Type Register screen is displayed.
Figure 9-15 NF IP Type Register

- Click Edit from the top right side to edit or update a NF IP Type Register parameters. The screen is enabled for modification.
- Provide the values for the
attributes as follows:
- Select Status from drop-down menu.
- Select the required NF Screening Type from drop-down menu.
- Choose the Failure Action and NF Type List for Global Screening Rules Data.
- Click Save.
PLMN ID Parameters
Configuring PLMN ID Parameters
To configure PLMN ID parameters follow the procedure:
- From the left navigation menu, navigate to NRF and then
Screening Rules. Under Screening Rules select PLMN
ID. The PLMN ID screen is displayed.
Figure 9-16 PLMN ID
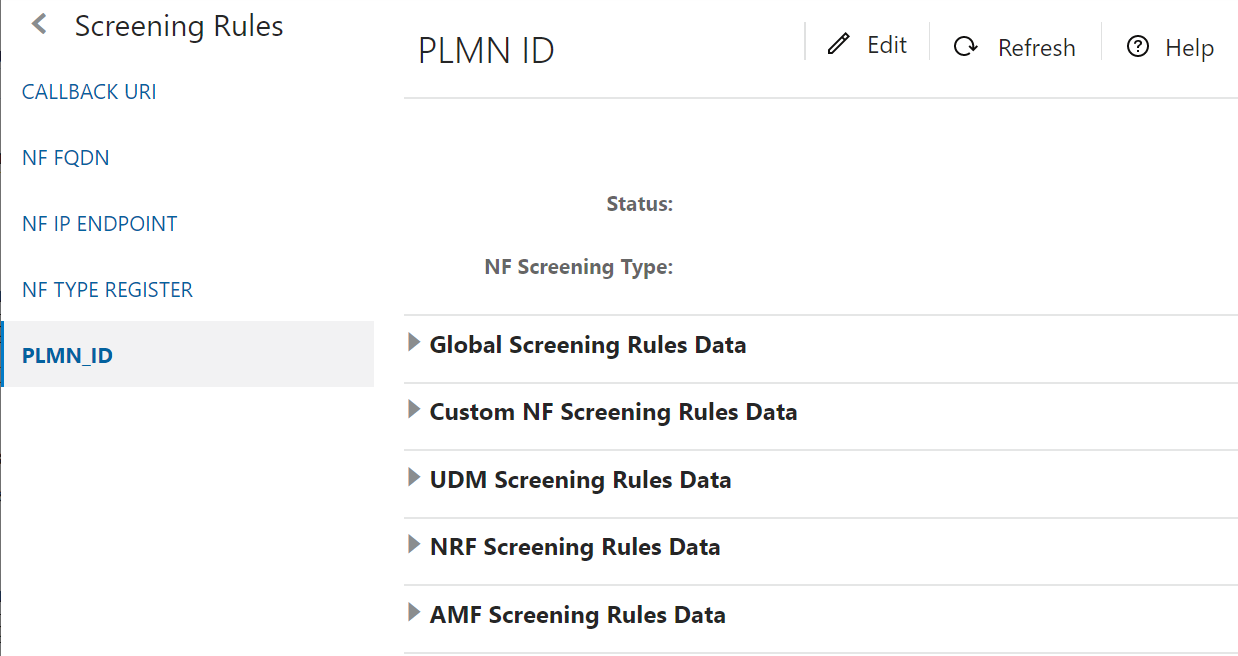
- Click Edit from the top right side to edit or update a PLMN ID parameters. The screen is enabled for modification.
- Provide the values for the
attributes as follows:
- Select Status from drop-down menu.
- Select the required NF Screening Type from drop-down menu.
- Choose the Failure Action for specific Rules Data from drop-down menu.
- Click Add provided under PLMN List section based on the requirement for each Rules Data to add PLMN List. Refer to Configuring NF Screening for more information in parameter values and description.
- Click Save.
Modifying PLMN ID
The user can edit or delete the PLMN ID.
Editing PLMN ID
To edit an existing PLMN ID:
- In the Edit Mode of PLMN ID screen, click Edit from the PLMN List section under each Rules Data. The Edit PLMN List Screen appears.
- Modify the attribute values as per the requirement.
- Click Save.
Deleting PLMN ID
To delete a PLMN ID Parameters:
- Click Delete from the
action items of the PLMN List section under each Rules Data.
The " Do you want to delete the record" message appears.
- Click OK to delete the parameter.