A.1 Creating NF Certificate Using OCCM - Sample Configuration
This section describes the sequence of steps to be performed to generate a signed certificate (NF certificate) using OCCM
- Create the Issuer:
The following screenshots provide a sample configuration for creating the issuer using CNC Console GUI
-
Figure -3 Create Issuer

-
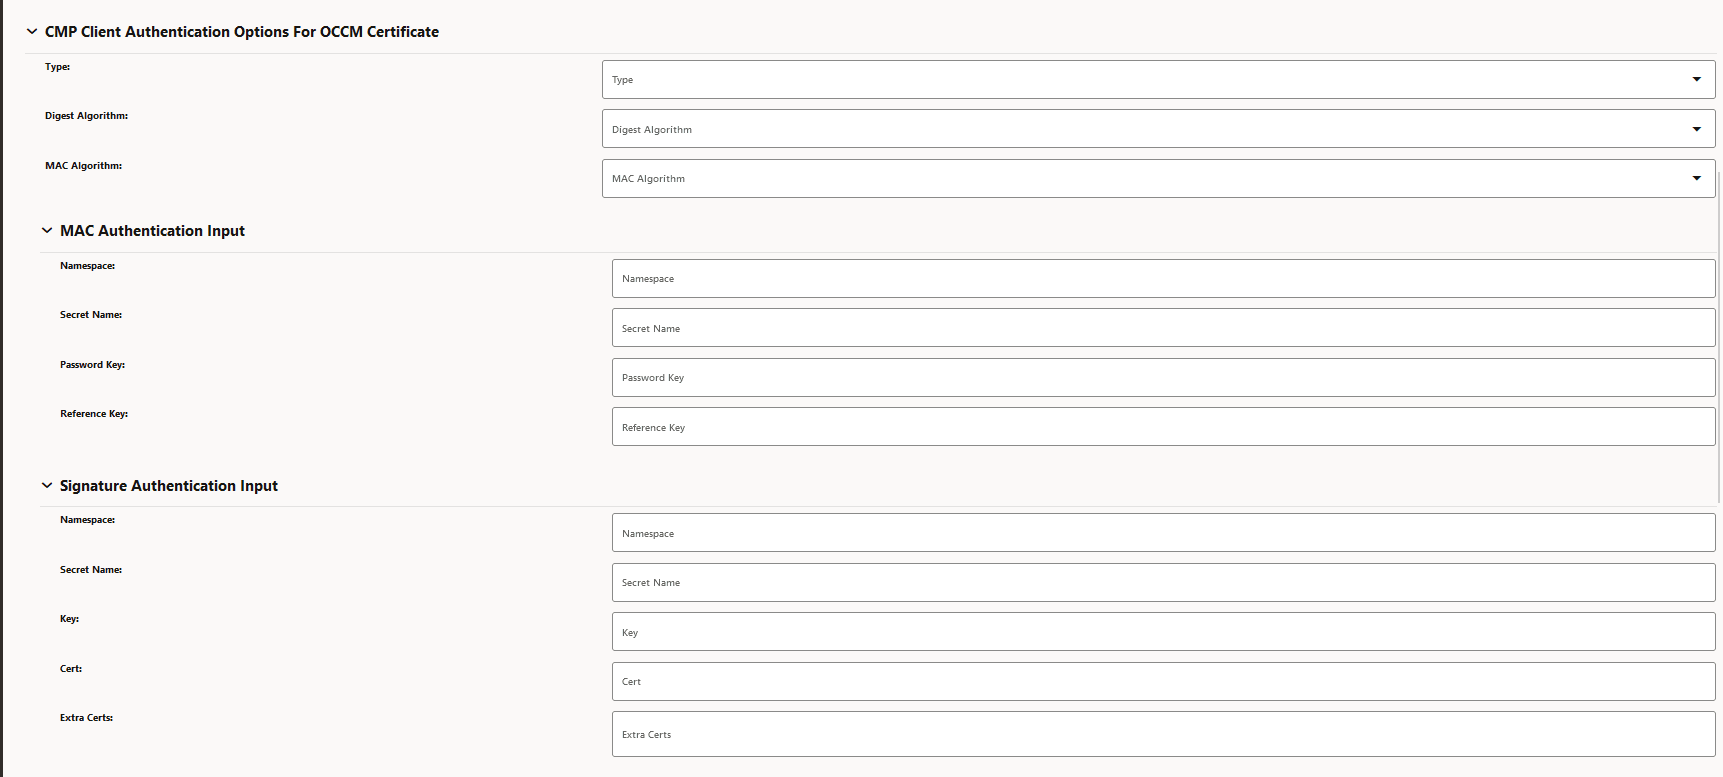
Figure -4 CMP Client Authentication Options for OCCM Certificate
-
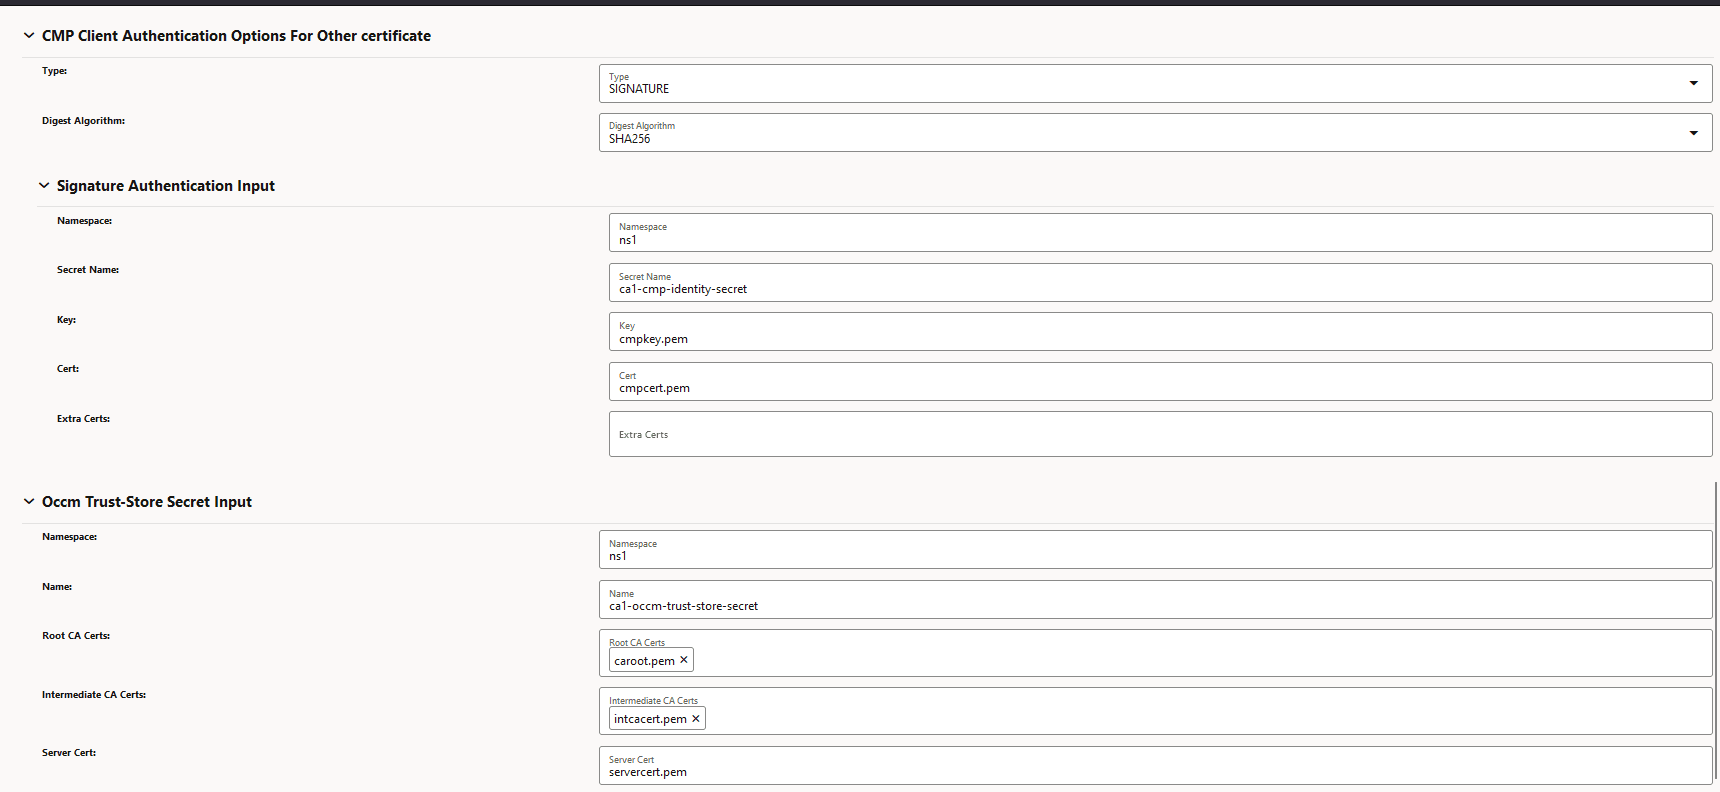
Figure -5 CMP Client Authentication Options for Other Certificate
-
- Create OCCM Certificate:
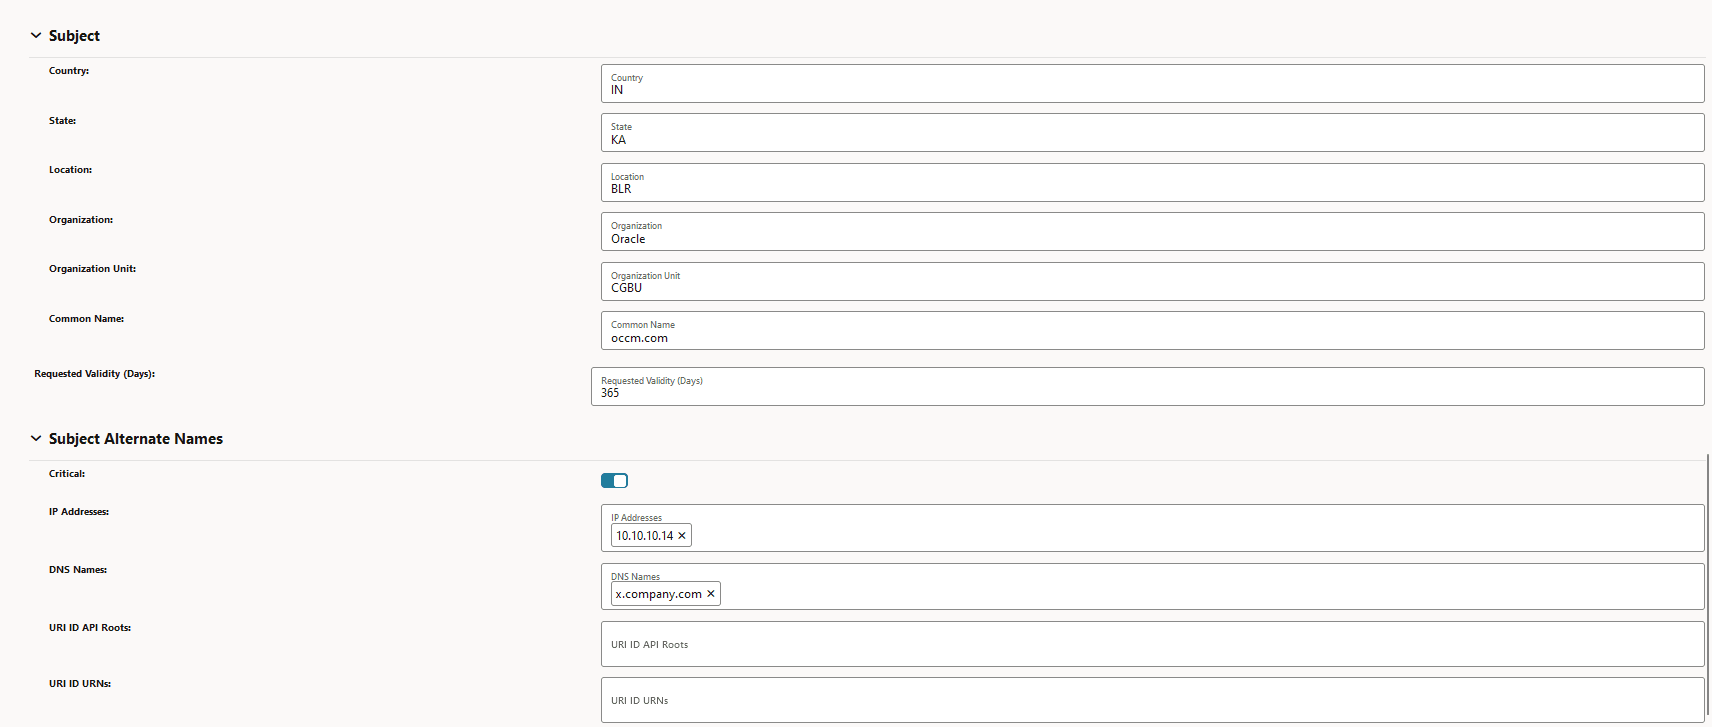
The following screenshots provide a sample configuration for creating OCCM Certificate using CNC Console GUI. Here, OCCM certificate is configured manually.
-
Figure -6 Create OCCM Certificate

-
Figure -7 Private Key Options

-
Figure -8 Public Key Certificate Options

-
Figure -9 Subject and Subject Alternate Name
-
Figure -10 Certificate Output

-
- Create NF Certificate:
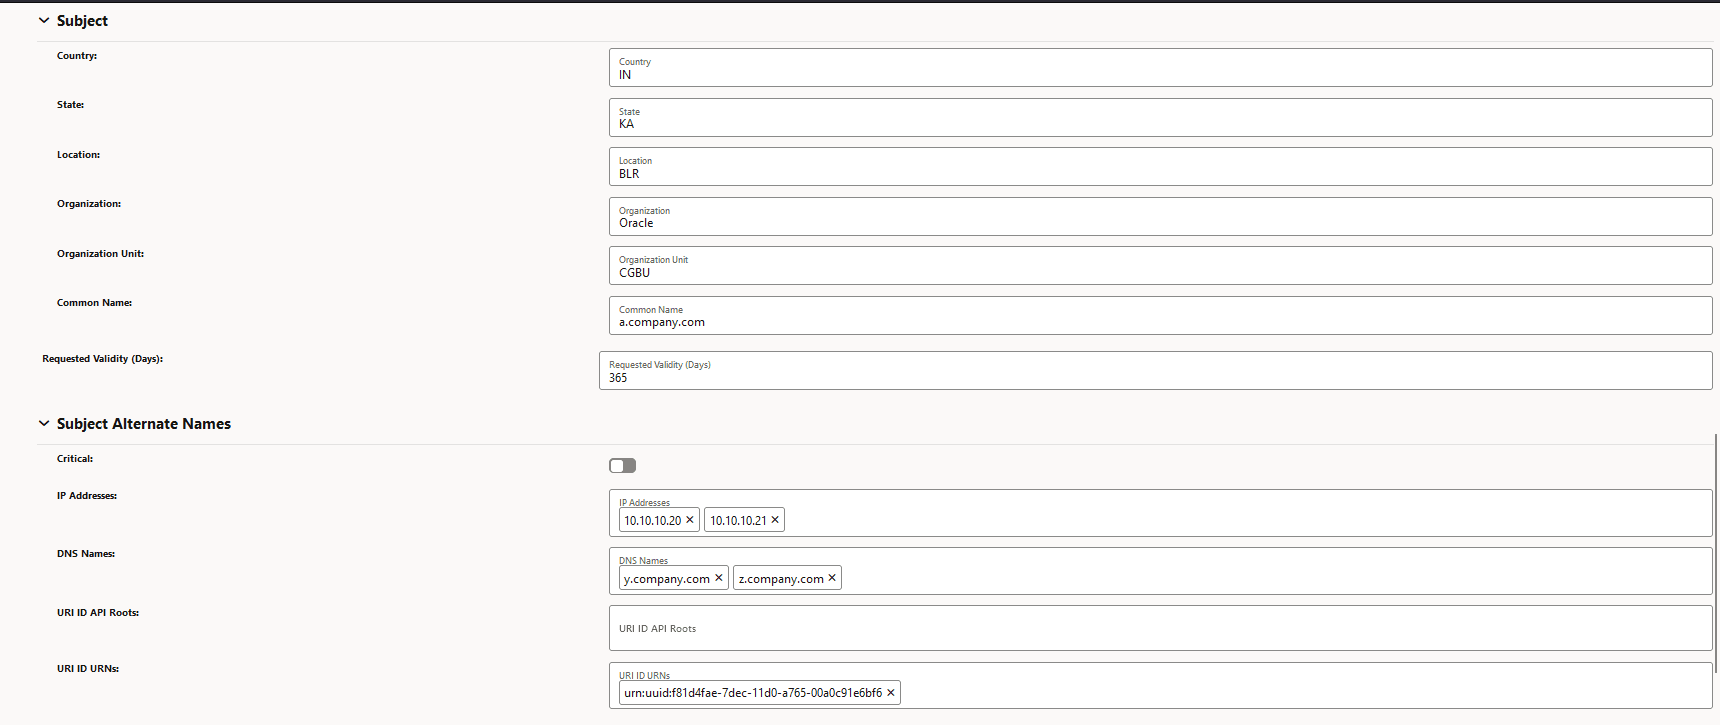
The following screenshots provide a sample configuration for creating NF Certificate using CNC Console GUI.
-
Figure -11 Create NF Certificate

-
Figure -12 Private Key Options

-
Figure -13 Public Key Options

-
Figure -14 Subject and Subject Alternate Names
-
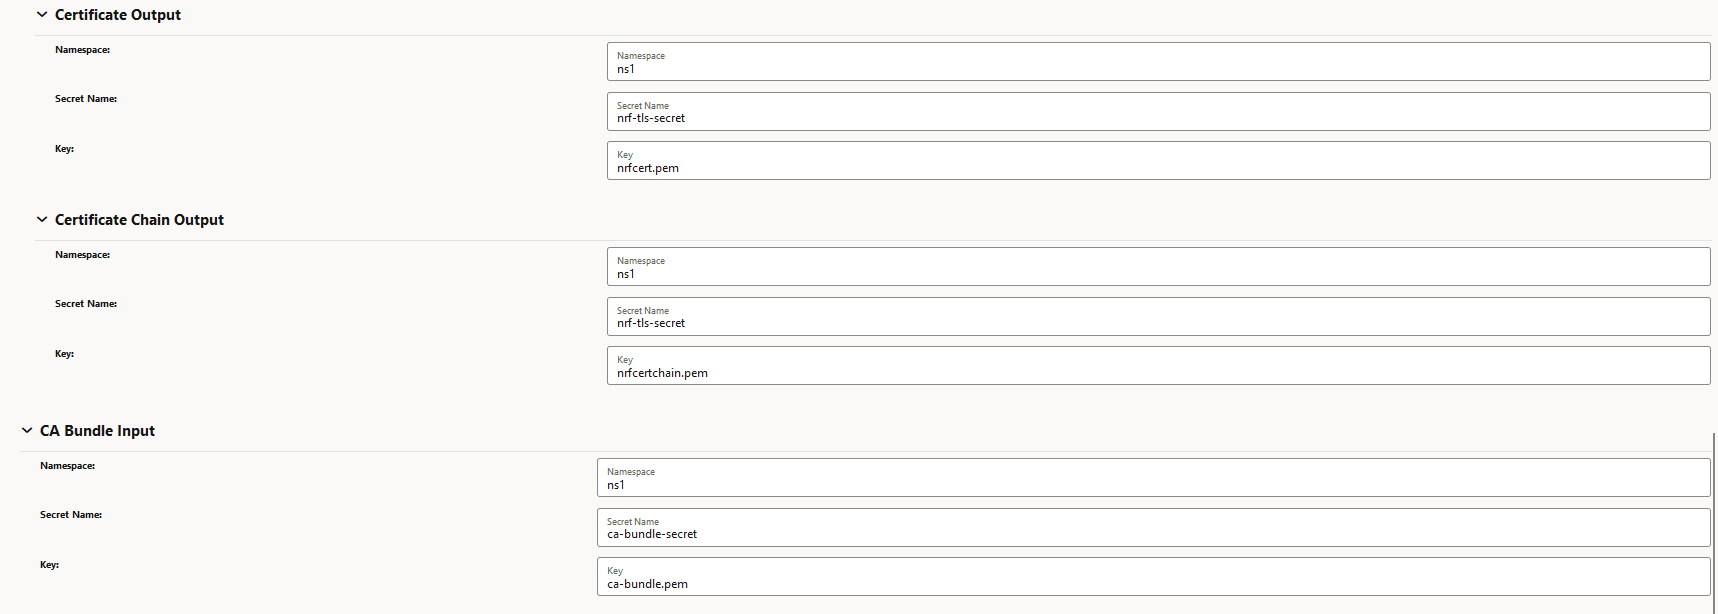
Figure -15 Certificate Output
-
- Check Grafana Dashboard
Check the grafana dashboard to view the certificates created.
Figure -16 Sample Grafana Dasboard

The screenshot shows that NRF TLS Cert and CA1 certificates are created successfully. The left panel indicates their expiry time and the right panel shows that both are ready to be consumed.
- Verify Kubernetes secret
After the certificate request is submitted, verify whether the k8s secret specified under private key output and certificate output location is created or not.
Run the following command to get the content of the Kubernetes secret:kubectl get secret <k8s-secret-name> -n <namespace> -o yamlFor example:[scp-user@thrust5-bastion-1 ~]$ kubectl get secret nrf-tls-secret -n ns1 -o yaml apiVersion: v1 data: nrfcert.pem: LS0tLS1CRUdJTiBDRVJUSUZJQ0FURS0tLS0tCkXXXXXXXXXX nrfcertchain.pem: LS0tLS1CRUdJTiBDRVJUSUZJQ0FURS0tXXXXXXXXXXX nrfkey.pem: LS0tLS1CRUdJTiBQUklWQVRFIEtFWS0tLS0tCk1XXXXXXXXXXX kind: Secret metadata: creationTimestamp: ""2023-12-08T06:29:46Z" name: nrf-tls-secret namespace: ns1 resourceVersion: "563348905" uid: f0eb452d-e977-4809-99b0-c541b154dabe type: OpaqueOutput of openssl x509 command for the certificate:kubectl get secret <k8s-secret-name> -n <namespace> -o=go-template='{{index .data "<certificate-output-K8s-secret-key>"}}' | base64 -d | openssl x509 -text -nooutFor example:[scp-user@thrust5-bastion-1 ~]$ kubectl get secret nrf-tls-secret -n ns1 -o=go-template='{{index .data "nrfcert.pem"}}' | base64 -d | openssl x509 -text -noout Certificate: Data: Version: 3 (0x2) Serial Number: XXXXXXXXX Signature Algorithm: sha256WithRSAEncryption Issuer: CN = x.company.com Validity Not Before: Sep 25 05:46:31 2023 GMT Not After : Sep 24 05:46:31 2024 GMT Subject: C = IN, ST = KA, L = BLR, O = Oracle, OU = CGBU, CN = a.company.com Subject Public Key Info: Public Key Algorithm: rsaEncryption Public-Key: (2048 bit) Modulus: 00:c9:1b:35:bf:21:e6:1f:69:9e:78:25:07:4b:6e: XXXXXXXXX Exponent: 65537 (0x10001) X509v3 extensions: X509v3 Key Usage: Digital Signature X509v3 Extended Key Usage: TLS Web Client Authentication, TLS Web Server Authentication X509v3 Basic Constraints: CA:FALSE X509v3 Subject Alternative Name: IP Address:10.10.10.20, IP Address:10.10.10.21, DNS:y.commpany.com, DNS:z.commpany.com, URI:urn:uuid:f81d4fae-7dec-11d0-a765-00a0c91e6bf6 X509v3 Subject Key Identifier: 2B:0D:XXXXXXXXXXXX X509v3 Authority Key Identifier: 20:03:XXXXXXXXXXX Signature Algorithm: sha256WithRSAEncryption Signature Value: XXXXXXXXXXXXXXXXXXXXXXX