3.6.4 Procedure 11 INSTALL THE LSMS APPLICATION
Table 3-16 Procedure 11 - Install the LSMS Application
| S T E P# | A | B | This procedure installs the application on the server. Estimated time: 25 minutesNote: Below procedure needs to be executed on both MPS A and MPS B servers. | |
|---|---|---|---|---|
|
1. |
☐ |
☐ |
MPS X: Log in to console the server as the user “root” |
|
|
2. |
☐ |
☐ |
MPS X: Perform Procedure in 3.7, A.1 or copy LSMS 14.1.X ISO to |
|
|
3. |
☐ |
☐ |
MPS X: Start platcfg utility by logging in as platcfg user. |
|
|
4. |
☐ |
☐ |
MPS X: Early upgrade checks |
The platcfg Main Menu appears. On the “Main Menu", select Maintenance and press [ENTER]. |
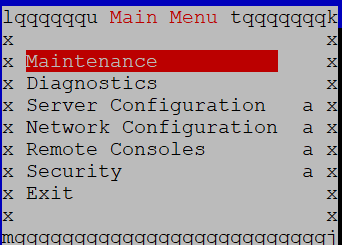 Select the “Upgrade” menu and press [ENTER]. 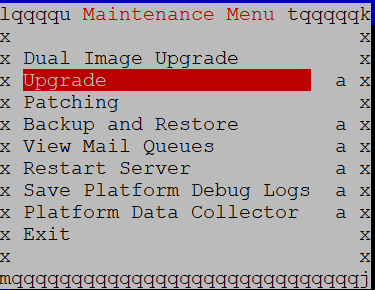 Select the “Early Upgrade Checks” menu to verify that the system is ready for upgrade. 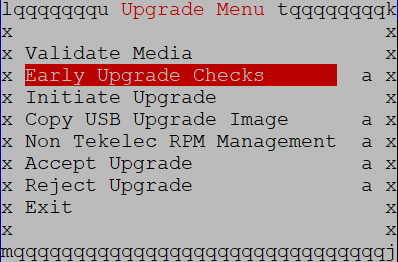 Select the desired upgrade media and press [ENTER].  If the Early Upgrade Checks fail due to the ongoing syncing of raid mirrors, then follow the steps 5 and 6 to ignore the disk mirroring before the LSMS installation. If the Early Upgrade Checks passed then jump to Step 7. |
||||
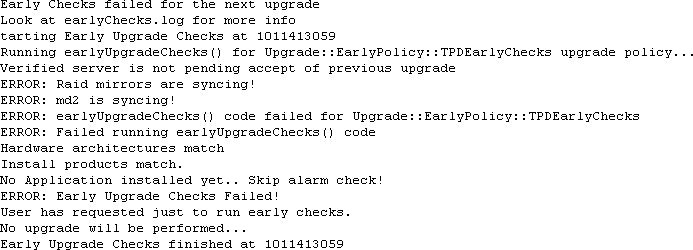 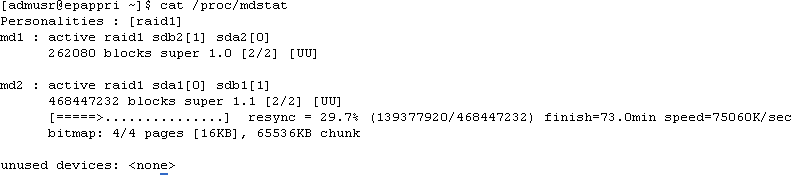 Contact My Oracle Support following the instructions on the Appendix E, if the early upgrade checks fail due to any other reason. |
||||
|
5. |
☐ |
☐ |
MPS X: Exit the platcfg menu |
Select Exit and press [ENTER] to return to the Maintenance Menu.  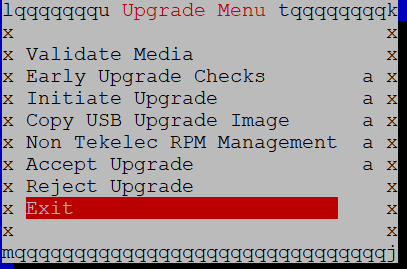 Select Exit and press [ENTER] to return to the Main Menu. |
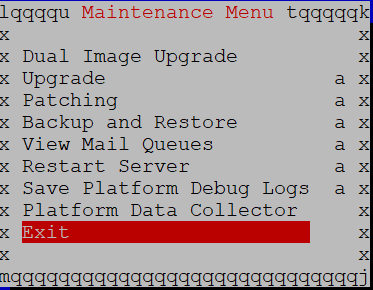 Select Exit and press [ENTER]. The “platcfg” utility terminates. 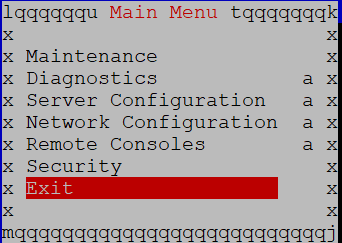 |
||||
|
6. |
☐ |
☐ |
MPS X: Ignore disk mirroring before LSMS installation |
Verify: |
|
7. |
☐ |
☐ |
MPS X: Validate the upgrade media Use the “Arrow” and the [ENTER] keys to navigate the Menu options as shown to choose the upgrade media. |
On the platcfg “Main Menu”, select Maintenance and press [ENTER]. |
|
Press any key to return to the menu and then press Exit all way back to the Maintenance Menu |
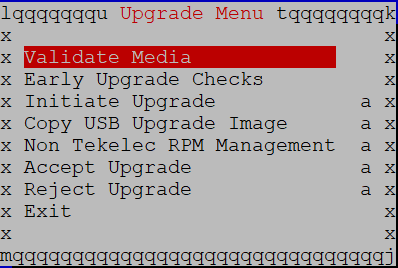  The results of the validation will be displayed, similar to the example below. Press the “Enter” key to continue. 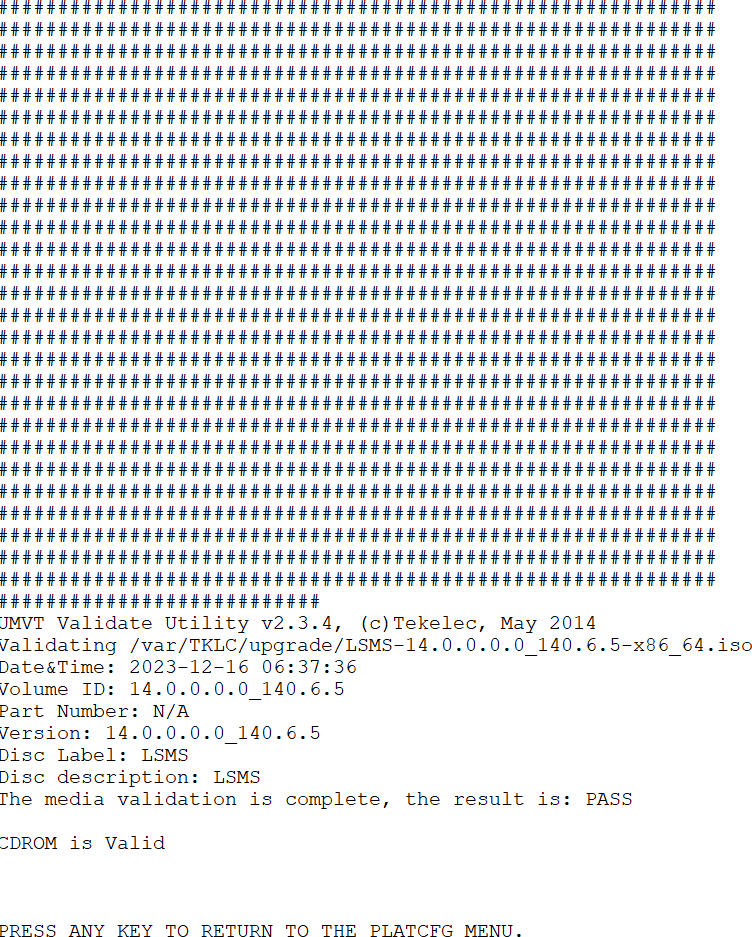 |
|||
|
8. |
☐ |
☐ |
MPS X: Navigate to the Initiate Upgrade menu. Use the “Arrow” and the [ENTER] keys to navigate the Menu options as shown to choose the upgrade media. |
Select the Initiate Upgrade menu and press [ENTER]. 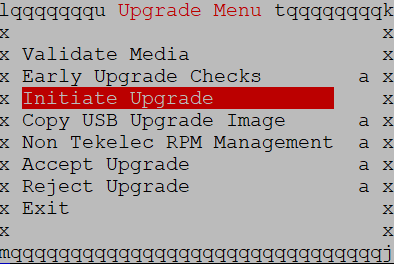 The screen displays a message that it is searching for upgrade media. When the upgrade media is found, an Upgrade Media selection menu appears similar to the example below. Select the desired upgrade media and press [ENTER]. |
|
9. |
☐ |
☐ |
MPS X: Upgrade proceeds |
The screen displays the output like following, indicating that the upgrade software is first running the upgrade checks, and then proceeding with the upgrade. 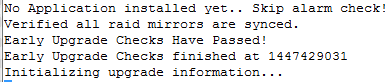 Many informational messages appear on the terminal screen as the upgrade proceeds. The messages are not shown here for clarity sake. When installation is complete, the server reboots. |
|
10. |
☐ |
☐ |
MPS X: Upgrade completed |
After the final reboot, the screen displays the login prompt as in the example below. 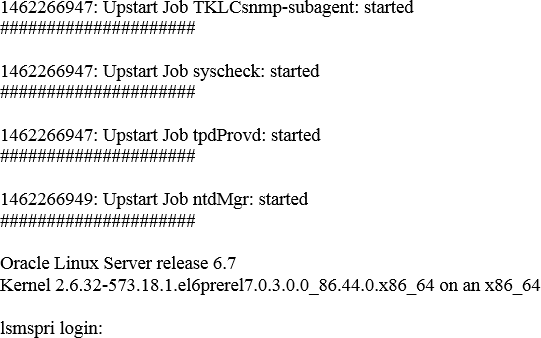 |
|
11. |
☐ |
☐ |
MPS X: Login as root user. |
|
|
12. |
☐ |
☐ |
MPS X : Check the upgrade and warnings |
|
|
13. |
☐ |
☐ |
MPS X: Verify LSMS release. |
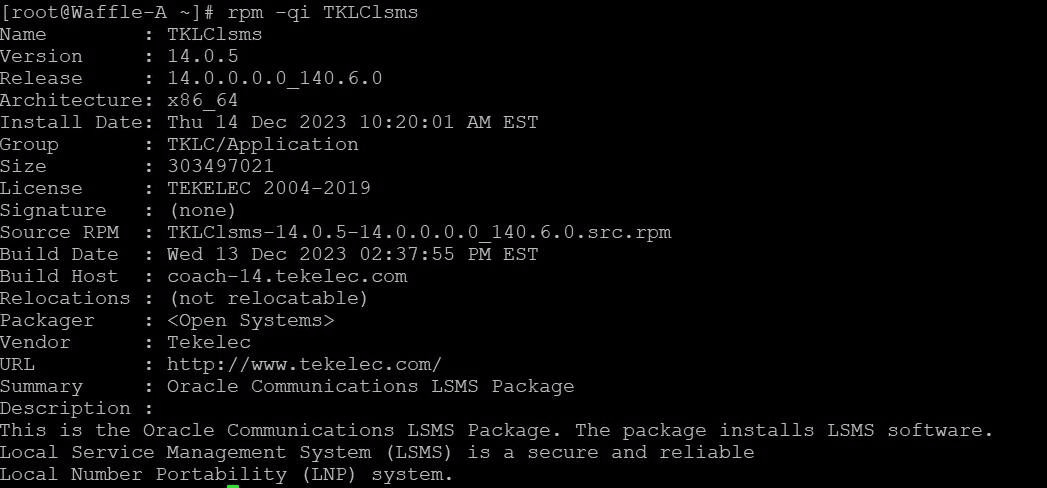 |
|
14 |
Create config file in ssh directory : Do not run this if ELAP is already upgraded to ELAP11 |
Run below steps on both servers after installation is complete:
|
||
|
This procedure is complete! |
||||