4.1 Procedure 25 DIU Upgrade Server B
Note:
Ensure that the Legacy Upgrade before DIU is accepted, otherwise it might cause an error while initiating background upgrade in DIU.Table 4-1 Procedure 25 DIU Upgrade Server B
| S.No | Steps | This procedure performs Dual Image Upgrade on the server.Check off (✔️) each step as it is completed. Boxes have been provided for this purpose beside each step number.If this procedure fails, contact My Oracle Support and ask for ASSISTANCE.Estimated time: 80 mins Note: Make sure to follow DIU Upgrade Steps before starting this procedure |
|---|---|---|
|
1 |
MPS B: Login prompt is displayed. |
Note: Press enter if no login prompt is displayed. |
|
2 |
MPS B: Log in as “root” user. |
|
|
3 |
MPS B: Copy DIU ISO |
Perform the procedure in Procedure A.1 or copy LSMS APPB DIU ISO to Make sure that only the DIU ISO and patch is present in the directory. |
|
4 |
Create a terminal window log in MPS B. |
If not already connected, connect to the E5-APP-B card via the serial port. For connecting the E5-APP-B B card, disconnect the console cable from the serial port on the E5-APP-B A card’s adapter. The cable should be disconnected at the point where it connects to the serial port labeled ‘S1’ on the E5-APP-B A card’s adapter and use it for serial access. Cable part numbers - 830-1220-xx |
|
5 |
MPS B: Stop Node and Move all custom files and run pre upgrade script |
Note: NTP must be configured before starting DIU. Note: All custom files, scripts, folders need to be migrated to remote server before the DIU process is started. These need to be restored back to their place after the DIU process is completed. 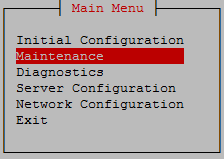 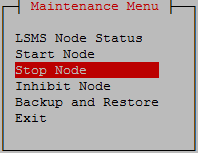 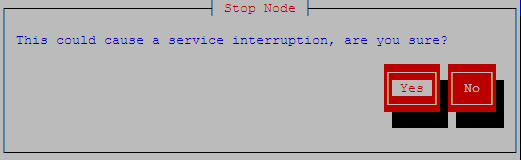 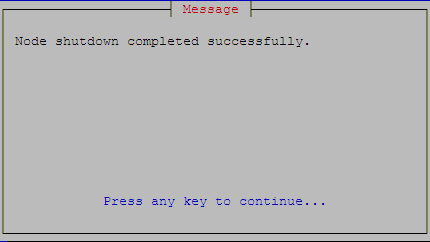 Exit the lsmsmgr menu. Run the following command and verify the HA state Verify that the hastatus of server is ‘UNINITIALIZED "INHIBITED"’ Before running below script, make sure to grep and kill ‘osisk6|opesk6|npacagent’ process if running Note: Bring DIU_script.sh from Oracle Software Delivery Cloud (OSDC) and place it in /usr/TKLC/lsms/tools/ directory. Use DIU_script.sh to cleanup the extra files and make extra space for DIU. Change permission and group of the script: Note: Before running the pre-upgrade script, ensure the mount point `/var/TKLC/lsms/free` is not in active use. Specifically, verify that no interactive shells (e.g., `bash`) or other processes have their current working directory set to `/var/TKLC/lsms/free` (or any subdirectory), as this will cause the unmount step to fail with “target is busy.” Run the pre-upgrade script. 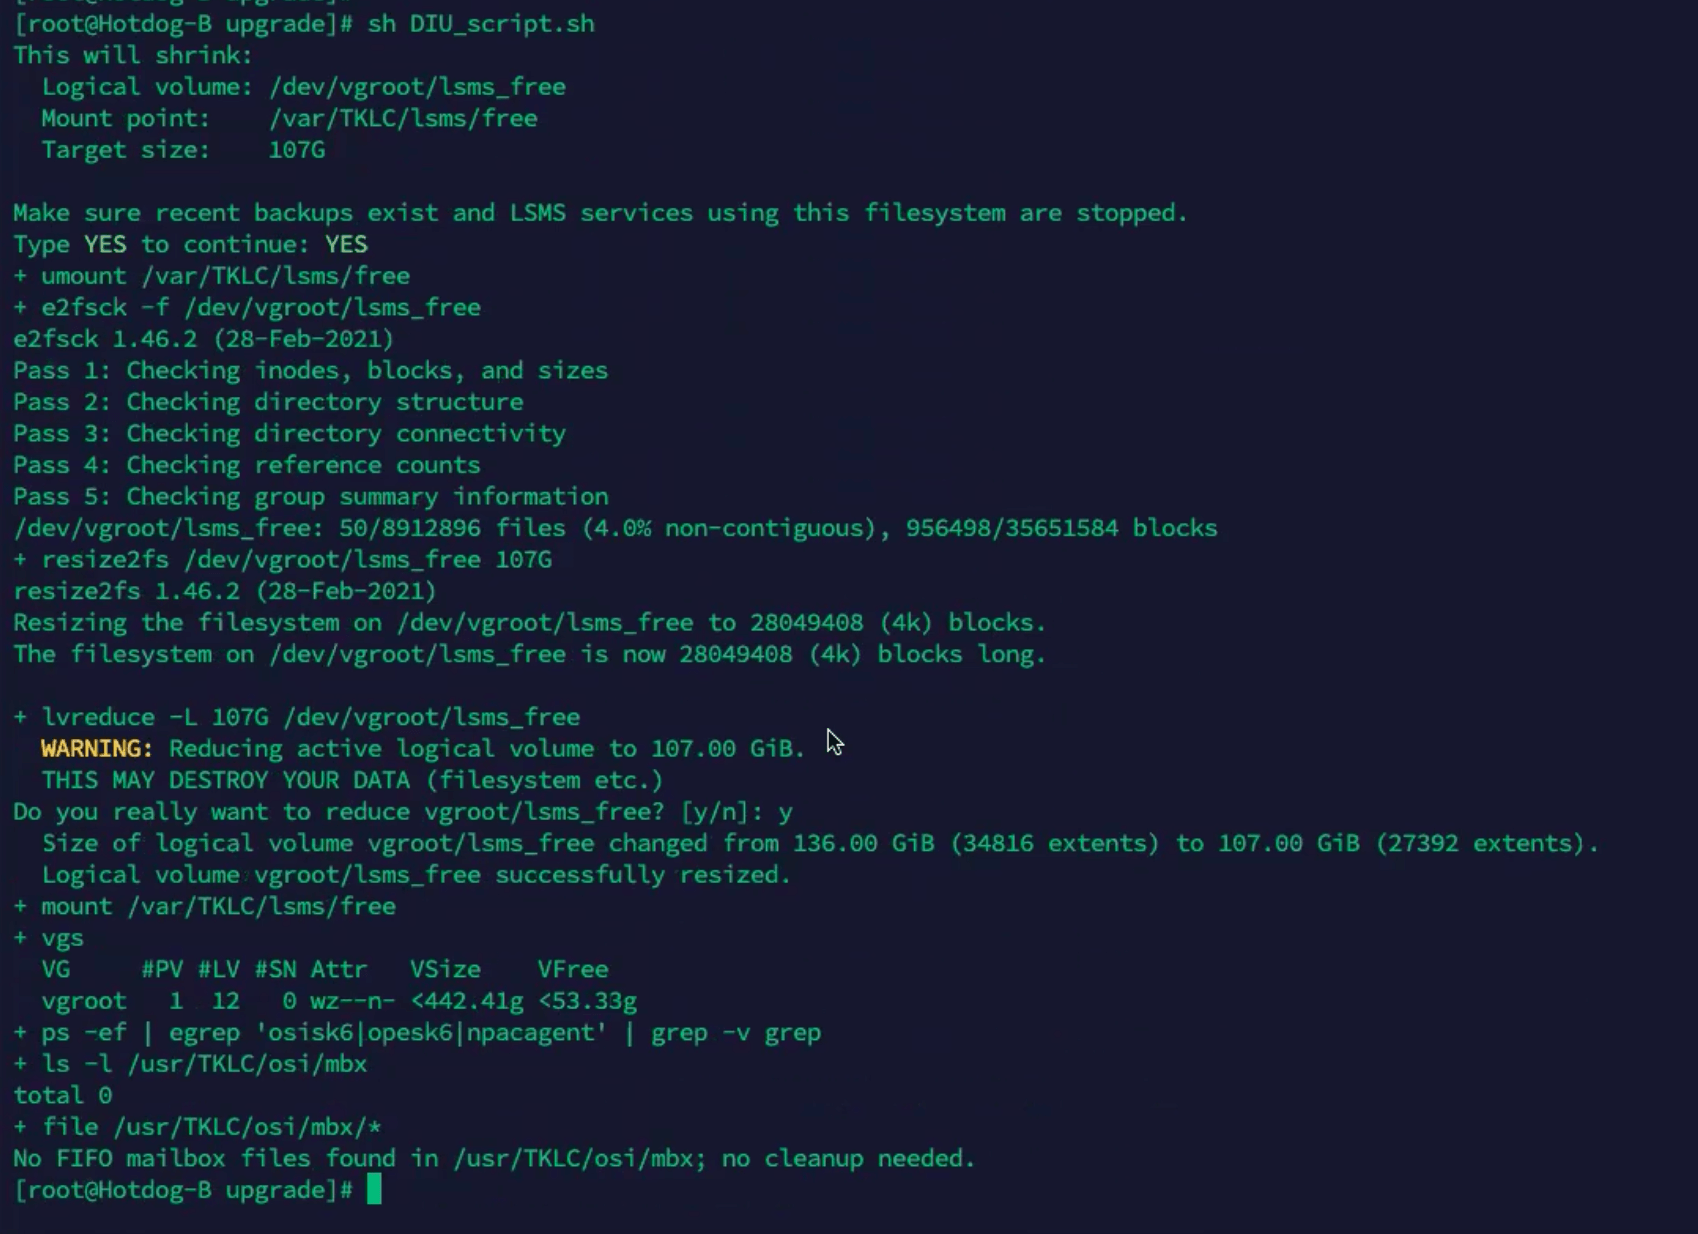 |
|
6 |
MPS B: Start platcfg utility. |
|
|
7 |
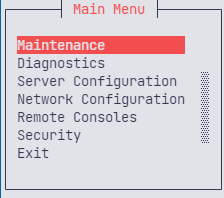
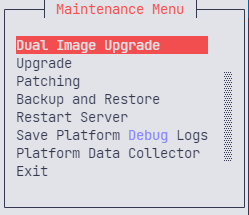
MPS B: Navigate to the Upgrade menu. **NOTE**: Make sure to select Dual Image Upgrade only. |
The platcfg Main Menu appears.
|
|
8. |
MPS B: Validate ISO file. |
Validate ISO file using Procedure A.2. |
|
9. |
MPS B: Select Early Upgrade Checks |
Select the “Early Upgrade Checks” menu to verify that the system is ready for upgrade. 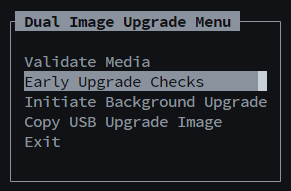 Note: Please note that the previous upgrade should be accepted before proceeding for DIU upgrade. If the previous upgrade is not accepted, then early upgrade checks will fail with the error that previous upgrade is not yet accepted. If the Early Upgrade Checks fail due to the NTP related alarms, then ignore the NTP alarms using the following commands:
For example: To allowlist the NTP alarm, “tpdNTPDaemonNotSynchronizedWarning”, which has the alarm code TKLCPLATMI10, the above-mentioned line should be edited as EARLY_CHECK_ALARM_WHITELIST=TKSPLATMI2,TKSPLATMI10 Note: There should not be any space between two alarms i.e. between TKSPLATMI2 and TKSPLATMI10. If the Early Upgrade Checks fail due to “Server Default Route Network Error”, then this alarm shall be allowlisted in upgrade.conf file. To allowlist the alarm which has the alarm code TKSPLATMA14, the above-mentioned line should be edited as: EARLY_CHECK_ALARM_WHITELIST=TKSPLATMA2,TKSPLATMI2,TKSPLATMA5,TKSPL ATMI10, TKSPLATMA14,TKSPLATMA28,TKSPLATMI39 Note: Please note that TKSPLATMA5, TKSPLATMA2, TKSPLATMI2 should always be whitelisted. |
|
10 |
MPS B: Navigate to the Initiate Upgrade menu |
Select the Initiate Background Upgrade menu and press [ENTER]. 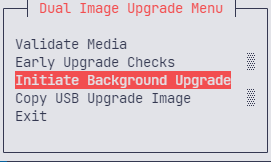 |
|
11 |
MPS B: Select the Upgrade Media. |
The screen displays a message that it is searching for upgrade media. When the upgrade media is found, an Upgrade Media selection menu appears similar as shown in the example below. Select the desired upgrade media and press [ENTER]. 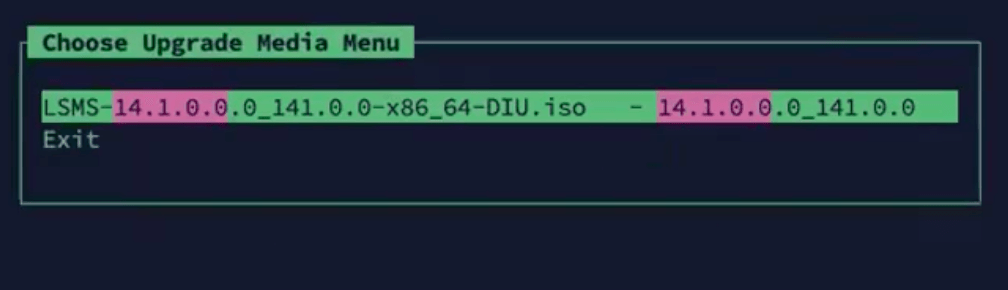 In case there is a failure in the upgrade process, then run the following command to verify whether the raid is synced or not:
Example of lsblk output when raid is in sync, 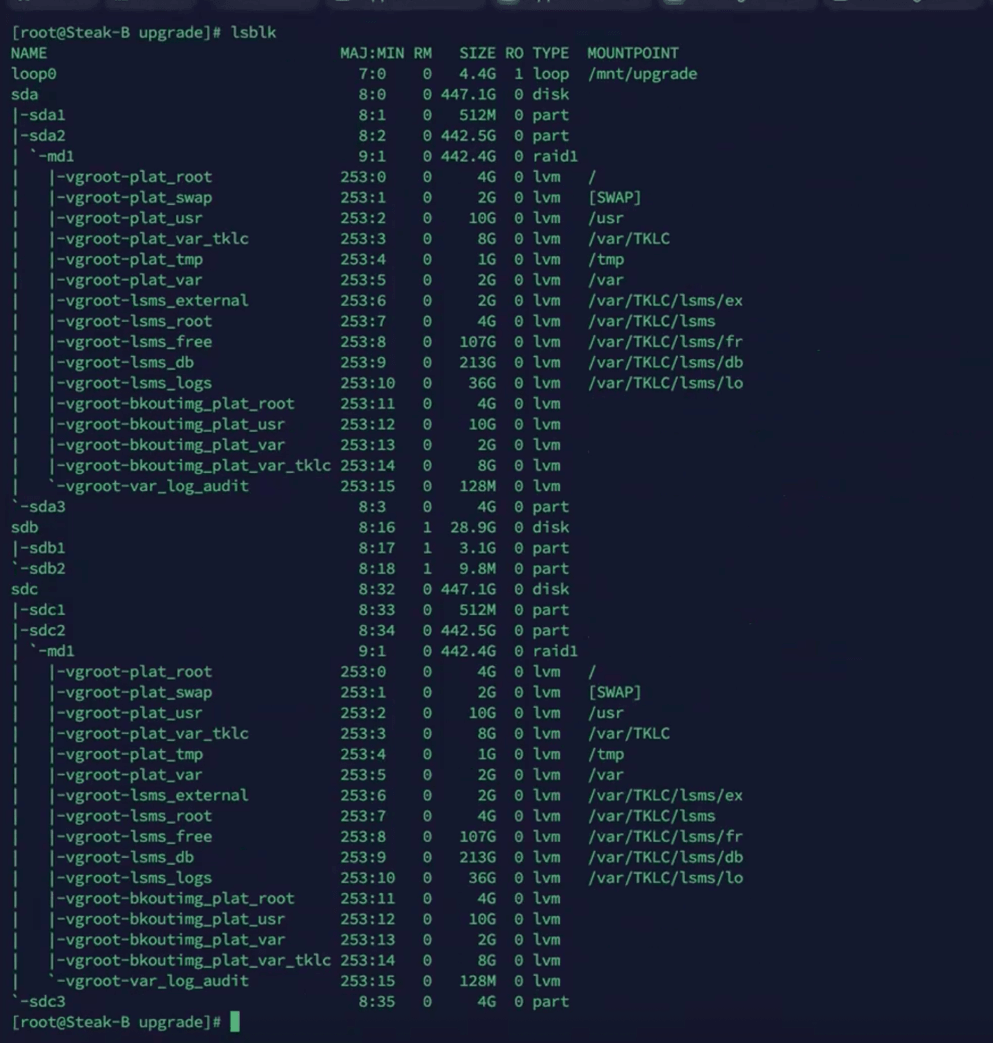 Please note that in the above raid in sync snapshot of lsblk, sdb is for USB as it shows 28.9G while sda and sdc are for HDD which is 447.1G. Hence whenever you run lsblk command, always take a note of which drive is showing USB and which drives are showing HDD. Raid not in sync example snapshot: 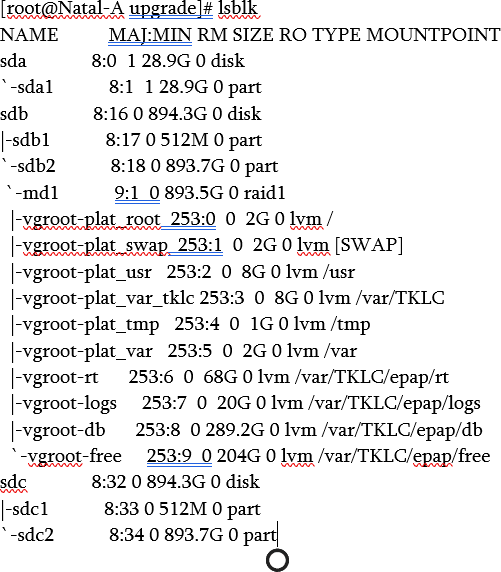 Please note that in the above raid in sync snapshot of lsblk, sda is for USB as it shows 28.9G while sdb and sdc are for HDD which is 447.1G. Hence whenever you run lsblk command, always take a note of which drive is showing USB and which drives are showing HDD. Here we are saying raid is not in sync because only sdb is showing md1 device but sdc is not showing any md device. If the raid is not in sync, then run the following command:
where sdX can be any of sda, sdb, or sdc according to LV configurations. sdX will never be the USB partition. This can be verified using lsblk command. In the above example, sdb and sdc are for hard disk and sda is for USB, here sdc is not in sync as it is not showing the proper md device md1. Hence, the command for syncing the above raid not in sync scenario will be like given below.
The following command can be used to check the status of the sync after running the above command. Wait till the time recovery is not completed 100%. |
|
12 |
MPS B: Upgrade proceeds. Apply Upgrade. |
Many informational messages appear on the terminal screen as the upgrade proceeds. After the background upgrade is done, the system will return to this screen. After this, select [EXIT] and press [ENTER]. From the Dual image Upgrade Menu, select [EXIT] and press [ENTER}. 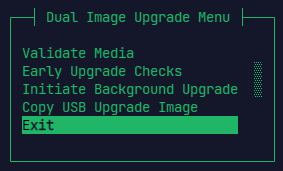 Exit platcfg meny and verify the status using below command, It should show “Ready to Apply upgrade” Status Messages:
From the platcfg menu -> select maintenance menu, select Dual Image Upgrade and then Press Enter. 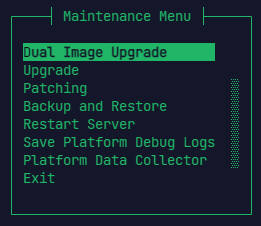 From the Dual Image Upgrade Menu, select Apply Upgrade and press [ENTER]. 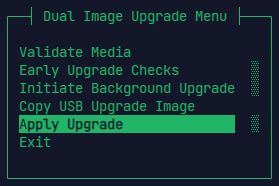 Select YES and press ENTER. 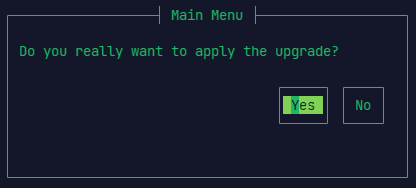 When the upgrade process is complete, the server reboots. |
|
13 |
MPS B: Upgrade completed. |
After the final reboot, the screen displays the login prompt as displayed in the example below. 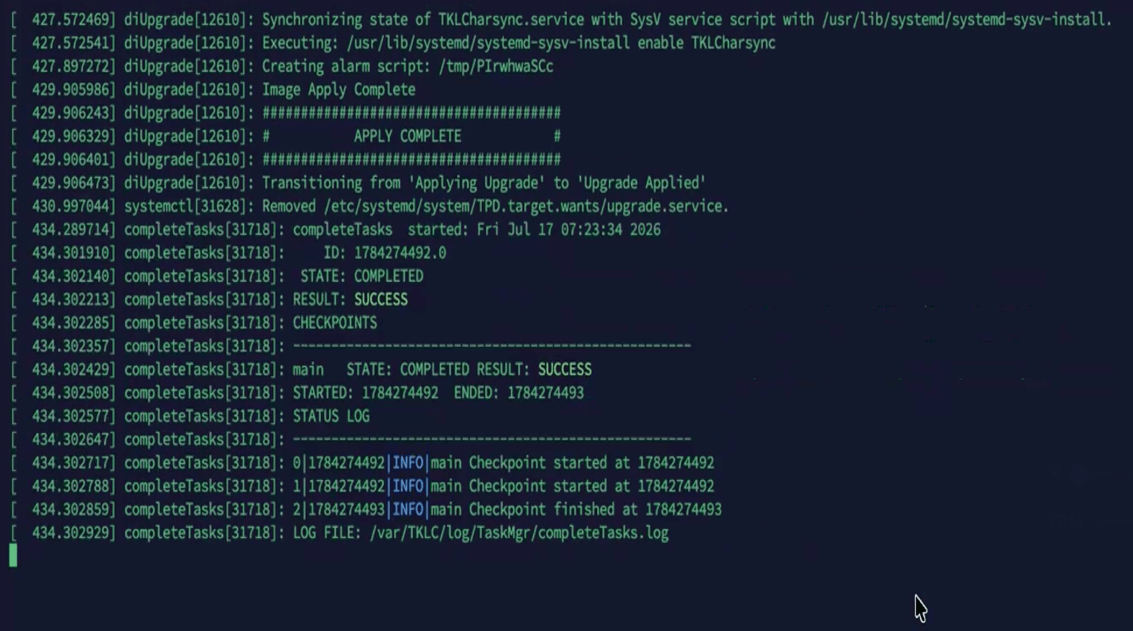 Make sure to verify that the state is transitioned from “Applying upgrade” to “Upgrade Applied” and we get Completed Result: SUCCESS using below command. |
|
14 |
MPS B: log in as “root” user. |
|
|
15 |
MPS B: Check the Upgrade log. |
Examine the upgrade logs in the directory /var/TKLC/log/upgrade and verify that no errors and warnings were reported. |
|
16 |
MPS B: Check that the upgrade completed successfully. |
Run the command from the root user: |
|
17 |
MPS B: Check that the upgrade completed successfully. |
Verify that the following output is displayed. If it is not, contact My Oracle Support following the instructions on the front page or the instructions on the Appendix E. 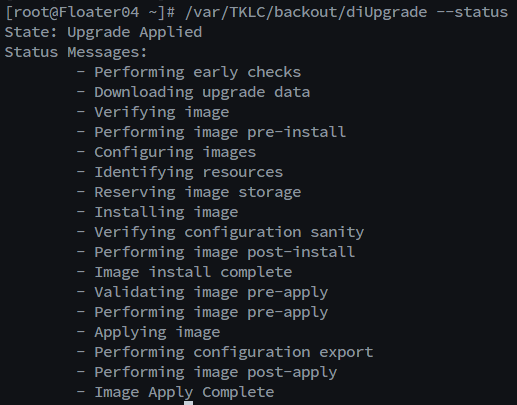 |
|
19 |
MPS B: Reboot after installation |
Reboot the system after the “Apply Complete Process” to finally finish the installation. |
|
20 |
MPS B: Install Complete. |
The installation procedure is complete. If there are any issues in the upgrade, check Procedure A.48 Dual Image Upgrade Known Issues Fix. |
|
21 |
Note down the timestamp in log. |
Run the following command: |
|
22 |
Start Node the server to make it Standby |
The command will take time depending on the DB size. |