4 pfSense
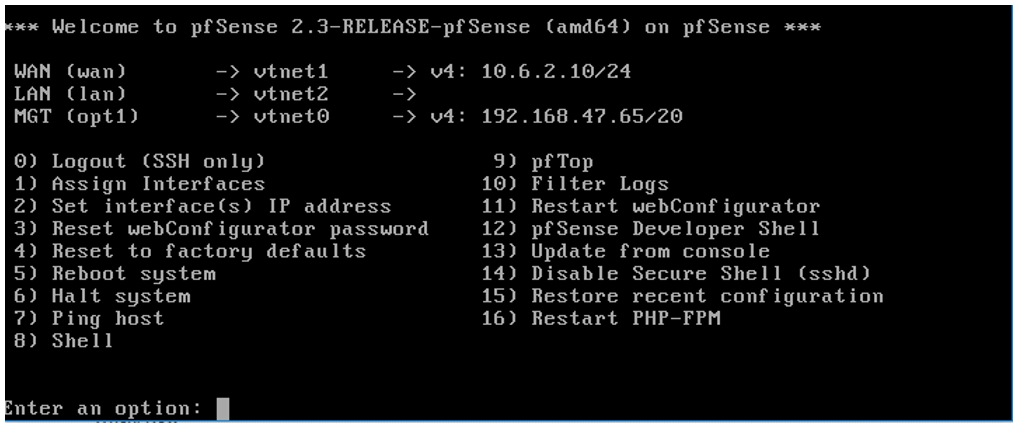
Once the console to the pfSense Firewall is available, use the shell console displayed in
Figure 6 for network configuration. The pfSense version 2.3 was used for
verification.
The user should configure an IP address for the Guest VM. This guide uses the MGT (opt1) interface on the pfSense Firewall, but you may also use the LAN interface if desired.
To assign an IP address, select option 2. You may verify the MAC addresses assigned to
the logical port via option 1, as well as with the sudo /sbin/ifconfig
command on the Talari.
Once an IP address has been assigned, you may also define a gateway for the MGT (opt1) interface from the shell using option 8 from the menu. This command will add a route into the route table for initial off subnet access to the web console of the pfSense interface, similar to the following example (Subnet: 192.160.0.0/16, Gateway: 192.168.44.1).
- Route add -net 192.168.0.0/16 192.168.44.1
The MGT (opt1) interface blocks all traffic by default, so you must allow traffic for the initial configuration. When using option 8, the user should enter the following commands.
echo pass in on vtnet0 all >> /tmp/rules.debug
echo pass out on vtnet0 all >> /tmp/rules.debug
pfctl -F all -f /tmp/rules.debug
Verify connectivity with the ping command to the MGT IP address, and if successful, you should now have access to the GUI of the pfSense Firewall.
Within the GUI, the user must configure and save rules before rebooting pfSense. Otherwise, access to the pfSense GUI will be lost if using the MGT (opt1) interface for Management access.