EC2 Deployment Procedure
Deploying the SBC on EC2 includes the following high-level steps:
- Launch your Instances on AWS—This is the main instance configuration procedure. It includes a multi-dialog wizard that presents configuration options in the preferred sequence. The result of this wizard is an installed, operational SBC or two HA SBC instances with no networking.
- Configure the Network Interfaces for Your Instances—This is a preparatory task, creating interfaces that you attach to instances in the next procedure.
- Attach the Network Interfaces to Your Instances—This assigns interfaces to instances. Check your interface assignments using the SBC ACLI interface-mapping commands, shown below, after SBC startup and correct interface assignment, if necessary. See the Oracle® Communications Session Border Controller Platform Preparation and Installation Guide for further instructions on using these commands.
- Apply your SBC Configuration—This is an SBC ACLI configuration procedure.
- During ACLI configuration, configure the first private address provided by EC2 for media interfaces as the pri-utility-address, and the secondary private address as the interface's ip-address when you configure your primary HA SBC.
- During ACLI configuration, you only need the first private address provided by EC2 for the secondary HA SBC media interface addresses. Configure that address as each applicable media interface's sec-utility-address.
Deploying the SBC for HA, adds the following high-level considerations:
- Configure an Identity and Access Management (IAM) Role for the SBCs—This is a preparatory task.
- Place both SBCs in the same Availability Zone.
- A Place Group, of the type Spread, must be available, within which you place both SBCs.
- You must assign a public IP to the wancom0 management interface.
- Configure Secondary Private IPs (Virtual IPs) for all Media Interfaces to create virtual IPs for use during HA switchovers.
- You must map the Secondary addresses used for Virtual IPs to Elastic IP addressing.
- The wancom0 management subnets must be public to allow access from outside the cloud. You can meet this requirement by allowing an auto-assigned Public IP or by configuring it with an Elastic IP.
For both HA and standalone deployments, all Media interfaces addresses that must be reachable through the internet must reside on public subnets; all others can reside on private subnets. In addition, you can create additional IP addresses for an interface, allowing for different addresses on steering-pools, HIP, and other objects.
Your EC2 workspace may present dialogs and fields that differ from this procedure. For full information on deploying EC2 instances, see the Amazon EC2 documentation.
Configure an IAM Role
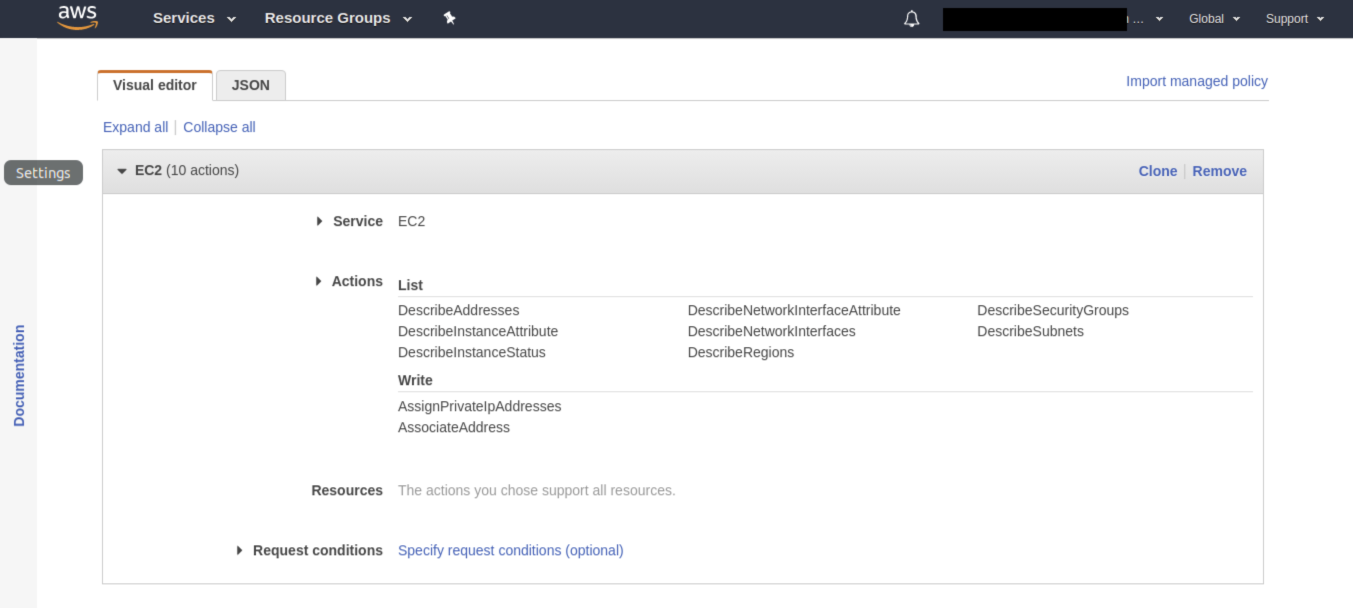
Create an IAM policy and role for high availability SBC instances. (This is not required for standalone SBCs.)
- Create an HA policy.
- Navigate to .
- Select the JSON tab.
- Paste the following JSON into the JSON
editor.
{ "Statement": [ { "Action": [ "ec2:DescribeAddresses", "ec2:DescribeNetworkInterfaces", "ec2:DescribeNetworkInterfaceAttribute", "ec2:DescribeInstanceAttribute", "ec2:DescribeSubnets", "ec2:AssignPrivateIpAddresses", "ec2:AssociateAddress", "ec2:DescribeSecurityGroups", "ec2:DescribeInstanceStatus" ], "Effect": "Allow", "Resource": "*", "Sid": "VisualEditor0" } ], "Version": "2012-10-17" } - Click Review Policy.

- Enter a name and description for this policy.
- Click Create policy.
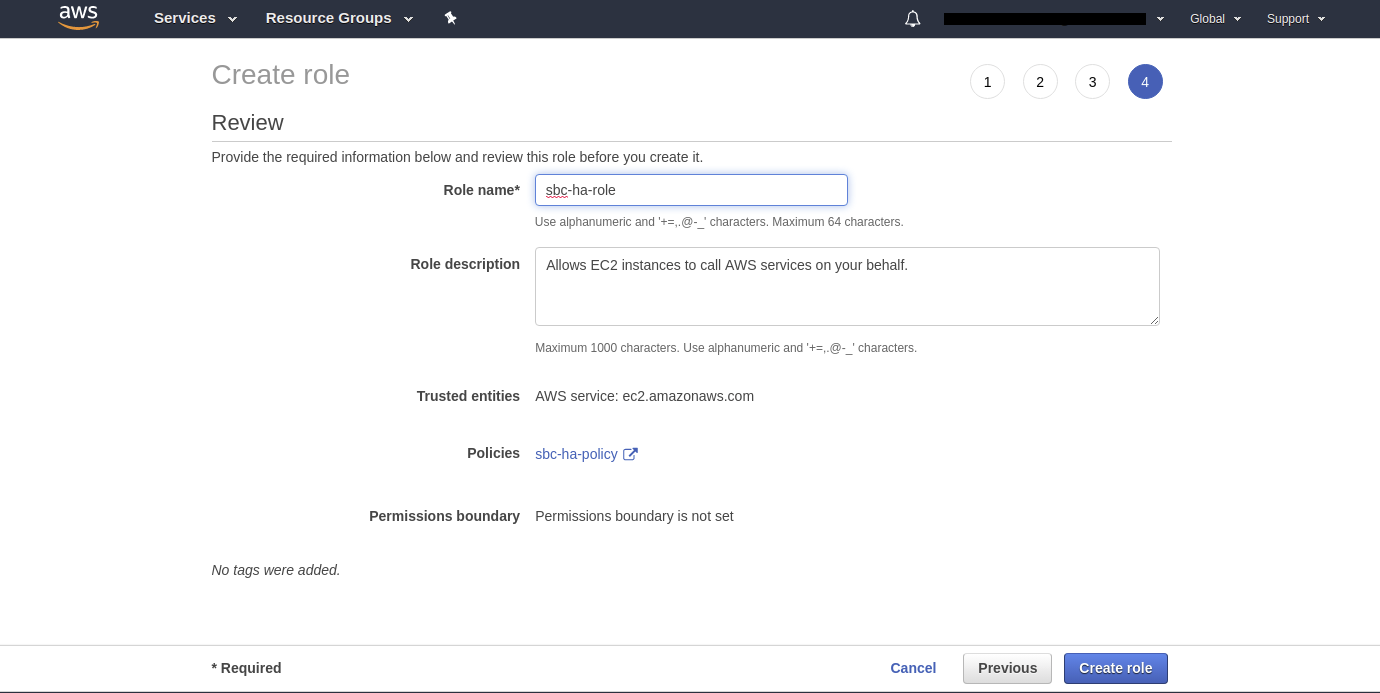
- Create an HA role.
- Navigate to .
- Select .
- Select the previously created policy and click Next: Tags.
- Add metadata tags, if desired, and click Next: Review.
- Enter a name and click Create role.

Create a NAT Gateway
For customers who want no direct connectivity between the wancom0 interface and the public internet, create a NAT gateway. For details on pricing, see Amazon VPC pricing.
- Create a NAT gateway.
- Navigate to .
- Enter a name.
- Select a subnet.
- Select an Elistic IP.
- Click Create NAT gateway.
- Create a route table.
- Navigate to .
- Enter a name.
- Select a VPC.
- Click Create.
- Add the NAT gateway and private wancom0 subnet to the route table.
- From the Route Tables page, select your route table.
- In the Routes tab, select Edit routes and then Add route.
- Add a route for 0.0.0.0/0 to the target route.

- Click Save routes.
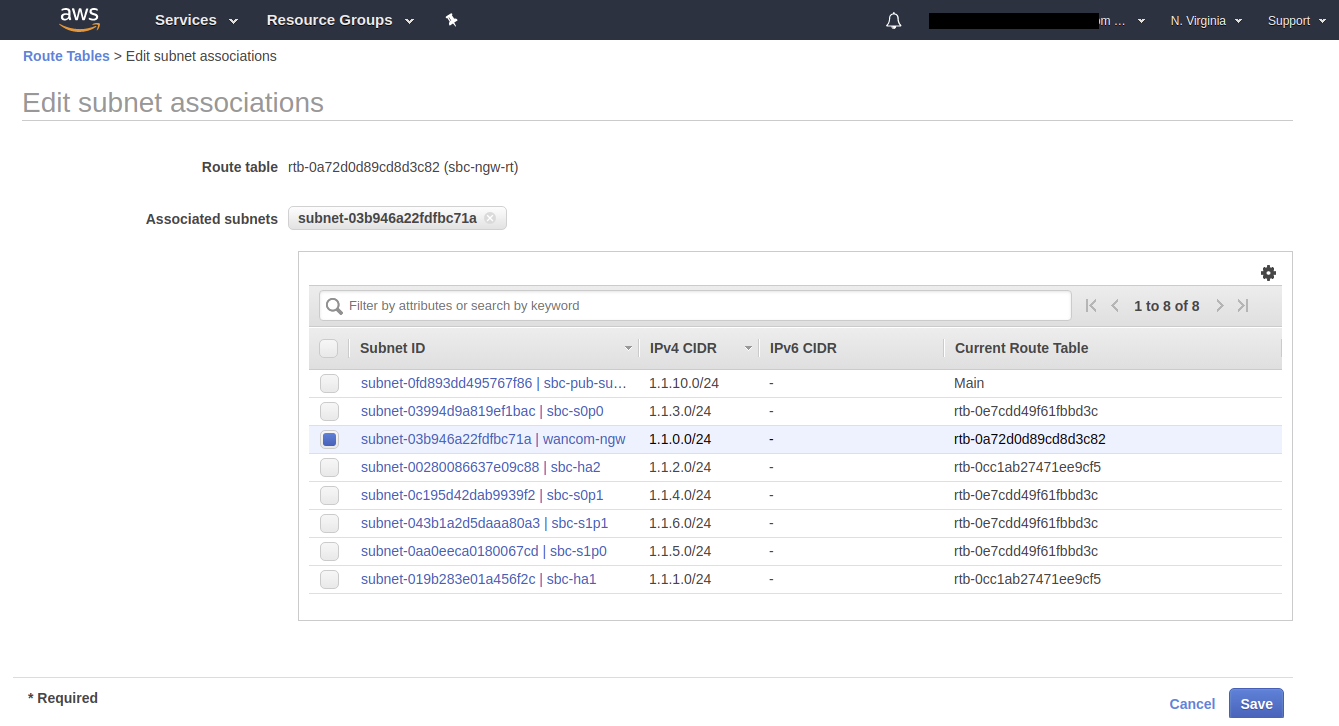
- Associate your private wancom0 subnet with the route table.
- From the Route Tables page, select your route table.
- In the Subnet associations tab, select Subnet associations and then Edit subnet associations.
- Select your wancom0 subnet.

- Click Save.
Launch Your Instance
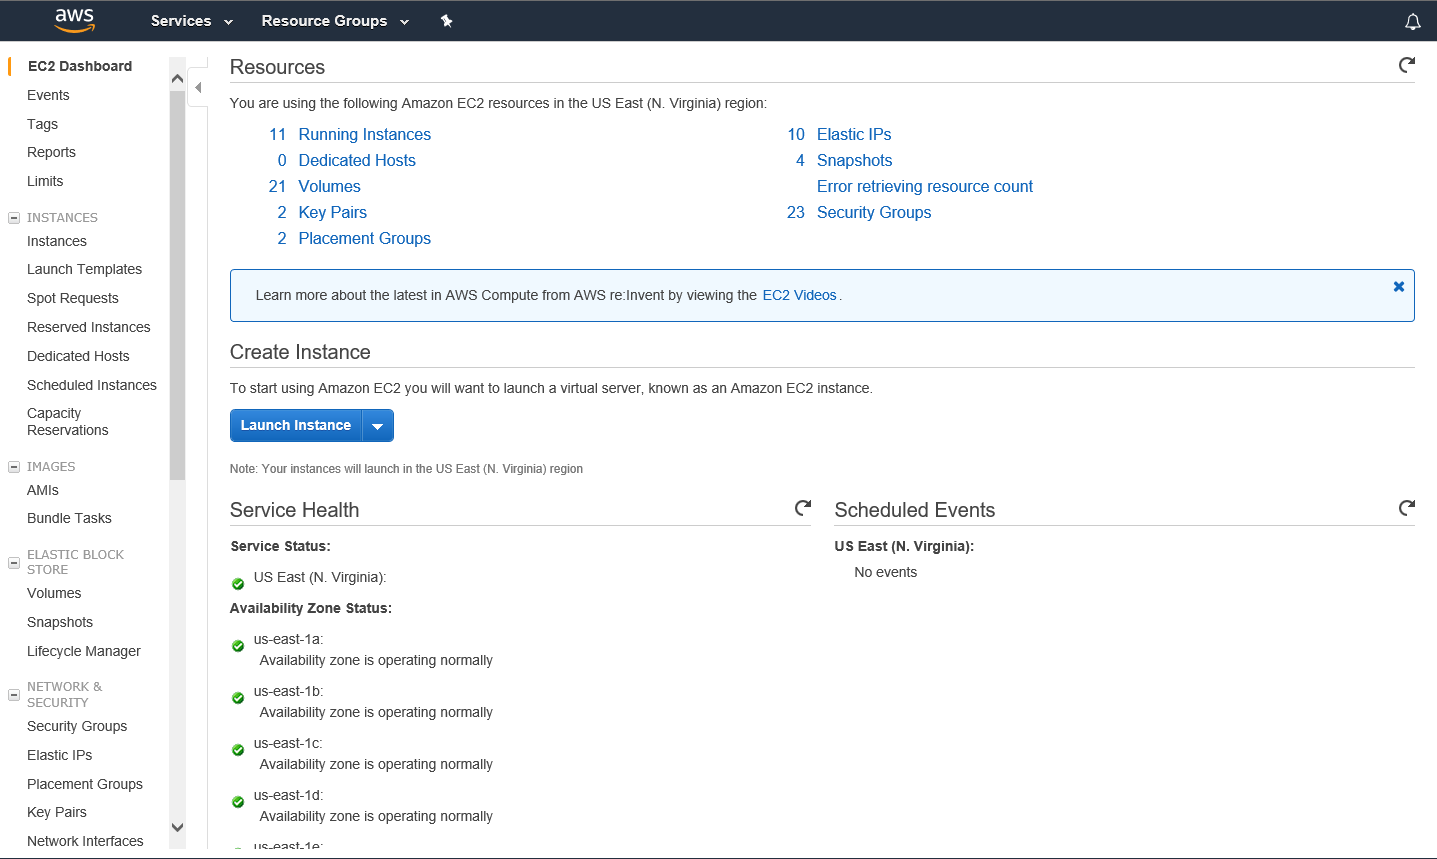
- Login to the AWS management console and click the EC2 link to open the EC2 Dashboard.
- Review and confirm your deployment's Region and Availability Zone.
- On the EC2 Dashboard, click
Launch
Instance.

- Navigate to the My AMIs link to choose the image for your instance, and click Select.
- Chose the desired instance type. See your software version's release notes for tables of supported machine sizing.
- Click Next: Configure Instance Details. The AWS instance deployment sequence displays the Configure Instance Details dialog.
- Configure the following instance
details; leave the others at their defaults:
- Specify the number of Instances. (Specify 2 for an HA setup.)
- Select the correct Network for wancom0.
- Select the correct Subnet for wancom0.
- Establish a public IP for wancom0, either by using the Auto assign Public IP control or by configuring an elastic IP after deployment.
- HA only—Check Placement Group. Ensure the group is of type Spread, and that both SBCs reside in the same group.
- HA only—Select the appropriate IAM role. (Choose the IAM role you configured above.)
- Scroll down to the Network interfaces configuration fields.
- Ensure you are configuring the Device named eth0.
- Select New network interface from the Network Interface dropdown list for wancom0.
- Select the correct Subnet from the dropdown list for wancom0.
- Ensure the Primary IP field is set to Auto-assign.
- Scroll to the bottom of the Configure Instance Details dialog and click Next: Add Storage.
- Choose your desired SBC storage size in GB. The default storage size is 40GB.
- Click Next: Add Tags.
- Enter any arbitrary name to identify the instance. Ensure the name allows you to uniquely identify this instance during later deployment procedures and operation.
- Click Next: Configure Security Group.
- You can either create a new security group or select an existing security group to set appropriate firewall rules. Refer to EC2 documentation for configuration instructions.
- Click the Review and Launch button. EC2 displays a summary of your instance.
- Review the Instance configuration and click the Launch button.
- From the pop-up screen, select an
existing SSH key pair or create a new key pair and check the acknowledgment check-box.
- If you create a new key pair, enter a name and click Download Key Pair.
- Move the PEM file to your
.sshdirectory. - After launching the instance, SSH to the VM with the -i
argument.
ssh -i .ssh/my_new_keypair.pem admin@<Public IP address>
- Click Launch Instances. EC2 creates your instances.
- Return to the EC2 Dashboard and click the Running Instances link.
- Select your new instances and name them. These names can be the same as your tag names.
Create Network Interfaces for SBC Instances
- From the EC2 Dashboard, click Network Interfaces under Network & Security on the left panel.
- Click Create Network Interfaces.
- Create HA and/or Media interfaces by
selecting the appropriate subnet and security group from the popup.
Example configurations on an instance named myHA1 include:
- Wancom-1 interface for
myHA1
- For Description, type in a name that you can clearly recognize later.
- For Subnet, choose the subnet you created for HA management from the drop-down.
- For Private IP, retain the auto assign setting, based on the following criteria. If you use auto assign, EC2 applies the first available IP from the subnet to that interface. If you need more precise IP management, the custom option is recommend.
- For Security groups, choose the Security group you created for this management from the drop-down.
- s0p0 media interface for
myHA1
- For Description, type in a name that you can clearly recognize later.
- For Subnet, choose the subnet you created for this media interface from the drop-down.
- For Private IP, retain the auto assign setting.
- For Security groups, choose the Security group you created for media from the drop-down.
- Wancom-1 interface for
myHA1
Perform this step for each management and media interface on your instance.
Attach the Network Interfaces to the SBC Instances
- From the EC2 Dashboard, click Running Instances.
- Select your first instance. Ensure that it is highlighted
- Open the Actions drop down and select Networking, Attach Network Interface.
- From the Attach Network Interface pop-up, select your first network interface name.
- Repeat these steps for all network interfaces created above.
- Repeat these steps for all your instances.
Configure Secondary Private IPs (Virtual IPs) for all HA Deployments
This procedure, which creates virtual addressing, applies only to HA deployments. Perform these steps on the Primary instance of the HA pair only.
- From the EC2 Dashboard, click Running Instances.
- From the bottom panel, select Description, Network Interfaces.
- Click one of the media interfaces. Its network interface details appear in a pop-up.
- Click Interface ID from the pop-up window. This takes you to the network interface that is mapped to this media interface.
- From the Actions link, click the Manage IP Addresses option. This opens the Manage IP Addresses pop-up.
- Click the Assign new IP option. This assigns a new secondary private IP address to the network-interface selected.
- Click the Yes, Update button.
- Repeat these steps for all the media interfaces on the current instance.
Configure Elastic IP Addressing
This procedure, which makes virtual addresses persistent through HA switchovers, applies only to HA deployments.
- Under Network & Security in the left column, click Elastic IPs.
- Click Allocate Elastic IP Address, and then Allocate, and then Close.
- Select the newly allocated IP address and click Actions, and then Associate Elastic IP Address.
- Click on the text box next to Instance and select your instance from the drop-down menu.
- Click Associate.
Set the User and Administrative Passwords on the SBC
These password procedures are required before any further SBC operations. For HA deployments, perform these procedures on both SBCs.
- From the E2C Dashboard, under Instances in the left column, click Instances and click the newly created SBC.
- Under the Description tab, note the public hostname and the Instance ID.
- When the virtual machine has finished initializing, SSH to the public hostname. The username is "user" and the initial SSH password is "acme" + the instance ID.
- Set the user password by logging in for
the first time.
$ ssh user@somewhere.compute-1.amazonaws.com user@somewhere.compute-1.amazonaws.com's password: *ALERT* ***************************************************************** user password has not been set. Please set password now. ***************************************************************** ** Only alphabetic (upper or lower case), numeric and punctuation ** characters are allowed in the password. ** Password must be 8 - 64 characters, ** and have 3 of the 4 following character classes : ** - lower case alpha ** - upper case alpha ** - numerals ** - punctuation ***************************************************************** Enter New Password: Confirm New Password: > - Set the administrative password by
typing enable at the command prompt. The initial enable password is
"packet" + the instance ID.
> enable Password: *ALERT* ***************************************************************** admin password has not been set. Please set password now. ***************************************************************** ** Only alphabetic (upper or lower case), numeric and punctuation ** characters are allowed in the password. ** Password must be 8 - 64 characters, ** and have 3 of the 4 following character classes : ** - lower case alpha ** - upper case alpha ** - numerals ** - punctuation ***************************************************************** Enter New Password: Confirm New Password: # - Verify the network interfaces have MAC
addresses.
Use the show interfaces mapping command to verify the network interfaces have MAC addresses.
# show interfaces mapping
Interface Mapping Info
-------------------------------------------
Eth-IF  MAC-Addr                Label
wancom0 06:DF:71:BA:D8:77       #generic
wancom1 06:A6:08:58:92:C9       #generic
s0p0    06:D4:E6:E8:B8:FB       #generic
s1p0    06:EA:08:51:4D:DF       #generic
wancom2 FF:FF:FF:FF:FF:FF       #dummy
spare   FF:FF:FF:FF:FF:FF       #dummy
s0p1    FF:FF:FF:FF:FF:FF       #dummy
s1p1    FF:FF:FF:FF:FF:FF       #dummy
s0p2    FF:FF:FF:FF:FF:FF       #dummy
s1p2    FF:FF:FF:FF:FF:FF       #dummy
s0p3    FF:FF:FF:FF:FF:FF       #dummy
s1p3    FF:FF:FF:FF:FF:FF       #dummy
Execute the interfaces-mapping, swap command, if necessary, to correct any issues with your interface to MAC address mapping.
- Reboot the virtual machine.
# reboot
Refer to the Oracle® Communications Session Border Controller Configuration Guide after you have completed this deployment for administrative and service configuration, including product setup, entitlement setup and HA configuration.