Migrating to an Optimized3.Flex Machine Shape
The SBC supports machine migration to and from supported versions on OCI VM.Optimized3.Flex shapes.
The table lists the supported standard shapes that you can migrate to their respective VM.Optimized3.Flex shapes. Changing instance type from VM.Standard2.X to VM.Optimized3.Flex is supported only when both the instances have the same number of OCPUs, the same amount of memory, the same number of vNICs attached, and the same type of networking mode (SRIOV).
| From Instance Type | To Instance Type | OCPUs | Memory |
|---|---|---|---|
| VM.Standard2.4 | VM.Optimized3.Flex-Small | 4 | 60 |
| VM.Standard2.8 | VM.Optimized3.Flex-Medium | 8 | 120 |
| VM.Standard2.16 | VM.Optimized3.Flex-Large | 16 | 240 |
The SBC supports this instance type modification for both standalone and HA deployments. Follow the steps below to migrate a standalone VM from the VM.Standard2.X shape to the VM.Optimized3.Flex shape .
- Upgrade the software on VM.Standard2.X shape to the vSBC version that supports VM.Optimized3.Flex shapes.
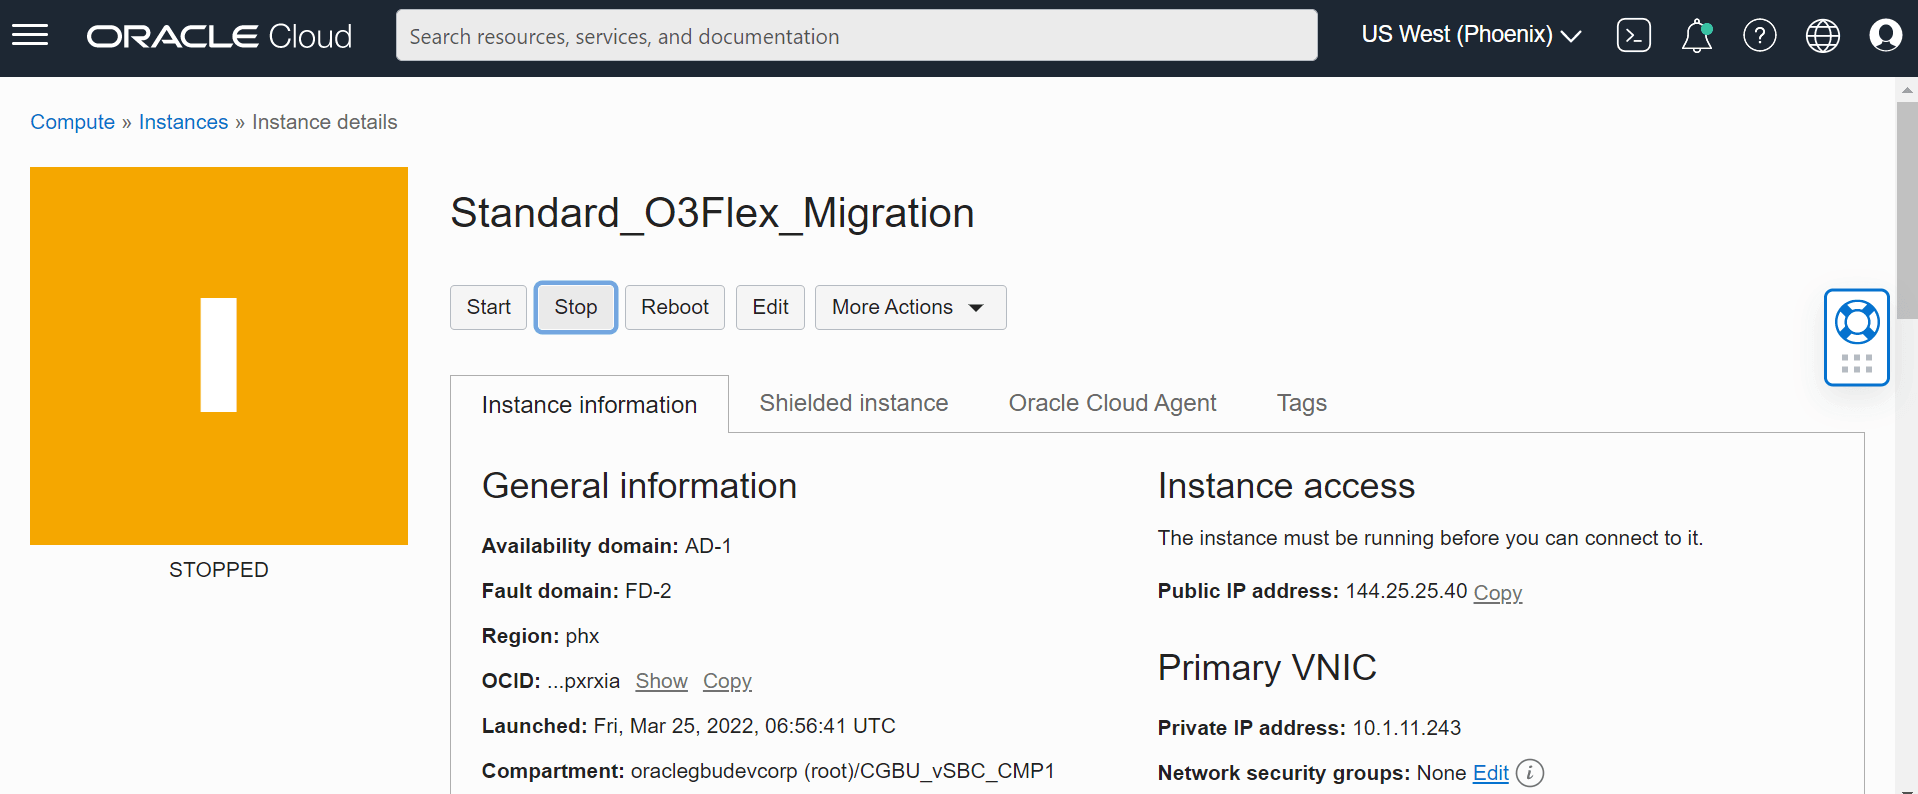
- After upgrading the software, stop your VM from the OCI console.
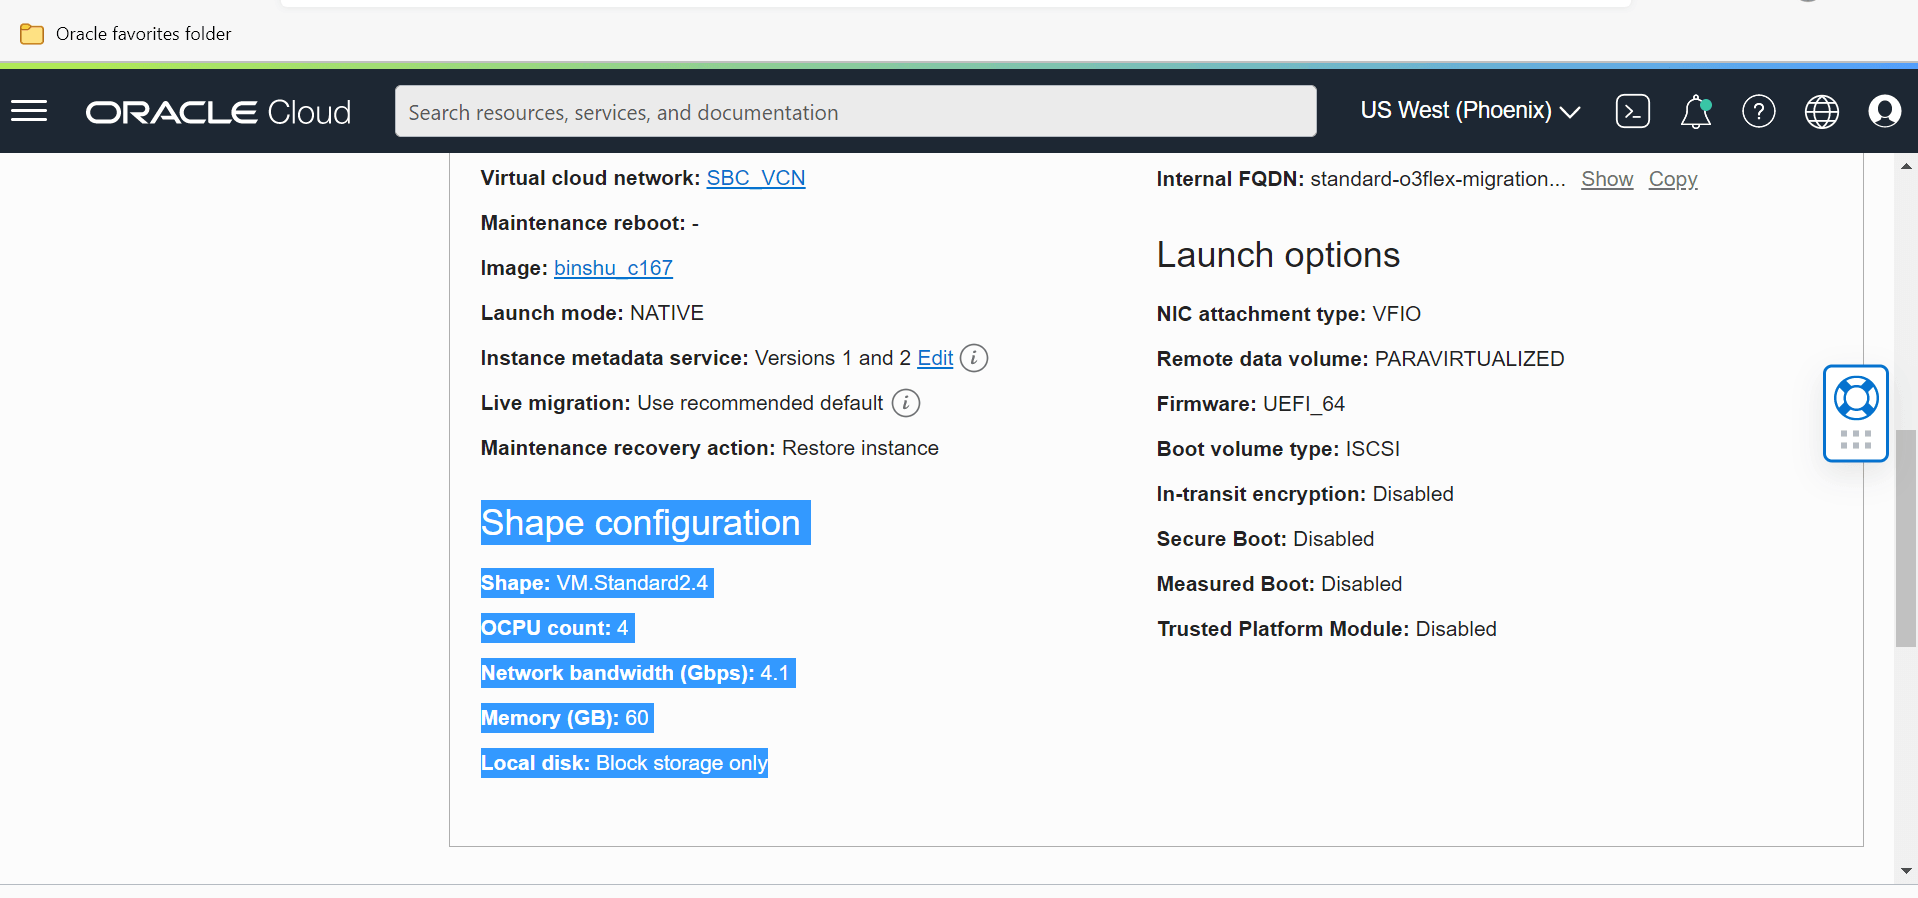
The image below depicts a VM.Standard2.4 instance’s Shape Configuration before migration.

Stop your instance by clicking the “stop” button.

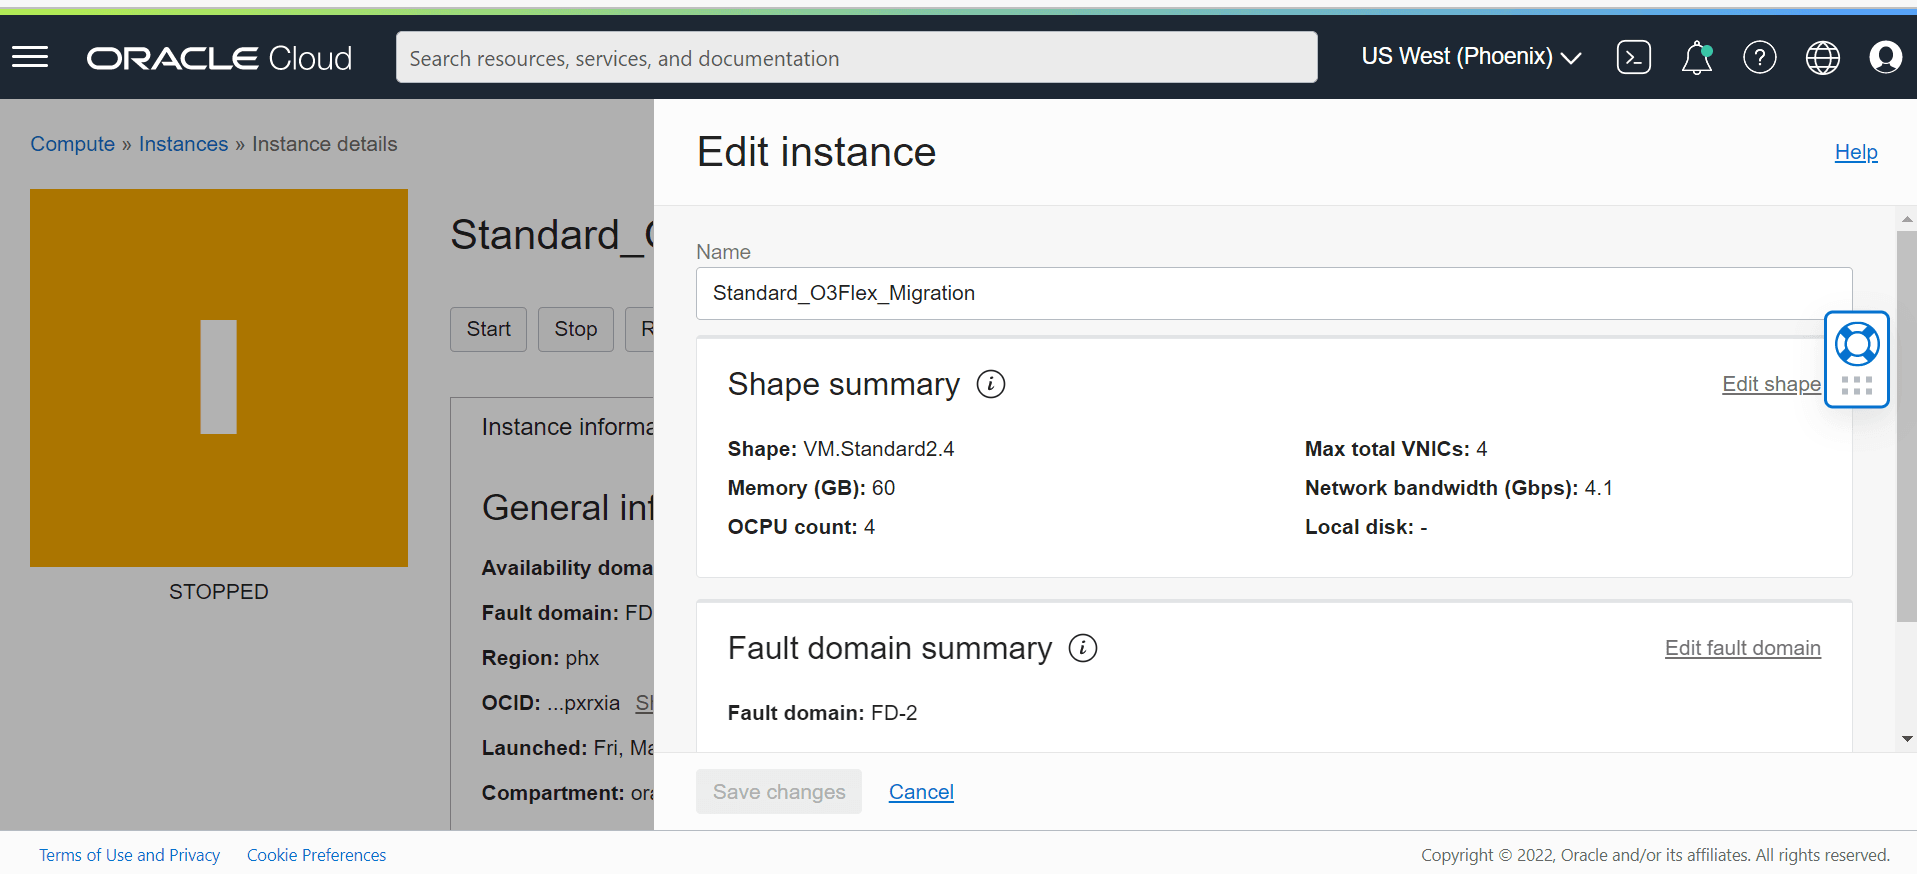
- Navigate to Edit, Edit Shape, and select the target shape name (Intel,
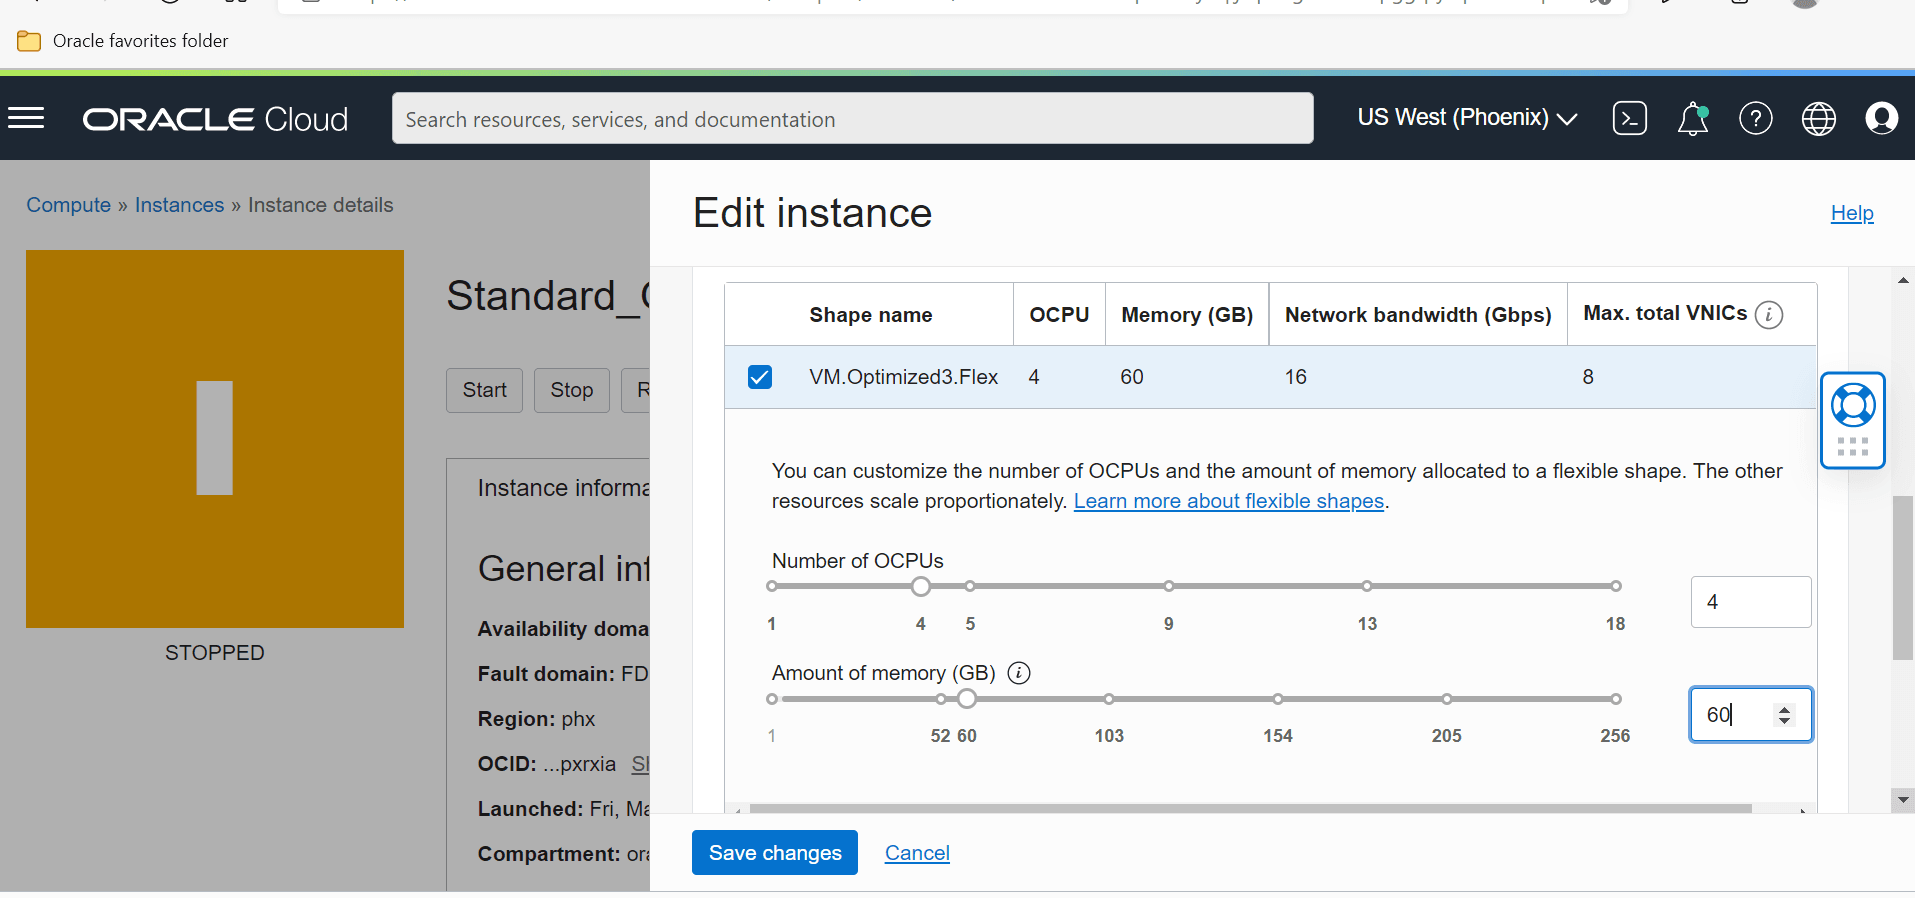
VM.Optimized3.Flex).

- Set the same number of OCPUs and amount of memory as that of standard
shape, then Save changes.

- Start your migrated vSBC machine.
Migrating an HA Pair
Follow the steps below to migrate an HA pair of VM.Standard2.X instances to VM.Optimized3.Flex shapes. Both the starting and target instances of the HA pair must be the same instance type, with the same number of OCPUs, the same amount of memory, and the same networking type (SRIOV).
- Upgrade the software on both nodes of VM.Standard2.X shapes to the vSBC version that supports VM.Optimized3.Flex shapes.
- From OCI console, stop your standby VSBC.
- Navigate to Edit, Edit Shape, and select the target shape name (VM.Optimized3.Flex).
- Set number of OCPUs and amount of memory to be the same as that of standard shape and save your changes.
- Start your migrated standby vSBC machine.
- After startup, check that the original active and standby are in the same roles and are synchronized.
- From OCI console, stop your active vSBC. The vSBC over the new Flex VM takes the role as new Active.
- Navigate to Edit, Edit Shape, and select the target shape name (VM.Optimized3.Flex).
- Set the number of OCPUs, the amount of memory (the same as that of standard shape) and save your changes
- Start the instance. This instance takes the new standby role.
- Verify the HA roles and that the systems are synchronized.
If you want to change the number of forwarding cores in your deployed VM.Optimized3.Flex shape, change the active instance first and reboot it after the configuration fully synchronizes. Once the first VM comes up, it takes the role as “Standby”. Reboot the newly active vSBC for the forwarding core count changes to come into effect on both instances of your HA pair.