Customize the Display

Depending on the features that you use in the OCSDM GUI, you can change the way information is displayed by customizing the way table columns are displayed and table entries are ordered. You can also customize the number of records that are displayed per page. Any customization that you do is maintained for the life of the session only. Once you log out, the changes that you made, revert to their default state.

  1. Position the cursor over a column heading. An arrow appears on the right hand side of the box. For example:

    Figure displays the positioning of a cursor over a column heading.

  2. Click the down arrow to display the menu. For example:

    Figure displays clicking a down arrow to display a menu.

  3. Select Sort Ascending to sort the data in ascending order or Sort Descending to sort the data in descending order.
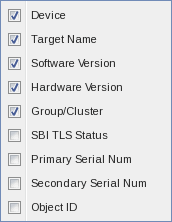
  4. Select Columns to access a list of column names. For example:

    The figure displays an example of a column menu.

  5. Click a marked checkbox to hide that column or click to check an empty checkbox to display that column. The display view automatically updates.
  6. To display a page of records that you want to view, you can use the buttons to move between pages or enter the page number you want.
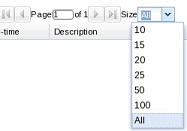
  7. To customize the number of records that are displayed per page, click the Size drop-down list.

    Note:

    If you cannot sort table columns using the Sort Ascending or Descending column options, select the All option from the Size drop-down list in order to use these column options. For example, the All option appears in the Size drop-down list when you load a device in Configuration Manager to display records for the local-policy configuration element. If you are having trouble sorting the column order for this configuration element, use the All option and try again.
    The figure displays how to select All from the Size menu.
  8. Click elsewhere in the display to clear the menus.