- Installation Guide
- Public Cloud Platforms
- Create and Deploy OCSM on OCI
- Deployment on OCI
Deployment on OCI
The OCI instance configuration procedure includes a multi-dialog wizard that presents configuration options in sequence.
- Login to the OCI console by selecting the appropriate region and compartment.
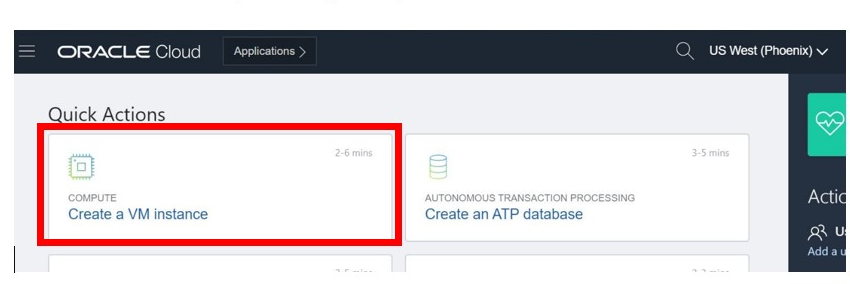
- Click Create a VM instance.

- In the Create Compute Instance page, provide a name for
the instance.
- Select a compartment from the list of compartments.
- Select the appropriate Oracle Linux base image version that is required.
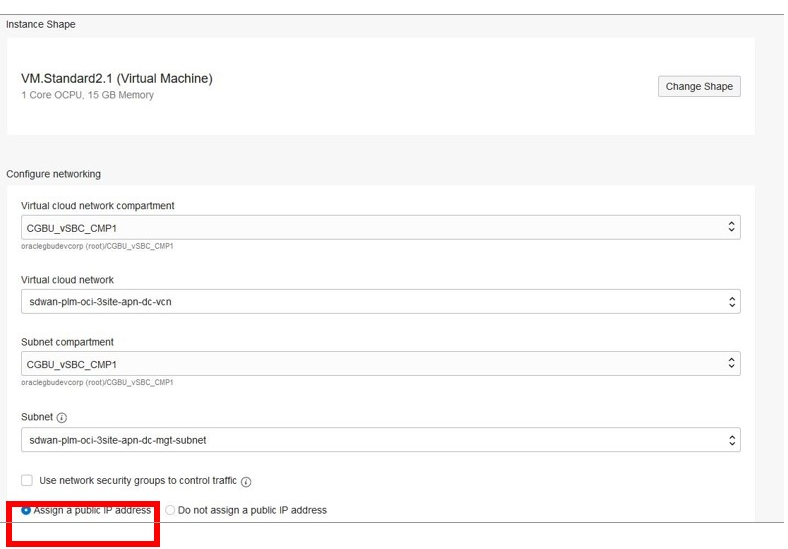
- Click Change Shape to change the Instance shape.
- You can choose from two Standard Instance Types: a) Virtual Machine and b) Bare Metal Machine.
- Select a Shape. Select one option from the available options -
AMD Rome,Intel Skylake,Speciality and Legacy. - Select a shape according to your requirement for the Virtual Machine created.
- Select the Virtual Cloud Network Compartment.
- Select Virtual Cloud Network.
- Select Subnet Compartment.
- Select a subnet as required and choose Assign a Public IP
Address.

- In Configure boot volume screen, select SPECIFY A CUSTOM BOOT VOLUME and mention the required size.
- In the Add SSH keys screen, choose the appropriate SSH
key. Use one option to add the public key:
Generate SSH Key Pair,Upload Your Own Public Key,Paste own public key. - In the Show Advanced Options screen, provide if any details are required.
- Review the details which are selected or created in the previous steps, make changes if anything is required.
- Click Create to start creating the instance.
- After a delay of few minutes, the instance is created and the public and private IP addresses of the instance are displayed in the newly loaded page.
- By default, the instance /(/root) file system has 40 GB only; even if you have defined the size in the earlier step. Follow the method explained in the document: How To Create a Linux Instance With Custom Boot Volume and Extend The Root Partition in OCI to increase the size.
- After resizing the VM instances, follow the instructions in the Oracle
Communications Session Monitor Installation Guide.
Note:
If the disk size is increased after the OCSM installation and configuration, partitions space can be reconfigured by using script:/opt/oracle/ocsm/usr/share/pld/scripts/admin/change-disk-usage.pyFor example:.
/opt/oracle/ocsm/usr/share/pld/scripts/admin/change-disk-usage.py
                                -d1 <new-size> -d2 <new size>
Use d2 only if dual disks are being used. However, if the new partition space is lesser than the previous size then data is deleted. Ensure that the size is larger than the preconfigured size.