- Hardware Guide
- Oracle Talari D6000 Hardware Guide
- Booting with the USB Drive
Booting with the USB Drive
Complete the following tasks to boot with the bootable USB drive.
See the following sections for how to create a bootable USB drive.
- Connect to the serial port (#16 on back panel). It is configured at 115200 baud.
- Insert the install
USB drive into the rear of the unit (#15 on back panel).
Figure 1-2 Device Back Panel

- Login to the Service Processor.
- Reset the HOST and
connect to the HOST using the following command:
ORACLESP-1907XC3025 login: root Password: Detecting screen size; please wait...done Oracle(R) Integrated Lights Out Manager Version 4.0.4.33 r128860 Copyright (c) 2019, Oracle and/or its affiliates. All rights reserved. Warning: password is set to factory default. Warning: HTTPS certificate is set to factory default. Hostname: ORACLESP-1907XC3025 -> reset /system << RESET HOST Are you sure you want to reset /System (y/n)? y Performing hard reset on /System -> start /HOST/console/ << connect to Host console Are you sure you want to start /HOST/console (y/n)? y Serial console started. To stop, type ESC ( - Wait for the HOST
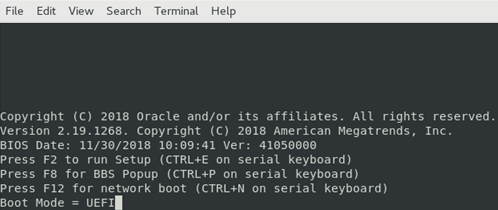
to boot. After about 1 minute, the first boot screen appears.
Figure 1-3 Boot Screen
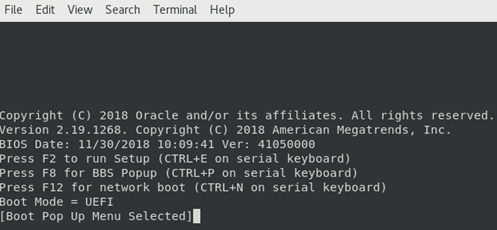
- Press CTRL-P until
[Boot Pop Up Menu
Selected]is displayed on the screen.
Figure 1-4 Boot Pop Up Menu
The Boot Device menu is displayed in about 2 minutes.
Figure 1-5 Boot Device Menu
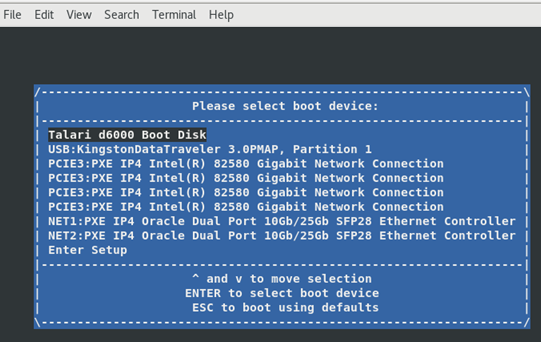
- Using the Up/Down
arrows keys, position the cursor on your install USB boot device. Press the
ENTER key to select the USB boot device.
Figure 1-6 USB Boot Device
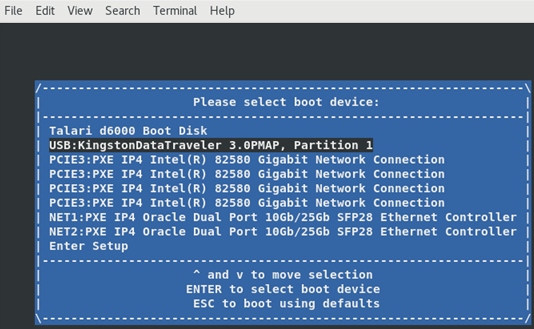
The GNU GRUB menu is displayed. It has a 5 second timeout.
Figure 1-7 GNU GRUB Menu
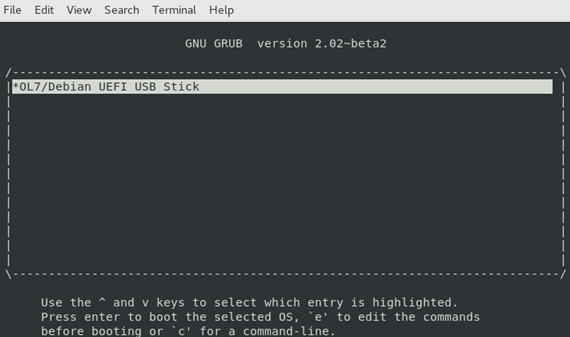
The system is now booting the USB. This process may take up to 5 minutes. After the process is complete, a login prompt is displayed. If you have missed viewing the login prompt in the boot messages, press the ENTER key at any time, for a new login prompt. This is safe.
Figure 1-8 System Booting Using the USB
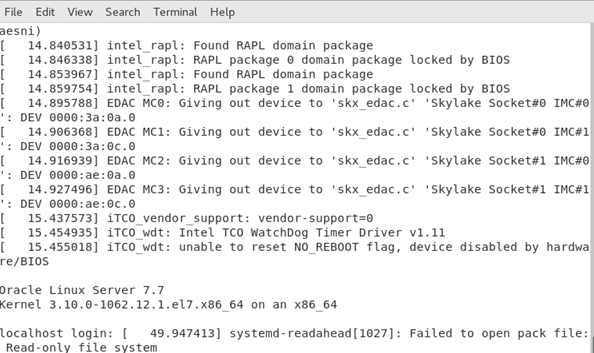
- Login to the
system with user name root and a password of talari.
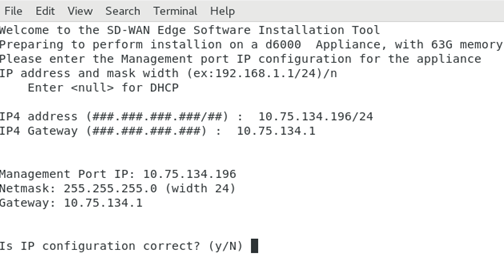
You can set the IP address of the appliance now, or you can set it after installation.
- Choose any one
option:
- If you want to defer the setup, press the ENTER key when the system prompts you for IP4 address and press y to indicate that the configuration is correct.
- Otherwise, enter the IP4 address with mask width and optionally the gateway. After completing it, pressy to indicate that the configuration is correct.
Figure 1-9 Device IP Address Configuration
Note:
After accepting the IP4 configuration, the installation script creates the partitions, formats the partitions, and loads the SDWAN OS and application software on the system. When this is complete, you are asked to type reboot and remove the USB drive. This process takes up to 3 minutes.Figure 1-10 Rebooting

- Type reboot after completion of the previous step.
- After rebooting,
and after the second stage install is complete (which may take up to 10
minutes), login to the appliance.
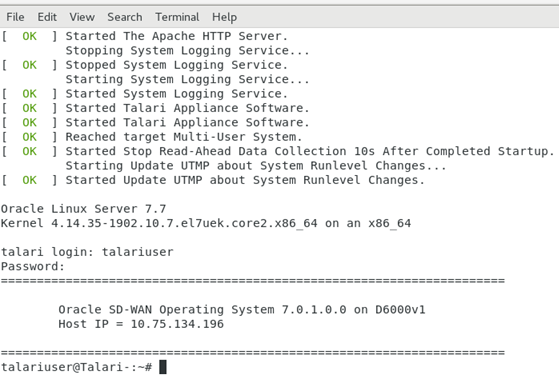
Figure 1-11 Appliance Ready for Use
