User Operations
This chapter provides step-by-step instructions to perform user operations.
1. Login to the Oracle Field Service Mobility application.
You can access the application by adding '/m' to the Oracle Field Service URL <ofs_link/m>.
2. Access the Mobility page using the worker/technician's credentials. The page shows the activities in the queue of the worker.
3. Click Start to start the activity in the worker's queue.
4. Enter the Start Time and Work Activity Number. Click Submit.
5. To enter the activity details:
a. Click the activity. On the Activity Details page, click Assets.
b. Oracle Field Service displays all assets attached to this activity. Select the required asset to view the asset information.

6. To enter the service history details:
a. Click Service History on the Assets page.
b. From the list of service histories that are part of the activity, select the add button (+) next to the specific service history to add the required details.
c. Click Complete. The service histories are displayed in the Entered pane.
Note: Crew can also save the service history in 'pending' state. Click Save. The pending service histories are displayed in the Entered pane with the 'pending' status.

d. To complete a service history in 'pending' status:
a. Click Edit to edit a specific service history.
b. Click Attach to attach images of various artifacts.
c. Browse and select the file to attach. Click Upload.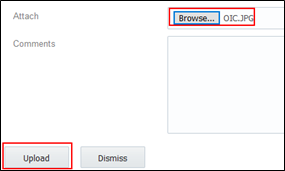
d. Click Complete.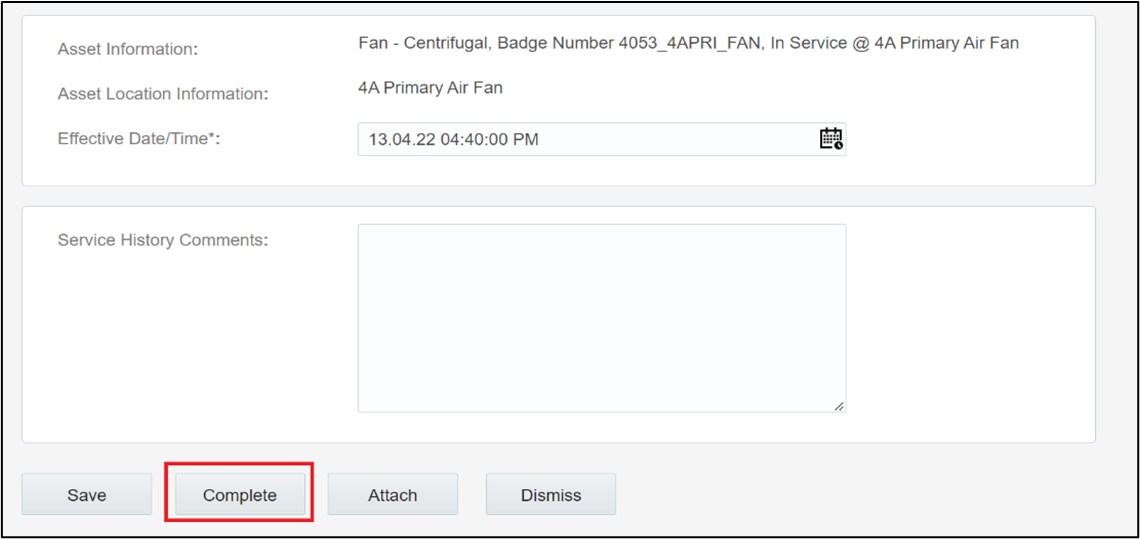
The completed service histories are displayed in the Entered pane. The number of times the service history was edited is also shown.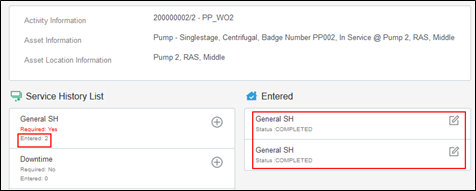
e. Populate the details for required service histories.
f. Make sure the service histories that are marked as 'Required: Yes' have at least one entry.
g. Click Asset Details to navigate back to the Asset Details page.
7. To enter measurement details:
a. Click Measurement.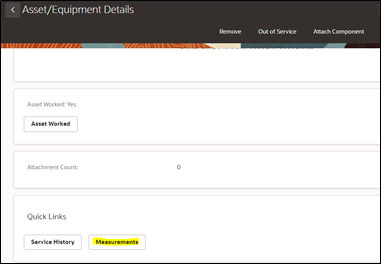
b. Click + on the Measurement Mobility page.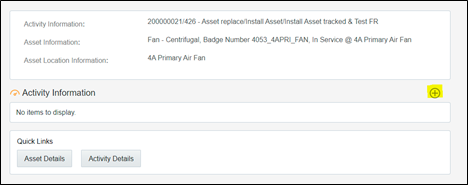
c. Enter the required measurement details and click Save.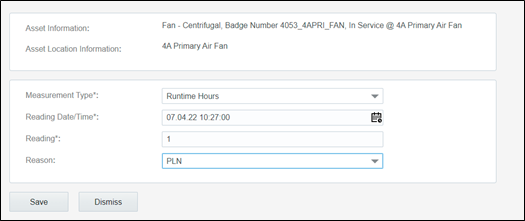
The measurement is displayed in the list.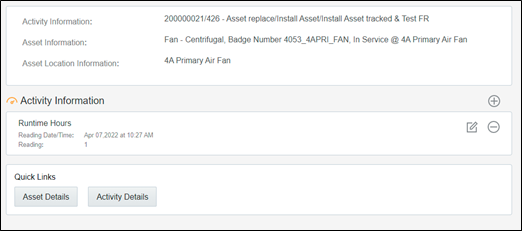
d. Click the edit icon to edit the measurement. You can enter multiple measurements.
e. Click Activity Details to navigate back to the Activity Details page.
8. To enter resource usage details:
a. Click Resource Usage in the Quick Links section in Activity Details page.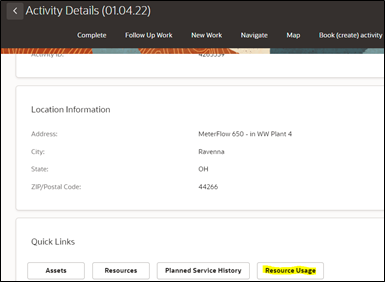
b. Enter time sheets, equipment, and other details.
Crew can enter individual timesheets (highlighted in purple) or for team (highlighted in yellow). In addition, a supervisor can enter individual timesheet for himself if the secure parameter, "ofsc_sup_in_team" is set to true/yes in the plugin settings.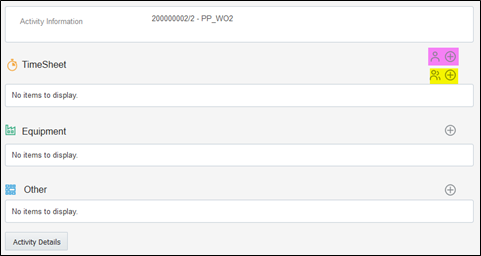
c. Click the '+' icon of multiple crew timesheet (highlighted in yellow above).
d. Enter the required information and click Save.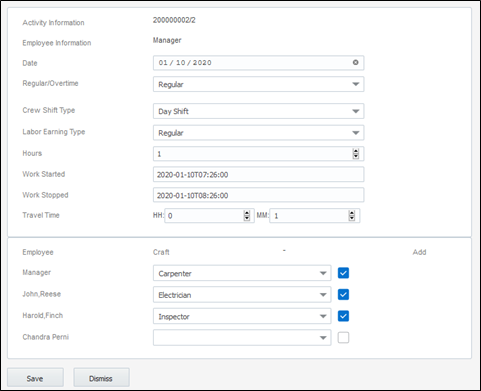
The timesheets for each crew member are created in 'pending' status.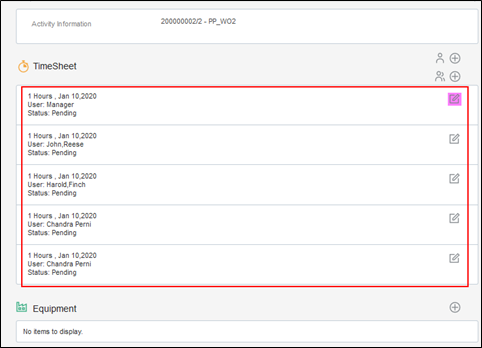
e. Click the edit icon and complete the timesheet.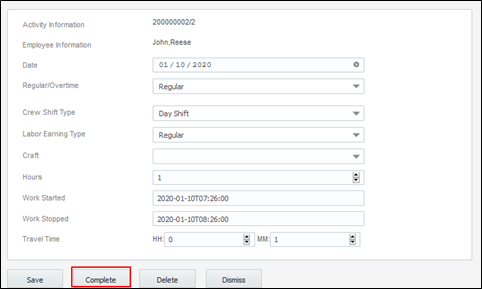
f. Complete the timesheets for all other crew members.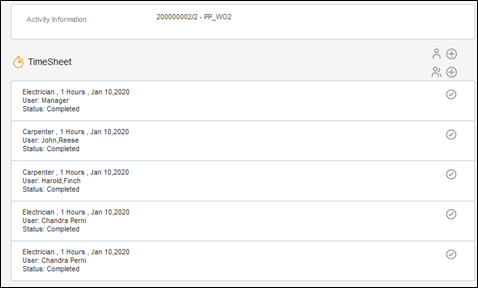
g. Populate entries for equipment and other.
h. Navigate back to the Activity Details page after populating all the required resource details.
i. Click Complete to verify the eligibility of the activity to complete.
j. If all activities are not eligible for activity completion, the following message is displayed. Click OK.
k. Else, it will navigate to the End Activity screen. Click Submit.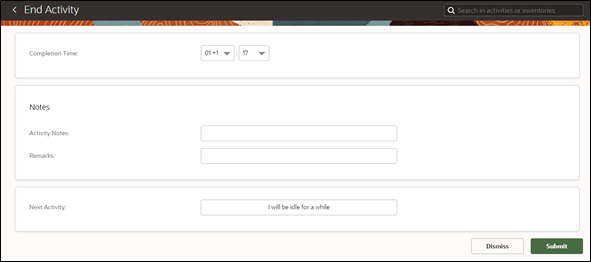
The completion information is sent to Oracle Utilities Work and Asset Cloud Service and the activity is completed.
9. To perform Asset Installs and Removals:
Install Asset:
a. Start the activity.
b. To install an asset, click on the location.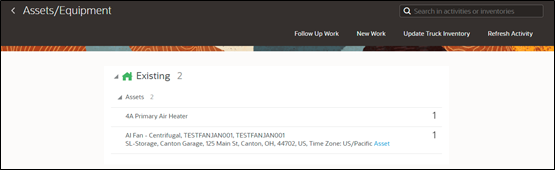
c. Click Install Asset.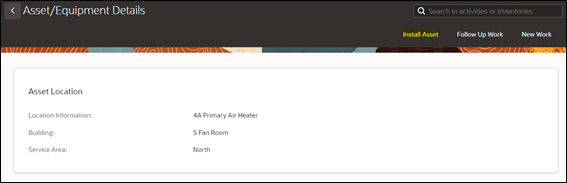
d. Give the Badge Number of the Asset to be installed on this location, and click Install.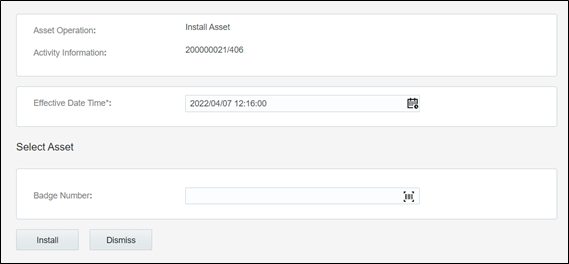
e. The newly installed asset is shown in the Installed pool.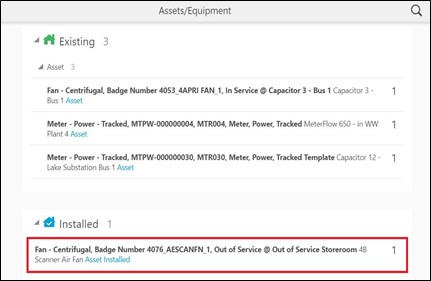
Attach Component:
a. Start the activity.
b. To attach a component, click the asset.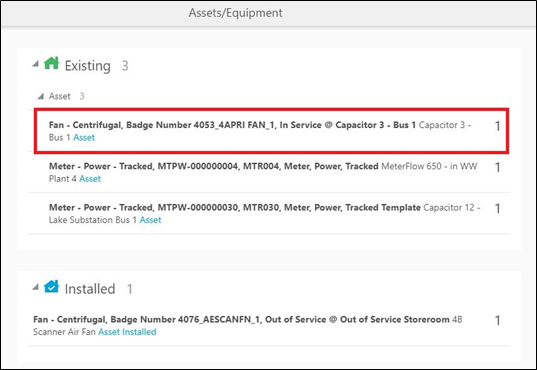
c. Click Attach Component.
d. Enter the Badge Number of the Component to be attached and click Attach.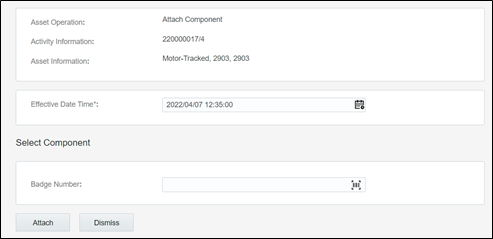
The attached component is shown in the Installed Pool.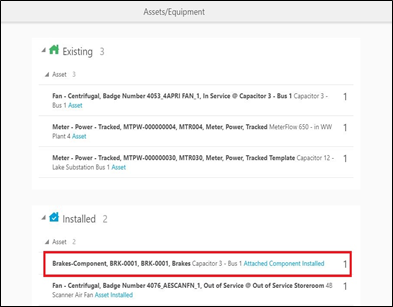
Out of Service:
a. Start the activity.
b. To move an asset out of service, click the asset.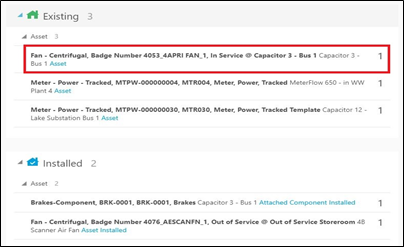
c. Click Out of Service.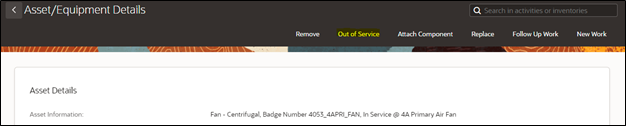
d. Enter the effective date/time and click Submit.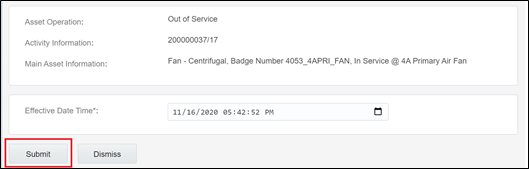
The asset moves to out of service status in Deinstalled pool.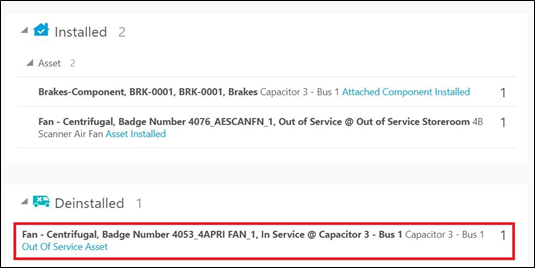
Remove Asset/Component:
a. Start the activity.
b. To remove a specific asset/component, click it.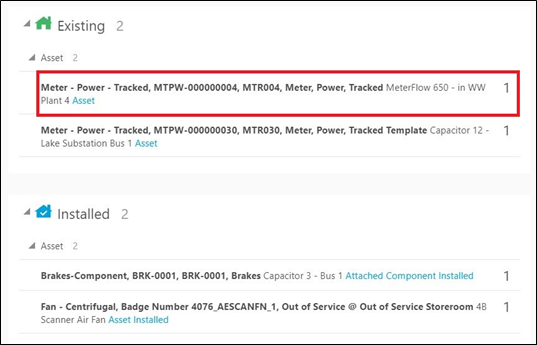
c. Click Remove.
d. Enter the effective date/time and click submit.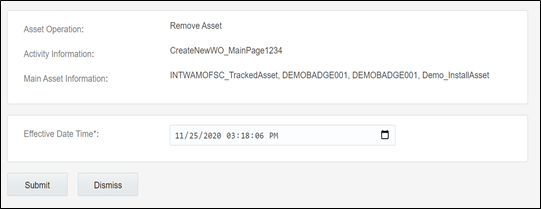
The asset/component is removed and moved to the Deinstalled pool.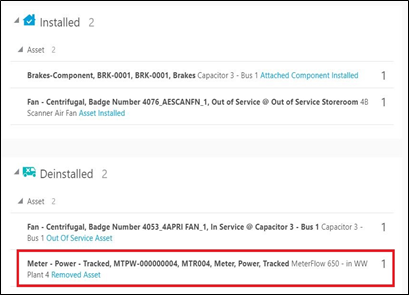
Undo Install:
a. To undo an installation, click the newly installed asset in the Installed pool.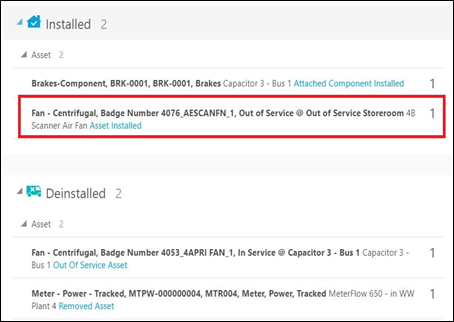
b. Click Undo Install Asset.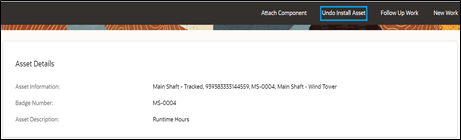
c. Click Submit.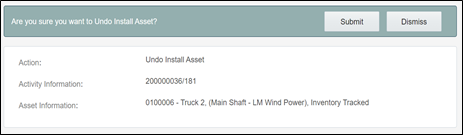
The asset/component installation is undone and it disappears from Installed Pool.
Undo Attach:
a. To undo attach, click the newly attached component in Installed pool.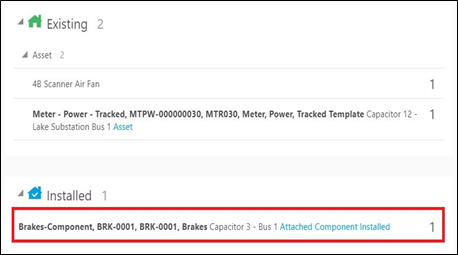
b. Click Undo Attach Component. 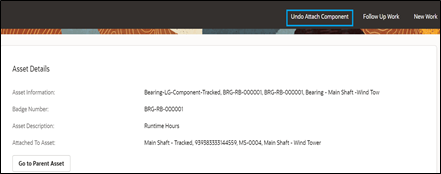
c. Click Submit.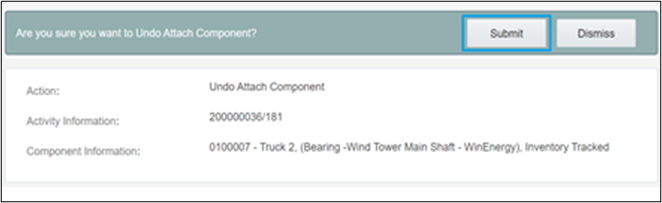
d. The attach operation is undone and the component disappears from installed pool.
Navigate to Parent Asset:
a. To navigate to the parent asset, click the newly attached component in the Installed pool.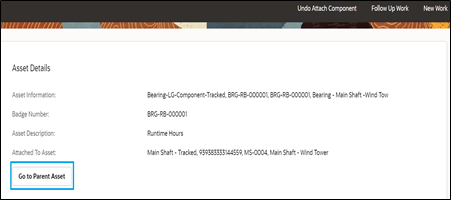
b. Click on Go to Parent Asset to navigate to the parent asset to which the component is attached to.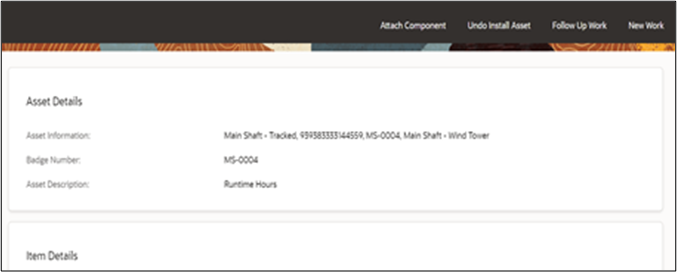
Undo Remove:
a. To undo remove, click the removed asset.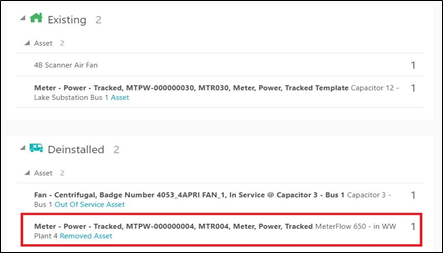
b. Click Undo Remove.
c. Click Submit.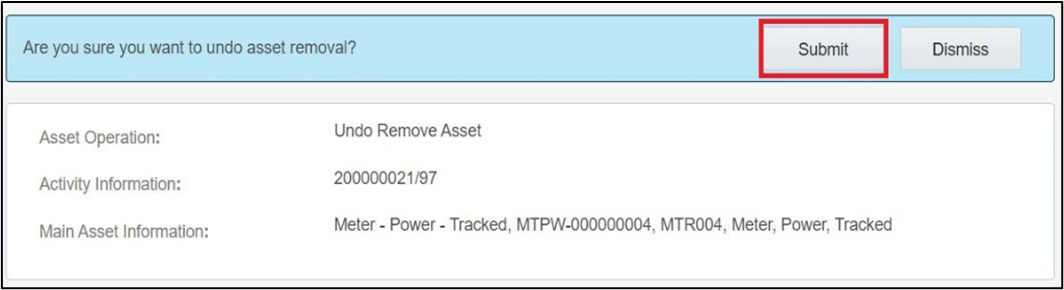
The removal is undone and asset disappears from Deinstalled pool.
Back to Service:
a. To move asset back to service, click Asset in Out of Service.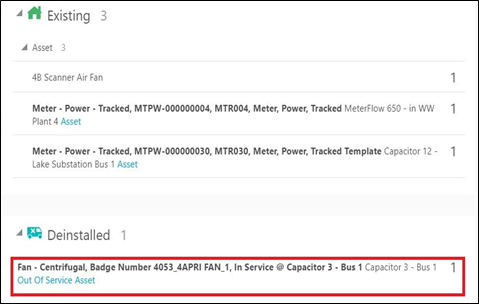
b. Click Back to Service.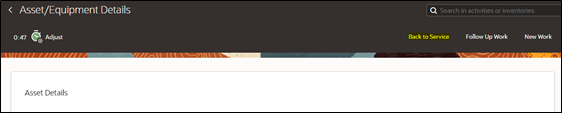
c. Click Submit.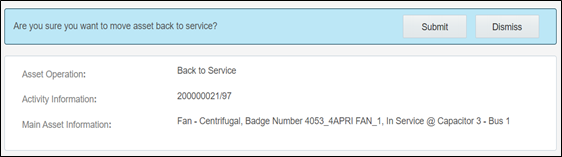
The asset moves to the Existing pool.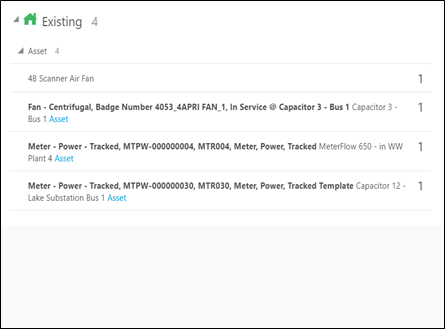
Replace Asset:
a. Click the asset that needs to be replaced.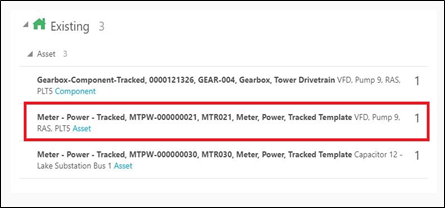
b. Click Replace.
c. Give the badge number of the asset to be replaced with and click Replace.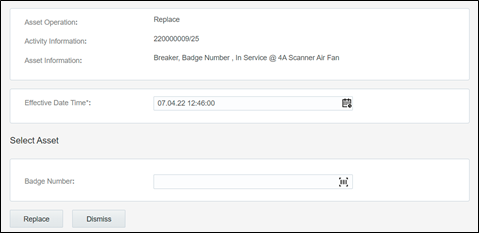
The new asset moves to the Installed pool and the replaced asset moves to the Deinstalled pool.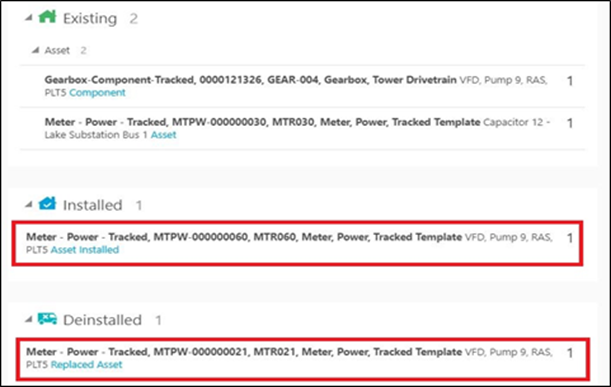
Replace the Component:
a. Click the component to be replaced.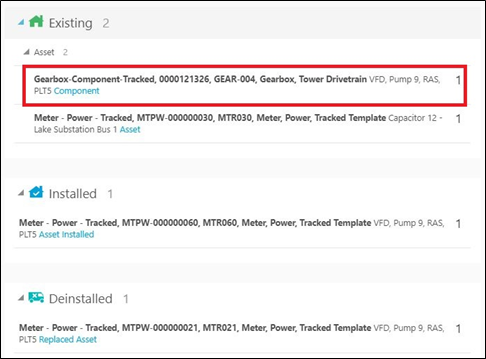
b. Click Replace.
c. Enter the badge number of the replacing component and click Replace.
The replaced component moves to the Deinstalled pool and the newly attached component moves to the installed pool.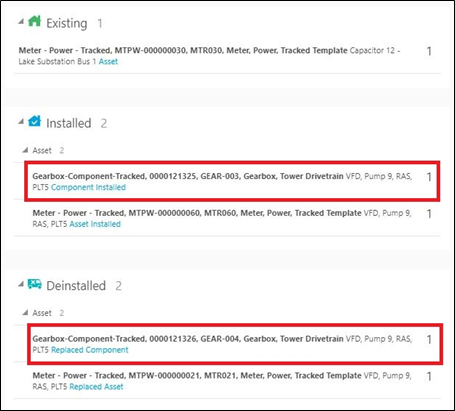
Undo Replace:
a. Click Installed Asset/Component.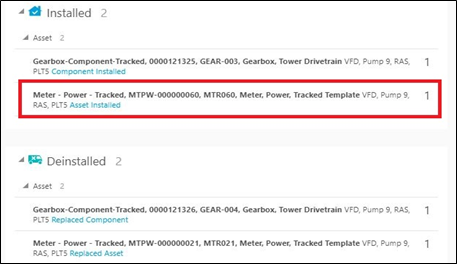
b. Click Undo Replace.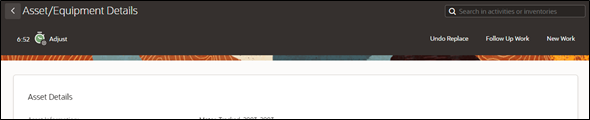
c. Click Submit.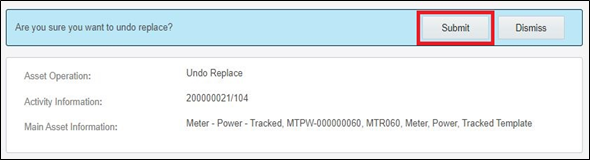
The replaced asset moves back to existing pool.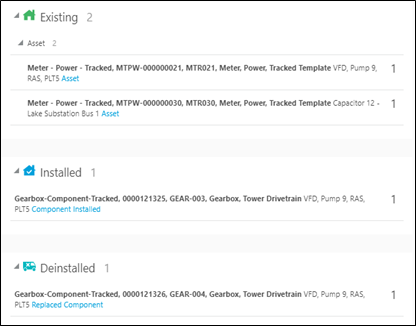
d. Repeat the above steps to undo replace for a component.