Enabling Quota Management at Bucket Level
Note that quota management can only be enabled at a bucket level. To do so:
1. Select quota, capacity area, resource info.
2. Select the Use as Capacity Area checkbox.
The quota Management feature is enabled for this bucket. You can now add the management information to your quota matrix.
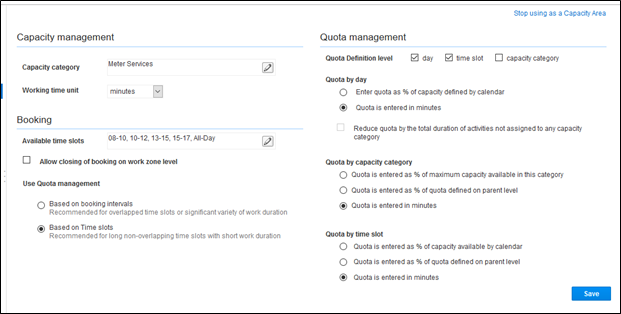
3. In the Quota Management section, configure the following features:
• Time Slots: Edit to add time slots to this bucket. If the time-interval (availability) based booking is configured, do not add time-slots.
• Capacity Categories: Edit to define capacity category types.
4. Click OK.
Configuring Quota Options
To configure the quota management settings:
1. Navigate to the Configuration page.
2. Select Time slot based quota checkbox and select Quota.
3. Select a capacity area/bucket from the left-hand pane.
4. Click the Configuration icon.
5. On the bucket’s Configuration page, configure the parameters as shown in the figure below. 
