Configuring BICC Extract
To import job definitions into the target BICC application in Oracle Fusion ERP Cloud:
1. Navigate to the package and copy the ERPSCM_ActiveSubinvExtBICC_WACS.zip zip file to the subinventory local directory.
2. Login to the Oracle Fusion ERP Cloud BICC application using BIADMIN/<password>.
https://FA OHS Host:FA OHS Port/biacm (or)
https://<Fusion cloud application URL>/biacm
Example: https://Fusion cloud application URL.com:443/biacm
3. Verify the port when accessing the URL to run the report from BICC.
4. Create a new user “BIADMIN” (if not available) with following roles:
• ORA_ASM_APPLICATION_IMPLEMENTATION_ADMIN_ABSTRACT
• OBIA_EXTRACTTRANSFORMLOAD_RWD
• ORA_ASM_APPLICATION_IMPLEMENTATION_CONSULTANT_JOB
• ORA_ASM_APPLICATION_IMPLEMENTATION_MANAGER_JOB
• BICC_UCM_CONTENT_ADMIN
• RCS_SCM_EXTRACT_TRANSFORM_LOAD_DUTY
• OBIA_EXTRACT_TRANSFORM_LOAD_DUTY
5. Upload the bulk/incremental zip file.
a. Login to Oracle Business Intelligence Cloud Connector Console.
b. From the tool bar on the right pane, click the Manage offerings and Data stores icon.
c. Click Import Customization.
d. On the Import Customization page, click Browse to navigate to the source folder and select the zip file.
e. Click Import.
6. From the tool bar on the right pane, click the Manage Jobs icon > Manage Jobs to verify if the job is uploaded successfully.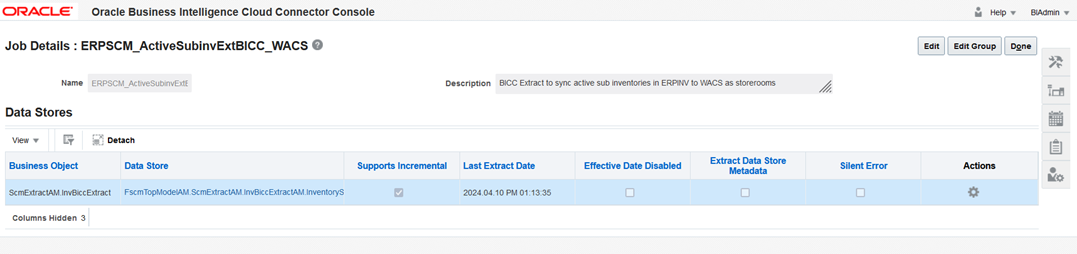
7. Select Data Store > Edit Data Store Details to modify the Query Filter if necessary.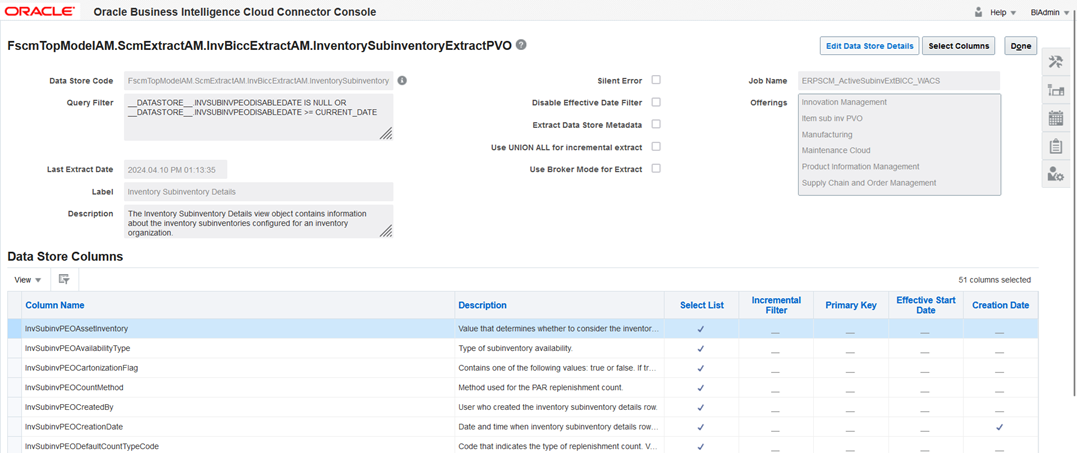

__DATASTORE__.INVSUBINVPEODISABLEDATE IS NULL OR __DATASTORE__.INVSUBINVPEODISABLEDATE >= CURRENT_DATE is the Query Filter which fetches only the active Subinventories in the extract. Initially it fetches all the Subinventories (Bulk), next it fetches only the modified or newly created ones (Incremental) since last extract datetime. The same Job does the Bulk and Incremental extracts.
8. Click Save to complete the updates.
Note: If the content cannot be loaded directly, use the CSV files in the package to copy the content to the Data Store setting and select the columns manually.
Important! If the steps mentioned above generate an error, do the following:
1. Perform the steps 1 to 4 mentioned above.
2. On the right pane, select Manage Jobs.
3. Click + to create a new job.
4. Enter the following details:
• Name: ERPSCM_ActiveSubinvExtBICC_WACS
• Description: BICC Extract to sync active sub inventories in ERPSCM to WACS as storerooms.
5. From the Offering drop-down list, select “All”.
6. Search for the “FscmTopModelAM.ScmExtractAM.InvBiccExtractAM.InventorySubinventoryExtractPVO” data store and select it.
7. Select the Enabled for Extract checkbox and click Save.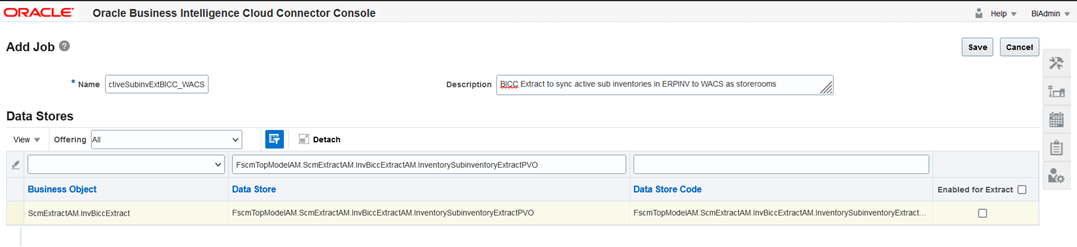
8. After the business object is saved, the data store is displayed.
9. Click the job and then click data store.
10. On the data store, click Edit Data Store Details.
11. Enter the following query in the Query Filter.
DATASTORE__.INVSUBINVPEOSUBINVENTORYTYPE=1 AND (
DATASTORE .INVSUBINVPEODISABLEDATE IS NULL OR
DATASTORE .INVSUBINVPEODISABLEDATE >= CURRENT_DATE)
12. Click Done.
13. On the main screen, click Select Columns.
14. Include the necessary columns and click Save.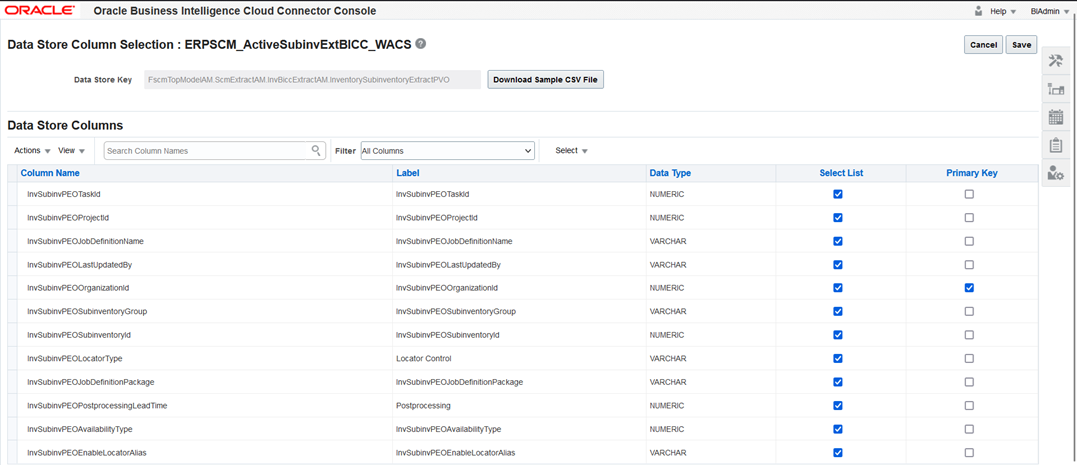
15. Mark “InvSubinvPEOOrganizationId” as the Primary Key.
16. Mark “InvSubinvPEOLastUpdateDate” as the Incremental Key.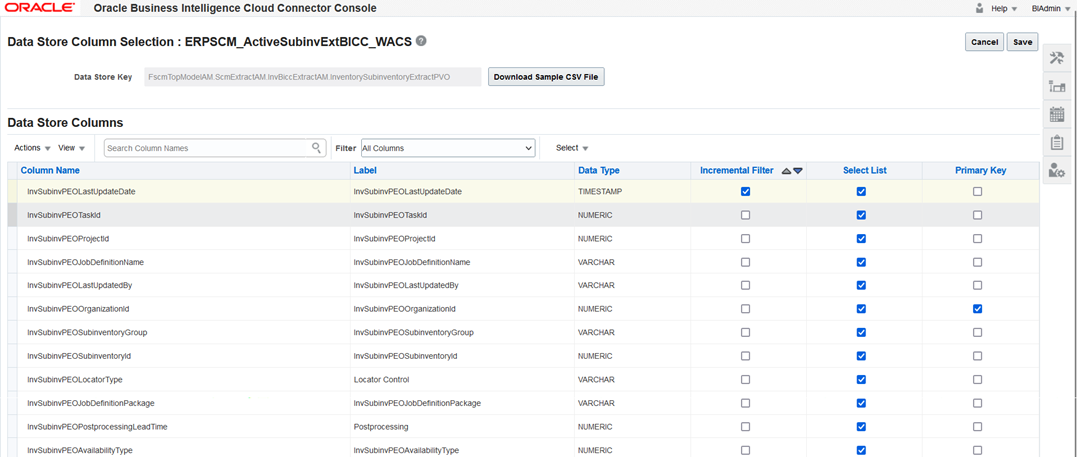
17. Click Save.
To manually create an extract from the package, download the package first. It includes the following files:
• Use C.JOB.csv to fetch Name and Description.
• Use C_JOB_DATA_STORE_CUST_COL_REL.csv to identify columns to be included in the Select Column field. Add the respective primary and incremental keys in the column.
• Use C_JOB_DATA_STORE_REL.csv to get the data store.
• Use C_JOB_DATA_STORE_RUNTIME.csv to get the query to be updated in the data store.