Configuring Outages
Self-service options are available to the customer to view outages applicable to them, report a problem or outage with their utility service, and view a service outage map.
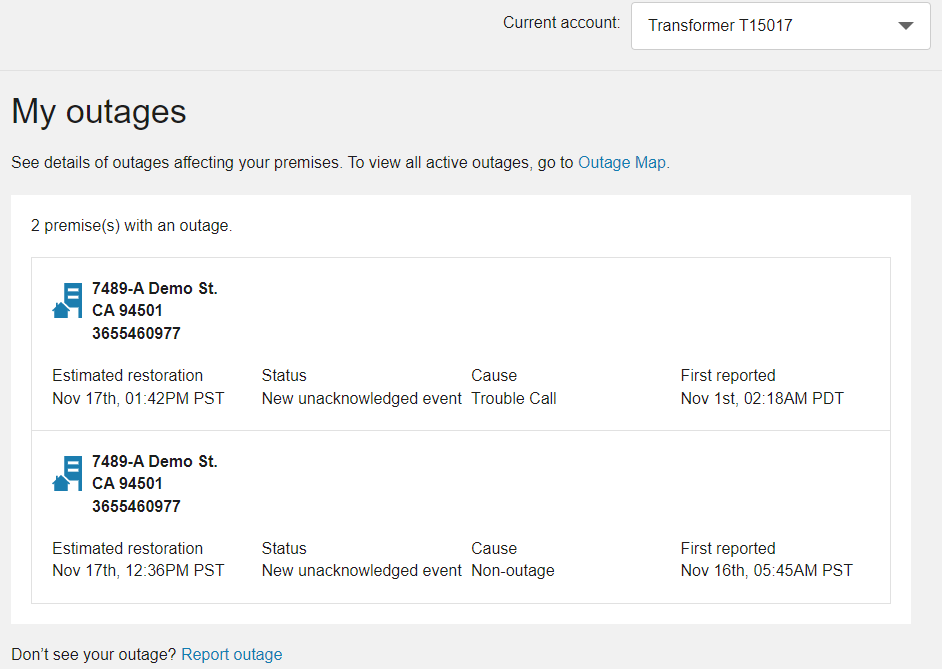
Configuring My Outages
The My Outages feature provides customers with personalized information about the outages affecting their service addresses. Examples of the My Outages features are provided below.
Note: This documentation provides steps to complete these configuration tasks using Oracle Utilities Customer Care and Billing. However, many of these tasks can be completed with other applicable products such as Oracle Utilities Customer to Meter or Oracle Utilities Customer Cloud Service. Refer to your applicable product documentation for steps to complete the configuration using your Oracle Utilities product. Additionally, this documentation assumes that you know how to create the various objects listed below as well as modify or create master configurations. For additional details on these tasks, refer to the applicable Oracle Utilities Documentation.
To configure outage information retrieval
Complete the following steps to define the processing logic for reported outages.
- Log in to Customer Care and Billing as a user with edit access for the CC&B Self-Service Integration master configuration.
- From the Admin menu, select General, and select Master Configuration. From the Master Configuration zone, select the Edit option for the CC&B Self-Service Integration master configuration. The master configuration is displayed.
- From the Outage zone, for Job History Processing Script, type
CMRetJobHsy. Review and modify CMRetJobHsy as needed. - Select Save to save your master configuration changes.
Configuring My Outages Messaging and Behavior
Note: This documentation provides steps to complete configuration tasks using the Opower Configuration Tool. For more information on using the Opower Configuration Tool, refer to the Oracle Utilities Opower Configuration Tool User Guide.
To configure My Outages messaging and behavior:
- From the Opower Configuration Tool, select Widgets, and then select Current Outages. The configurations for Current Outages are displayed.
- To configure text and messages of the My Outages feature:
- Select Text (locale), where locale is the language locale you are configuring.
- Text and messages are included for the text used throughout the various experiences of the My Outages features. For example, the Estimated Restoration configuration allows for the definition of the label for the estimated restoration time message.
- Select Save Changes to save any changes to the default text and messages. Text and messages that are directly available are updated in the preview, while text and messages in secondary locations may not be directly highlighted in the preview.
- To configure the behavior of the My Outages feature:
- Select Functionality.
- Make any required configuration changes. For example, the Date Time Format option allows you to define how date and time information is formatted. The help text provided with configurations can provide additional explanation of each available option.
- Select Save Changes to save any changes to the default configurations. Certain configurations that are directly available are updated in the preview, while some configurations may not be directly highlighted in the preview.
- Refer to the Oracle Utilities Opower Configuration Tool User Guide for steps to publish configuration changes.
Configuring Report Outages
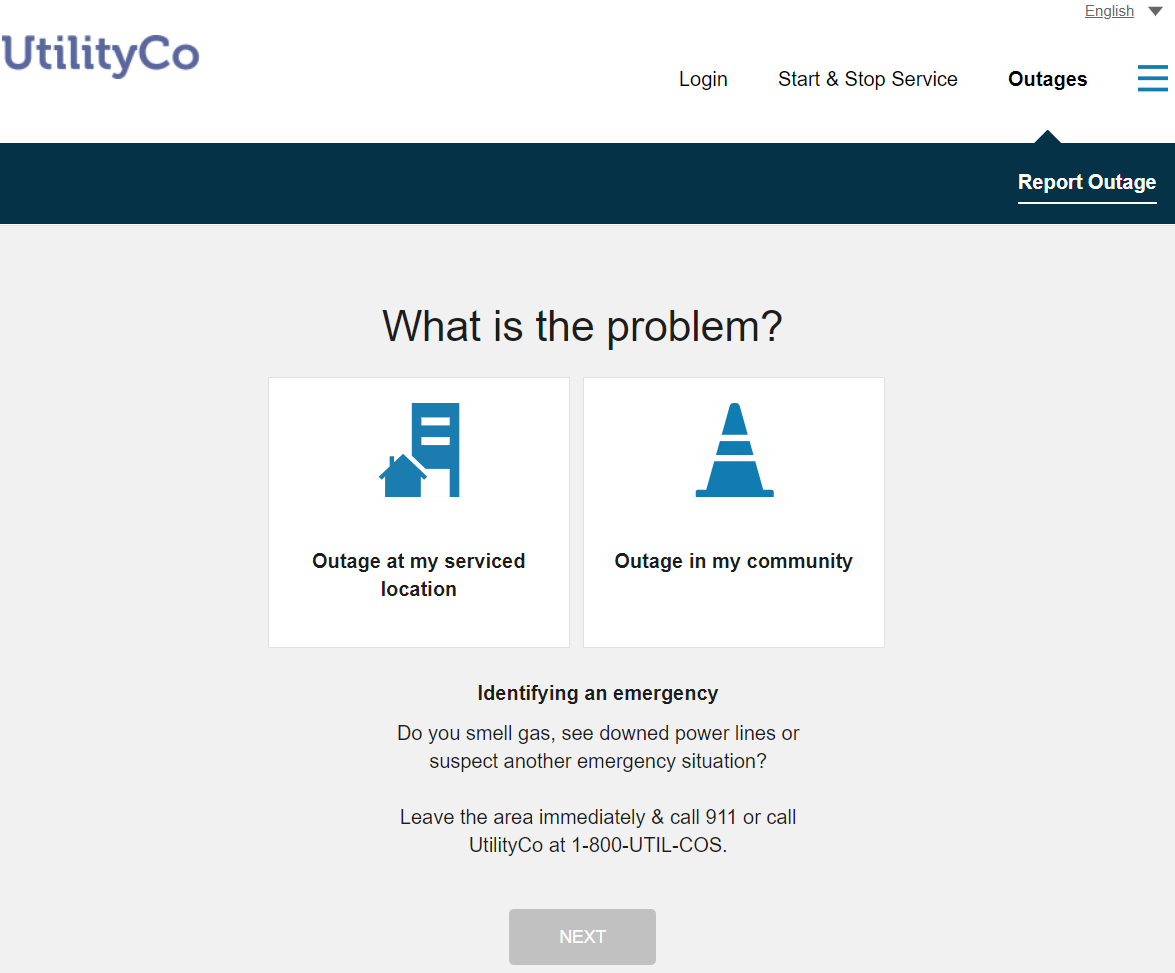
The service reporting options walk the customer through the process and collect information needed by utilities to efficiently troubleshoot service issues. Examples of the Report Outages features are provided below.
Report Outages Landing Page:
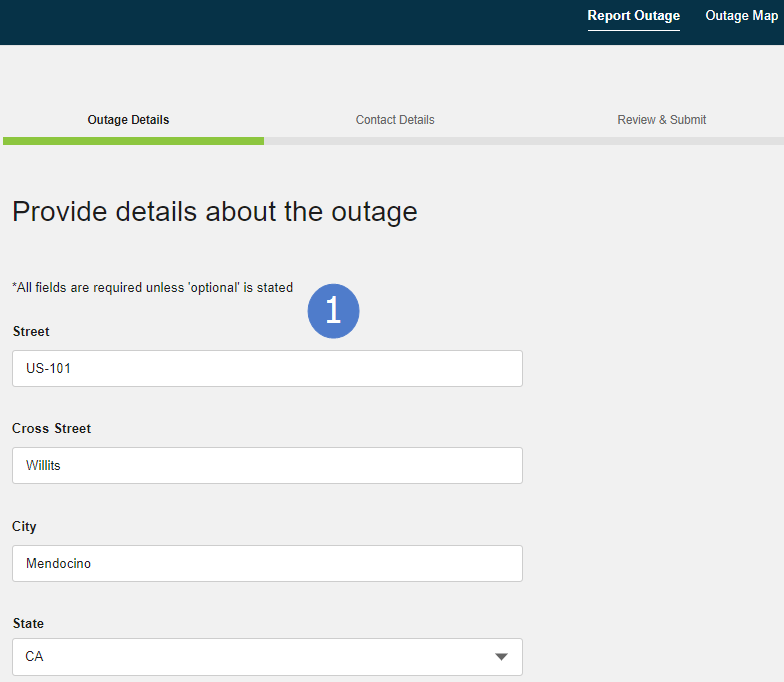
Report Outages Details:
Note: This documentation provides steps to complete these configuration tasks using Oracle Utilities Customer Care and Billing. However, many of these tasks can be completed with other applicable products such as Oracle Utilities Customer to Meter or Oracle Utilities Customer Cloud Service. Refer to your applicable product documentation for steps to complete the configuration using your Oracle Utilities product. Additionally, this documentation assumes that you know how to create the various objects listed below as well as modify or create master configurations. For additional details on these tasks, refer to the applicable Oracle Utilities Documentation.
To configure report an outage processing
Complete the following steps to set up the processing logic for reported outages.
- Log in to Customer Care and Billing as a user with edit access for the CC&B Self-Service Integration master configuration.
- From the Admin menu, select General, and select Master Configuration. From the Master Configuration zone, select the Edit option for the CC&B Self-Service Integration master configuration. The master configuration is displayed.
- From the Outage zone, for Report an Outage Processing Script, type
CMReportOtg. Review and modify the CMReportOtg script as needed. - For Service Type, select Electric. Be aware that only one service type can be configured for Outages support at a time.
- Select Save to save your master configuration changes.
To configure the outage type
Complete the following steps to define the outage types that customers can report.
- Log in to Customer Care and Billing as a user with edit access for the CC&B Self-Service Integration master configuration.
- From Admin menu, select Outage Call Type, and select Add.
- Complete the following information to configure a property outage:
- Main:
- Outage Call Type: DSS – Property
- Description: Property Outage
- Related Transaction BO: Outage Call with Premise
- Service Task Type Status: Active
- Outage Call Details:
- Premise Required: Enabled
- Number of Outages Codes: 3
- Outage Group Codes: Click the Add icon once for each definition described below:
- First Group Code:
- Sequence: 1
- Outage Group Code Characteristic Type: Power
- Default Value: All Power Out
- Second Group Code:
- Sequence: 2
- Outage Group Code Characteristic Type: Cause
- Default Value: Unselected
- Third Group Code:
- Sequence: 3
- Outage Group Code Characteristic Type: Description
- Default Value: Unselected
- First Group Code:
- Main:
- Select Save to create the property outage type.
- From Admin menu, select Outage Call Type, and select Add. Complete the following information to configure a public outage:
- Main:
- Outage Call Type: DSS – Public
- Description: Public Outage
- Related Transaction BO: Outage Call without Premise
- Service Task Type Status: Active
- Outage Call Details:
- Premise Required: Disabled
- Number of Outages Codes: 3
- Outage Group Codes: Click the Add icon once for each definition described below:
- First Group Code:
- Sequence: 1
- Outage Group Code Characteristic Type: Power
- Default Value: All Power Out
- Second Group Code:
- Sequence: 2
- Outage Group Code Characteristic Type: Cause
- Default Value: Unselected
- Third Group Code:
- Sequence: 3
- Outage Group Code Characteristic Type: Description
- Default Value: Unselected
- First Group Code:
- Main:
- Select Save to create the public outage type.
- From the Admin menu, select General, and select Master Configuration. From the Master Configuration zone, select the Edit option for the CC&B Self-Service Integration master configuration. The master configuration is displayed.
- From the Outage zone complete the following definitions:
- Property Outage Call Type: Property Outage
- Public Outage Call Type: Public Outage.
- Select Save to save the master configuration changes.
To configure self-service task
Complete the following steps to define the self-service tasks that support Report Outages.
- Log in to Customer Care and Billing as a user with edit access for the CC&B Self-Service Integration master configuration.
- From the Admin menu, select General, and select Master Configuration. From the Master Configuration zone, select the Edit option for the CC&B Self-Service Integration master configuration. The master configuration is displayed.
- From Menu, select Self-Service, select Self-Service Task Type, and select Add. The Select Business Object dialog box opens.
- From the Service Task Type Business Object drop-down list, select Report Outage Task Type and click OK. The Maintenance page opens.
- Complete the following information for the self-service task type:
- Service Task Type: REPORTOUTAGE
- Description: Report Outage
- Related Transaction Object: Report Outage Task
- Service Task Type Status: Active
- Select Save to create the self-service task type.
- From the Admin menu, select General, and select Master Configuration. From the Master Configuration zone, select the Edit option for the CC&B Self-Service Integration master configuration. The master configuration is displayed.
- Navigate to the Outage zone. From the Service Task Type drop-down list, select the self-service task type Report Outage that you created earlier in this procedure.
- Select Save to save the master configuration changes.
To configure the account lookup identifier
Complete these steps to configure account lookup identifiers:
- Log in to Customer Care and Billing as a user with edit access for the CC&B Self-Service Integration master configuration.
- From the Admin menu, select General, and select Master Configuration. From the Master Configuration zone, select the Edit option for the CC&B Self-Service Integration master configuration. The master configuration is displayed.
- Navigate to the Outage zone. From the ID Type drop-down list, select the appropriate identifier.
- Select Save to save the master configuration changes.
To configure notification preference enrollment option for outage reporting
Complete the following steps to configure the notifications that support outage reporting.
- Log in to Customer Care and Billing as a user with edit access for the CC&B Self-Service Integration master configuration.
- From the Admin menu, select General, and select Master Configuration. From the Master Configuration zone, select the Edit option for the CC&B Self-Service Integration master configuration. The master configuration is displayed.
- Navigate to the Outage zone. From the Notification Type drop-down list, select Outage.
- From the Email Contact Type select the Primary Email option and from SMS Contact Type select Cell Phone.
- Select Save to save the master configuration changes.
To configure the CIS Division
Complete the following steps to define the CIS divisions that support Report Outages.
- Log in to Customer Care and Billing as a user with edit access for the CC&B Self-Service Integration master configuration.
- From the Admin menu, select General, and select Master Configuration. From the Master Configuration zone, select the Edit option for the CC&B Self-Service Integration master configuration. The master configuration is displayed.
- Navigate to the Outage zone. From the CIS Division drop-down list, select the appropriate CIS Division.
- Select Save to save the master configuration changes.
To configure outbound confirmation notifications
If enabling all default notification capabilities, Oracle Utilities recommends that you create an Individual Push notification type for outage confirmation notifications and associate it with the Self-Service Updates parent notification type. The base algorithm associated with outage confirmation notifications is C1OUTNTFTD. For additional information, refer to Configuring Outbound Notifications.
Configuring Report Outages Messaging and Behavior
Note: This documentation provides steps to complete configuration tasks using the Opower Configuration Tool. For more information on using the Opower Configuration Tool, refer to the Oracle Utilities Opower Configuration Tool User Guide.
To configure Report Outages messaging and behavior:
- From the Opower Configuration Tool, select Widgets, and then select Report Outage. The configurations for Report Outage are displayed.
- To configure text and messages of the Report Outages feature:
- Select Text (locale), where locale is the language locale you are configuring.
- Text and messages are included for the text used throughout the various experiences of the Report Outages features. For example, the Zip Placeholder configuration allows for the definition of the placeholder text in the field that prompts for a zip code.
- Select Save Changes to save any changes to the default text and messages. Text and messages that are directly available are updated in the preview, while text and messages in secondary locations may not be directly highlighted in the preview.
- To configure the behavior of the Report Outages feature:
- Select Functionality.
- Configurations are included in sections that reflect the components and supporting information used for Report Outages, such as Fields for account lookup and Format for contact information fields.
- Make any required configuration changes. For example, the Fields for account lookup options allow you to define which fields are used to confirm the account for a customer. You can select Add New to include an additional field and then use one of the allowed field values, such as ssn to include a field for social security number. The help text provided with configurations can provide additional explanation of each available option.
- Select Save Changes to save any changes to the default configurations. Certain configurations that are directly available are updated in the preview, while some configurations may not be directly highlighted in the preview.
- Refer to the Oracle Utilities Opower Configuration Tool User Guide for steps to publish configuration changes.
Configuring the Outage Map
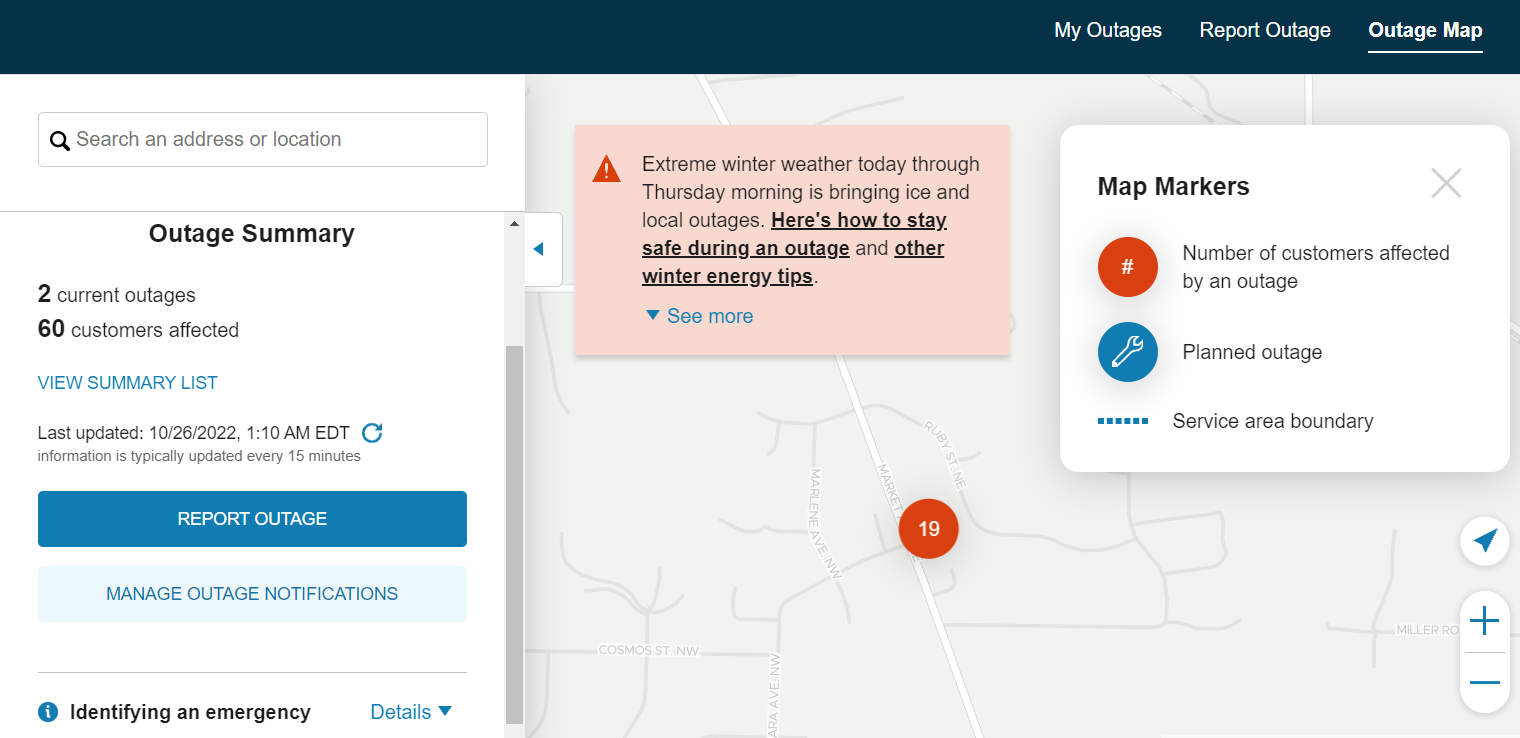
The Outage Map provides information on all outage events affecting the service territory. The Opower Configuration Tool (see Oracle Utilities Opower Configuration Tool User Guide) can be used to configure the messaging and experience of the Outage Map for customers. Examples of the Outage Map features are provided below.
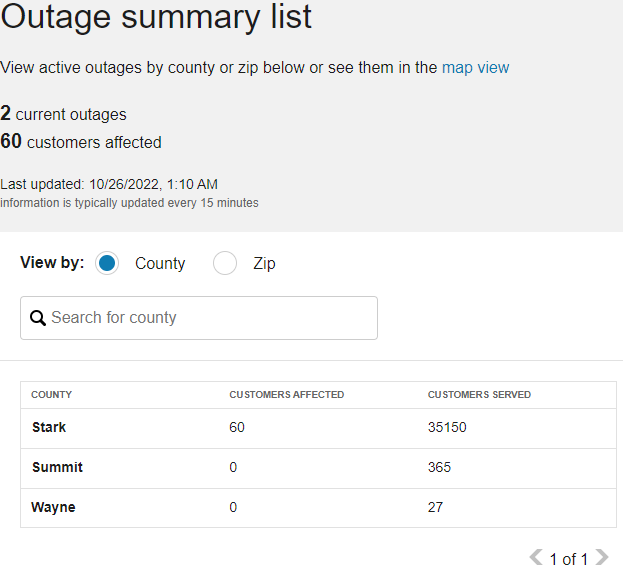
Outage Summary:
Outage Details:
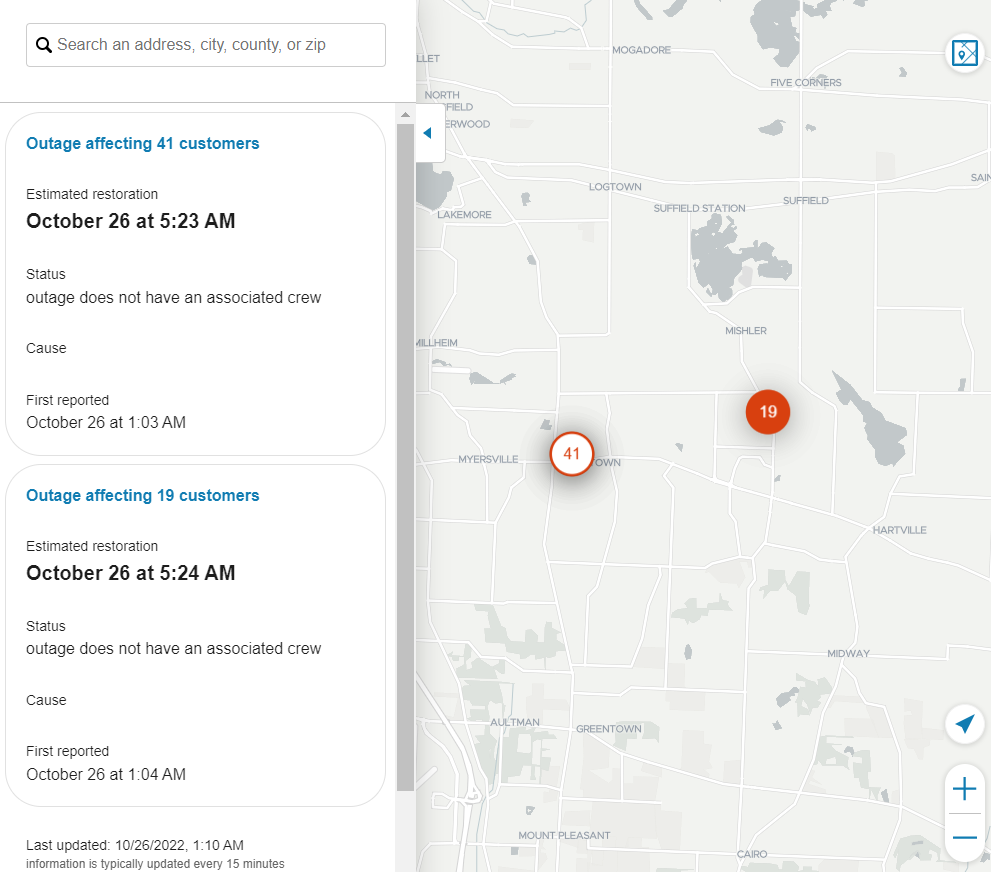
Outage List:
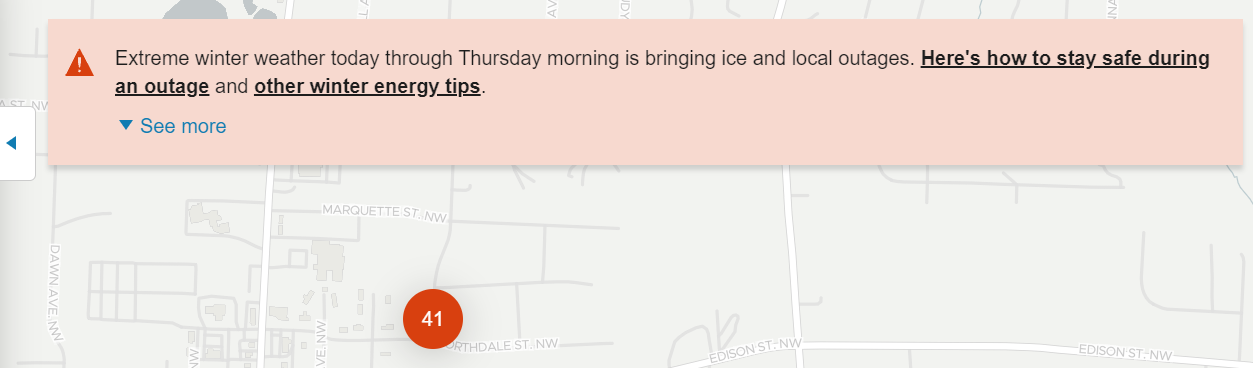
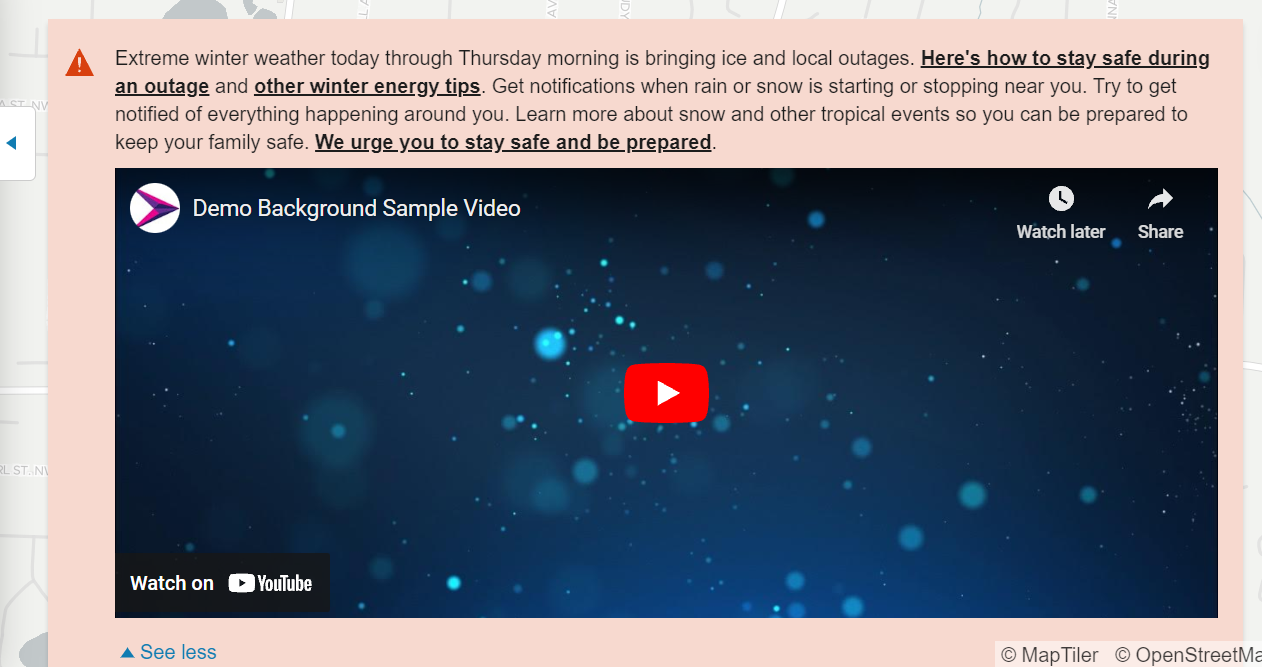
Alert Banners:
The examples below show alert banners displayed on an outage map, including an expanded view of an alert banner with embedded video.
To configure the Outage Map:
- From the Opower Configuration Tool, select Widgets, and then select Outage Map. The configurations for Outage Map are displayed.
- To configure text and messages included on the Outage Map:
- Select Text (locale), where locale is the language locale you are configuring.
- Text and messages are included in categories such as Map for text included on the main Outage Map, and General for text used throughout the various experiences of the Outage Map. For example:
- The Map configurations allow for the definition of the title displayed for the Outage Map legend. They also include the Alert banner configurations for defining the outage banner messaging and media content.
- The General configurations allow for the definition of the summary information for the outage.
- Select Save Changes to save any changes to the default text and messages. Text and messages that are directly available in the Outage Map are updated in the preview, while text and messages in secondary locations may not be directly highlighted in the preview.
- To configure the behavior of the Outage Map:
- Select Functionality.
- Configurations are included in categories that reflect the components of the Outage Map, such as Map and List.
- Make any required configuration changes. The help text provided with configurations can provide additional explanation of each available option. For example:
- The Map options allow you to define the initial map location coordinates. Supplying a set of coordinates defines the Outage Map to display at those coordinates upon initial display. You can also use the Display alert banner option to show or hide a banner during an outage.
- The Details options allow you to show or hide various information related to the outage including the cause and the status of the outage.
- Select Save Changes to save any changes to the default configurations. Certain configurations that are directly available in the Outage Map are updated in the preview, while some configurations may not be directly highlighted in the preview.
- Refer to the Oracle Utilities Opower Configuration Tool User Guide for steps to publish configuration changes.