Maintenance Object wizard
In cases where a whole new "Maintenance object" is being added to the application, and the data is first entered onto the CI_MD_MO and related tables, there is a wizard that will use that meta data as a starting point and with some developer input, create all of the manually coded Java Entity_Impl classes with their proper tree structure, and also optionally create a Java Maintenance class "starting point".
The "Maintenance Object Wizard" is available under the "New .." menu item, either under the file menu, or by right clicking a node in the package explorer (the package explorer option is recommended, as it will default the project and source directory selected). From the list of new wizards available, choose "Other...".
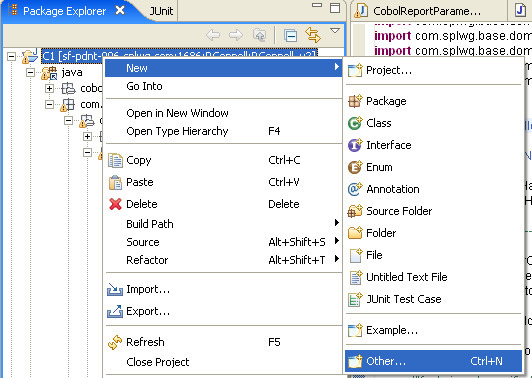
This will open a new dialog, where the maintenance object wizard is under SPL:
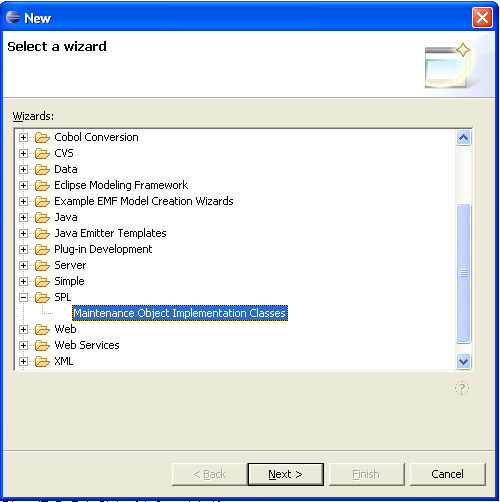
(Note that you can configure Eclipse so that in the future the "Maintenance Object implementation classes" wizard appears directly under the first "New..." menu.)
The first page of the wizard asks for the project and source path to place the new files. Then it asks for the some information it uses to construct the package name for the new files. The standard is that the new classes go under the application's domain path, with a possible extra sub package (e.g., a subsystem, like 'common' or 'customerInformation'), followed by the top level entity's name (e.g., account). The top level entity's name, along with lots of data used by the next page, comes from the maintenance object itself.
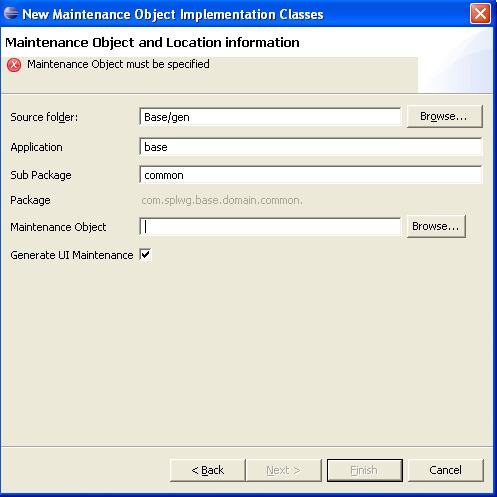
Finally, you can optionally choose to Generate the UI Maintenance (the default is to generate it).
The maintenance object input has a "Browse..." button associated with it that will launch a search dialog where the maintenance object can be searched for by either the Maintenance Object's code, or by the primary table for the maintenance object.
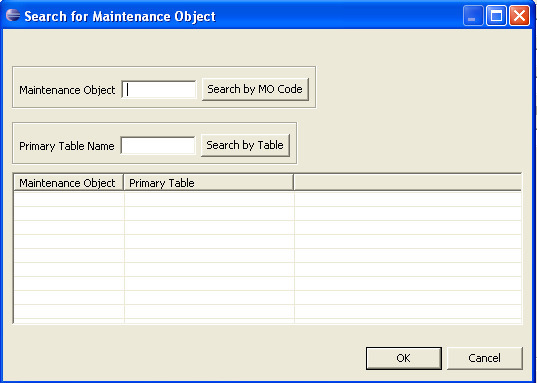
Both of these searches are "likable" in that partial matches starting with the input will be shown.
Pressing OK on the search or double clicking a row will bring the selected maintenance object back into the Maintenance Object input on the main wizard.
Once the main wizard's inputs are specified, the next button can be pressed. This will display the second detailed wizard page. A tree view is displayed with the tree representation of the Maintenance object selected, with its child tables.
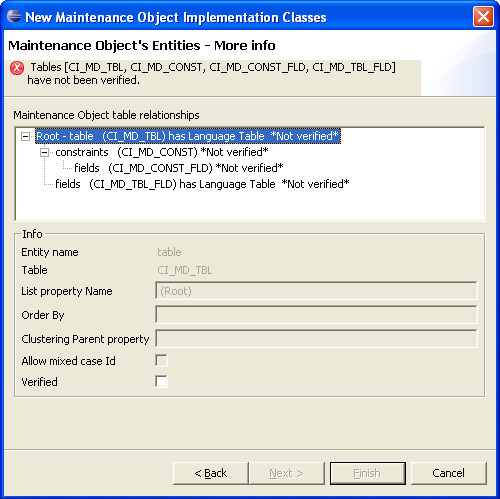
Each node in the tree must be visited in order to enter some information or at least verify that the default data is correct. The nodes themselves show the list property name, the table, whether the table has a language table, and whether the node has been verified.
The selected node's data is shown in the "Info" box below the tree. Only editable information is available to be changed- other values may be disabled. The values that can be changed for each node include the list property name, the order by fields, the clustering parent property, and whether the Id can contain mixed case.
The list property name is the name on the parent that the child collection will be accessed by. For example, in the above Maintenance Object for Table, the table's child collection of rows on the table CI_MD_CONST will be accessed via the property 'constraints'. And likewise, each constraint will then have a child collection called fields.
The order by is an optional property. It is a comma-separated list of columns that specify the order in which the list will be retrieved when the collection is read from the database. An example for the constraints collection would be "CONST_ID, OWNER_FLG".
The clustering parent property comes into play for generated IDs. In some cases, it is beneficial to cluster the generated keys for related objects so that batch threading is more efficient. An example is every Service Agreement can have its ID generated with some portion of its account ID. The account will be accessed off of a serviceAgreement via the property account. Thus the Service Agreement root node in the above dialog would probably have a value of 'account' for the clustering parent property.
In case of user defined string keys, most of the time the application only uses uppercase keys. However, in some cases, mixed case keys are allowed. The "Allow mixed case Id" check box should be checked in this event.
Finally, to ensure that the developer reviews each node's values, the Verified check box must be checked for each node, prior to proceeding to the next page or finishing.
If the option to generate the Maintenance was not chosen, the Finish button will be enabled when the tree nodes' data is complete and valid. Clicking finish will cause all of the entity classes to be created in the specified package, and will open an editor window on each new class.
If the option to generate the Maintenance was chosen on the first page, the "Next>" button should be enabled after all the tree nodes data is finished and valid. Clicking "Next" will then present the final wizard page, where information about the maintenance class can be entered.
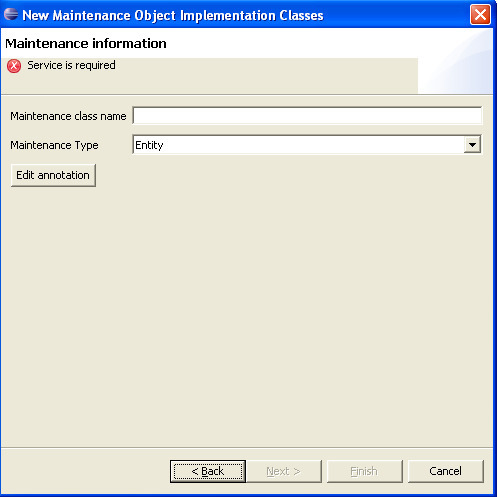
On this page, the maintenance class name and maintenance type can be chosen. The maintenance class name is something like the root entity name followed by 'Maintenance" by convention, although it can differ. The maintenance type choices are 'Entity', which is a standard maintenance for a single instance of the maintenance object at a time, with nested child lists, etc. The other choice is 'List", which is a simplified maintenance where many instances of the maintenance object are edited at once in a grid. This is usually limited to simple objects with a code and description, and maybe one or two other fields. Anything more complex would be difficult to present in the single grid.
(Note that changing the Maintenance Type will clear out any existing information on the annotation.)
After the class name and maintenance type is chosen, there is more information required to be edited on the Annotation. See Java Annotation in the Developer Guide for details about annotations. Clicking on the "Edit Annotation" button will launch a new dialog window for editing the annotation. The most important information that every maintenance must specify on the annotation is the service name. This field is immediately visible on the main dialog for the annotation, and must have a value entered. Most everything else will have been defaulted with appropriate values from the Maintenance Object meta data. See the developer guide mentioned above for more information on using the annotation editor.
After the maintenance information and annotation is complete and valid, pressing finish will cause the entity files and an empty maintenance class to be created, and editor windows opened on each of them.
Parent topic