Understanding the Main Menu - Full Operations User Type
The main menu bar has four major sections:

1. The Main Menu icon
The Main Menu opens the side panel with the main menu options:
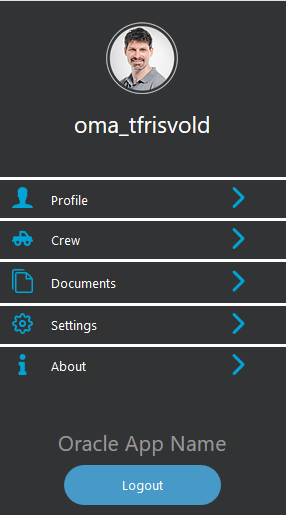
Each Main menu option will be describe below.
2. The OMA user and Crew status – This section will inform the OMA user of the NMS server they are connected to, their username they logged in with, the crew they are associated with and the crew status and availability.
3. The Network Status – This will let the user know the network status of the device and will have three modes:
- The device is connect to the network and has a good connection to the NMS server.
- The device is connect to the network and the NMS server is not responding
- The device is not connect to any network and the NMS server is not reachable.
4. The Crew Emergency icon – This will bring up the crew emergency popup and will give the user the opportunity to cancel the emergency or to notify the NMS system of the emergency. If the user does not respond, the notification will happen automatically after a timeout period. Once in Emergency mode, the icon will turn yellow and a subsequent selection of the icon will allow the user to cancel the emergency if they can enter their login password.
Understanding Your Profile
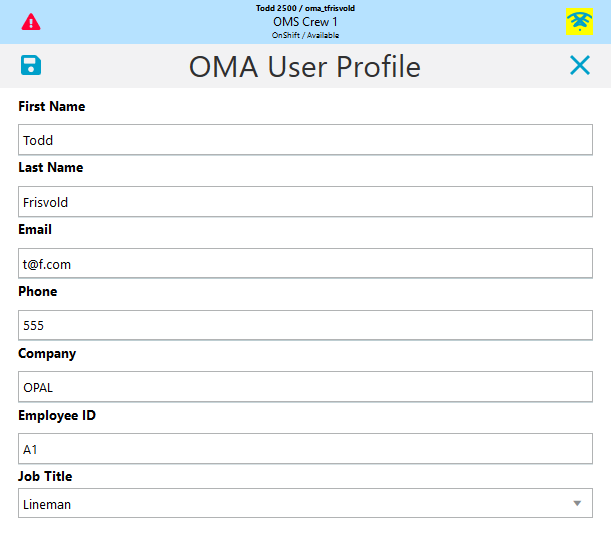
A completed profile is required for all OMA users and will automatically pop up when you log in for the first time. You are required to populate the entire profile in order to continue to use OMA:
Understanding Crews
The crew page contains the following tabs:
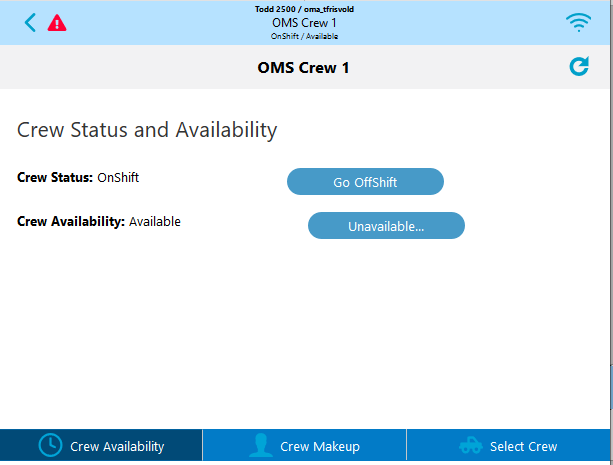
1. The Crew Availability tab
The crew availability tab allows the user to put the crew on or off shift and allows them to identify the crew as unavailable (Meeting, Coffee, …) and back to available:
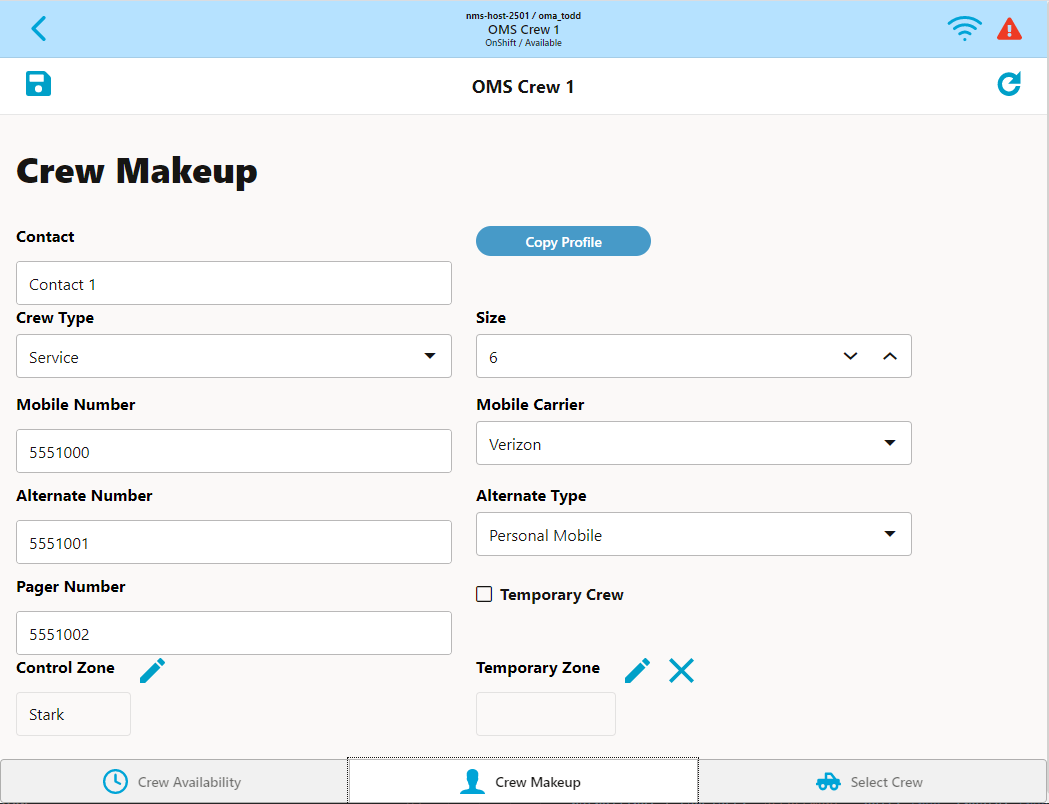
2. The Crew Makeup Tab
The Crew Makeup tab allows the user to update the details about the crew they are associated with:
3. The Select Crew Tab
The Select Crew tab is available to users with permission to change their associated crew. To associate yourself with a crew, select the crew card and then hit the check mark. Your associated crew will then appear on the top of the main menu bar.

Using the Documents Page
The Documents page lists any files or documents made available for the crew:

If you tap a file in the list, you will have the option to view or download it.
View (): Allows you to view the file, if it is supported on your device or browser.
Download ( ): Allows you to download the selected file.
 ): Allows you to download the selected file.
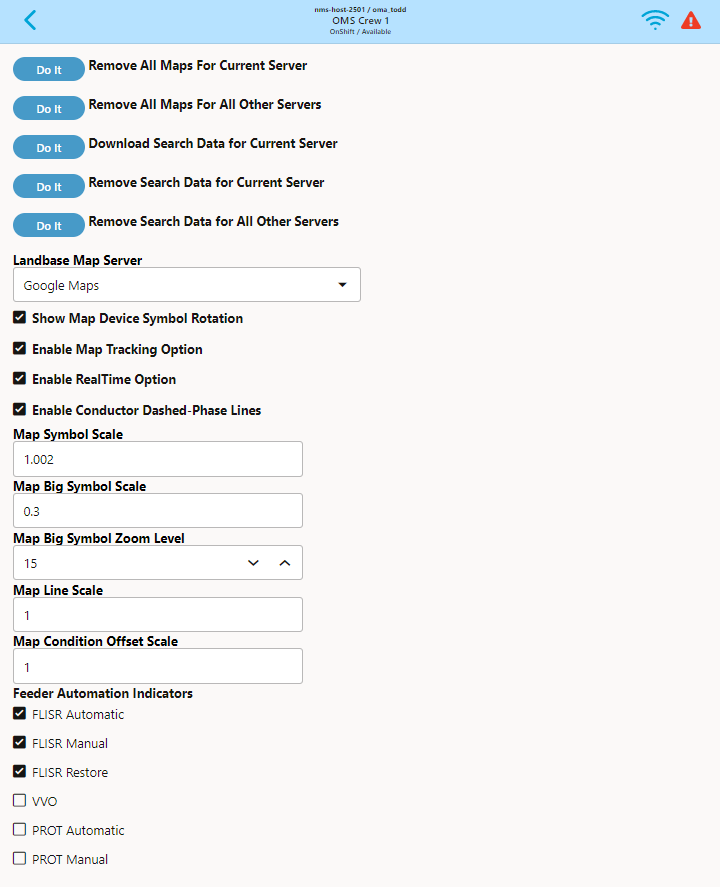
Understanding Settings
The Settings page provides options for removing maps, selecting a map server, dynamic map updates (Real-Time mode), and selecting whether to display device symbol rotation. Other options may be made available to the user based on project requirements:
About
The About page provides information about the application and associated servers.
• Application Information
• Product Version: The OMA release that is running.
• Project Version: The version number for a build of OMA with project specific customizations.
• Application Key
• Application Server: Information about the NMS application server.
• Mobile Server: Information about the NMS mobile gateway server.
Logout
To log out, select the main menu and the Logout button. On logout, you may be asked a number of questions, for example:
• Would you like to suspend your active jobs?
• Would you like to mark your crew as off-shift on logout?