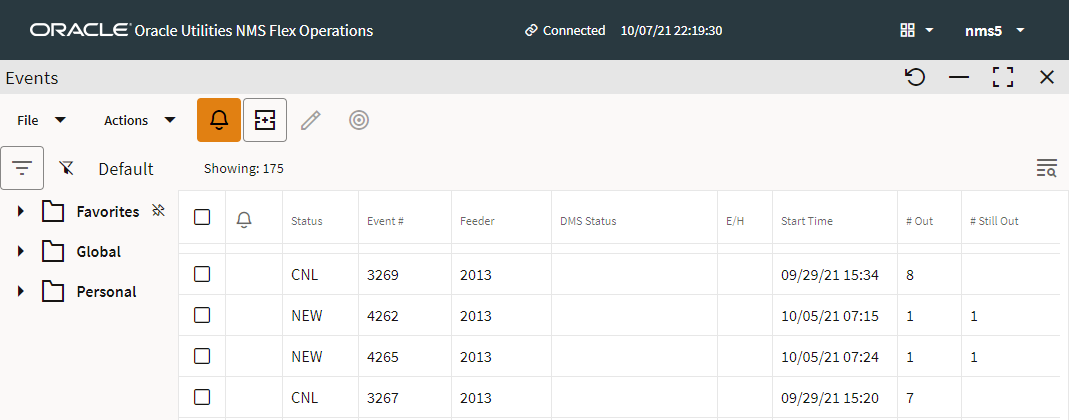
Understanding Table Filtering
Understanding Quick Filters
Quick Filters allow you to filter based on values in a column. To perform a quick filter, hover your mouse over a column heading and then click the filter button ( ) in the drop down toolbar. In the filter panel that opens, select an item to filter or enter the criteria in the Search box. Once you have filtered on a column, the filter icon (
 ) will be displayed in the column header and a quick filter breadcrumb will display the filter results and criteria. To remove the quick filter, click the remove quick filter button (
 ).
).
 ) in the drop down toolbar. In the filter panel that opens, select an item to filter or enter the criteria in the Search box. Once you have filtered on a column, the filter icon (
 ) will be displayed in the column header and a quick filter breadcrumb will display the filter results and criteria. To remove the quick filter, click the remove quick filter button (
 ).
).Example: filtering on the #Out column for a value of 10.

Note: Quick filtering is applied to all filtered views, but it is removed when you close the tool or log off.
Creating and Using Global and Personal Filter
Tools with table data may be filtered using filter panes that allow you to access Global (system-wide) filters and create and rearrange your own (Personal) filters. You may also create shortcuts to your favorite filters. Filtering in Flex Operations is very similar to filtering in the Web Workspace (see “Filtering Data Tables”).
To use an existing filter, click the Filter icon ( ) in the upper left corner of the table title area; the Filter pane will open.

The Filters pane has collapsible sections (folder icons that expand) that list filters that you have set as Favorites, Global filters saved by your organization, and Personal filters that you have created.
The filter pane will close once you click away from it; to keep it visible, click the pin icon ( ).
).
Create a New Personal Filter Folder Structure
To create a personal filter folder, right-click the Personal folder icon and select New Folder....
Create a New Personal Filter
To create a personal filter, do the following:
1. Select the Personal folder that you want to add the filter to, right‑click, and select New Filter....
2. In the New Filter dialog box, enter the criteria for your filter.
• Name: Your new filter's name.
• Value: Becomes active when you select an operator that requires a value to match.
Note: See “Filtering Data Tables” for the operator.
3. Click Add to List to add the filter criteria to list below.
4. You can build more criteria and select whether they all should match or if any can match. Click And to have the filter only show data that matches all of the added filter criteria; click the Or to match a criterion.
Editing and Removing Filters
To edit a filter statement, select it from the list, make your changes, and click Replace.
Removing Filters
You can remove any of the added filter statements by selecting it in the list and clicking Remove. To remove all of the statements in the list, click Clear.
Temporarily Disabling a Filter
Filters may be temporarily disabled by clicking the Disable Filter button ( ) next to the filter name. The Filter Name will be updated with strikethrough text to indicate that it is not active. For example, if you’ve selected In Progress to be your filter, but then decide to disable it, the filter bar will indicate so. Click the No Filter button again to restore the filter.
