Installation Overview
The Oracle Utilities Smart Grid Gateway installation involves the following steps:
Note: For instructions to install Oracle Utilities Service Order Management, refer to Installing Oracle Utilities Service Order Management.
1. Review the different tiers of the application architecture as described in Application Architecture.
2. Understand the hardware requirements for installing the application and the supported platforms for the application and database servers as described in Supported Platforms and Hardware Requirements.
Note: The installation and administration of the database server tier is described in detail in the Oracle Utilities Smart Grid Gateway Database Administrator’s Guide.
3. Plan your installation as described in Planning the Installation. This chapter includes lists of the required software for each supported combination of operating system and application server.
4. Install the database as described in the Oracle Utilities Smart Grid Gateway Database Administrator’s Guide.
Note: When implementing Oracle Utilities Smart Grid Gateway with Oracle Utilities Meter Data Management, both the Smart Grid Gateway and Meter Data Management database components should be installed in the same database.
5. Install all required third-party software as described in Installing Prerequisite Software. The required software is listed for each supported combination of operating system and application server.
6. Install the Oracle Utilities Application Framework.
7. Install Oracle Utilities Smart Grid Gateway.
8. Complete the post-installation and configuration tasks for your Oracle Utilities Smart Grid Gateway adapter as described in Configuring the Oracle Utilities Smart Grid Gateway Adapters.
9. Follow the installation guidelines described in Additional Tasks.
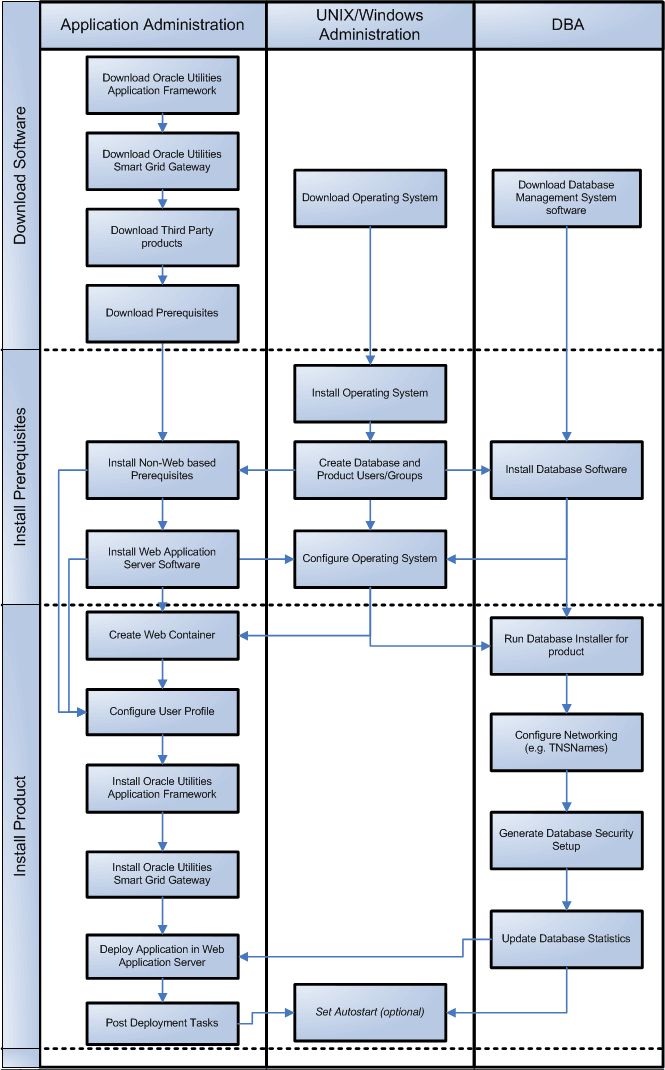
The following diagram provides an overview of the steps to install and configure Oracle Utilities Smart Grid Gateway: