- Account Configurations User Guide
- Bank Parameters
- Configure Bank Parameters
1.1 Configure Bank Parameters
This topic describes the systematic instructions to configure Bank Parameters.
- On Home screen, click Account Configurations. Under Account Configurations, click Bank Parameters.
- Under Bank Parameters, click Configure.The Configure screen displays.
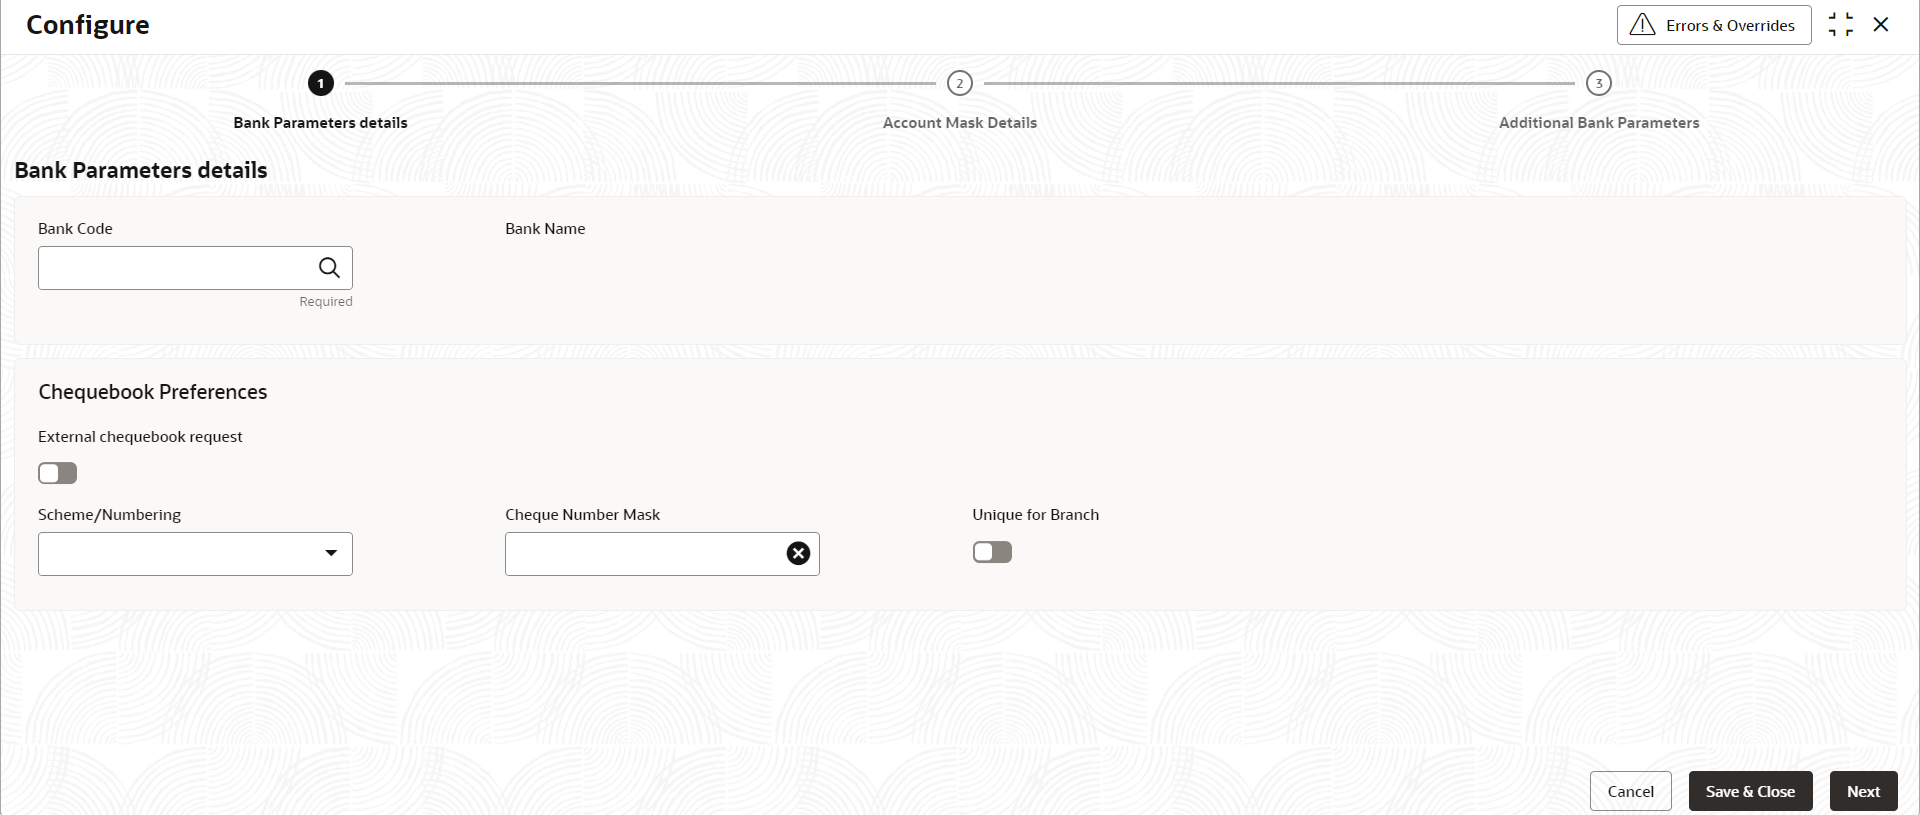
Figure 1-1 Configure Bank Parameters details
- On Bank Parameters details tab, specify the fields.
For more information on fields, refer to the field description table below.
Table 1-1 Bank Parameters Details - Field Description
Field Description Bank Code Specify the bank code which uniquely identifies your bank. Bank Name The detailed name of the bank is displayed and this field is auto-populated on selection of the bank code. External chequebook request Enable this check box to allow external cheque book requests. Scheme/Numbering The drop-down list displays the below option. - Automatic
Cheque Number Mask Specify the cheque number mask to be used by the bank. You can define numeric cheque mask as a series of N or an alphanumeric mask containing alphabets A and numbers N. Click to open the Add Mask window. Select Cheque Mask Fields from the given list and click Add to add the Cheque Number Mask.
Note:
Alphanumeric Cheque Mask is issued to the account only when the cheque generation is manual.Unique for Branch Specify whether cheque number should be unique at the branch level. For cheque numbers that are generated, you can choose to make cheque numbers unique across the branches of your bank.
If you specify that the cheque numbers are unique at the Branch level, then you cannot issue two accounts with the same cheque number. If you specify that the cheque numbers are not unique at the Branch level, then the same cheque number can be issued to one or more accounts.
The user must enable this field to be set to the Bank parameter.
Cheque MaskTable 1-2 Cheque Mask
Field Mask Character Mask Length Alphabet A 2 Number N User defined Validations:
- While defining an alpha numeric cheque mask, the alphanumeric character should always precede the numeric characters. For example: AANNNN, A being alpha numeric character and N being numeric character.
- When you enter the cheque mask field, the screen is refreshed with valid characters and options for cheque.
- Specify the information in the fields and click Next.The Account Mask Details tab displays.
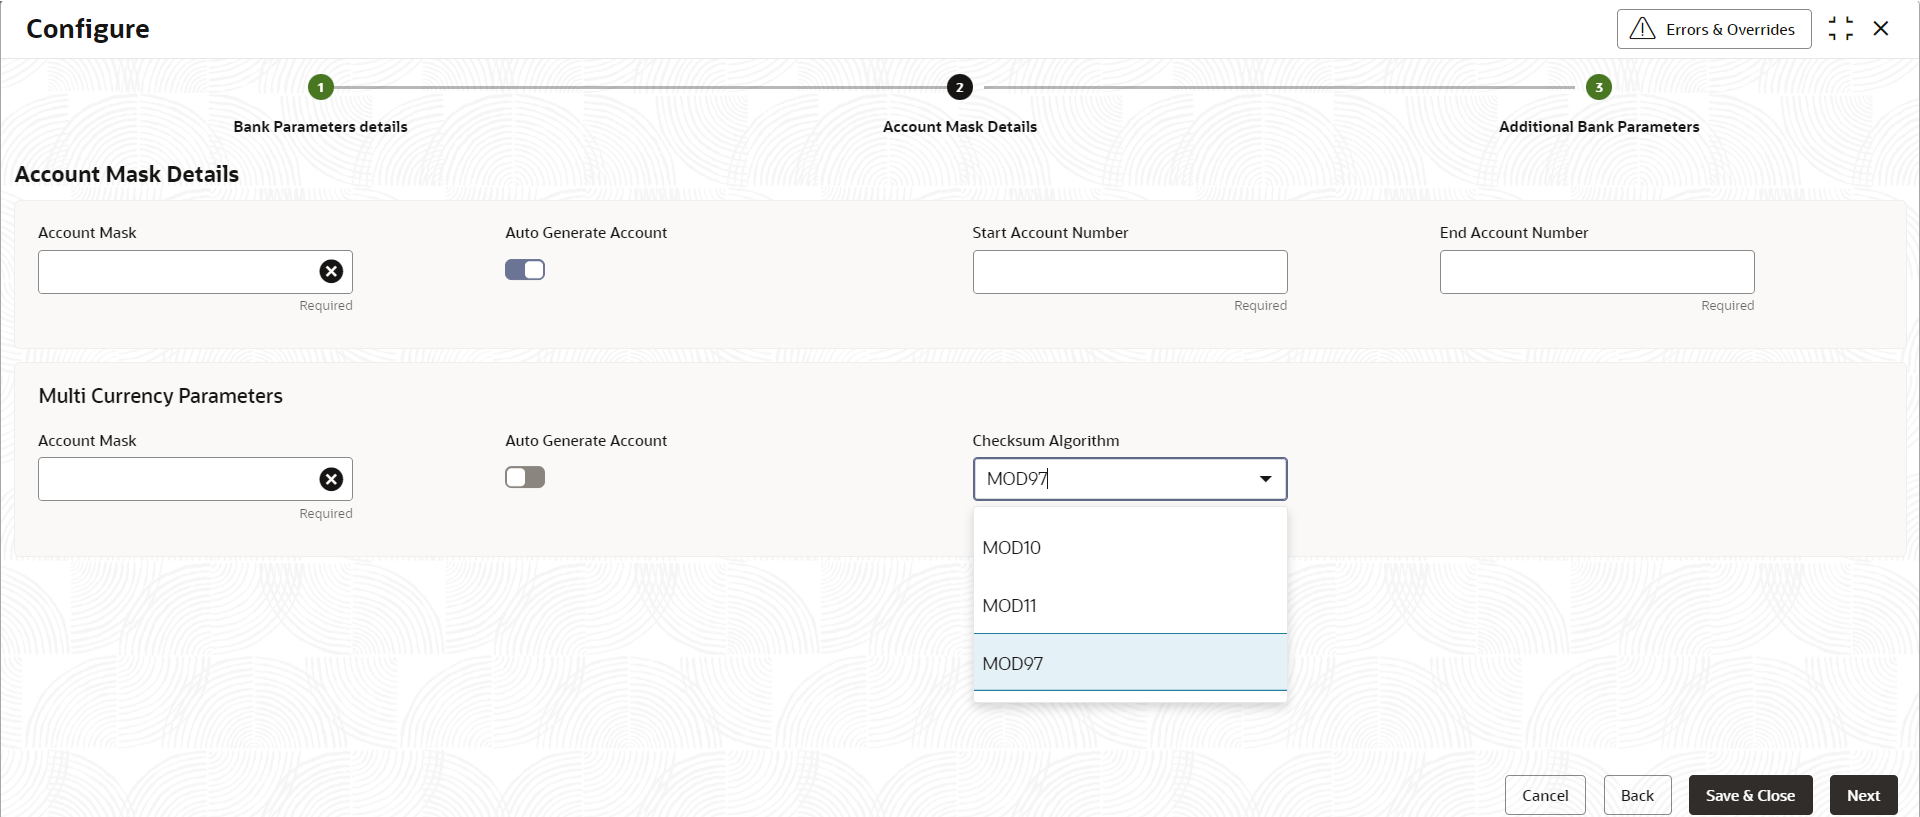
- On Account Mask Details tab, specify the fields.
For more information on fields, refer to the field description table below.
Table 1-3 Account Mask Details - Field Description
Field Description Account Mask This drop-down list displays the account mask value. The list of values is – - L - Account class
- T - Account code
- a – Alphabet
- B - Branch code
- D – Check digit
- $ - Currency code
- C - Customer number
- n - Numeric value
Auto Generate Account Select this check box to generate the account number automatically. If an account is automatically generated, it can either contain only numbers or a combination of branch code and numbers.
Note:
This flag is ‘Automatic’ if the Auto Generate Account flag is 'Yes' and, ‘Manual’ if Auto Generate Account flag is 'No'.Checksum Algorithm This drop-down list displays the checksum algorithm to be used for the account. The following items are available in the list.
- Modulo 10
- Modulo 11
- Modulo 97
Note:
Mod 97 supports only Numeric mask.Start Account Number This field appears if the Auto Generate Account is enabled. Specify the start account number. End Account Number This field appears if the Auto Generate Account is enabled. Specify the end account number. Note:
These fields are repeated for Multicurrency Parameters.Account MaskWhen you open the Account Mask field, the left pane displays the list of elements that are part of the account mask. Click and select from the left pane to view the fields. Where 'n' characters or numbers are allowed, a text box appears where users can enter the number of times that value must repeat. Click Add to populate the values in the account mask screen.
The following characters are supported in Account Mask.
Table 1-4 Account Mask
Field Mask Character Mask Length Account Class L 6 Account Code T 4 Alphabet (User Input) a User defined Branch Code B 3 Check Digit D 2 Currency Code $ 3 Customer Number C 9 Numeric Value (User Input) n User defined There is no restriction on the number of characters unless maximum length is provided. However, the overall length cannot exceed a maximum of 20 characters including the check digit.
- Specify the fields and click Next.The Additional Bank Parameters tab displays.
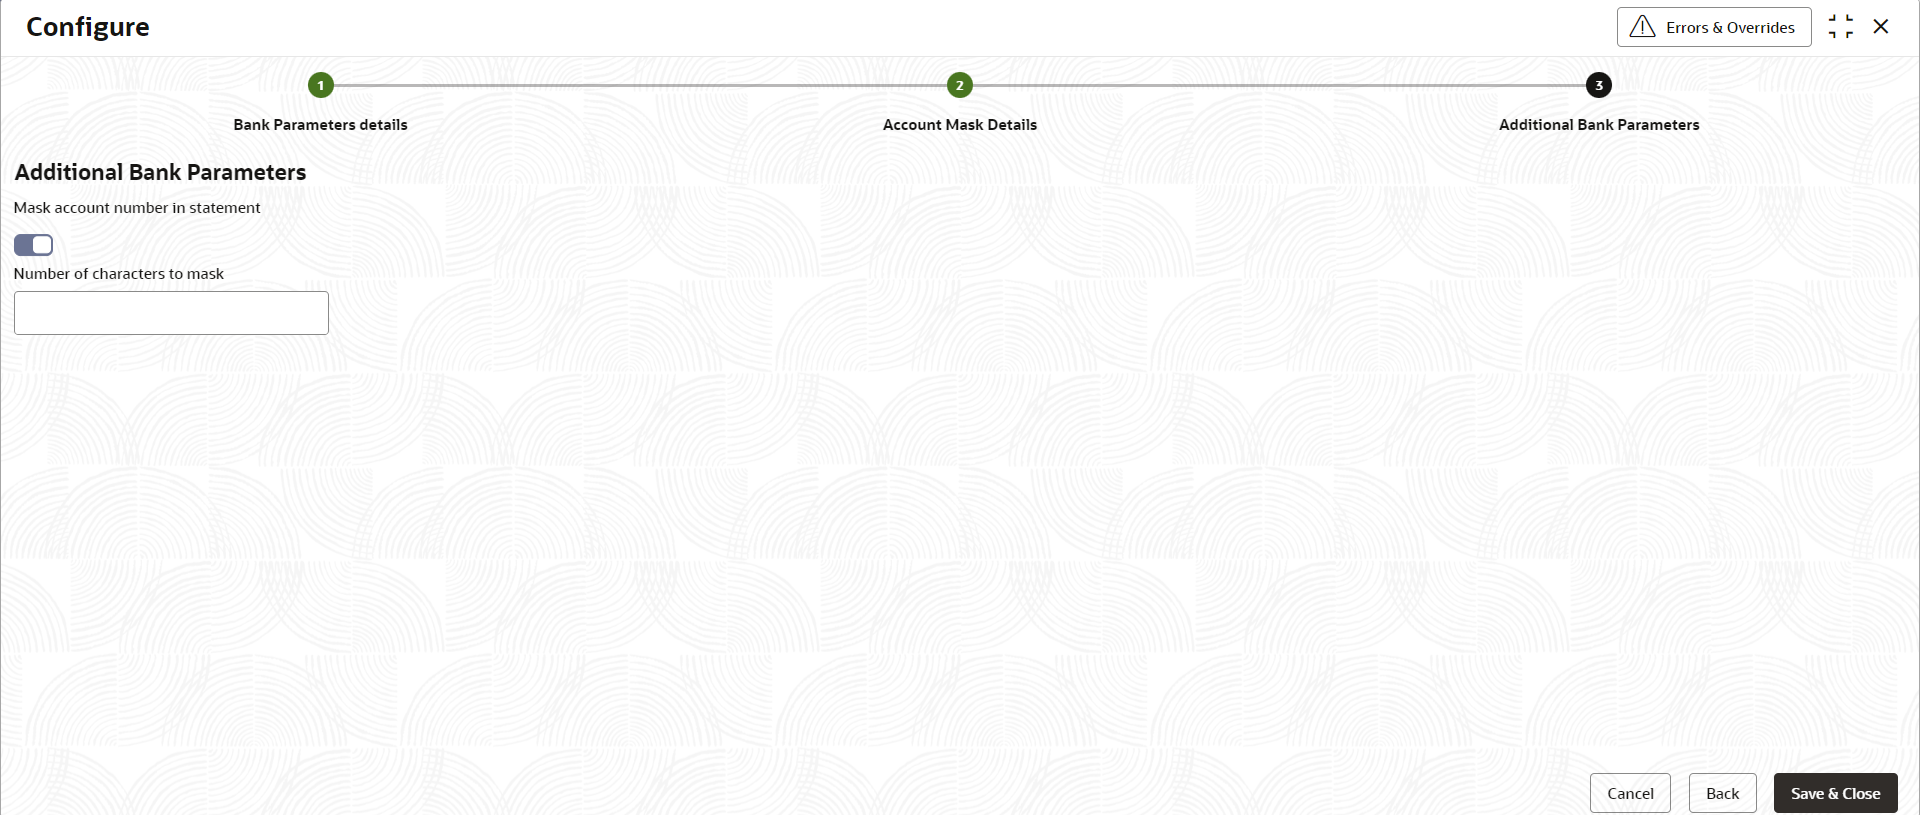
- On Additional Bank Parameters tab, specify the fields.
For more information on fields, refer to the field description table below.
Table 1-5 Additional Bank Parameters - Field Description
Field Description Mask Account Number in Statement When an account statement is generated and if this option is enabled, then the account number in the statement will be masked (hidden) to the extent of the number of characters that is mentioned for masking. The default value is No.
Number of Characters to Mask This field determines the number of characters from the mask to the account number generated in the statement. The masking is always from left to right. This field is displayed only when Mask Account Number in Statement is enabled. - Click Save & Close to complete the steps or click Cancel to exit without saving.
Parent topic: Bank Parameters


