- Account Configurations User Guide
- Source Code
- Configure Source Code
11.1 Configure Source Code
This topic describes the systematic instructions to configure source code.
- On Home screen, click Account Configurations. Under Account Configurations, click Source Code.
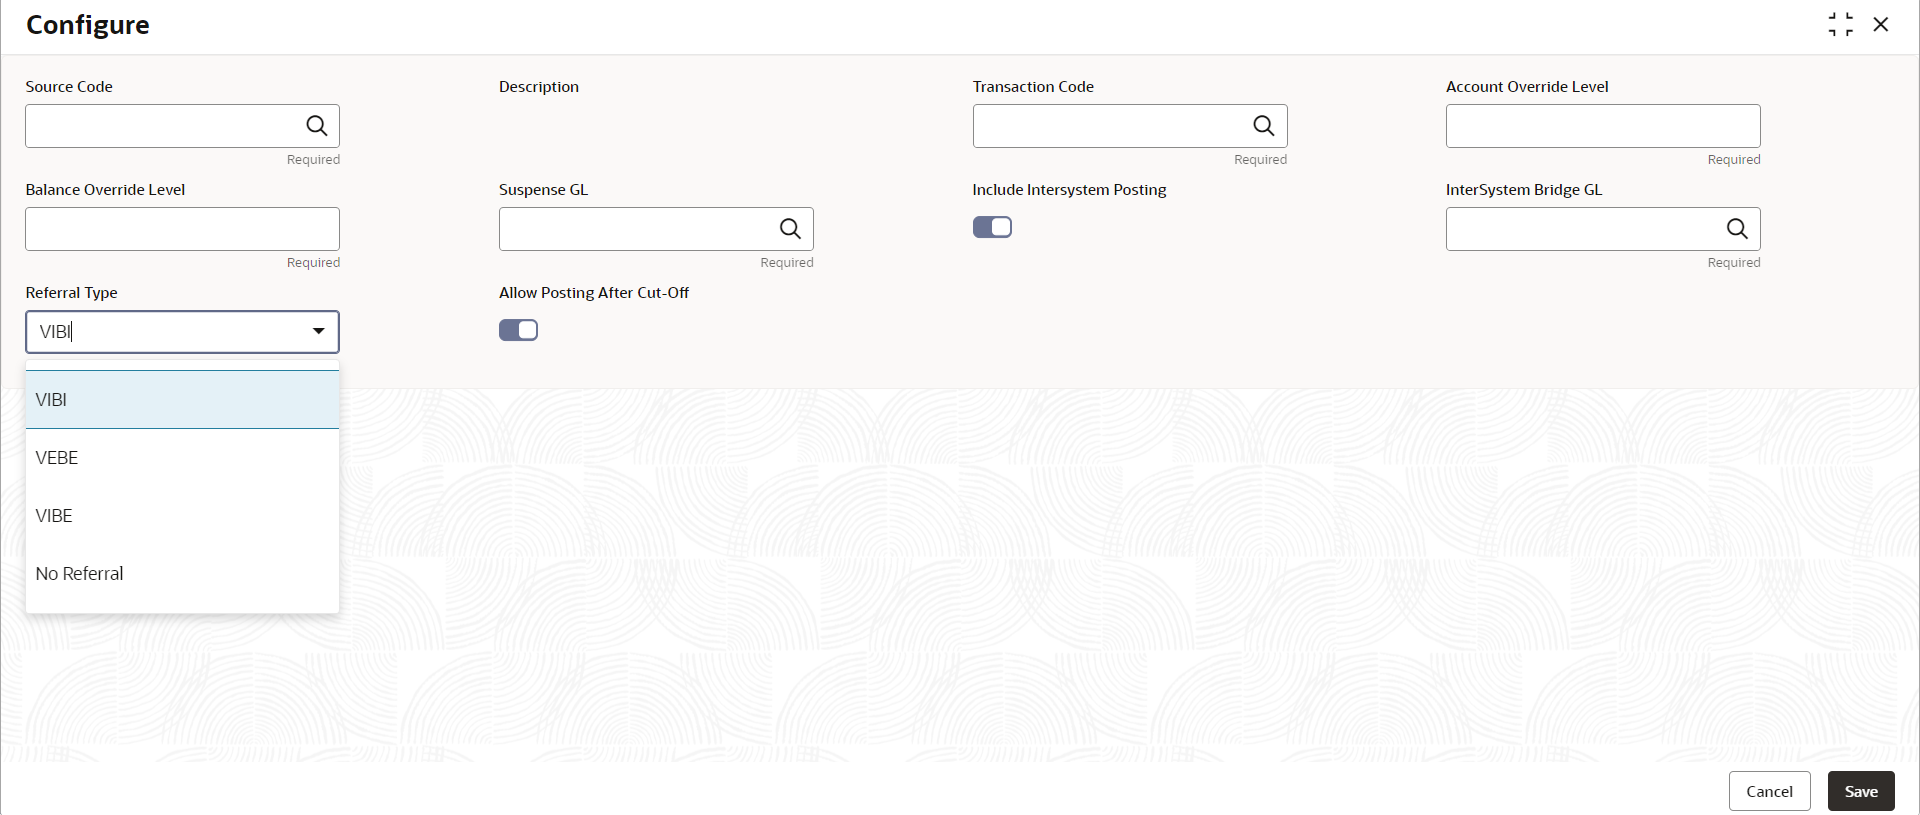
- Under Source Code, click Configure.The Configure screen displays.
- Specify the fields on Configure screen.
For more information on fields, refer to the field description table below.
Table 11-1 Configure Source Code - Field Description
Field Description Source Code Specify the source code. Click the search icon to open the Source Code window. Select and click to add the code in the field.
Description Specify the description for the Source Code. This field is auto-populated. Transaction Code Specify the default transaction code. Click the search icon to open the Transaction Code window. Select and click to add the code in the field.
Account Override Level Specify the default override level for account related validations. Balance Override Level Specify the default override level for balance related validations. Suspense GL Specify the GL to which suspense posting should be performed. Include InterSystem Posting Specify if Include InterSystem Posting is required or not. The default value is Yes. InterSystem Bridge GL Specify any Internal GL as an InterSystem Bridge GL for the specific source code. This field is required only if Include InterSystem Posting is set to Yes.
Referral Type Select the referral type for source code from the drop-down list. The following values are available: - VIBI
- VEBE
- VIBE
- No Referral
Allow Posting After Cut-Off If this is enabled, the system allows transaction post the cut-off. The default value is No. When transaction code and override level are not sent as part of the EA / ECA request, the system applies default transaction codes and override levels for the sources maintained in this screen. Therefore, it is mandatory to configure the DDA source preferences.
- Specify all the details and click Save to complete the steps or click Cancel to exit without saving.
Parent topic: Source Code
