4.2 View Business Process
This topic describes the systematic instructions to view the list of available business processes.
- Click Account Configurations. Under Account Configurations, click Corporate / Nostro Business Process.
- Under Corporate / Nostro Business Process, click View.The View page displays the configured Business Processes.
Tip:
Click or
or  to switch between the Tile view and the List view.
Table 4-11 Business Process Tile - Field Description
Field Description Business Process Code Displays the business process code. Description Displays the description for the business process code. Lifecycle Displays the life-cycle code. Authorization Displays the authorization status of the record. - Authorized
- Rejected
- Unauthorized
Status Displays the status of the record. - Open
- Closed
The following table describes the action items in the More Options (
 ) menu and the action items on the page.
Table 4-12 Action Items Description
Action Item Description Unlock Unlock a record and make amendments. Close Close a record to prevent it from being unlocked and amended. View View the details of a record. Delete Delete a record. Note: Once deleted, the component can no longer be used to define an entity. But entities already defined using the component can continue to use it.
Reopen Reopen a closed record. Authorize Authorize a record to make it active and available to define entities. Note: Creator of a record cannot authorize the component. Another user with authorize permissions can.
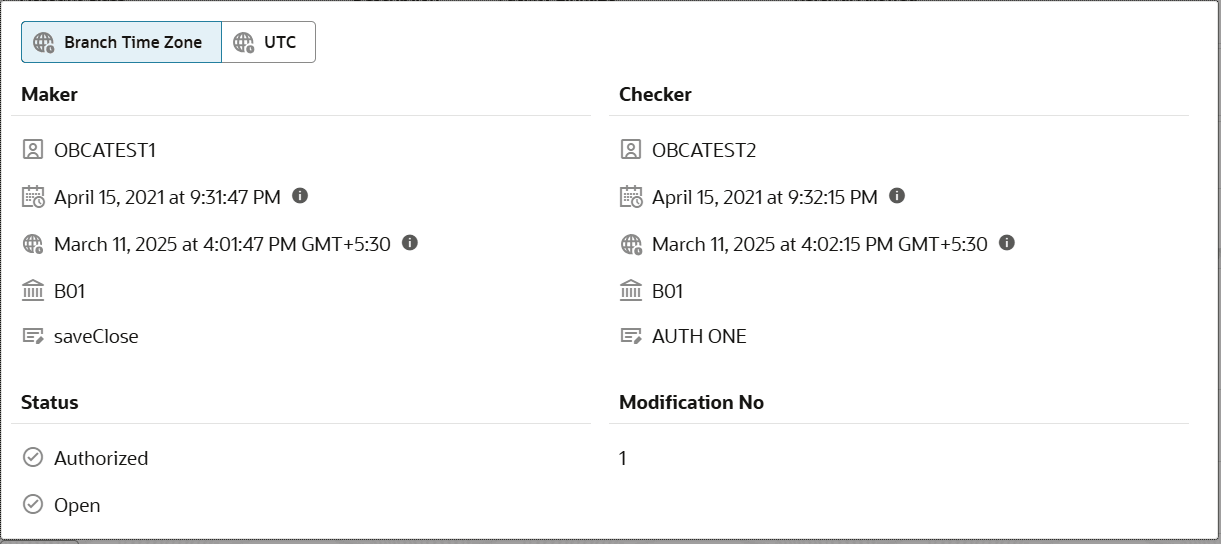
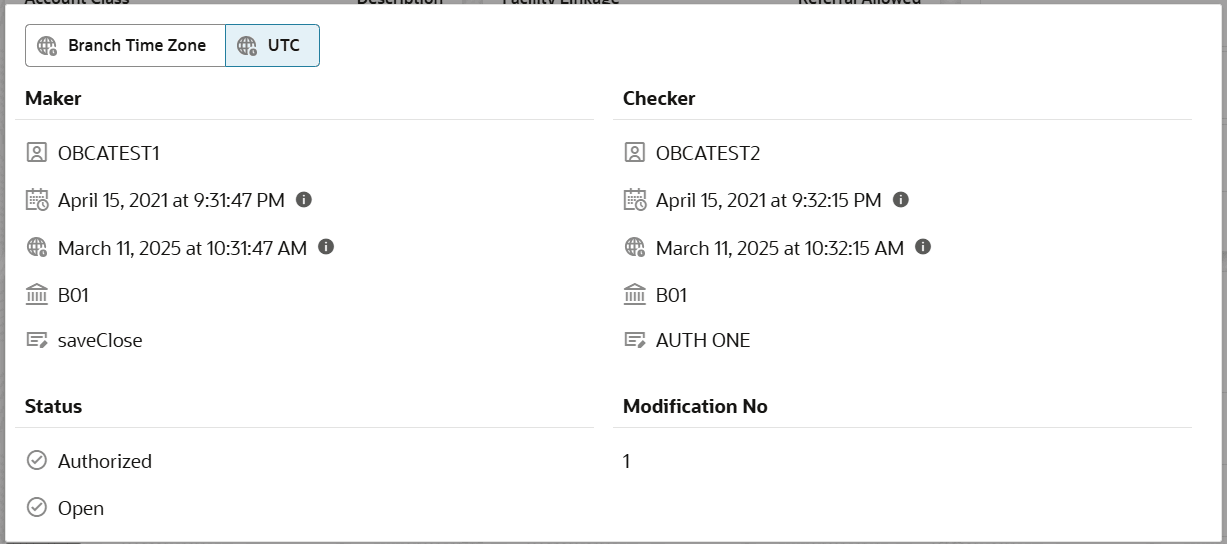
Audit Select to view the Maker, Checker, Status, and Modification Number of a record. Errors and Overrides Select to view all existing errors or warnings on the page. Note:
The actions you can perform depend on your role and the record status. - View the details of a Business Process.
- Click
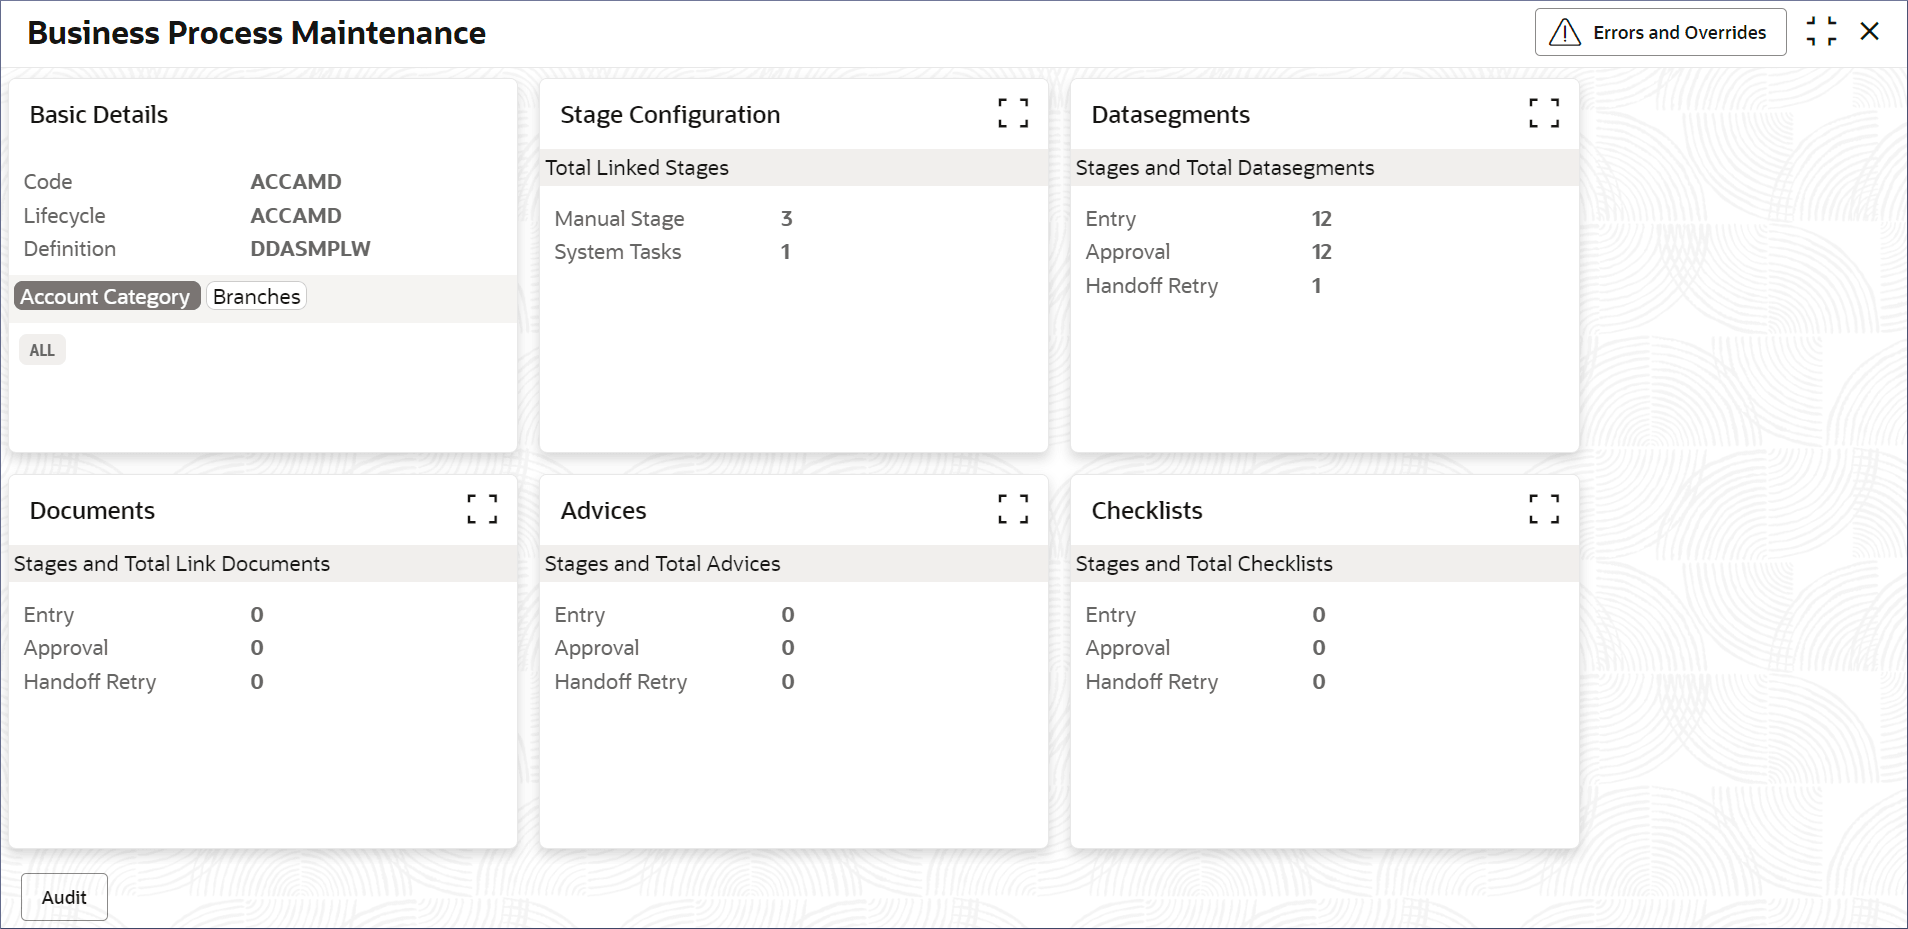
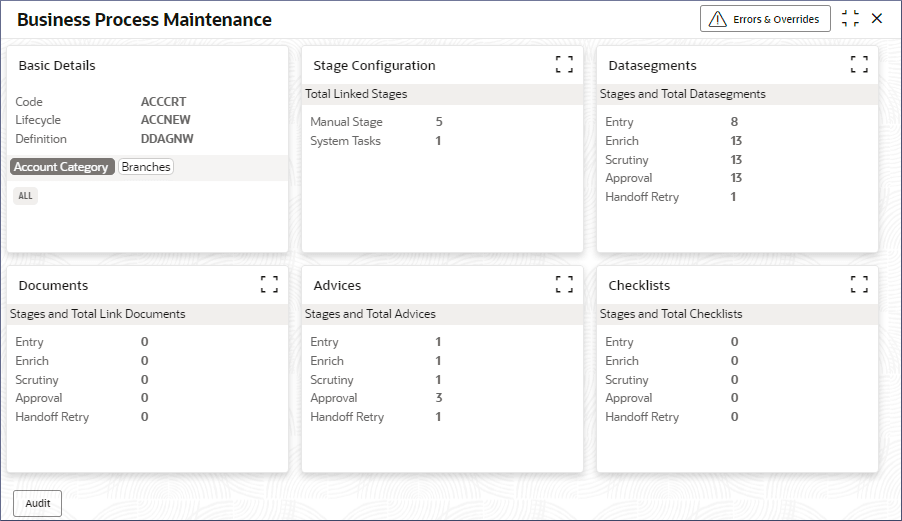
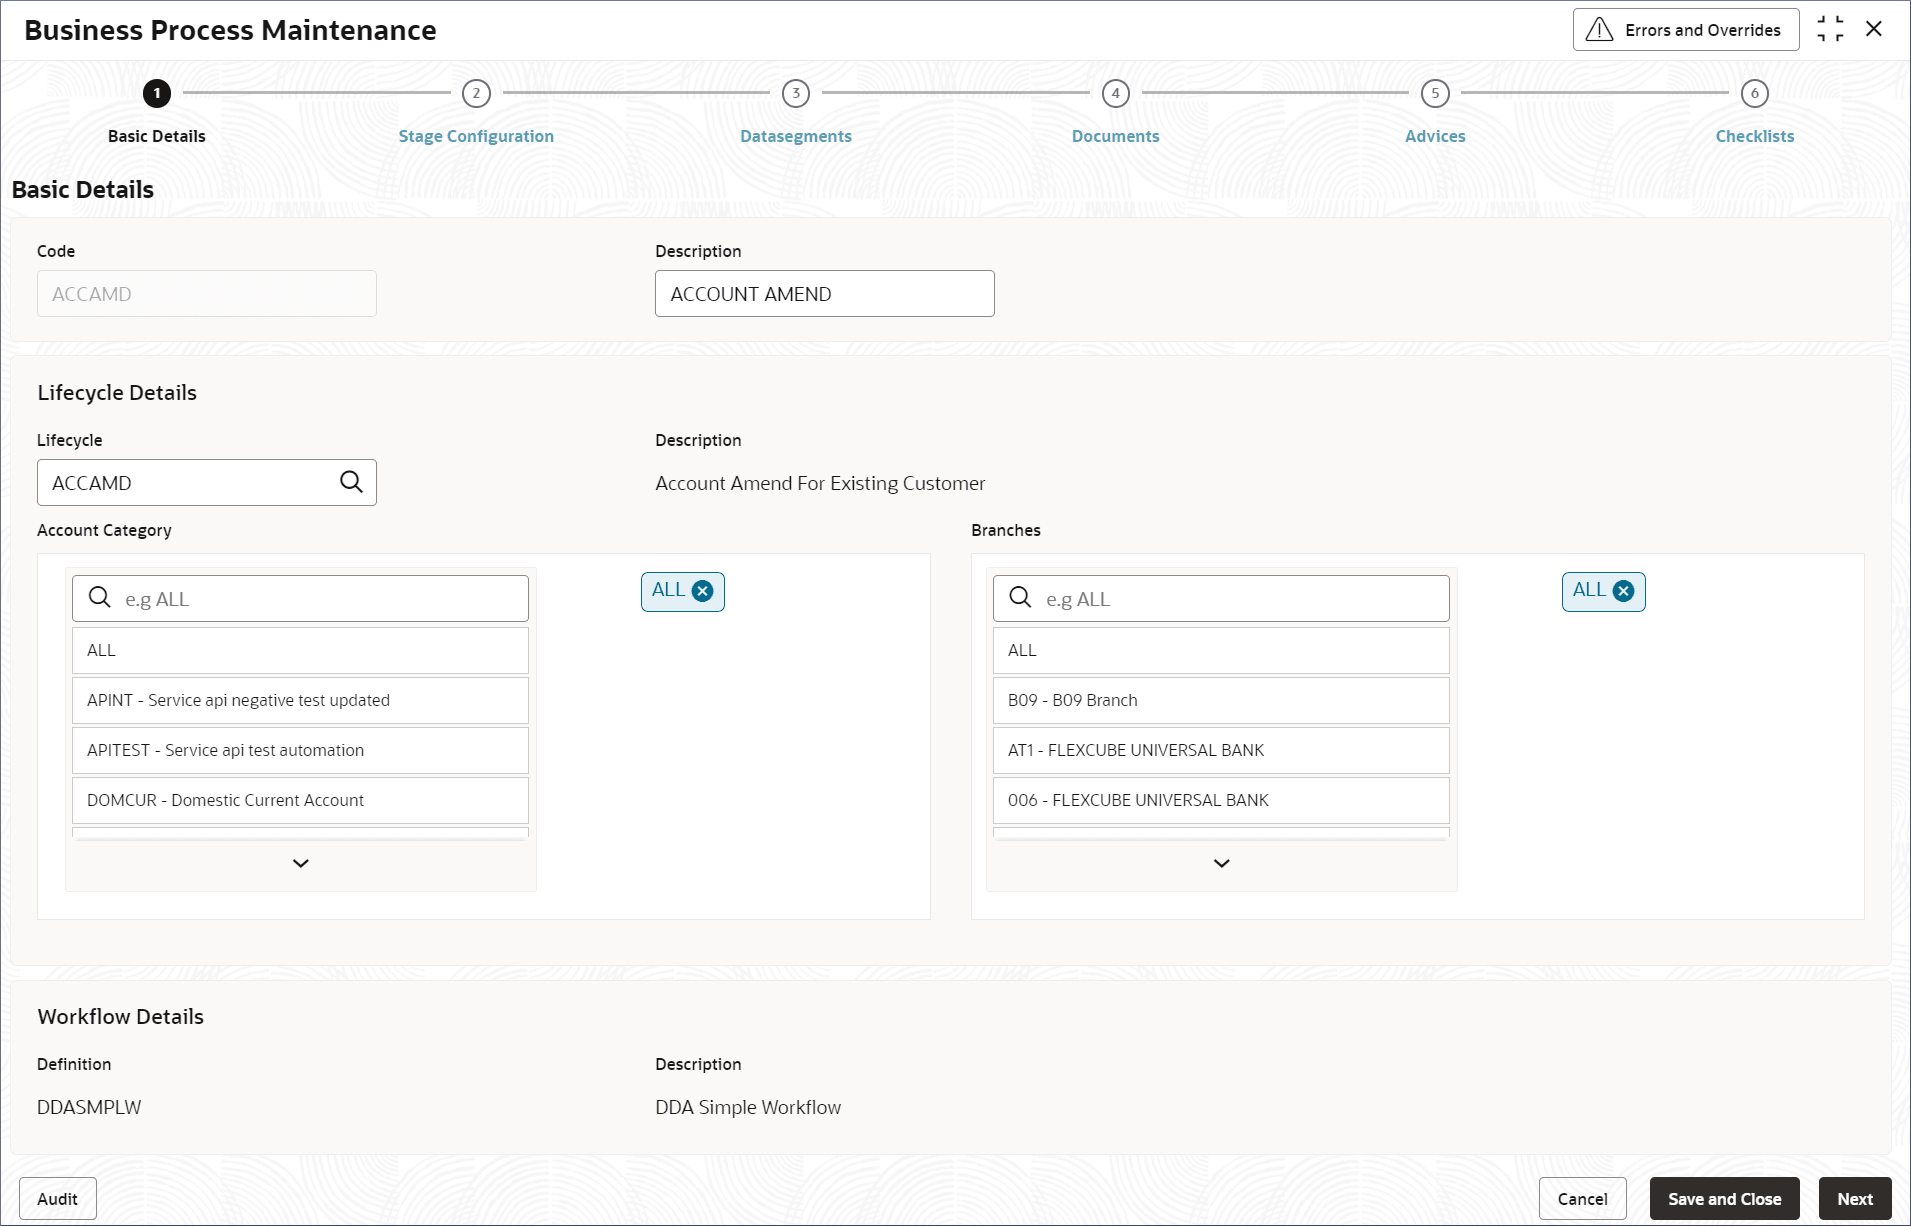
 and select View.The Business Process Maintenance page displays the business process details in different tiles.
Figure 4-12 View details of a Business Process
- Click Account Category or
Branches tab in the Basic
Details tile.The associated Account Categories or Branches are listed in the Basic Details tile.
- Click
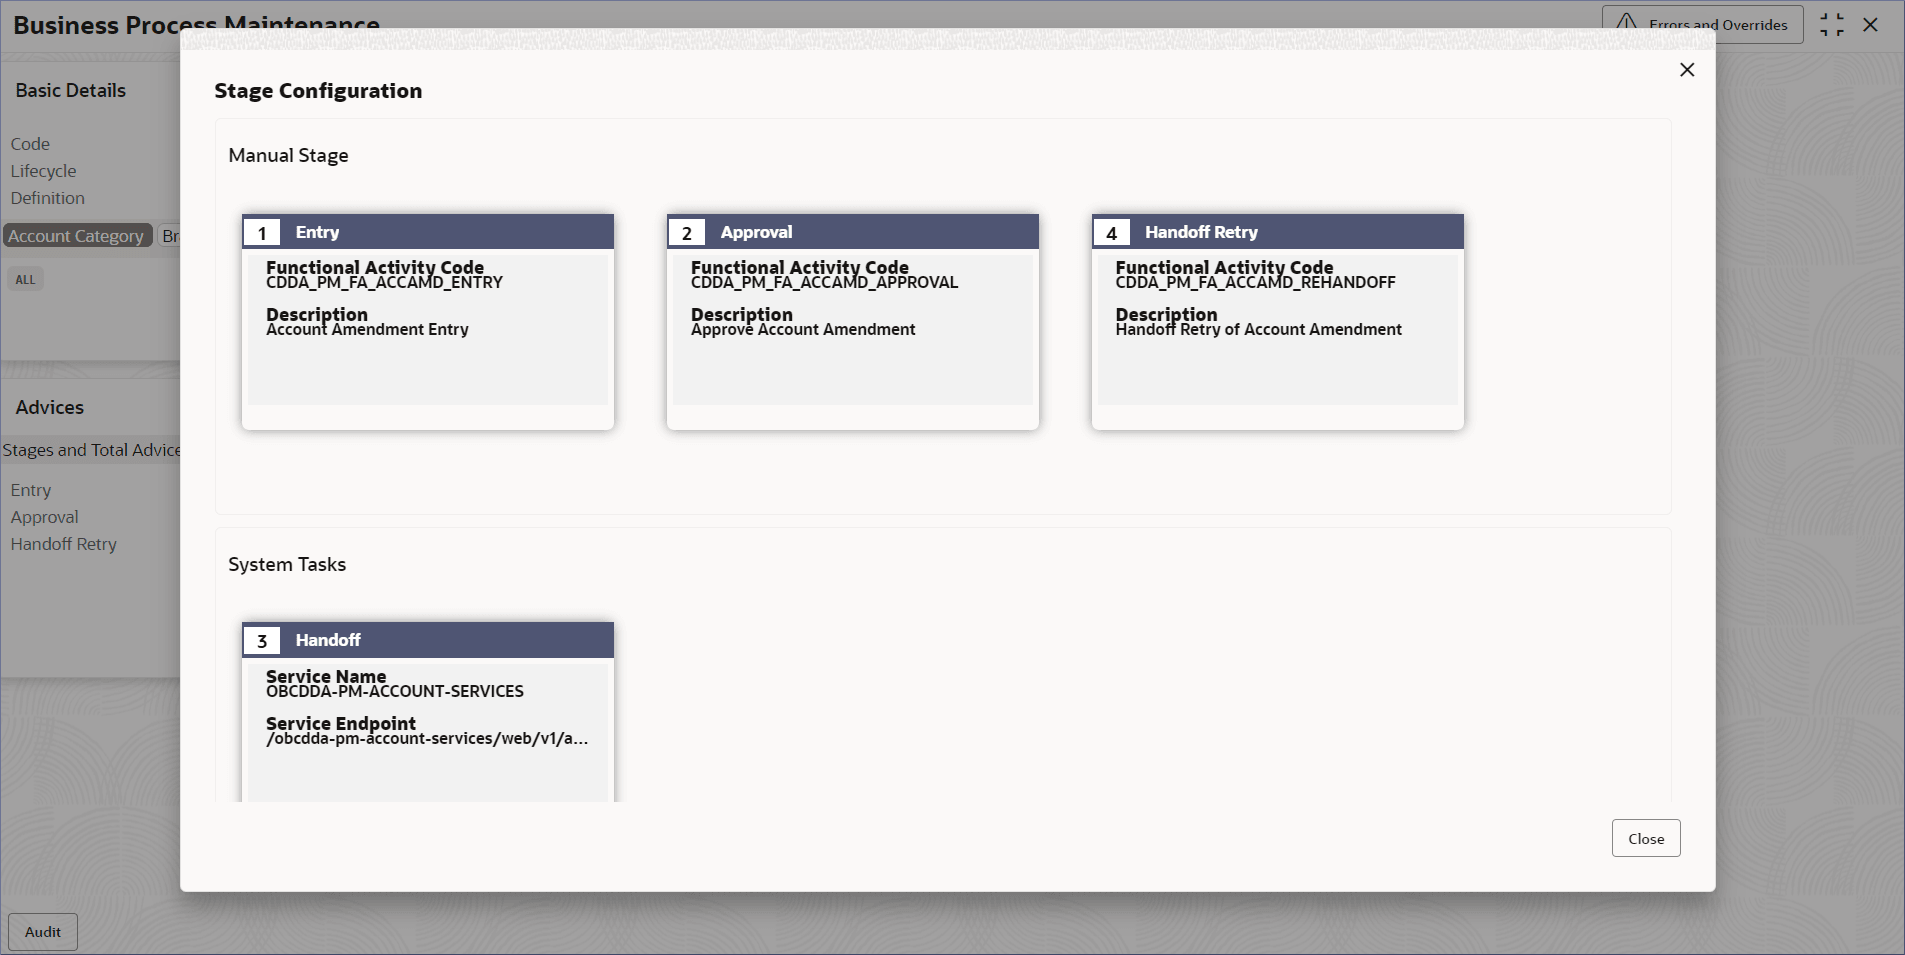
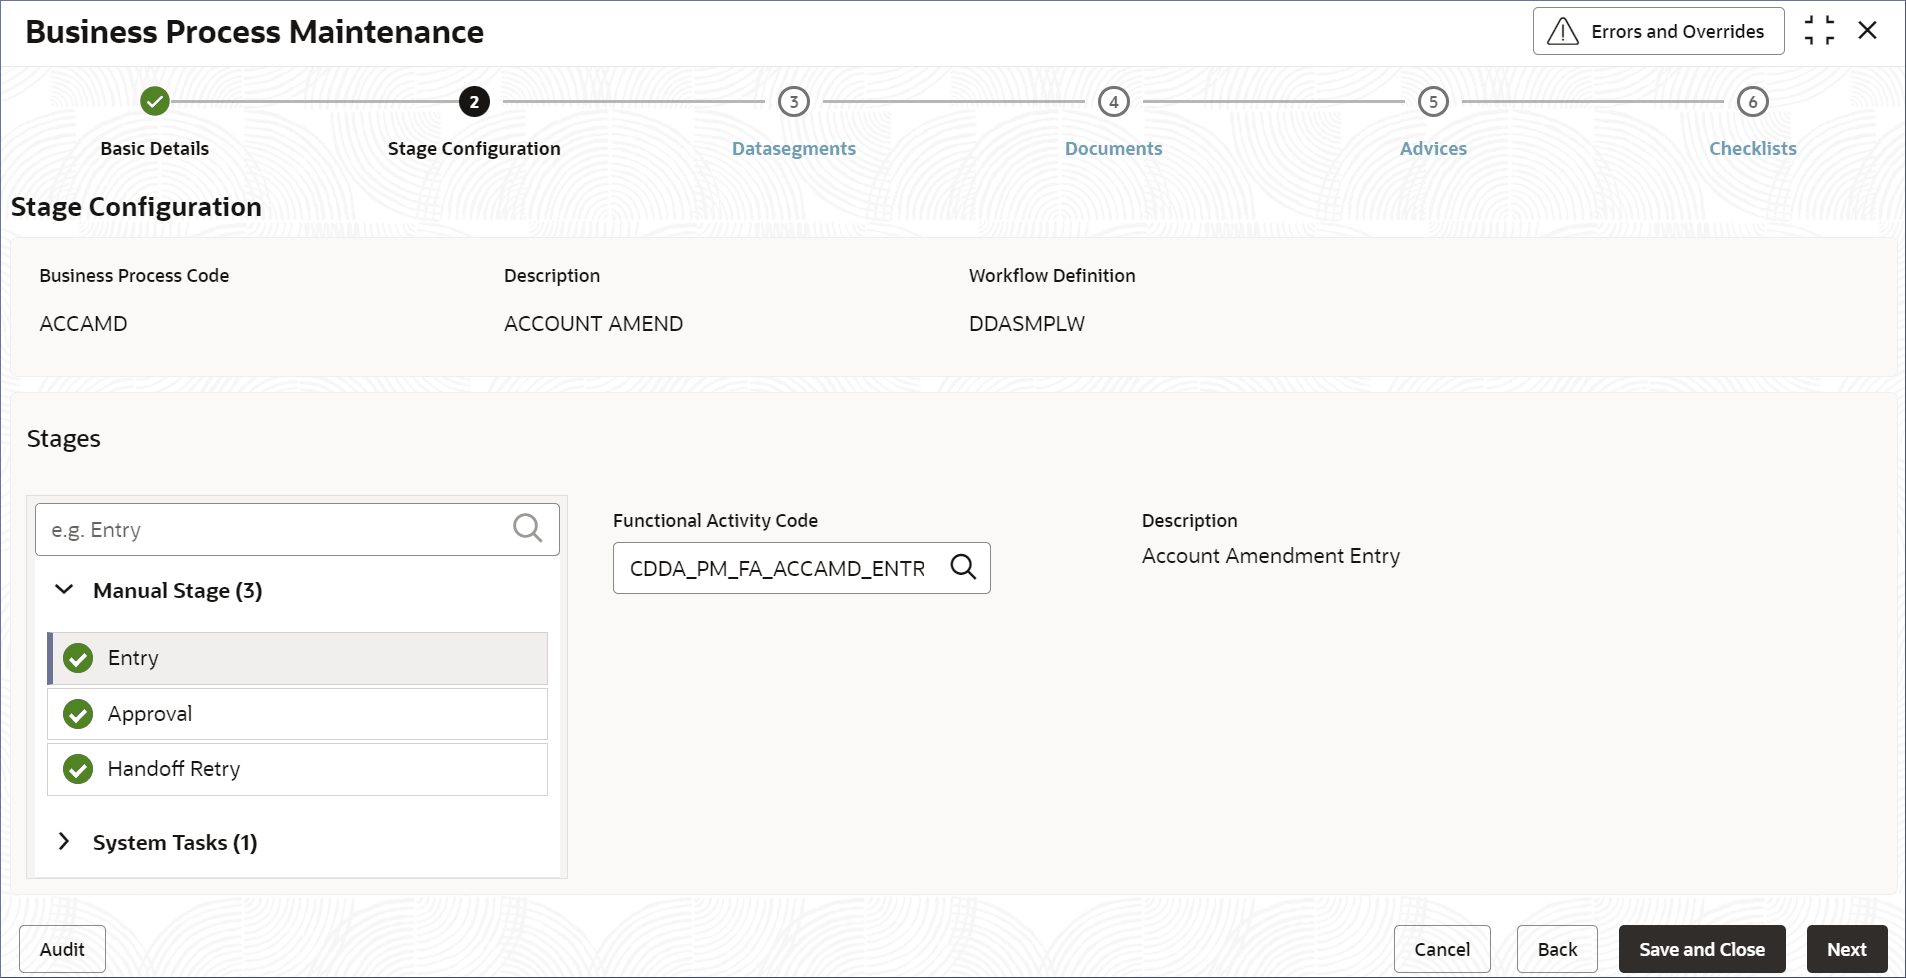
 on the Stage Configuration tile.The Stage Configuration details display the Manual Stages and System tasks configured in the Business Process.
Figure 4-13 Stage Configuration details of a Business Process
Note:
All the stages defined in the business process are displayed. And different business process can have different stages. - Click
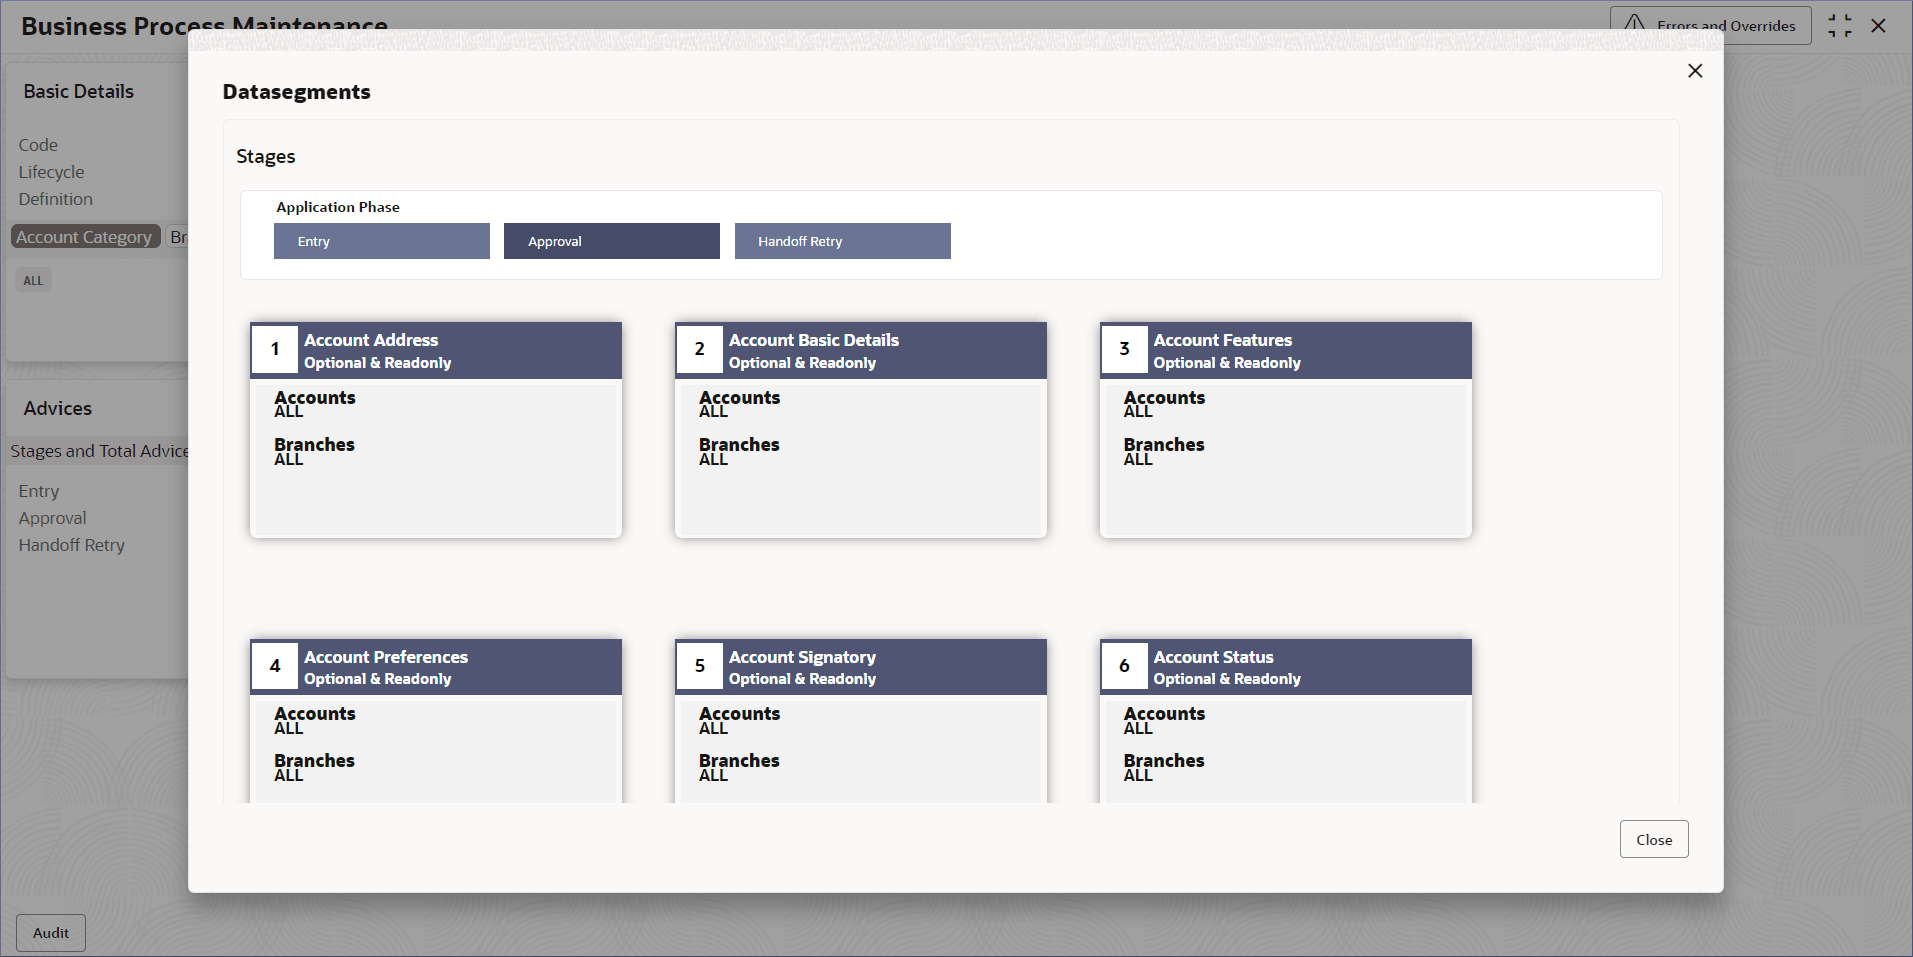
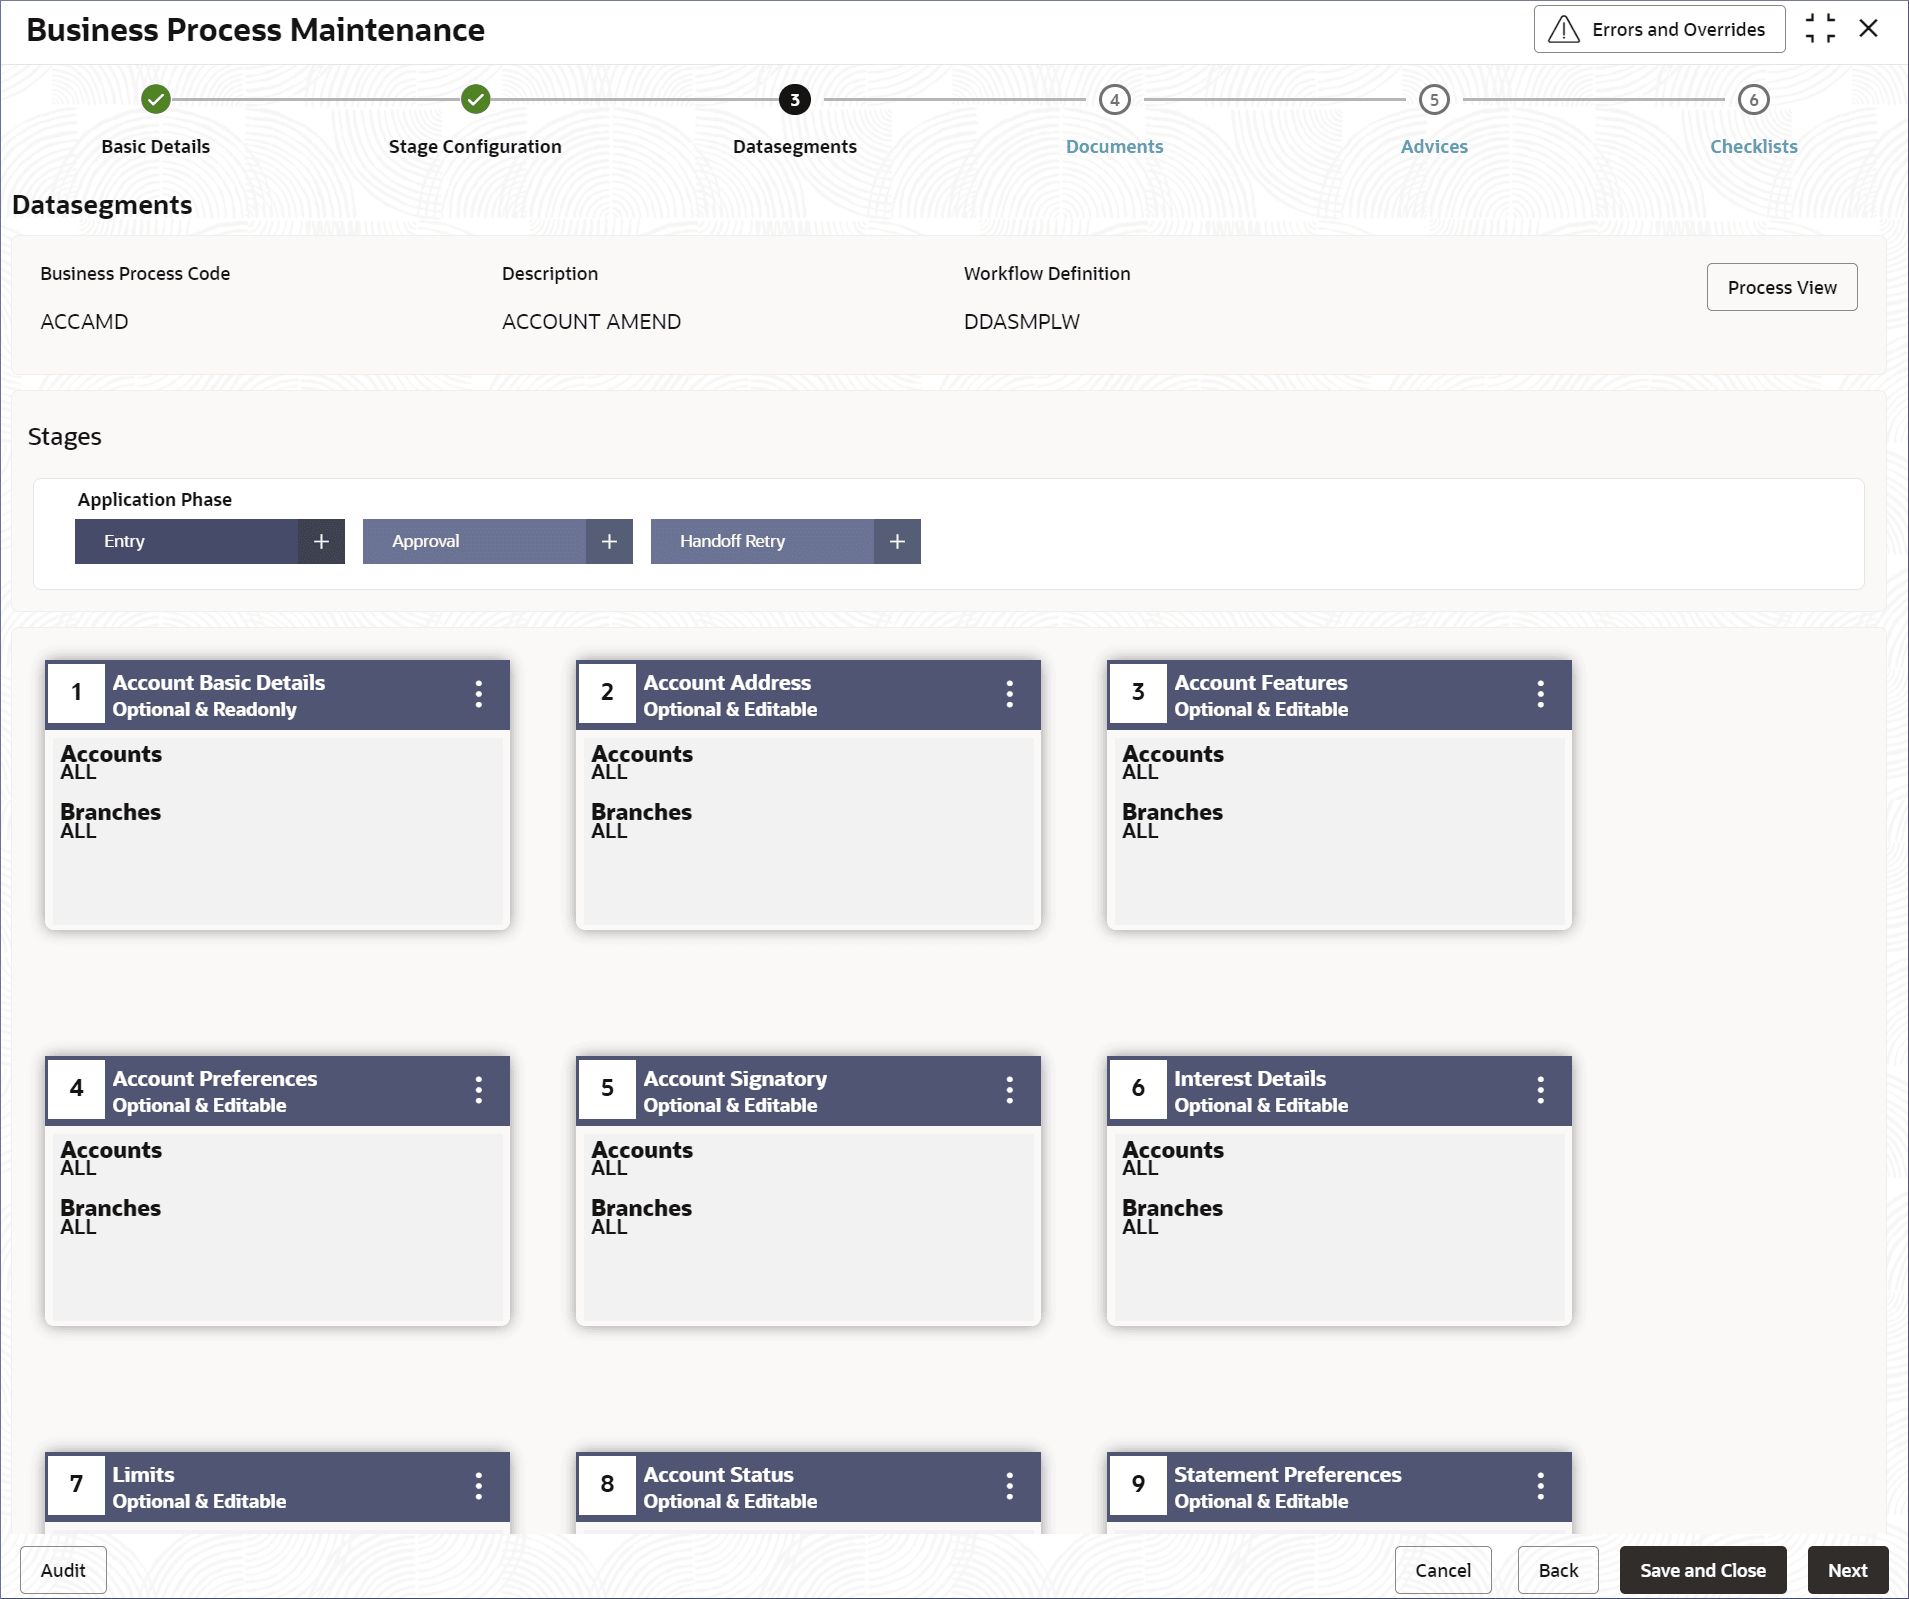
 on the Data Segments tile.The Data Segments screen displays the data segments added to each Application Phase of the business process.
Figure 4-14 View the Data Segments of a Business Process
- Click on an Application Phase tab to view the Data Segments valid for
each Application Phase.
Note:
For the business process in the image the following phases are defined: Entry, Approval, and Handoff Retry. - Click
 on the Documents,
Advices, and Checklist
tiles to view the corresponding details.
on the Documents,
Advices, and Checklist
tiles to view the corresponding details.Tip:
Click an Application Phase tab at the top to view the corresponding details.
- Click
- Unlock and update a Business Process.
- Click
 and select Unlock.The Business Process Maintenance page displays the Basic Details screen.
Figure 4-15 Unlock Business Process - Basic Details
Note:
Fields that are grayed out cannot be edited.Note:
For more information about fields in the Business Process screens, see Create Business Process. - Update the required fields and click Next.The Stage Configuration screen displays.
Figure 4-16 Unlock Business Process - Stage Configuration
- Update the required fields and click Next.The Business Process Maintenance page displays the Data Segments screen.
Figure 4-17 Unlock Business Process - Data Segments
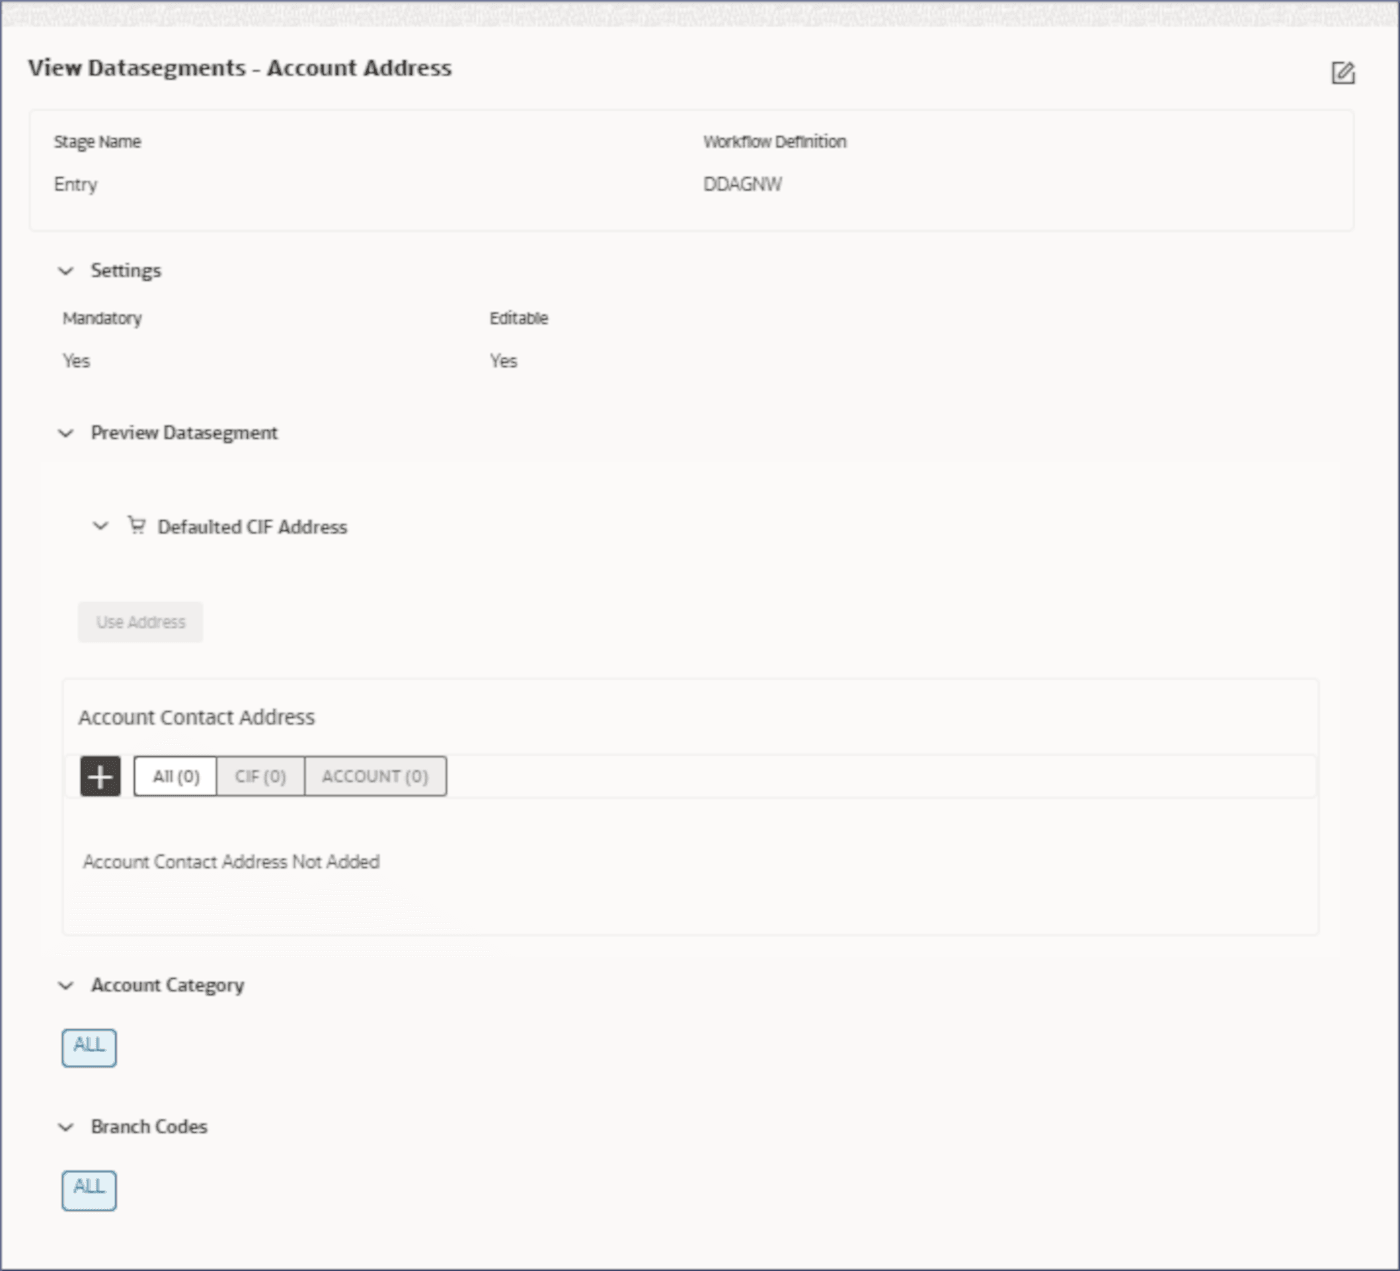
- To view, edit, or delete a Data Segment tile, click
 and select View,
Edit, or
Delete. For example, view the
Account Address data segment tile to display the
following:
Figure 4-18 Account Address - Data Segment
- To add a Data Segment to a stage, click + on
the required Application Phase stage tab.
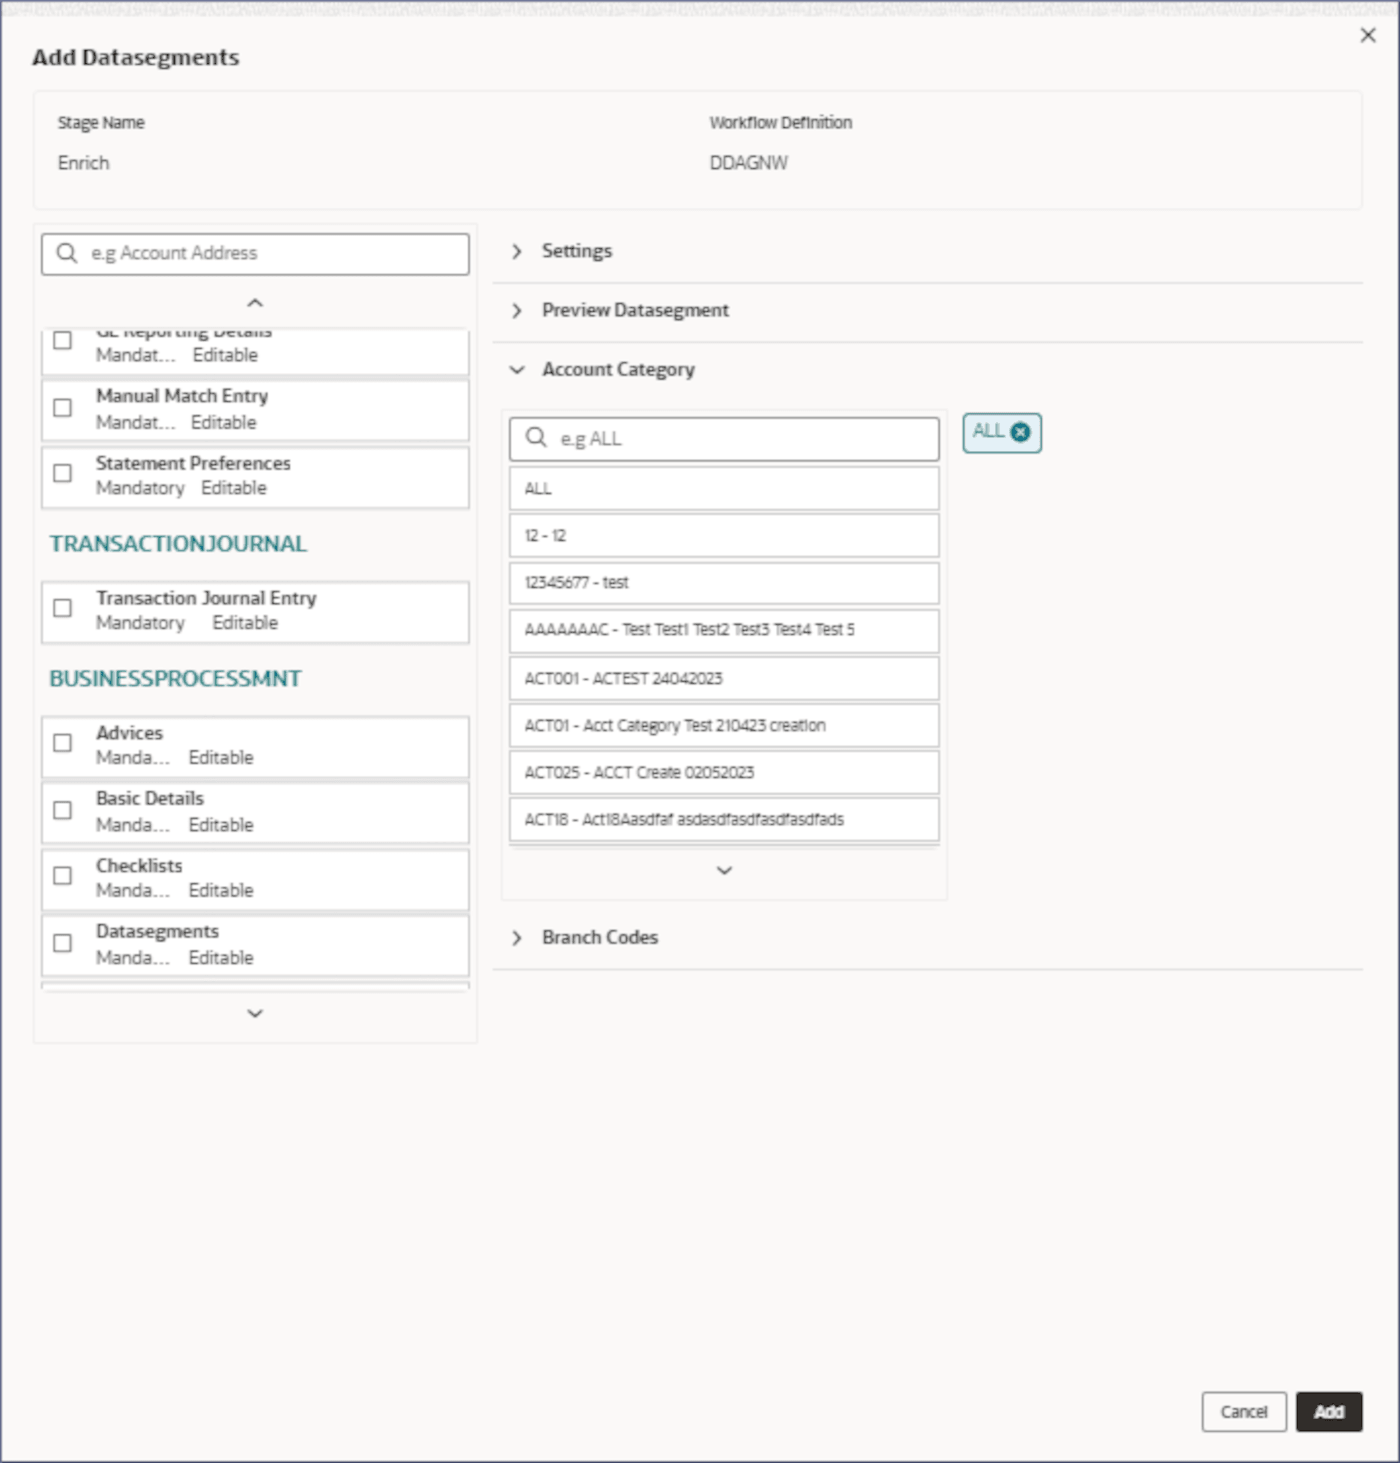
The add Data Segments dialog displays.
- Select the required Data Segments.
- Configure the Settings,
Account Category, and
Branch Codes for each data
segment.
Table 4-13 Configuration Fields Description
Fields Name Description Settings Click the field and select the required Role from the drop-down list. Account Category Specify the Account Categories to which the linked advice applies. Branches Specify the Branches to which the linked advice applies. - Click Add.
- To view, edit, or delete a Data Segment tile, click
- Click Next.The Business Process Maintenance page displays the Documents screen.
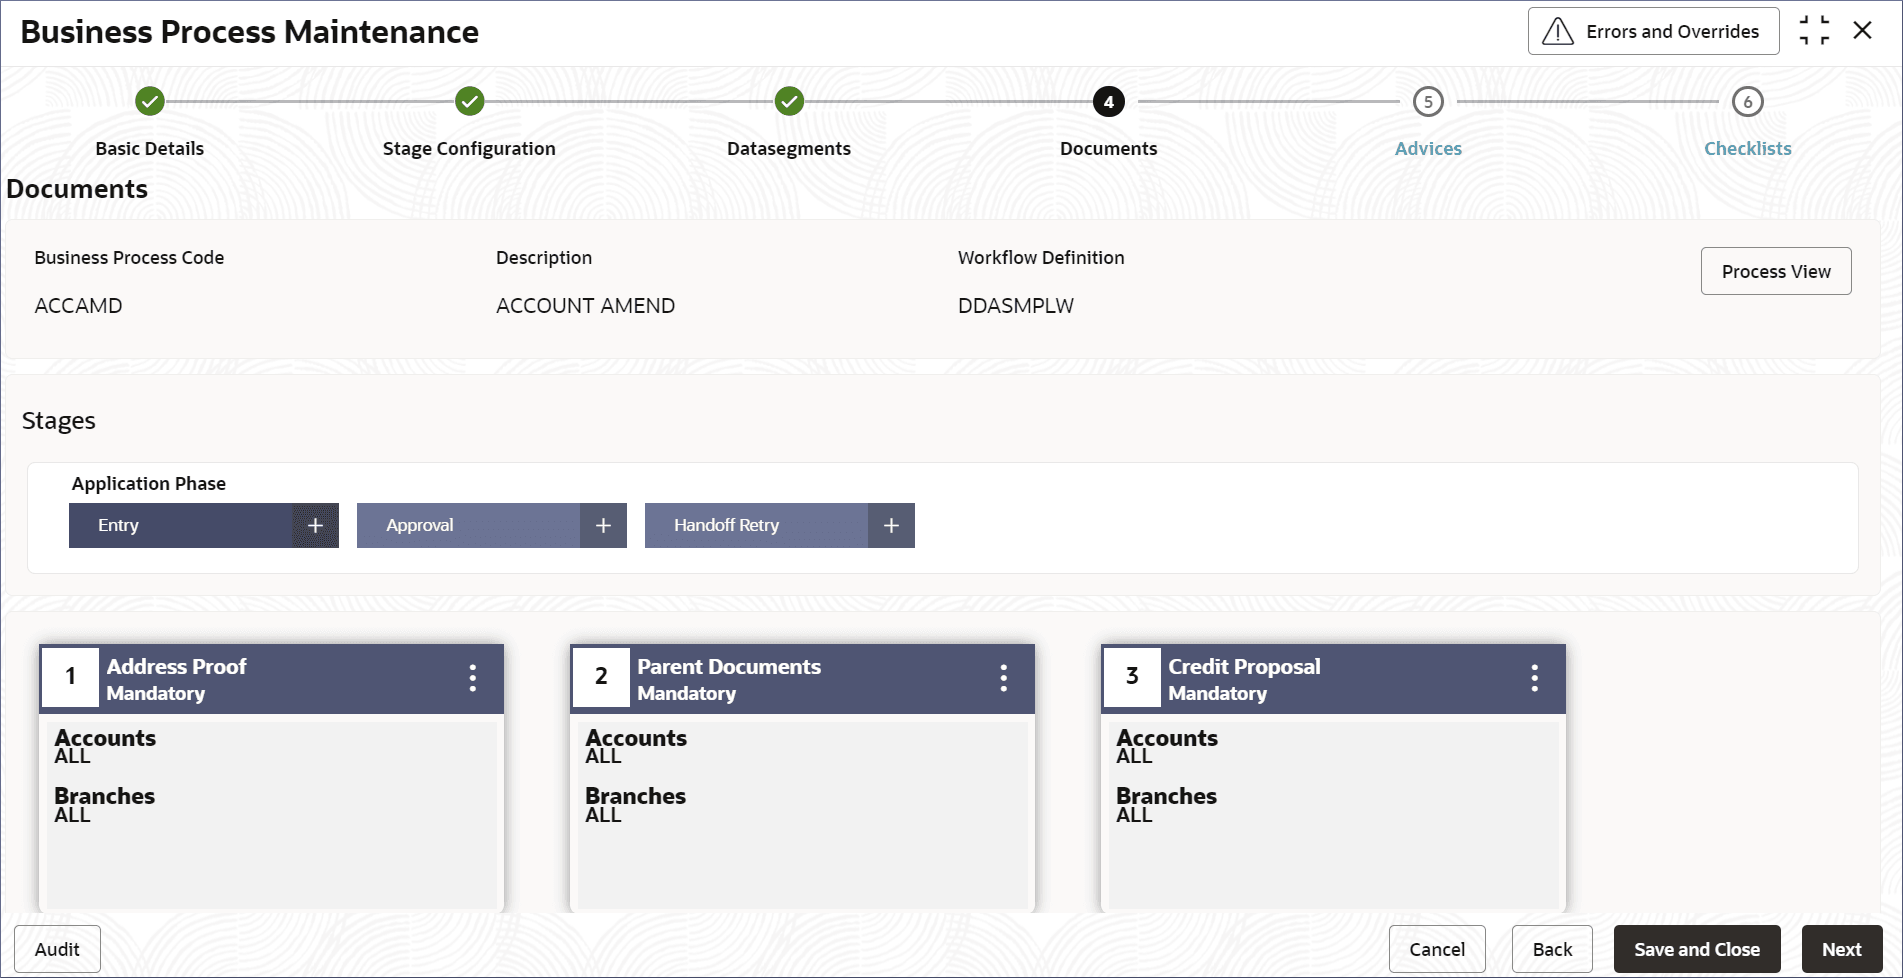
Figure 4-20 Unlock Business Process - Documents
You can link documents required at each stage of the business process.
- To view, edit, or delete a Linked Document tile,
click
 and select View,
Edit, or
Delete.
- To link document to a stage, click + on the
required Application Phase stage tab.
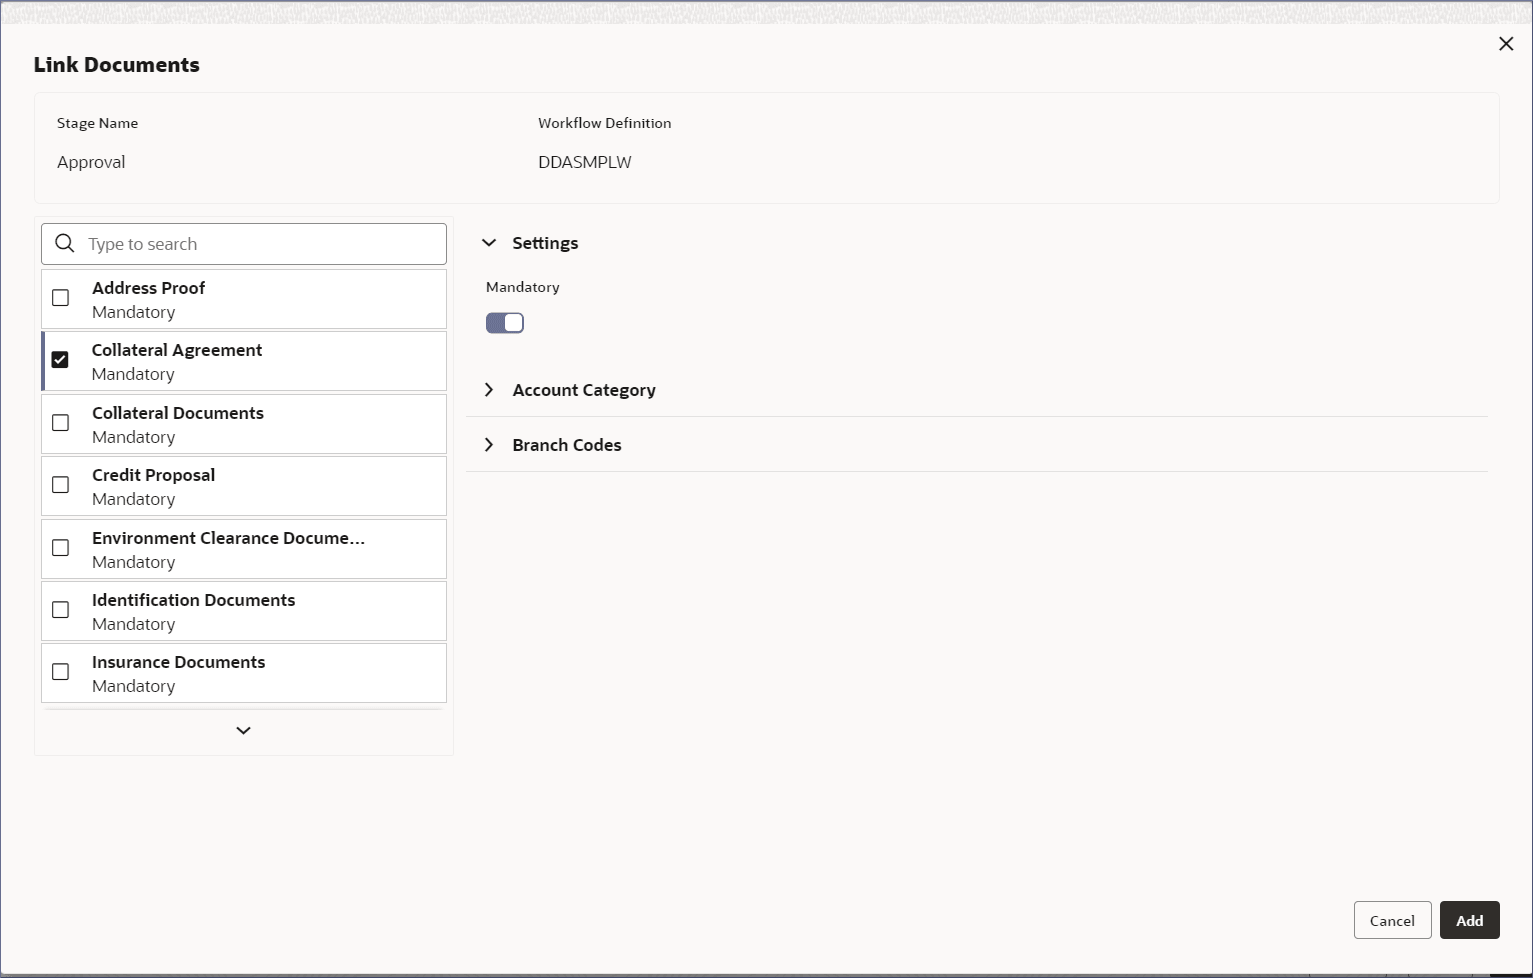
The Link Documents dialog displays.
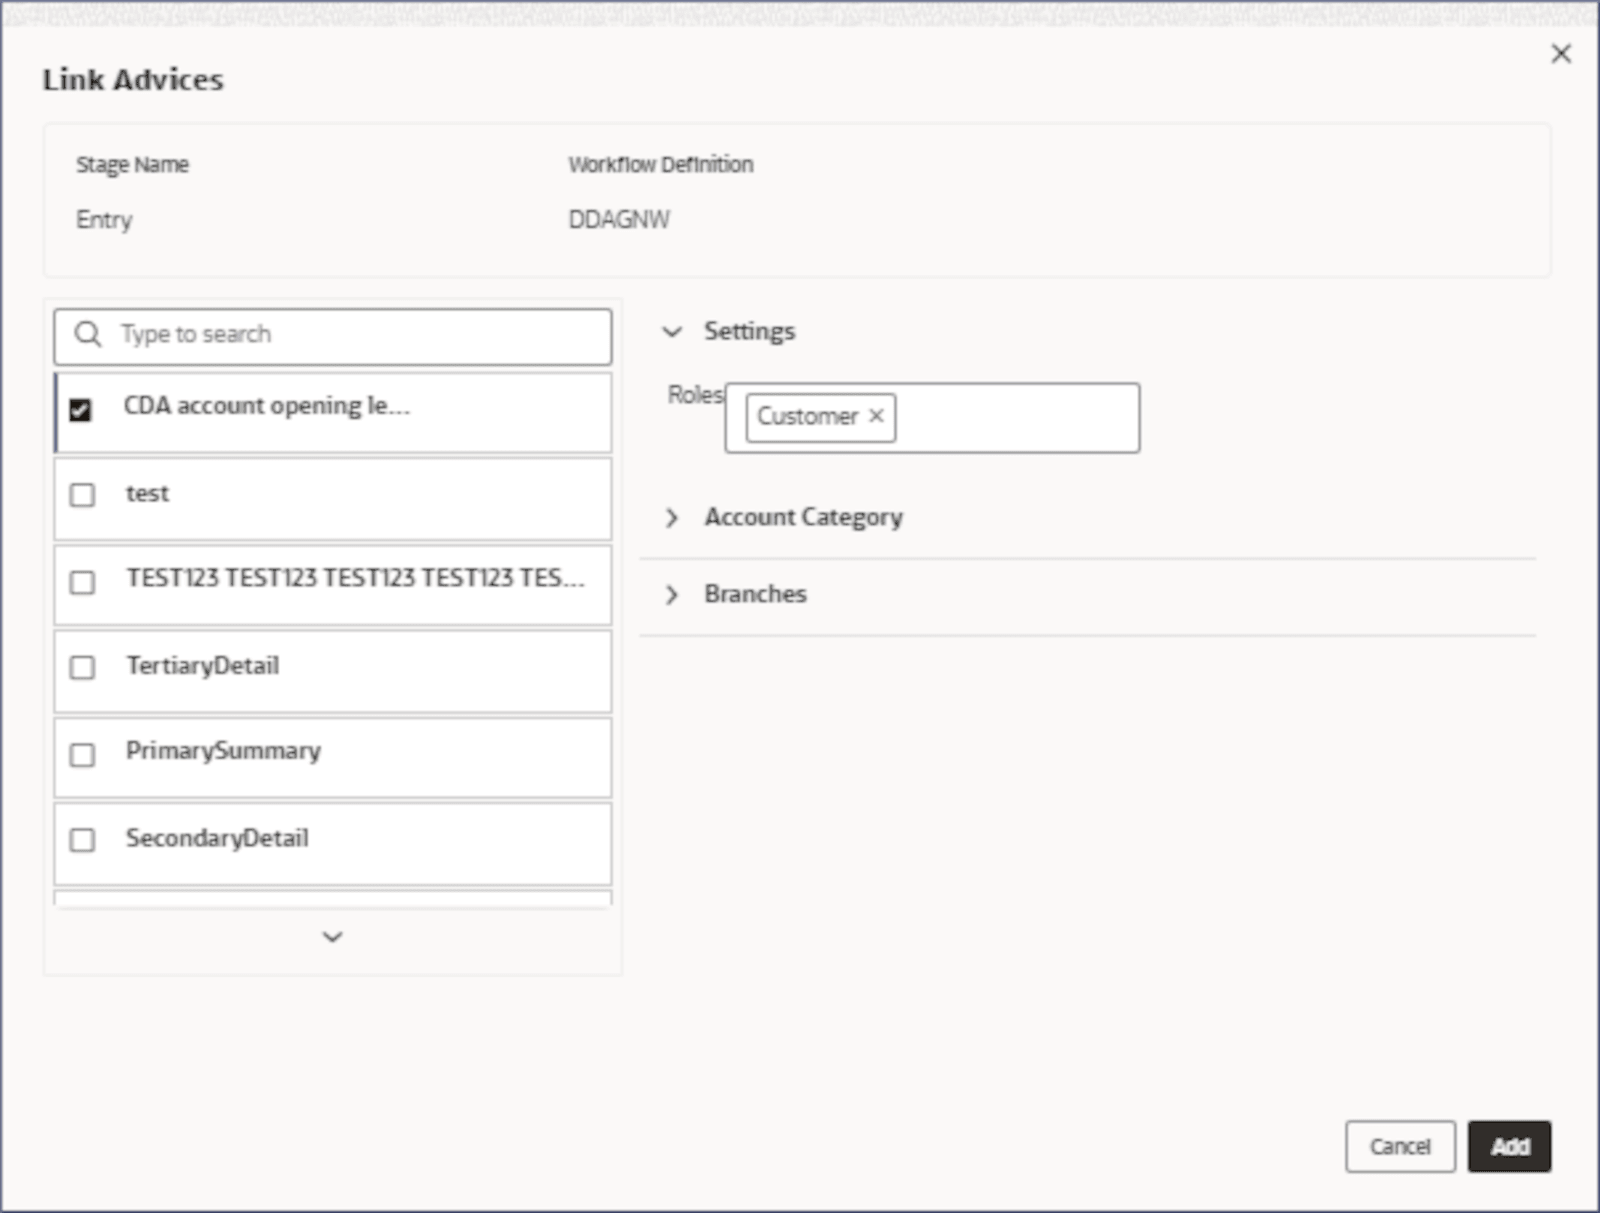
Figure 4-21 Unlock Business Process - Link Documents
- Select the required document.
- Configure the Settings, Account Category, and Branch Codes for each selected document.
- Click Add.
- To view, edit, or delete a Linked Document tile,
click
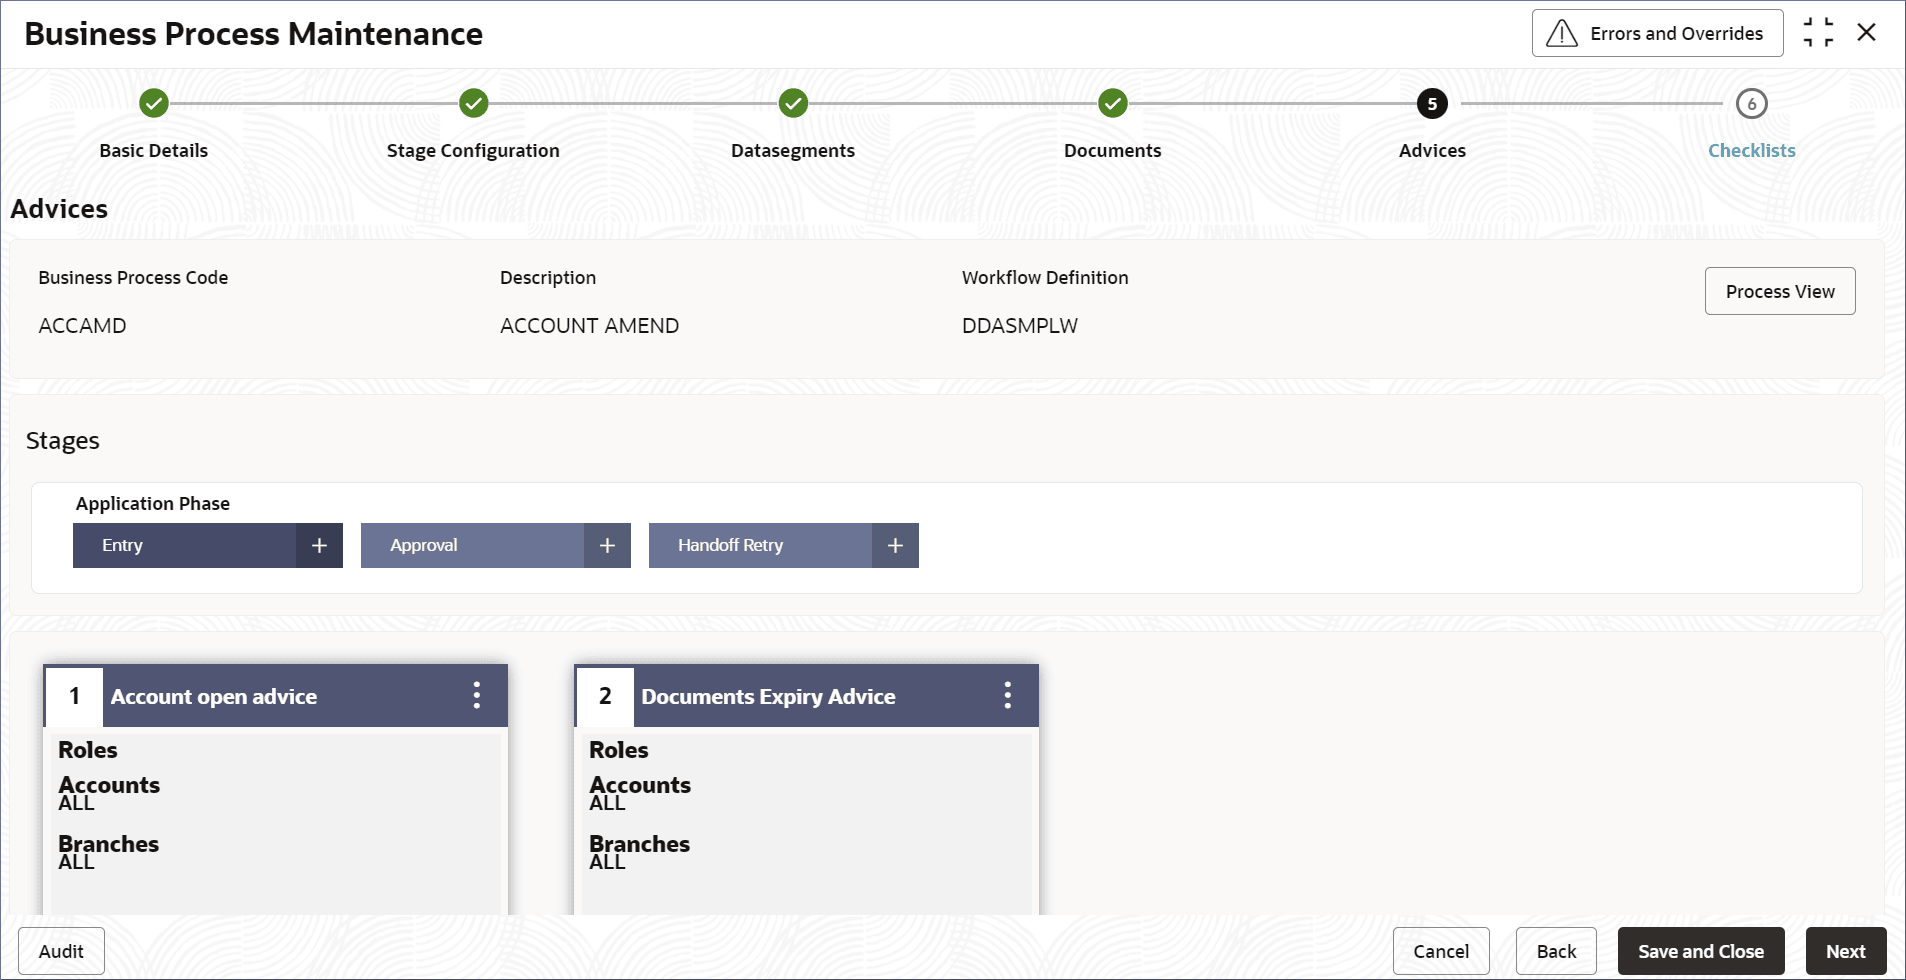
- Click Next.The Business Process Maintenance page displays the Advices screen.
- To view, edit, or delete an Advices tile, click
 and select View,
Edit, or
Delete.
- To link Advices to a stage, click + on the
required Application Phase stage tab.
The Link Advices dialog displays.
Figure 4-23 Unlock Business Process - Link Advices
- Select the required Advices.
- Configure the Settings, Account Category, and Branch Codes for each selected advice.
- To view, edit, or delete an Advices tile, click
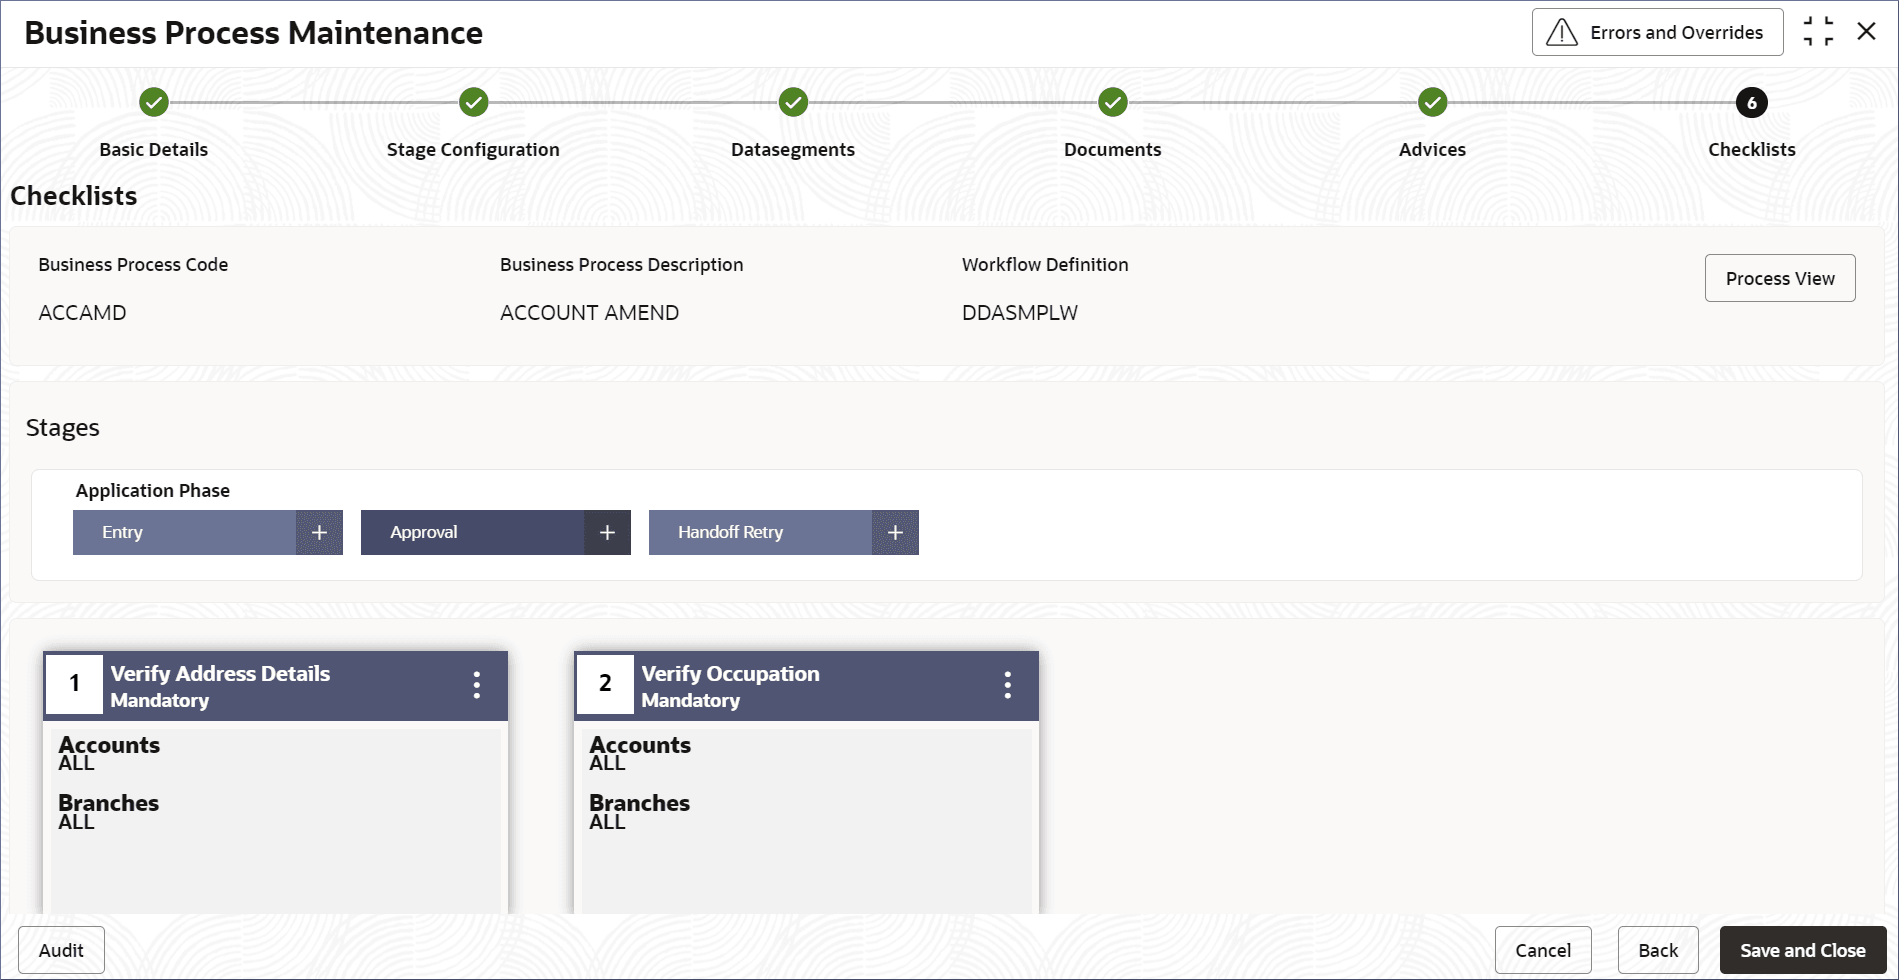
- Click Next.The Business Process Maintenance page displays the Checklist screen.
Figure 4-24 Unlock Business Process - Checklists
- To view, edit, or delete a Checklist tile, click
 and select View,
Edit, or
Delete.
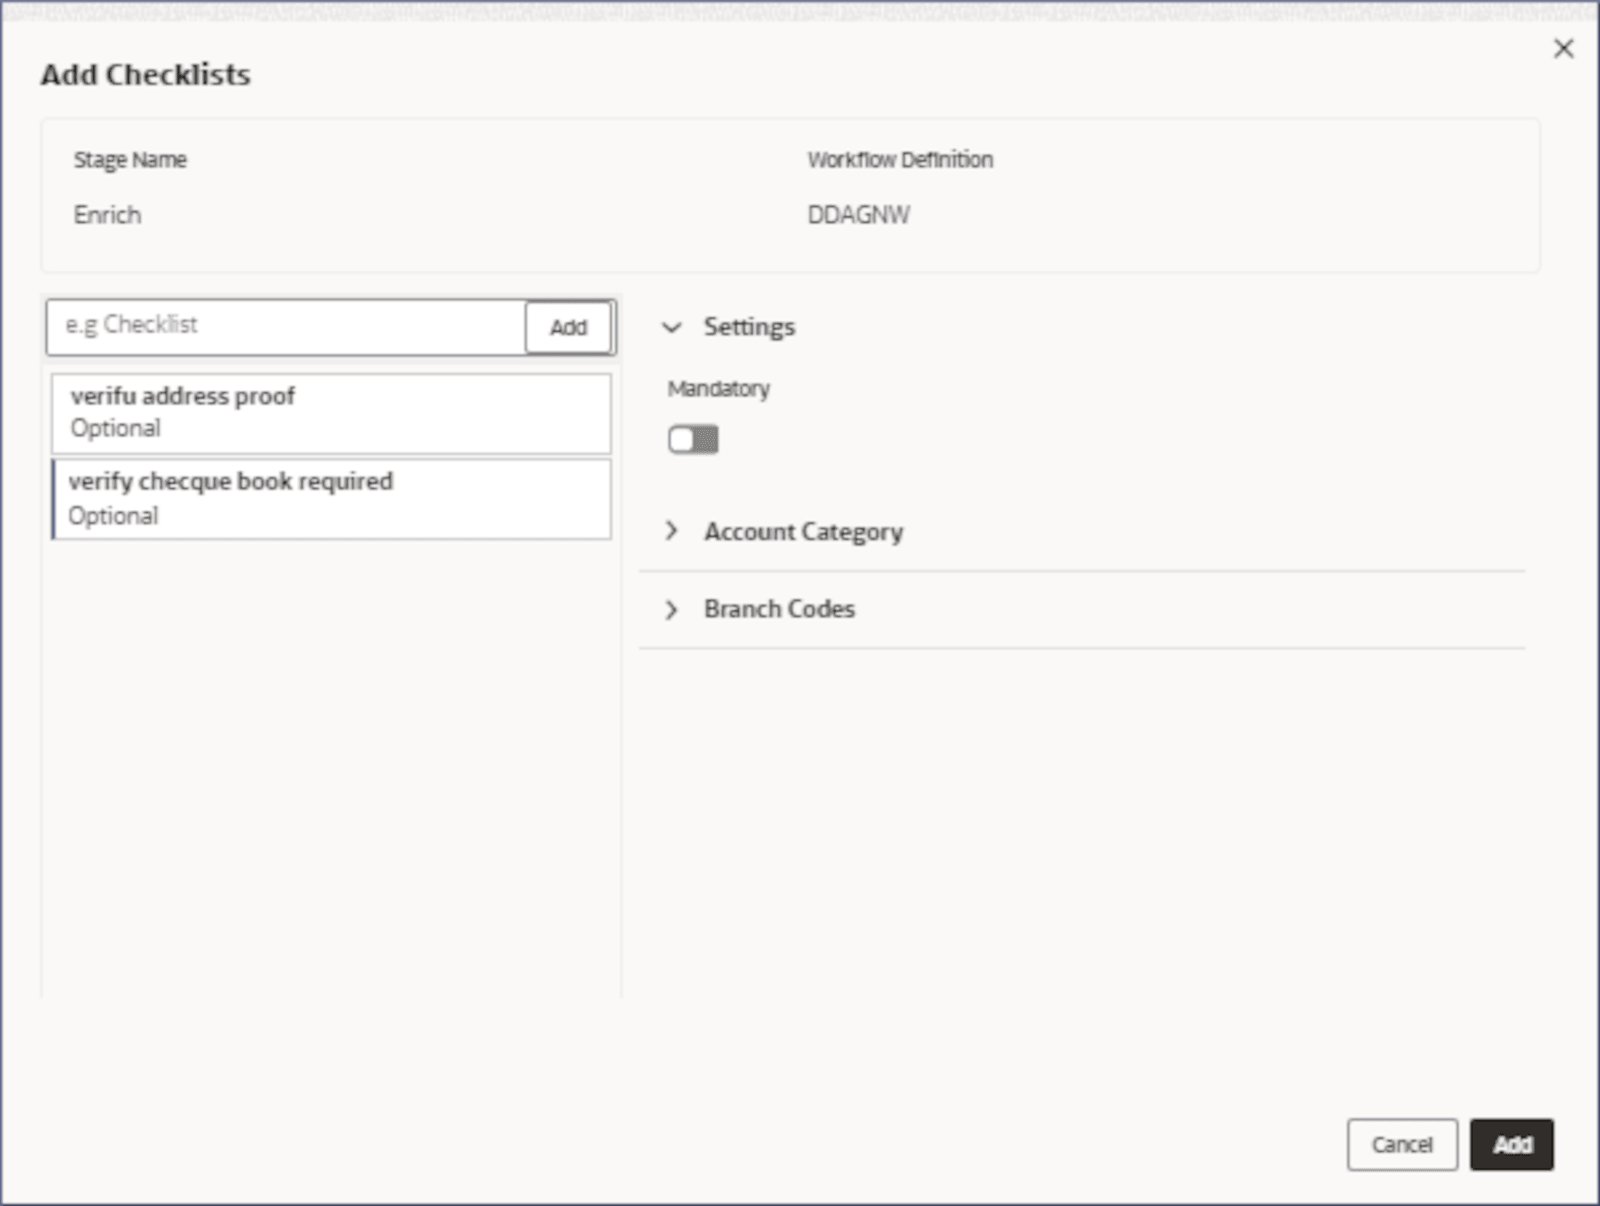
- To link Checklists to a stage, click + on
the required Application Phase stage tab.
The Add Checklists dialog displays.
- Select the required Checklists.
- Configure the Settings, Account Category, and Branch Codes for each selected Checklist.
- To view, edit, or delete a Checklist tile, click
- Click
- Approve or Reject an unauthorized Business Process.
- From the Search Filter, search for the required record that is in an Unauthorized and Open state.
- Click
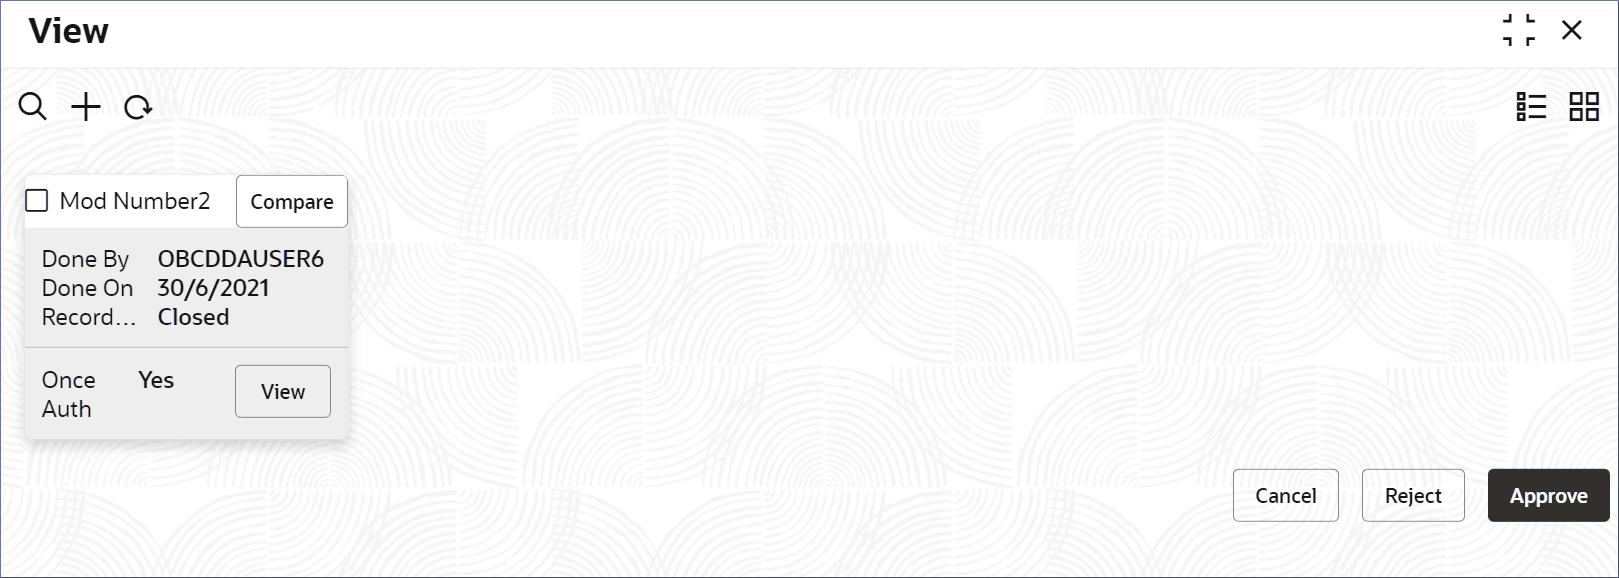
 and select Authorize.The View page displays.
Table 4-14 Authorize View
Field Name Description Mod Number<N> Indicates the number of times the record was modified. Where N represents the number of modifications. Note: For a newly created record the modification number is
1.Done By Name of the user who performed the latest modification. Done On Date on which the record was modified. Record Status The status of the record. Note: To authorize a record, its status should be Open.
Once Auth Specifies if the record was authorized at least once. Note: For a newly created record, the value is No.
Compare (Button) Click to compare the modified record with the previous version of the record. View (Button) Click to display the record details. - Click the check box besides Mod Number<N> to select the modified record.
- Click Approve or Reject.The Confirm dialog displays.
- Enter any remarks and click Confirm.A toast message confirms the successful approval or rejection of the record.
- On the View screen, click Audit.The following screen displays. This screen displays Date and Time details of the Branch.
- Click UTC tab.The following screen displays. This screen displays Universal Date and Time.
Parent topic: Corporate / Nostro Business Process
