1 Creating Credential Mapping
Steps to create credential mapping are:
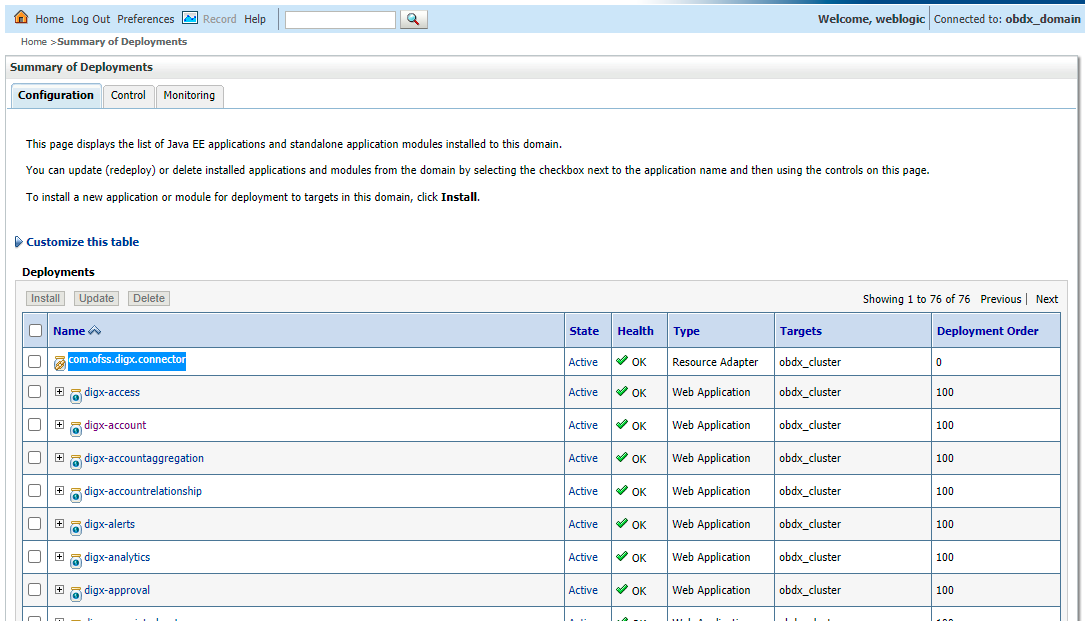
- In WebLogic, go to Deployments, and click on com.ofss.digx.connector
Figure 1-1 Deployed rar com.ofss.digx.app.connector
- Click Security → Outbound Credential Mapping. This will display Outbound Credential Mappings table.
Figure 1-2 Shows setting for com.ofss.digx.connector.rar
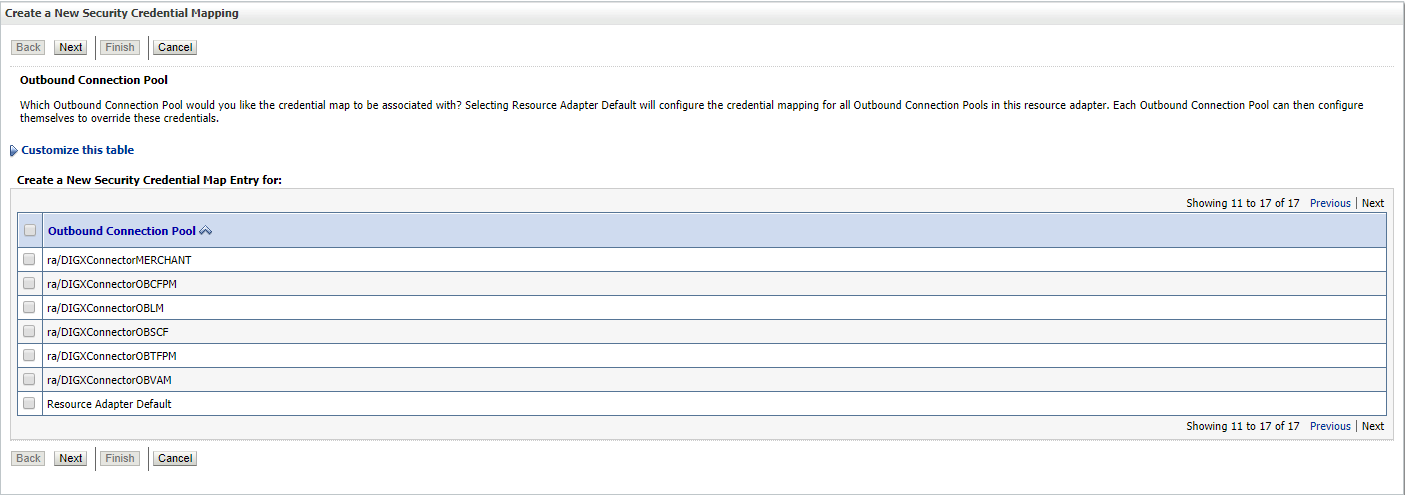
- Click New to add new credentials. This will display screen to create new security credential map entry. Also it shows Outbound Connection pool table. This table has Outbound Connection pool entry for each connection instance in weblogic-ra.xml in Resource Adapter along with default connection pool.
Figure 1-3 Shows Outbound Connection pool table
It shows corresponding weblogic-ra.xml file
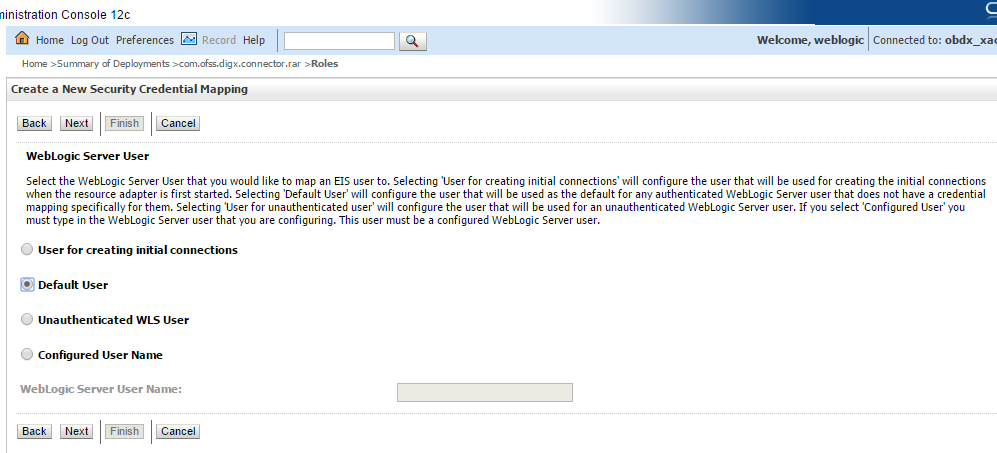
- Select Outbound connection pool to associate the credential map. And click Next. This will show screen to select weblogic server user.
- Select Default User. Selecting 'Default User' as WebLogic Server user will configure the user that will be used as the default for any authenticated WebLogic Server user that does not have a credential mapping specifically for them.
- And click Next. Screen to configure username and password will appear. Enter username and password.
Figure 1-5 User name and password configuration
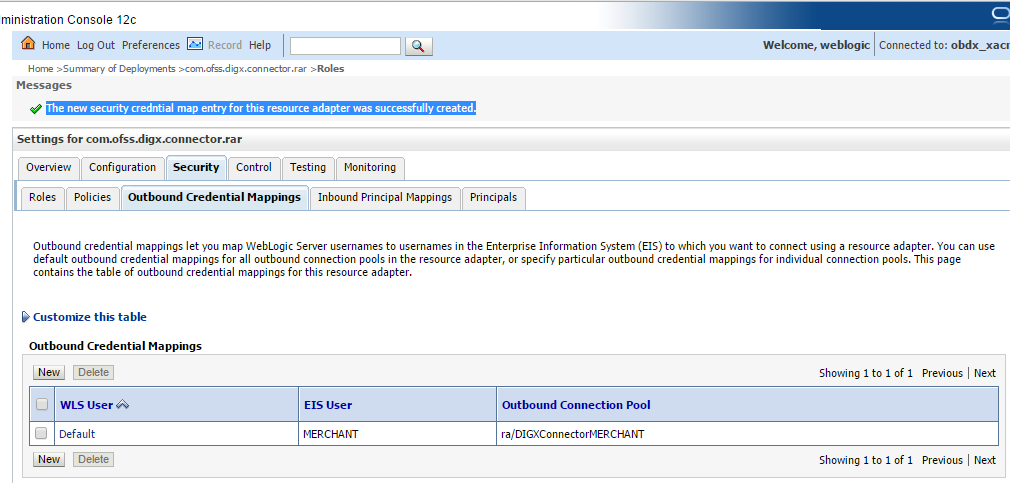
- Click Finish. The new security credential map entry will be created.
It displays the Credential map entry with username as MERCHANT associated with ra/DIGXConnectorMERCHANT connection pool.
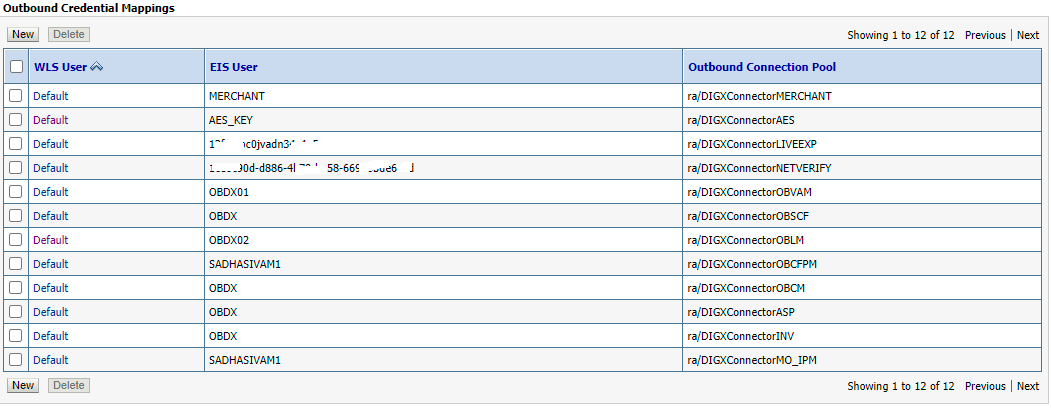
Below credential entries must be configured in connector. Managed server restart is required after this configuration
- DIGXConnectorAES is mandatory entry, The password value for this must be a 16 digit AES key that must be set
- Remaining entries are optional and depend on the module used.
Figure 1-7 Credential entries configured in connector
