- Core User Manual
- OAuth 2.0
- Identity Domain Maintenance
- Identity Domain Maintenance – Create
54.1.3 Identity Domain Maintenance – Create
To create an identity domain:
- Navigate to the above path.The Identity Domain Maintenance screen appears.
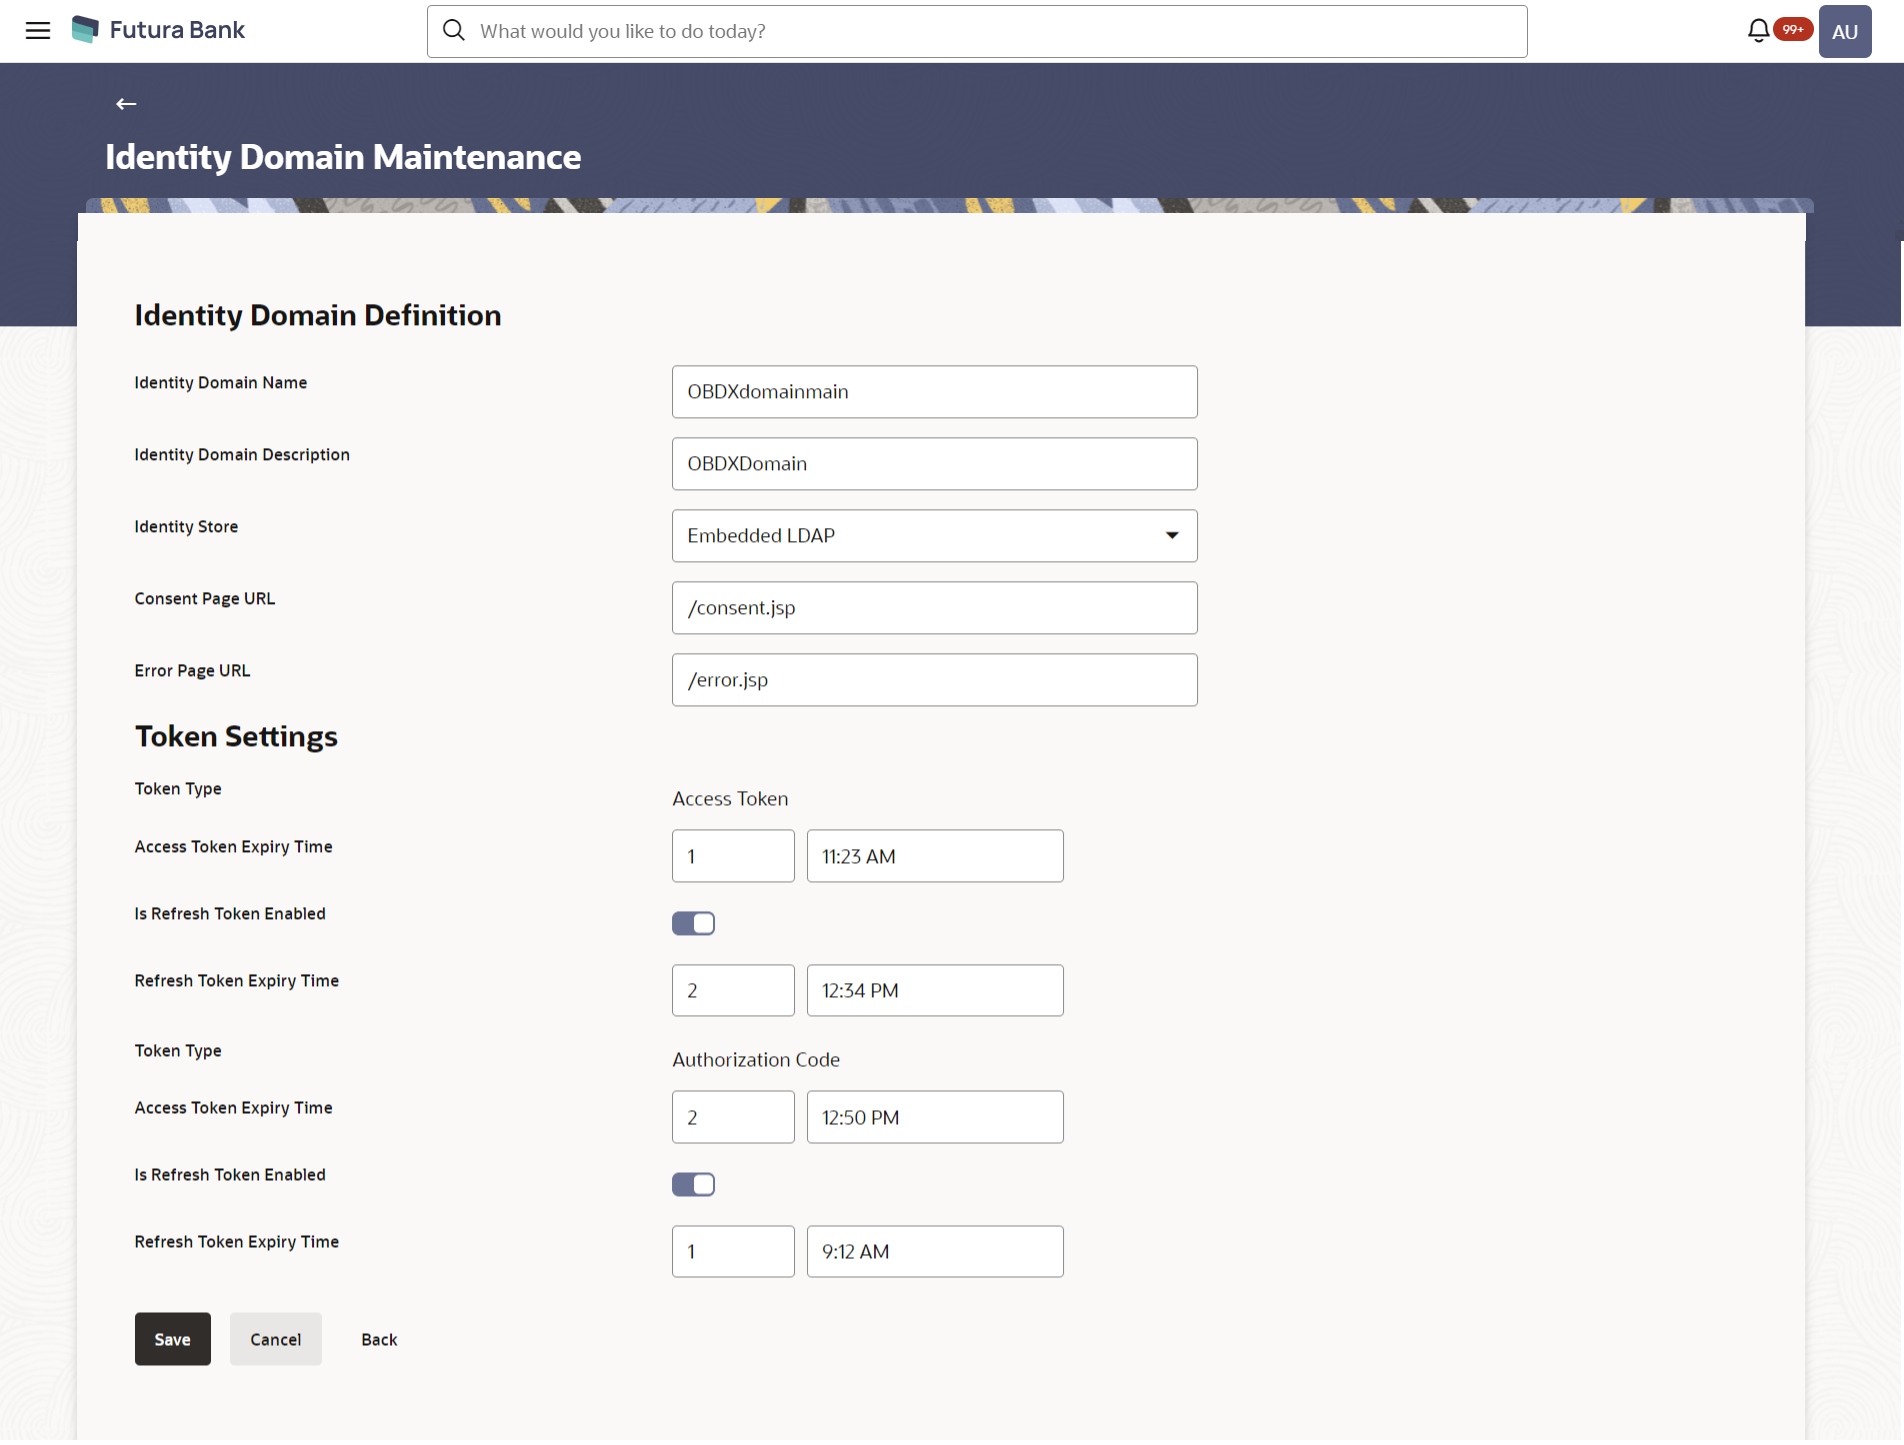
- Click Create to create a new Identity Domain. The Identity Domain Maintenance - Create screen appears.
Figure 54-5 Identity Domain Maintenance – Create
Table 54-3 Field Description
Field Name Description Identity Domain Definition Identity Domain Name Specify the name of the Identity Domain. Identity Domain Description Specify the Identity Domain description. Identity Store Select the Identity store to be mapped for the identity domain. Currently only Embedded LDAP is supported for the identity store. Consent page URL Specify the Consent page URL. This is the page on which the user will get re-directed to provide consent to the Third Party Provider (TPP) Error page URL Specify the Error page URL. This is the page on which the user will get re-directed to in case of incorrect details. Token Setting Token Type Displays the token type as Access Token. Token settings can be defined for both token types i.e. Authorization Code and Access Token Access Token Expiry Time Specify the expiry time for the access token. Is Refresh Token Enabled Specify whether the refresh token needs to be enabled. If enabled, the TPP will be provided with a refresh token along with access token. Refresh Token Expiry Time Specify the expiry time for refresh token. This field will be enabled to enter the expiry time only if Refresh Token is enabled.
Token Type Displays the token type as Authorization Code. Token settings can be defined for both token types i.e. Authorization Code and Access Token Access Token Expiry Time Specify the expiry time for the access token for token type as authorization code Is Refresh Token Enabled Specify whether the refresh token needs to be enabled. If enabled, the TPP will be provided with a refresh token along with access token for token type Authorization Code. Refresh Token Expiry Time Specify the expiry time for refresh token. This field will be enabled to enter expiry time only if Refresh Token is enabled for token type ‘Authorization Code’
- In the Identity Domain Name field, enter name for an identity domain to be created.
- In the Identity Domain Description field, enter description for an identity domain to be created.
- From the Identity Store list, select the Identity store for the identity domain.
- In the Consent Page URL field, enter URL for the consent page on which the user needs to be re-directed for providing consent to the TPP.
- In the Error Page URL field, enter URL for the error page on which the user needs to be re-directed in case of incorrect details entered.
- In the Access Token Expiry Time field for token type Access Token, enter the expiry time for the access token in days and hh:mm format.
- Click the Is Refresh Token Enabled toggle to ‘Y’ if
there is a need to provide with a refresh token along with an access
token.
- In the Refresh Token Expiry Time field, enter the expiry time for the refresh token in days and hh:mm format.
- In the Access Token Expiry Time field of Authorization Code Token type, enter the expiry time for the access token in days and hh:mm format.
- Click the Is Refresh Token Enabled toggle to ‘Y’ if
there is a need to provide with a refresh token along with an access token for
token type ‘Authorization Code’
- In the Refresh Token Expiry Time field, enter the expiry time for the refresh token in days and hh:mm format. This expiry time is for refresh token with token type ‘Authorization Code’
- Click Save to save the changes.OR
Click Cancel to cancel the transaction.
OR
Click Back to navigate to the previous screen.
- The Review screen appears.Verify the details, and click Confirm.
OR
Click Cancel to cancel the transaction.
OR
Click Back to navigate to the previous screen.
- The success message of identity domain details modification appears along with
the reference number.Click OK to complete the transaction.
Parent topic: Identity Domain Maintenance
