- Core User Manual
- Origination Workflow Configuration
- View Workflows
17.1 View Workflows
To view the origination workflows:
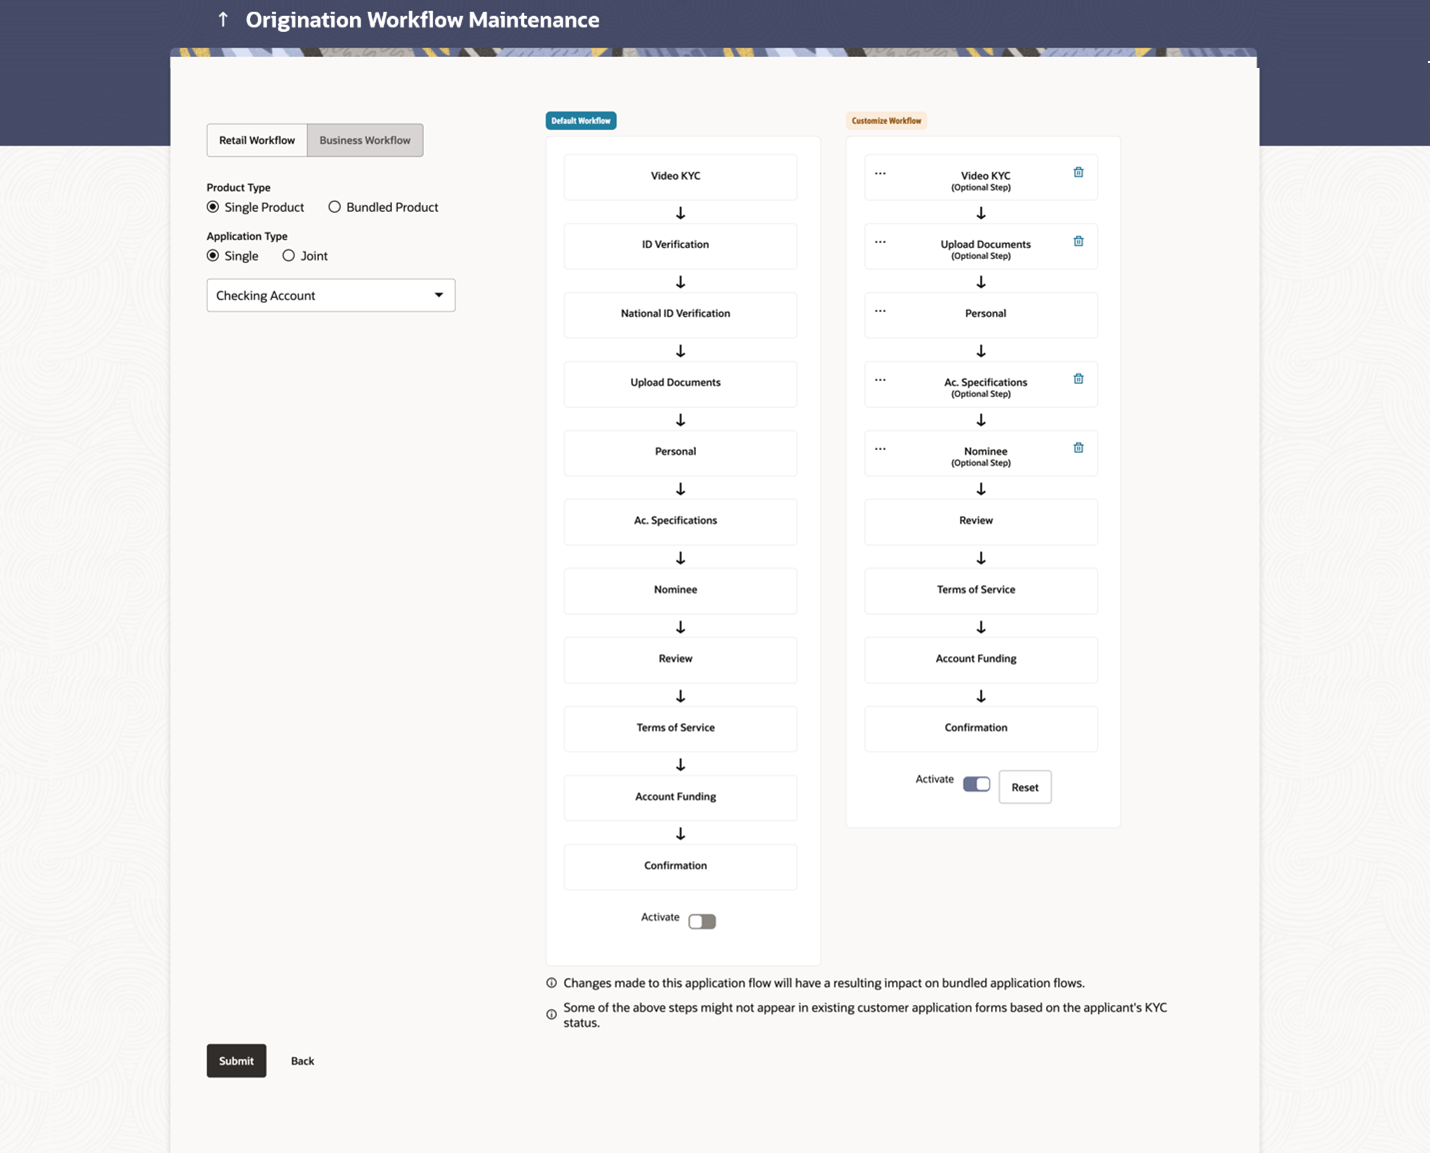
- Navigate to the above paths.The Origination Workflow Configuration screen appears.
- On the landing page, user needs to select Workflow Type, Product Type,
Application Type (if applicable) and Product Name (if applicable). On selecting values for these fields, both the default and custom workflows appears on the screen.
Figure 17-1 Origination Workflow Configuration- View Workflows
Table 17-1 Field Description
Field Name Description Workflow Type Workflows can be configured for Retail as well as Business products. Select the desired option. Configure workflow for Select the desired product application for which the workflow needs to be viewed or custom workflow is to be defined. The options are:- Single Product Application
- Bundle Application
Select Product Category Select the product category name for which the workflow needs to be viewed or configured. The list will be populated based on the Day 0 configurations done in the application. The options available for Retail are:- Savings Account
- Checking Account
- Term Deposits
- Credit Card
- Auto Loan
- Personal Loan
- Home Loan
- Education Loan
The options available for Business are:
- Savings Account
- Checking Account
- Term Loan
- Working Capital Loan
This field is appears only if the Single Product Application tab is selected in the Configure workflow for field.
Applicant type - Single/ Joint Select whether this workflow is for a single or a joint account application. This is available for Retail Savings and Checking accounts. Default Workflow On the screen, the user can see a sequence of steps that will be followed by default for the given product and application type. Custom Workflow Adjacent to the default workflow, the user can see a custom workflow. The user can change the sequence of steps as described in upcoming sections. Activate An activate button is present at the bottom of both the default and custom workflows. User can select to activate one of the workflows. - In the Actions column, click View
to view the default/ custom workflow details and activate it for selected
product.OR
Click Create to create a new custom workflow (Link is enabled only if no workflow is created for selected product).
OR
Click Back to navigate to the previous screen.
Parent topic: Origination Workflow Configuration
