59 Network Purpose Code Mapping

This topic describes the systematic instruction to Network Purpose Code Mapping option.

For certain countries, it is mandatory to capture purpose code of the payment for both domestic and Cross border transfers. In this option the provision is made for the customer to input the Purpose Code while initiating Domestic / Cross border payments.

Note:

This is supported only for the Domestic / Cross border payments.

Pre-requisites

  • Transaction access is provided to System Administrator

Features supported in application

  • Edit purpose code mapping

To update the network purpose code mapping:
  1. Perform anyone of the following navigation to access the Network Purpose Code Mapping screen.
    • From System/ Bank Administrator Dashboard, click Toggle Menu, then click Menu and then click Payments, Under Payments , click Network Purpose Code Mapping.
    • From the Search bar, type Payments – Network Purpose Code Mapping and press Enter.
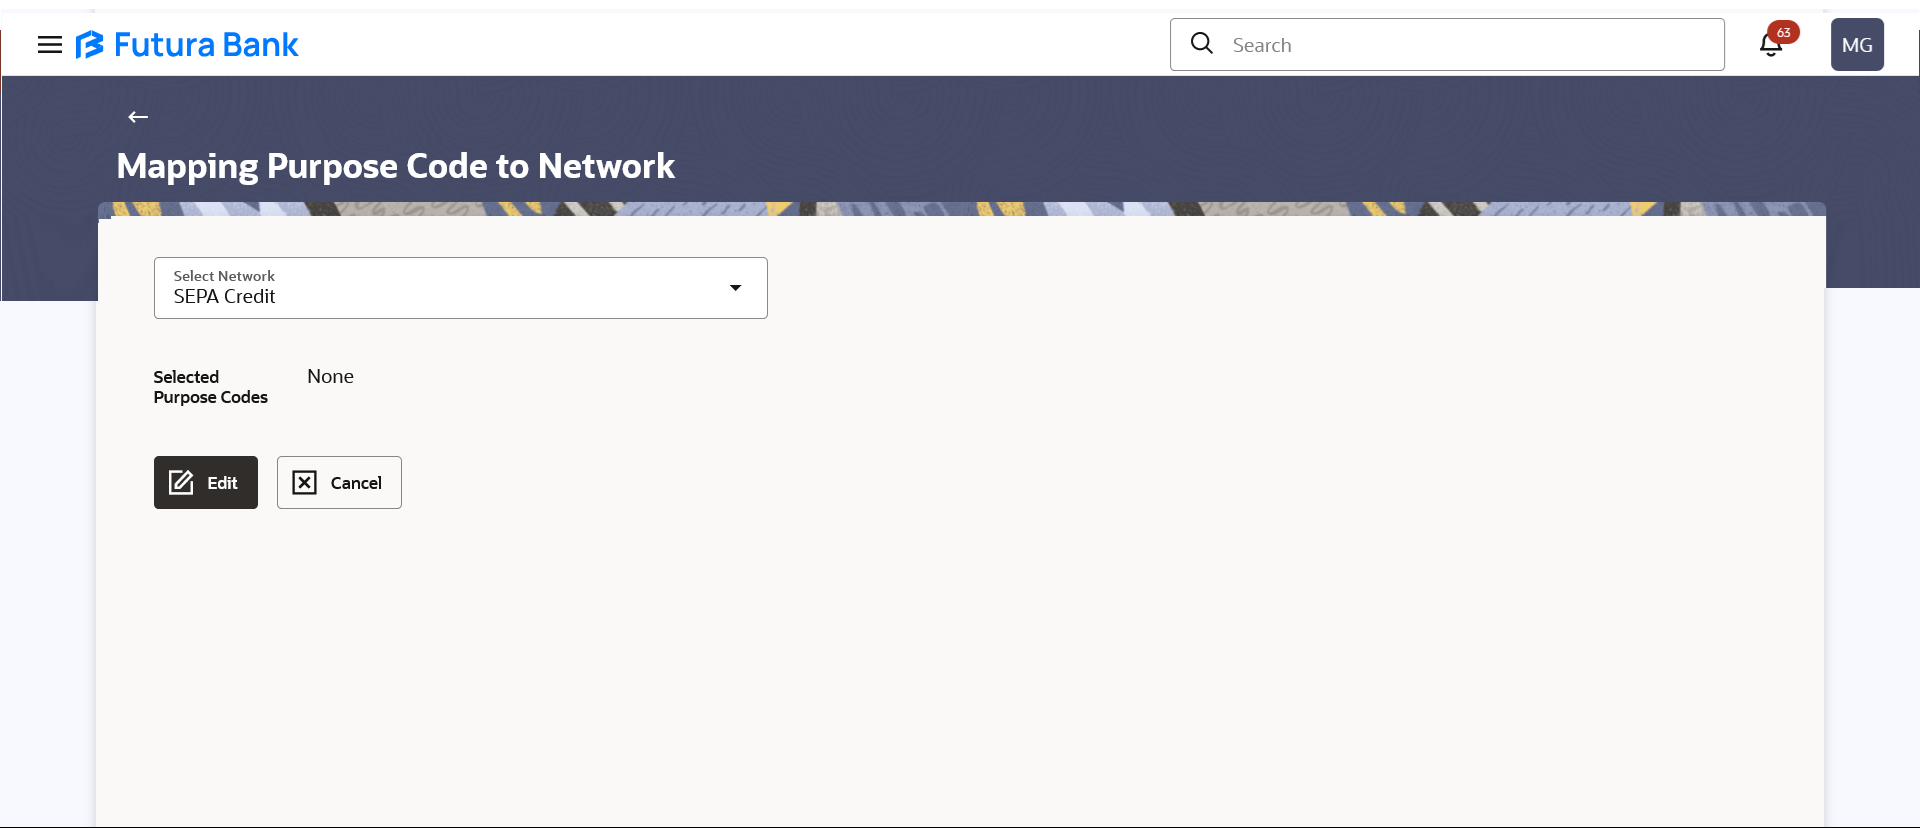
    The Network Purpose Code Mapping screen appears.
  2. From the Select Network list, select the desired network whose purpose code mapping you wish to modify.

    Figure 59-1 Network Purpose Code Mapping


    Table 59-1 Network Purpose Code Mapping - Field Description

    Field Name Description
    Select Network The network to be mapped with purpose code.

    The options are:

    • Cross Border Swift
    • RTGS (for India region)
    • NEFT (for India region)
    • IMPS (for India region)
    • SEPA Credit (for SEPA region)
    • SEPA Instant (for SEPA region)
    Selected Purpose Codes Displays the list of purpose code mapped with selected network.
  3. Click Edit.
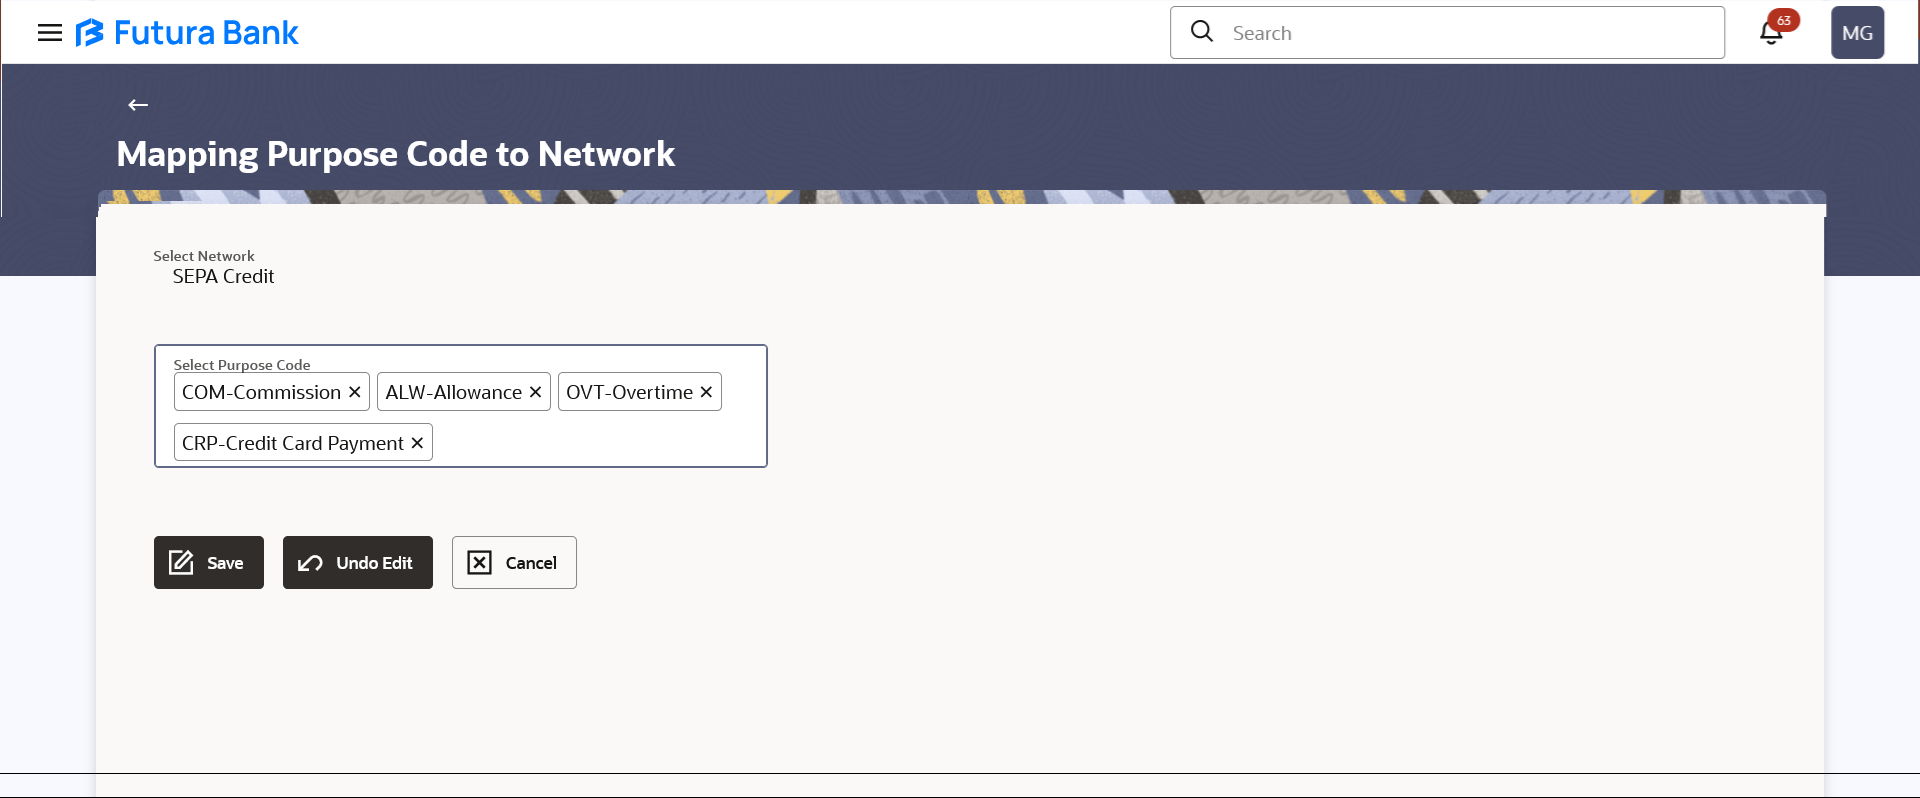
    The Network Purpose Code Mapping screen in editable mode appears.

    Figure 59-2 Network Purpose Code Mapping- Edit


  4. Click within the Select Purpose Code input field and select the purpose code from the list that you want to add to the mapping.
  5. Perform one of the following actions:
    • Click Save to mapped the purpose code(s) with selected network.

      The Review screen appears.

    • Click Cancel to cancel the transaction.
    • Click Undo Edit to reset the changes made.

    Note:

    Click the X icon to remove the purpose code from the mapping list.
  6. Perform one of the following actions:
    • Verify the details, and click Confirm.

      The success message with reference number & status appears.

    • Click Cancel to cancel the transaction.
    • Click Back to navigate back to the previous screen.
  7. Click OK to complete the transaction.