65.4.1 Biller Registration - Adhoc Report
This topic describes the systematic instruction to Biller Registration - Adhoc Report option.
Biller Registration Adhoc reports are generated on demand or on request. Generated reports can be viewed using My Reports screen.
To generate the Biller Registration adhoc report:
- Navigate to the above path.The Report Generation screen appears.
- Click the Adhoc tab.
- From the Report Name list, select the appropriate report
to be generated.The respective report generation screen appears.
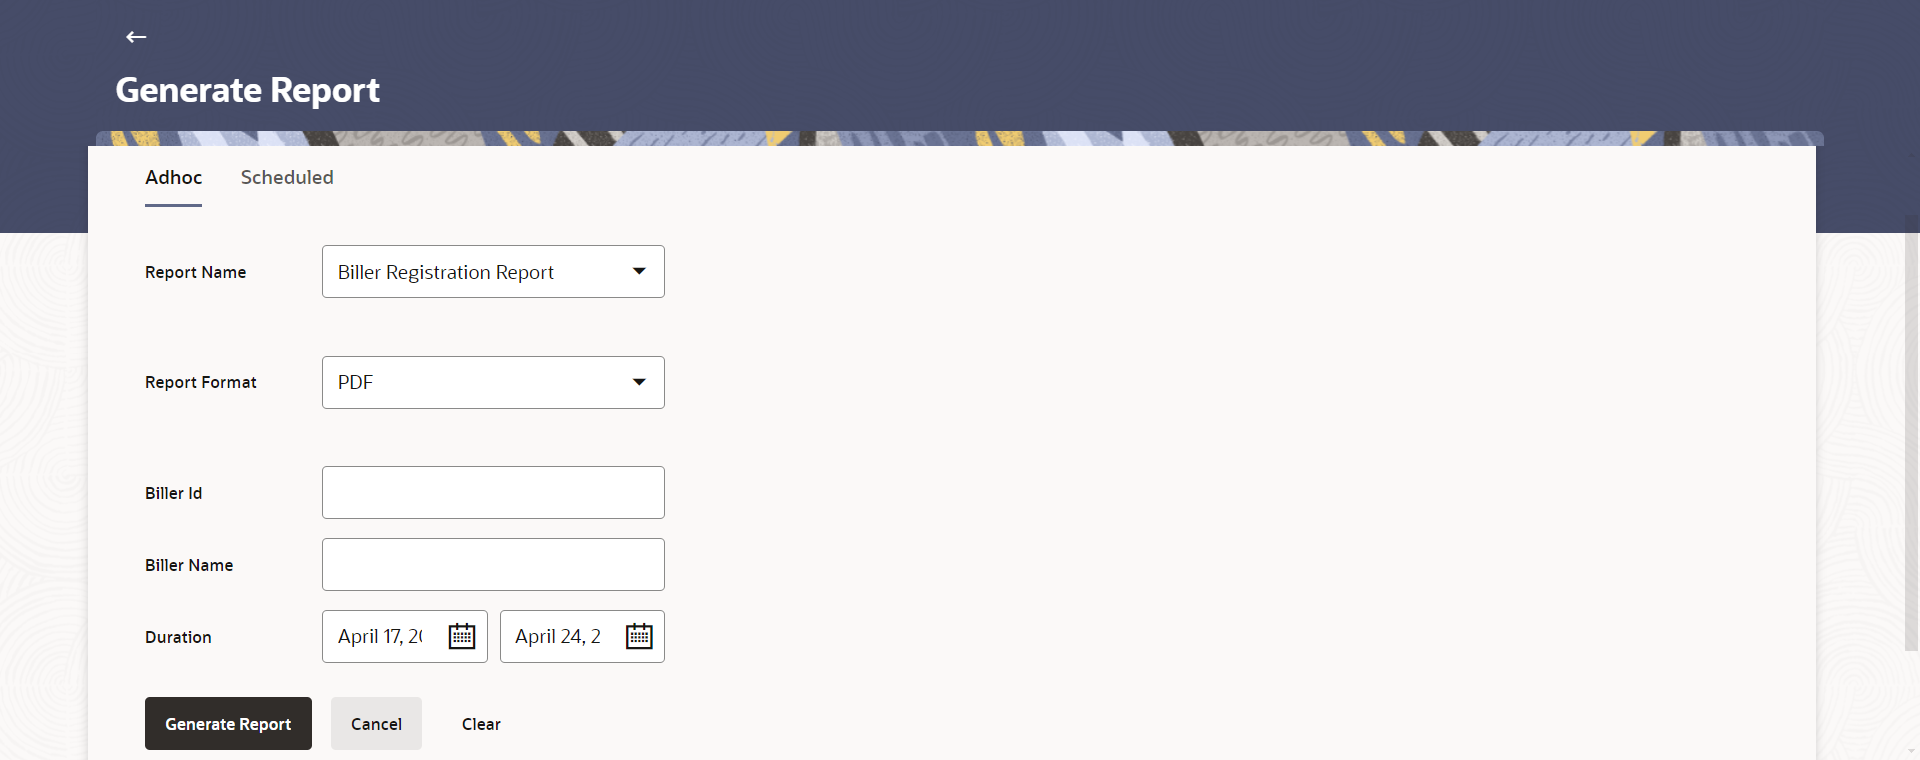
Figure 65-11 Biller Registration - Adhoc Report
Note:
The fields which are marked as Required are mandatory.For more information on fields, refer to the field description table.
Table 65-10 Biller Registration - Adhoc Report - Field Description
Field Name Description Report Name Select the type of report to be generated. Report Format Select the format in which the report is to be generated. The options with Internal Reporting Application are:- CSV
Biller Id Specify the unique code assigned to a specific biller. Biller Name Specify the name of the biller. Duration Select the date range for which the report is to be generated. User has to enter From and To dates.
- From the Report Format list, select the format in which the report is to be generated.
- In the Biller Id field, enter the id of the biller for whom the report to be generated.
- In the Biller Name field, enter the name of the biller.
- From the Duration - From and Duration - To list, select the appropriate duration.
- Perform anyone of the following actions:
- Click Generate Report to generate the report.
- Click Cancel to cancel the transaction.
- Click Clear to reset the search parameters.
- Perform anyone of the following actions:
- The success message along with the reference number, status and Report Request Id appears. Click Ok to close the screen and navigate to the dashboard.
- Click on the View Reports link to download the report.
The user is directed to the My Reports screen. The list of reports appears.
- Click Generate another report to generate another report.
- In the My Reports screen, click on desired
Report Sub ID to view and download the generated
report.A report will be generated in the format specified at the time of scheduling or generating an adhoc report.
Note:
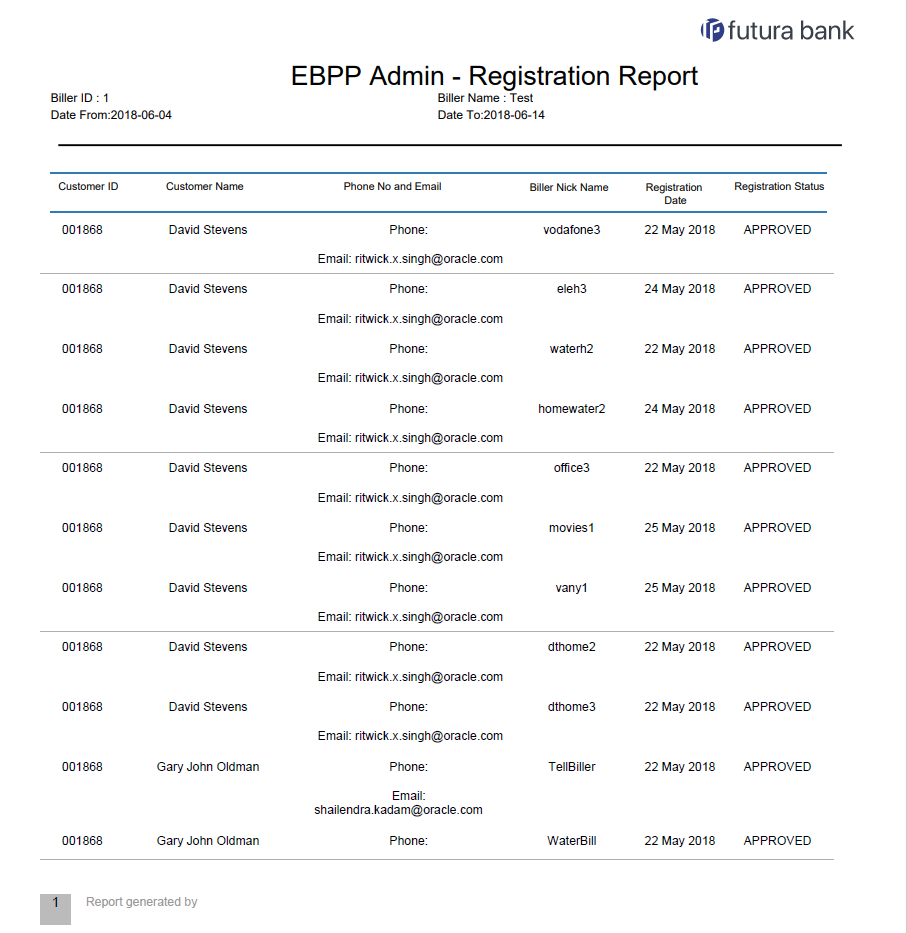
You can also download the requested report from Administrator Dashboard, click Toggle Menu, then click Reports and then click My Reports.Figure 65-12 For reference, a specimen of the report generated is given below:
Note:
The fields which are marked as Required are mandatory.For more information on fields, refer to the field description table.
Table 65-11 EBPP Admin Registration Reports - Field Description
Field Name Description Report Parameters Information specified in below fields are related to report parameters. Biller ID The unique ID of the biller. Biller Name The name of the biller. Date From The date from which the report is generated. Date To Date till which the report is generated. . Customer Id The unique id of the customer/Party. Customer Name The name of the customer/party. Customer Phone No and Email The phone number and Email address of the customer. Biller Nickname The nick name of the biller. Registration Date The date on which customer is registered to the biller. Registration Status The status of registration.
Parent topic: Biller Registration Report

