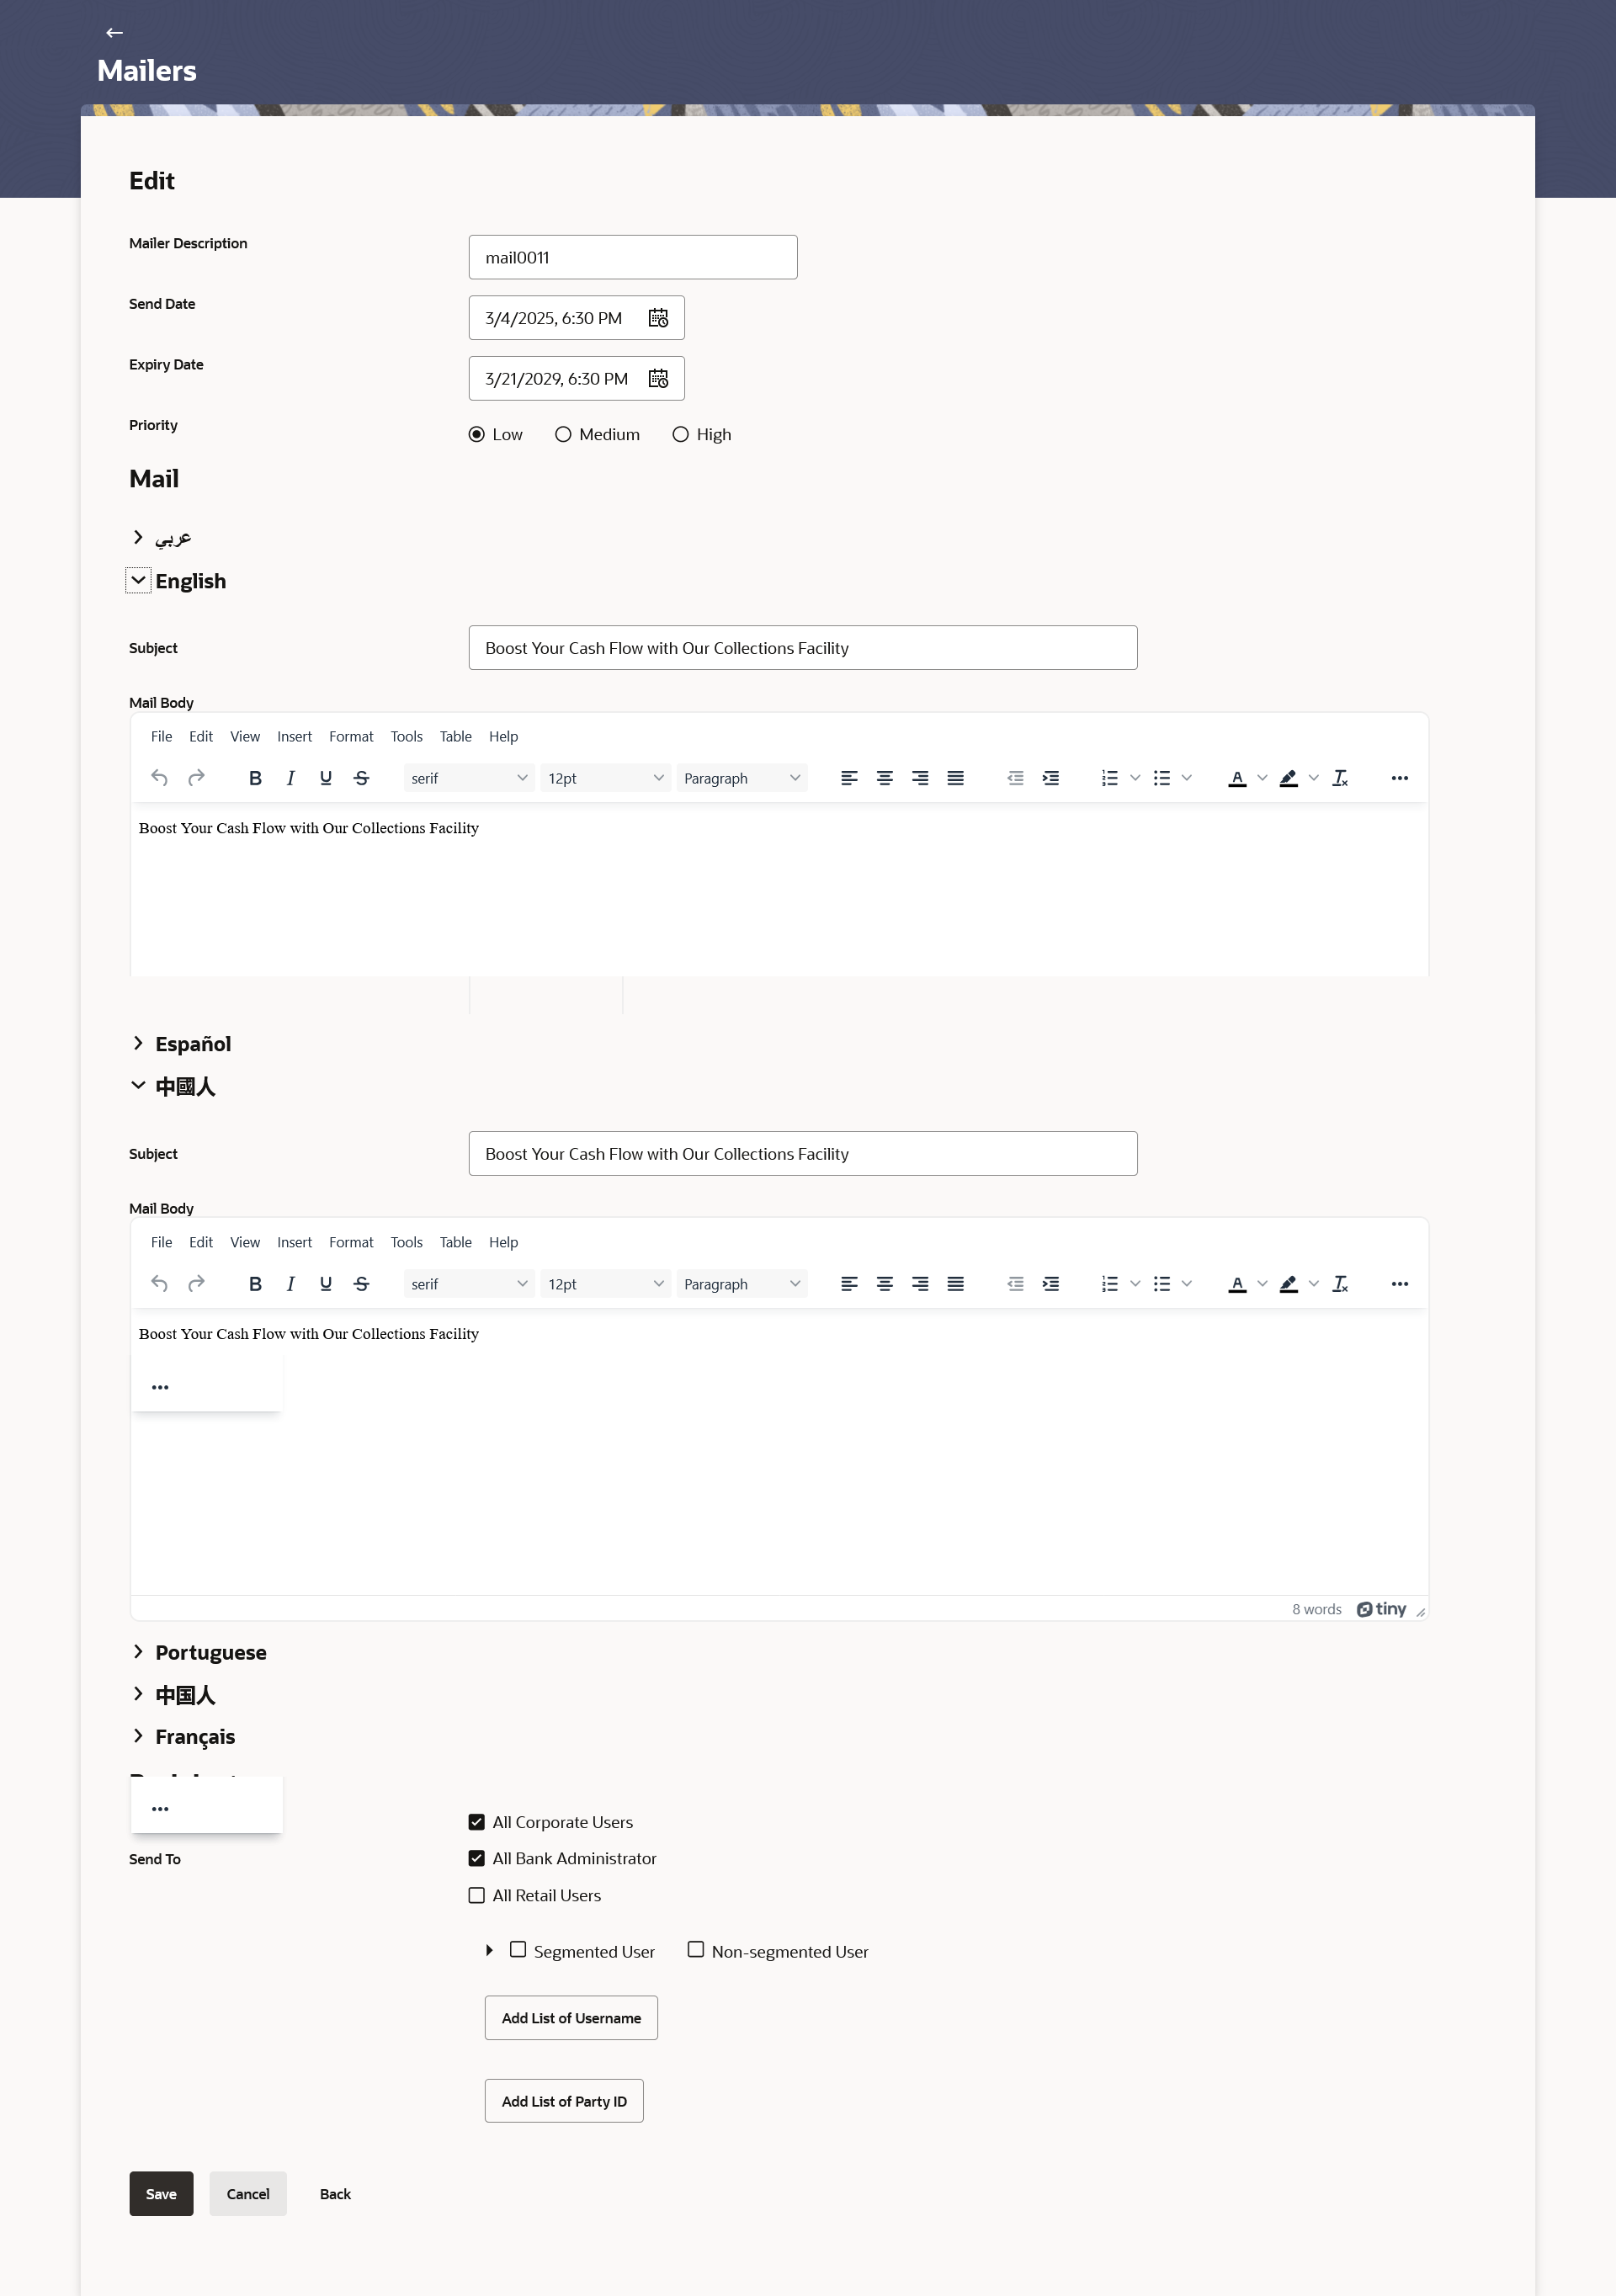
41.3 Mailers - Edit
This topic describes the systematic instruction to Mailers - Edit function.
This function enables the System Administrator to edit the mailer details.
Note:
This option is available only for Mailers, which have status as Scheduled (future dated).To edit or update a mailer details:
- Navigate to one of the above paths.The Mailers screen appears.
- Enter the search criteria, click Search.The search results appear on the Mailers screen.
- In the Mailer - Search Results section, click the
Mailer Code link of the record for which
you want to view the details.The search results appear on the Mailers - View screen appears.
- Perform anyone of the following actions:
- Click Edit to edit the mailer. The Mailers - Edit screen appears.
- Click Cancel to cancel the transaction.
- Click Back to navigate to the previous screen.
Note:
The fields which are marked as Required are mandatory.For more information on fields, refer to the field description table.
Table 41-4 Mailers - Edit - Field Description
Field Name Description Edit Mailer Code The unique key to identify the mailer. This field is not editable.
Mailer Description The description of the mailer corresponding to mailer code. Send Date The desired date and time for sending the mailer. Expiry Date The date and time on which the mailer will expire. Priority The priority of the mailer. The options are:- Low
- Medium
- High
Mail The following section displays the list supported languages in which Mailers can be maintain. Language Choose the preferred language in which mailer is to be defined. Drill down to add details of the mailer.
Mail Subject The subject of the mailer. Mail Body The content for the mail body of the mailer. Recipients Send To The recipients of the mailer. The options are:
- All Corporate Users
- All Bank Administrator
- All Retail Users
- Segmented Users
- Non-Segmented Users
- List of User ID: This field is enabled, if you click the Add List of User ID button.
- List of PartyID: This field is enabled, if you click the Add List of Party ID button.
- View the defined values for fields, in an editable form.
- Modify the required details.
- Perform anyone of the following actions:
- Click Save to update the changes.
- Click Cancel to cancel the transaction.
- Click Back to navigate to the previous screen.
- Perform anyone of the following actions:
- The Review screen appears. Verify the details, and click Confirm.
- Click Cancel to cancel the transaction.
- Click Back to navigate to the previous screen.
The success message of mailer update appears along with the transaction reference number.
- Click OK to complete the transaction.
Parent topic: Mailers
