63.2 Update Timer
This topic describes the systematic instruction for user to modify the execution schedule of the underlying Timer.
To update the timer details:
- Navigate to the Timer Maintenance screen.
- From the Timer ID list, select the event whose timer is to be set.
- Click Search. The details of selected event appears.
- Click Edit to modify the execution schedule of the
underlying Timer.The Timer Details appears in editable mode.
- Update the Expression, and click on the Validate Expression
to ensure the expression is as per the supported format and
understand it in human readable form through description.
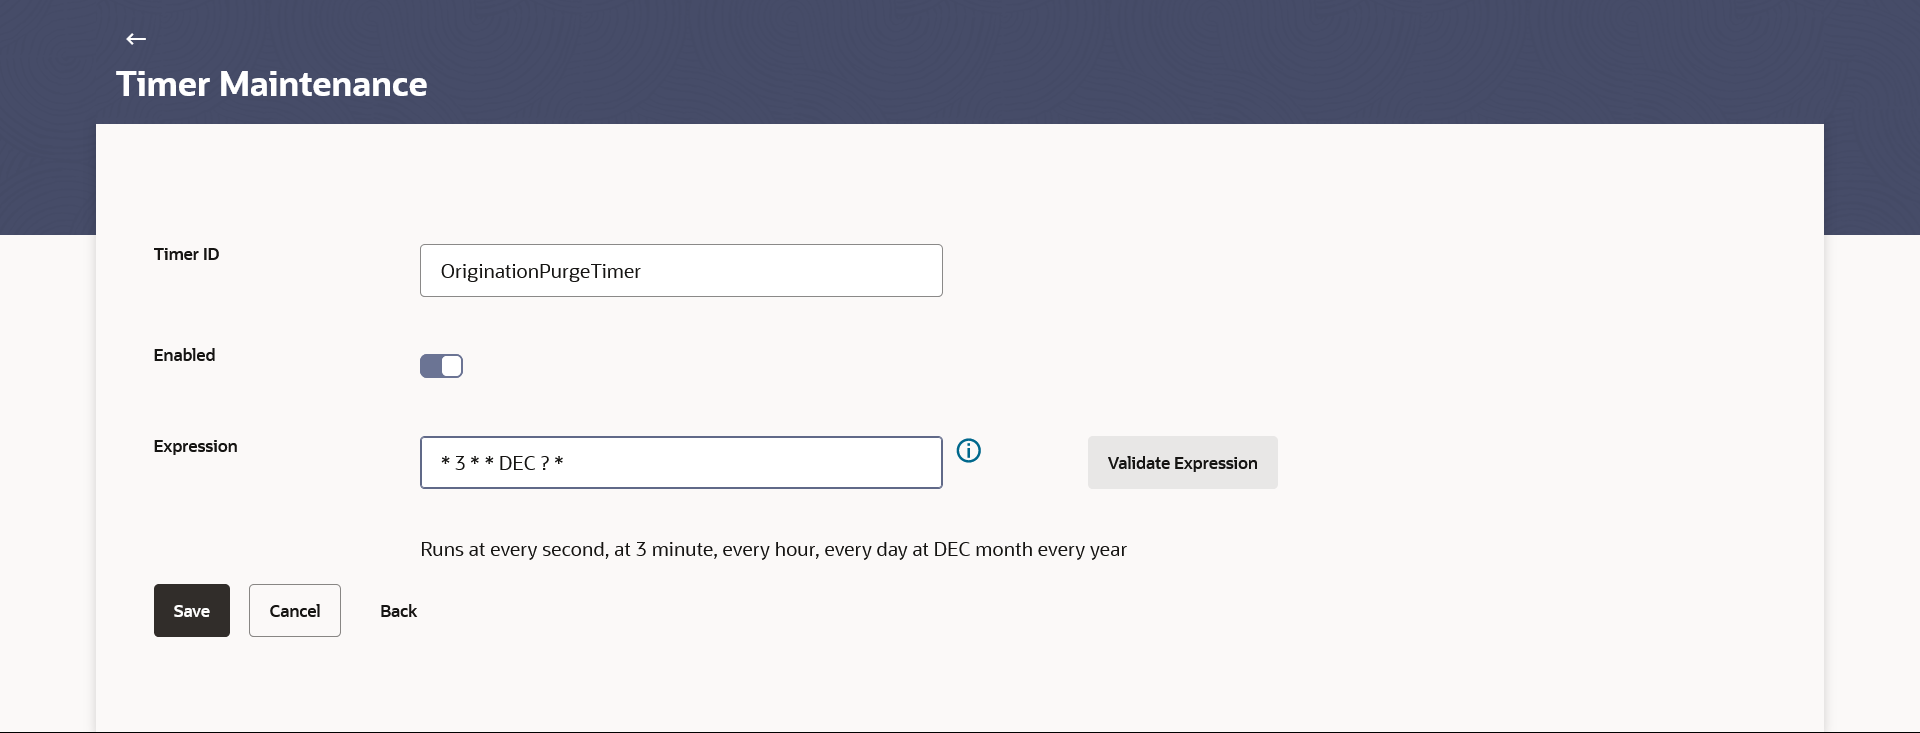
Figure 63-3 Timer Maintenance – Timer Details (Edit)
Note:
The fields which are marked as Required are mandatory.For more information on fields, refer to the field description table.
Table 63-3 Timer Maintenance – Timer Details (Edit) - Field Description
Field Name Description Timer ID Name of event for which timer is to be set. Enabled Enable or disable the switch to activate or deactivate the timer. Expression Specify the expression for the selected event.
The format to set the timer is <Seconds> <Minutes> <Hours> <Day of Month Month> <Day Of Week> <Year>.
Note:
- Click the
 icon to view the expression format.
- Click the Validate Expression to execute the expression and validate it.
Description Displays the expression details. - Click the
- Edit the required details.
- Perform one of the following actions:
- Click Save to update the changes.
The Review screen appears.
- Click Back to navigate back to previous screen.
- Click Cancel to cancel the transaction.
- Click Save to update the changes.
- Perform one of the following actions:
- Verify the details, and click
Confirm.
The success message with reference number appears.
- Click Cancel to cancel the transaction.
- Click Back to navigate back to previous screen.
- Verify the details, and click
Confirm.
- Click OK to complete the transaction.
Parent topic: Timer Maintenance
