54.3.4 User Groups - Retail & Business User – Group Summary

This topic describes the systematic instruction to User Groups - Retail & Business User – Group Summary option.

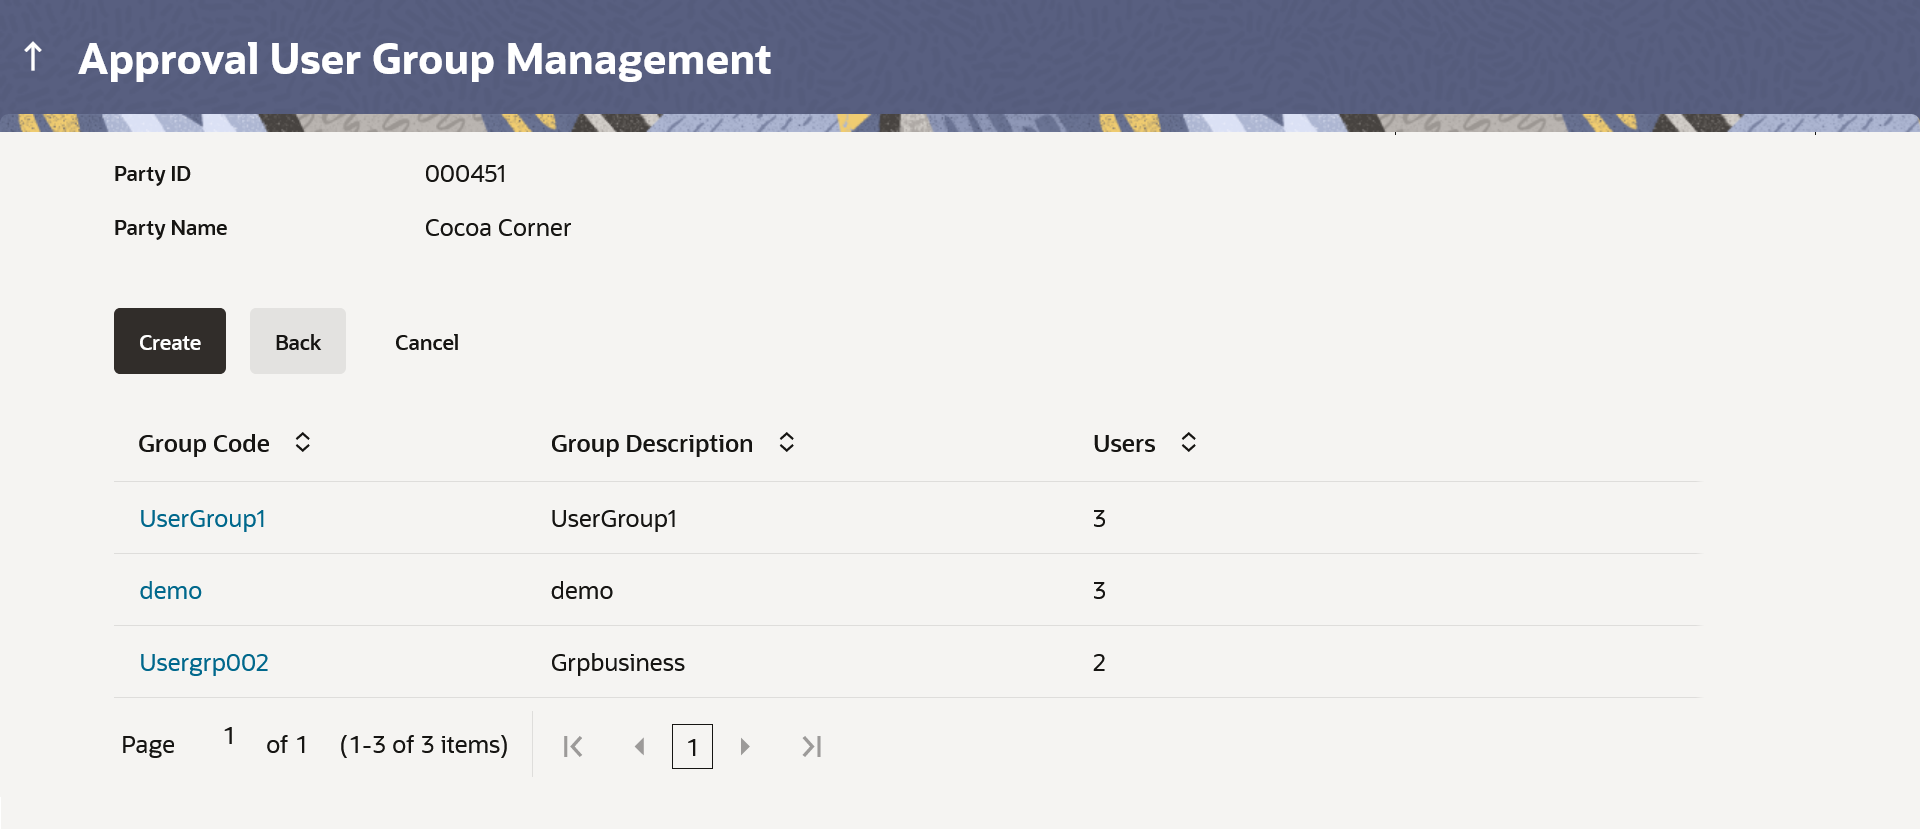
Once the logged in Bank Administrator navigates to User Group Management screen, and searches the party ID. User groups maintained if any under the party are displayed on the screen. User can opt to view the details of existing user groups or can create new user group using this screen.

  1. Navigate to the above path.
    The User Group Management screen appears.
  2. In the Party ID field, enter the Party ID.
  3. Click Search.
    User groups maintained if any under the party are displayed on the screen.
  4. Click on Party ID hyperlink to view details of the selected Approval Workflow.

    Figure 54-11 Retail & Business User – Search Summary


    Note:

    The fields which are marked as Required are mandatory.

    For more information on fields, refer to the field description table.

    Table 54-8 Retail & Business User – Search Summary - Field Description

    Field Name Description
    Summary Information specified in below fields are related to Summary.
    Party ID Party ID of which user groups are to be viewed/ edited.
    Party Name Party name of Party ID of which user groups are to be viewed/ edited.
    Search Result Information specified in below fields are related to Search Result.
    Group Code User group code.

    (This field will be displayed only if there are existing user groups available under a party).

    Group Description Description provided to the user group.

    (This field will be displayed only if there are existing user groups available under a party).

    Users Number of users available in each user group.

    (This field will be displayed only if there are existing user groups available under a party).

  5. Perform any one of the following actions:
    • Click Create to create new user group.
    • Click Back to navigate to previous screen.
    • Click Cancel to cancel the transaction.
    • Click on Group Code link to view details of the selected User Group.

    Further drill down is given on the each user group to view the details of the users mapped to each group.

Retail & Business User- View Group Details

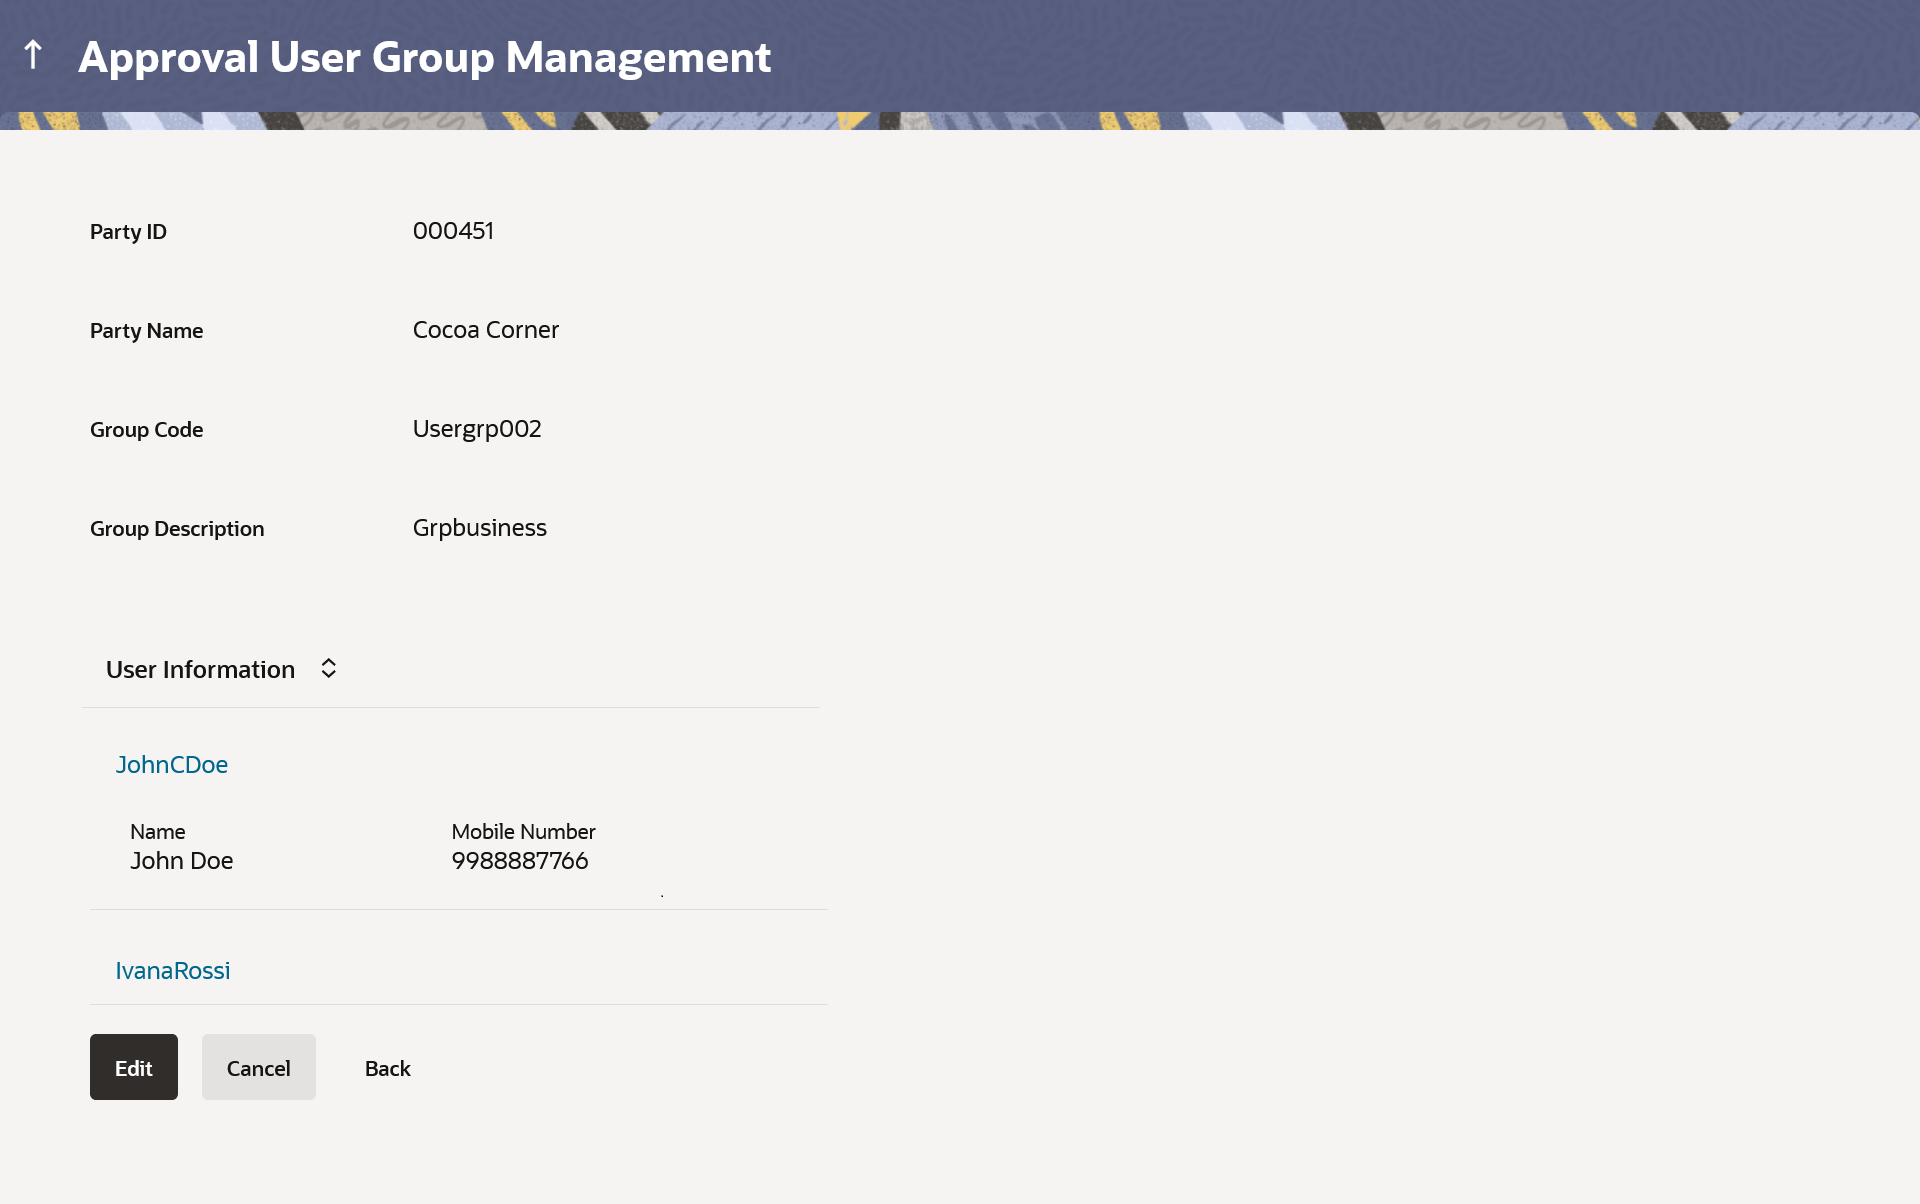
On accessing ‘User Group Management’ menu option and searching the user groups of specific party, summarized view of all the user groups created (if any) for the Party is displayed on the screen. Further drill down is given on the each user group to view the details of the users who are the part of user group.

Figure 54-12 Retail & Business User – View Group Details


Note:

The fields which are marked as Required are mandatory.

For more information on fields, refer to the field description table.

Table 54-9 Retail & Business User – View Group Details - Field Description

Field Name Description
View Information specified in below fields are related to View.
Party ID Party ID of which user groups are to be viewed/ edited.
Party Name Party name of Party ID of which user groups are to be viewed/ edited.
Group Code User Group code is displayed.
Group Description User Group description is displayed.
User Name User name of the user who is part of the selected user group is displayed.
User ID User ID of the user who is part of the user group is displayed.

  1. Perform any one of the following actions:
    • Click Back to navigate to previous screen.
    • Click Cancel to cancel the transaction.
    • Click Edit to edit the user group.

    User is directed to the User Group-Edit screen with values in editable form.