- Current Account and Saving Account User Guide
- Statement
- Ad hoc Account Statement
4.1 Ad hoc Account Statement
This topic describes the systematic instruction to generate account statement based on a given date range or selected period on the account holder’s request.
- On the Homepage, from Account
Services, under Statement, click
Ad hoc Account Statement, or specify the
Ad hoc Account Statement in the Search icon
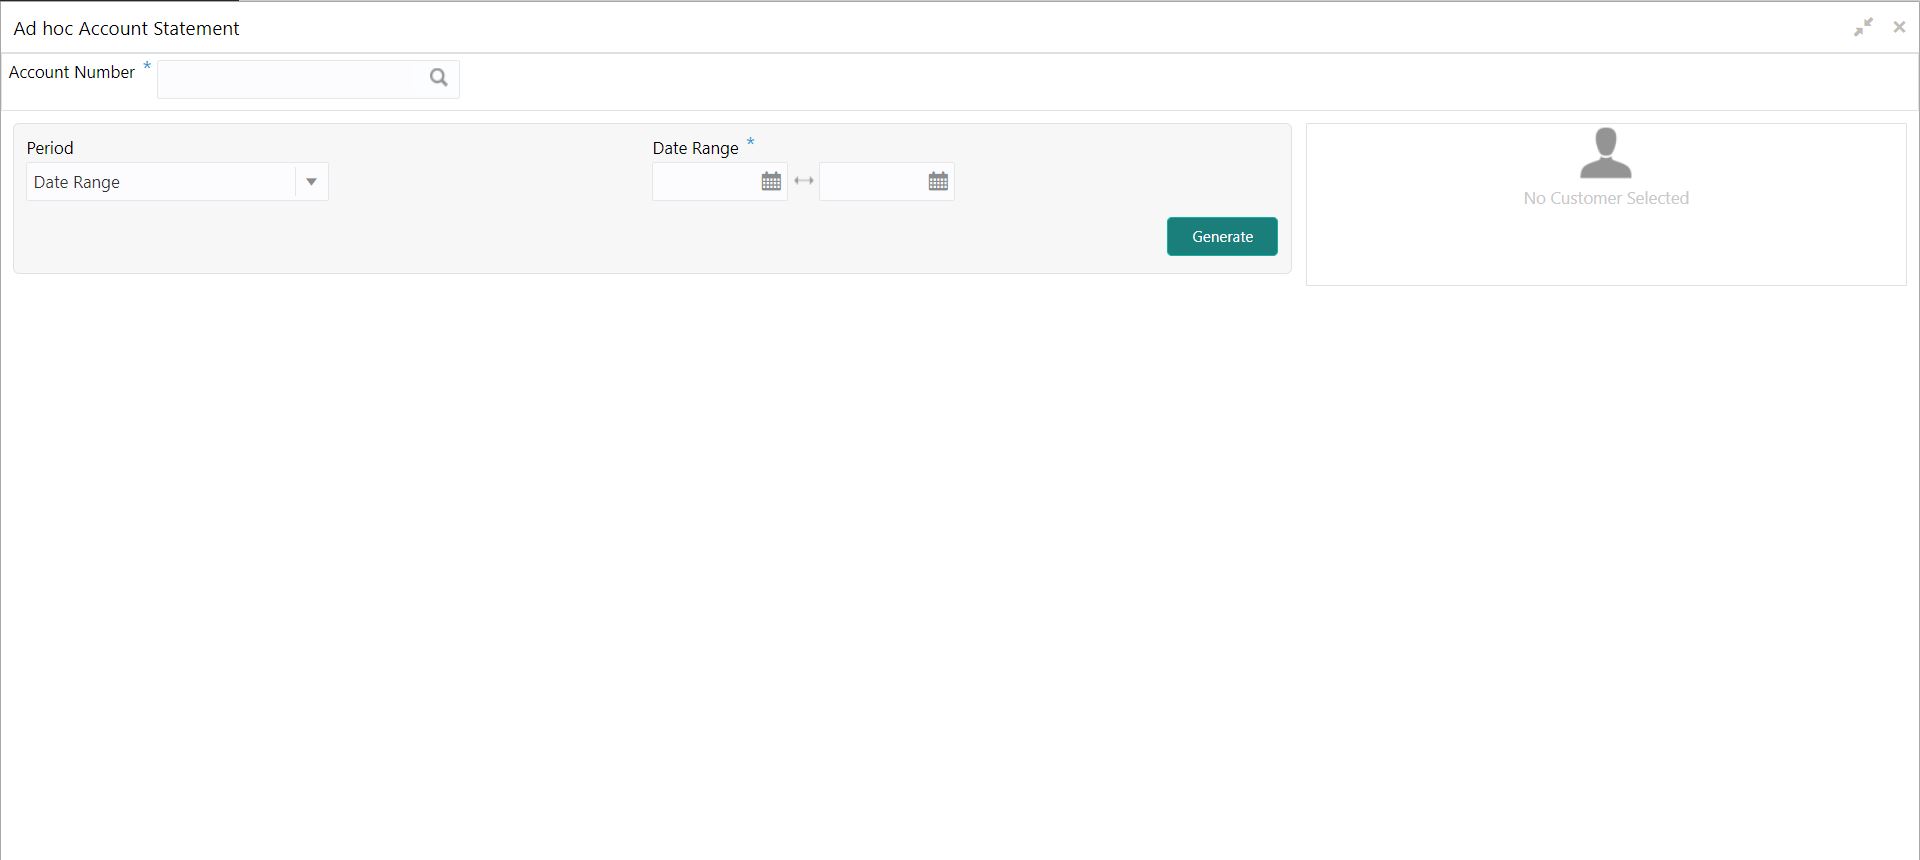
bar.Ad hoc Account Statementscreen is displayed.
Note:
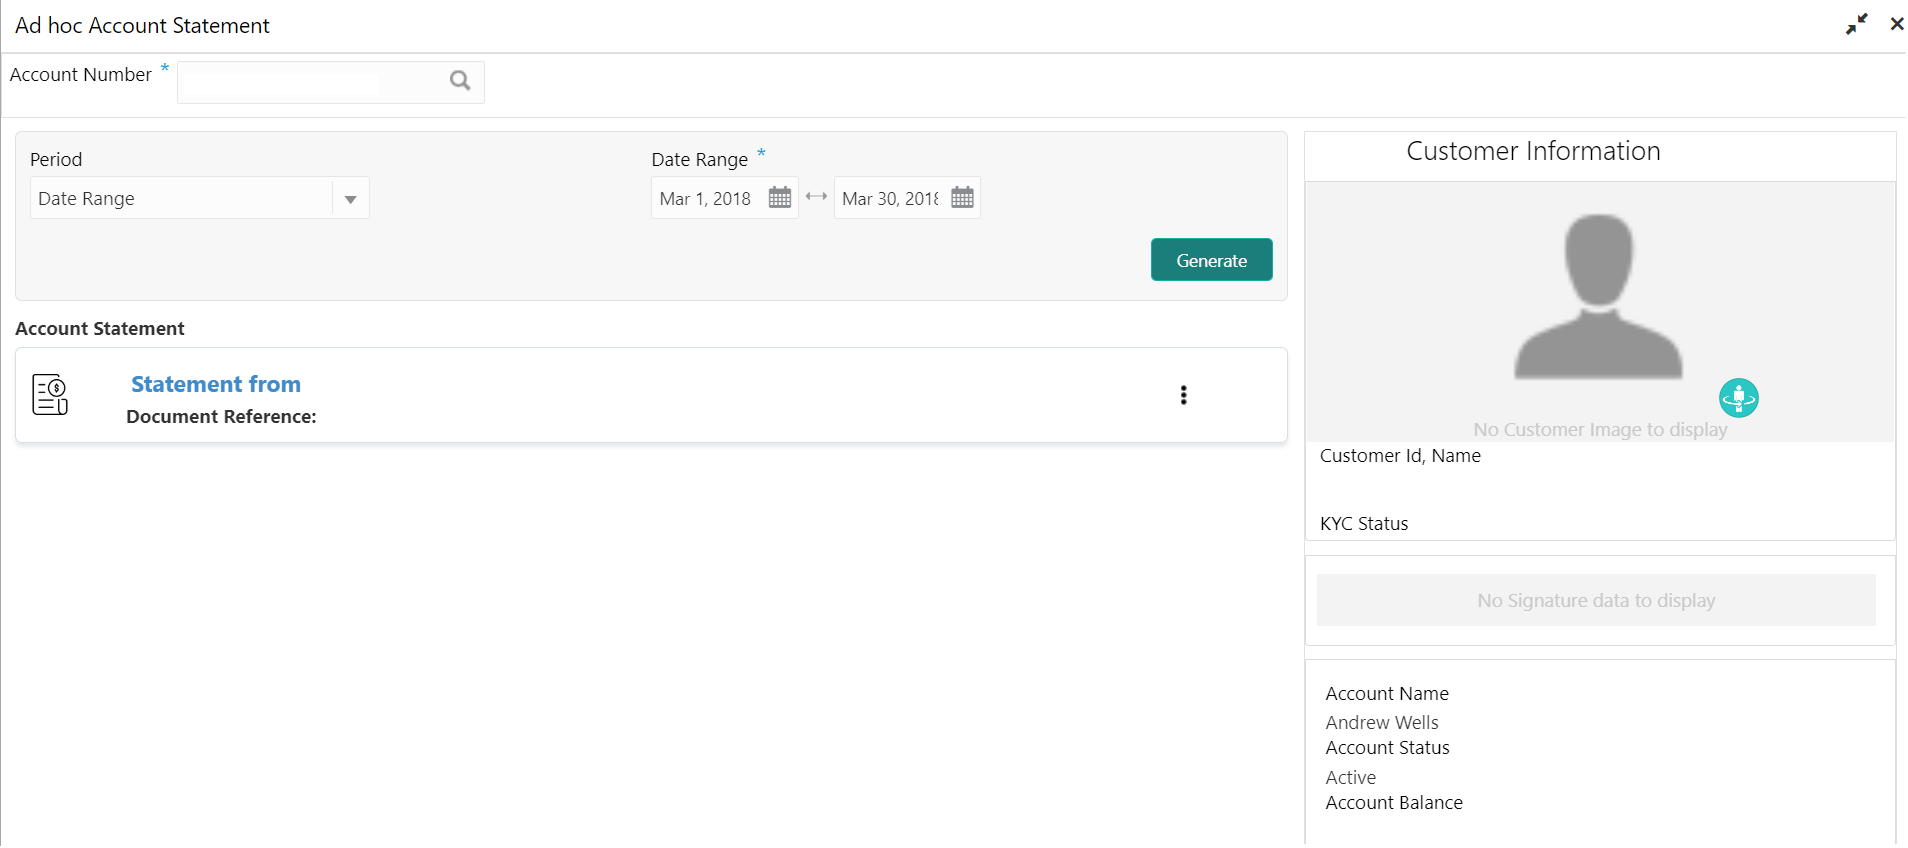
The fields which are marked in asterisk blue are mandatory. - Enter the Account Number.Ad hoc Account Statement details are displayed.
Note:
Account statement details get displayed if any statement is generated today.Figure 4-2 Ad hoc Account Statement Details

Description of "Figure 4-2 Ad hoc Account Statement Details" - On the Ad hoc Account Statement screen, specify the
fields.For more information on fields, refer to the field description table.
Table 4-1 Ad hoc Account Statement - Field Description
Field Description Account Number Enter the Account Number or click the search icon to view the Account Number pop-up window. By default, this window lists all the Account Numbers present in the system. You can search for a specific Account Number by providing Customer ID, Account Number, or Account Name and clicking on the Fetch button. Note:
- The Account Name is displayed adjacent to this field as the account number is selected.
- The customer information is also displayed to the left of the screen.
Period Users can select the period for account statement generation from the drop-down list. The drop-down lists the below values: - Date Range
- Last Month
- Last 2 Months
- Last 3 Months
- Last 6 Months
When you select the Date Range in the Period drop-down, you can specify the account statement generation date manually.
When you select the Last Month or Last 2 Months or Last 3 Months or Last 6 months in the Period drop-down, the Date Range field defaults, and the user cannot modify the date.
For Example:- If the user selects the Period drop-down as Last Month, the date will be default as last one month from the current date.
- If the user selects the Period drop-down as Last 2 Months, the system defaults the account statement generation date as last 2 months from the current date, and the user cannot modify the date.
- If the user selects the Period drop-down as Last 3 Months, the system defaults the account statement generation date as last 3 months from the current date, and the user cannot modify the date.
- If the user selects the Period drop-down as Last 6Months, the system defaults the account statement generation date as last 6 months from the current date, and the user cannot modify the date.
Date Range Click the calendar and specify the from date and to date. Note:
The Date Range cannot be blank and less than from date. - On the Ad hoc Account Statement screen, click
Generate button to generate the account statement for
selected period.Account Statement is generated.
- On the Generated Account Statement, the following
details are displayed:
- Statement Period
- Document Reference
- Click
 icon to view, or print the generated account statement.
Parent topic: Statement

