- Teller User Guide
- Journal Log
- Electronic Journal
15.2 Electronic Journal
Tellers and Supervisors can use the Electronic Journal screen to view the status of the cash transactions performed by them on the posting date.
For information on the common operations and icons on this screen, refer to About Electronic and Servicing Journals.
To view the status of the cash transactions:
- On the Homepage, from Teller mega menu, under
Journal Log, click Electronic
Journal or specify Electronic Journal in
the search icon bar and select the screen.The Electronic Journal screen is displayed.
- On the Electronic Journal screen, specify the details. For more information on fields, refer to the field description
table.
Table 15-5 Electronic Journal - Field Description
Field Description Teller ID Click Search icon and select the Teller ID from the list of values. Branch Posting Date Specify the branch posting date for which the inquiry is to be made. Note:
By default, the current posting date is displayed.Transaction Status Select the transaction status from the drop-down values. - Click

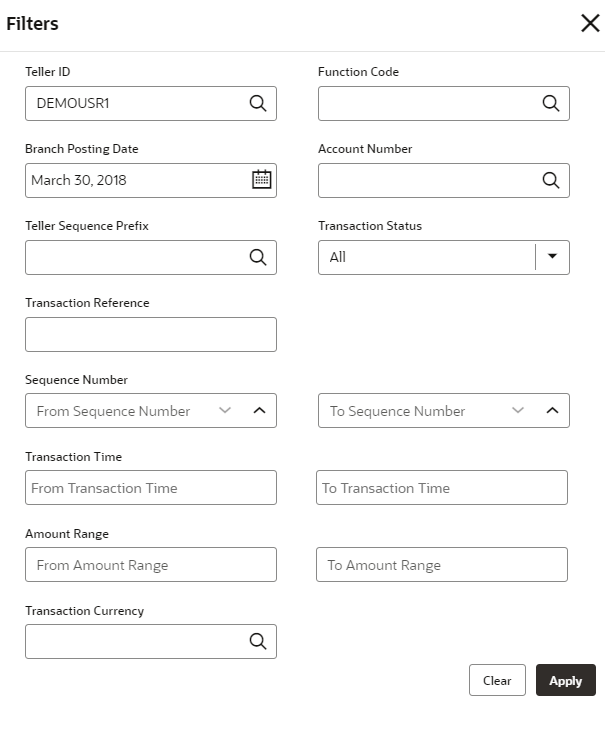
icon to filter the results on the tile/grid view based on the search criteria.The Filters overlays screen is displayed. - On the Filters overlays screen, specify the details to fetch the records. For more information on fields, refer to the field description
table.
Table 15-6 Filters - Field Description
Field Description Teller ID
Specify the Teller ID.Note:
You can also click the search icon and select the Teller ID from the list of values.Function Code
Specify the function code for which the inquiry is to be made.Note:
You can also click the search icon and select the Teller ID from the list of values.Branch Posting Date
Specify the branch posting date for which the inquiry is to be made.Note:
By default, the current posting date is displayed.Account Number
Specify the account number.Note:
You can also click the search icon and select the Teller ID from the list of maintained account numbers.Teller Sequence Prefix
Click the search icon and select from the list of values.
Transaction Status
Select the transaction status from the drop-down values.Note:
By default, Sent Back status is selected.Transaction Reference
Specify the transaction reference number.
From Sequence Number
Specify the start number of the sequence range.
To Sequence Number
Specify the end number of the sequence range.
From Transaction Time
Specify the transaction start time.
To Transaction Time
Specify the transaction end time.
From Amount Range
Specify the “from” amount of the amount range.
To Amount Range
Specify the “to” amount of the amount range.
Transaction Currency
Click the search icon and select the transaction currency from the list of values.
- Click Apply.The Electronic Journal screen displays.
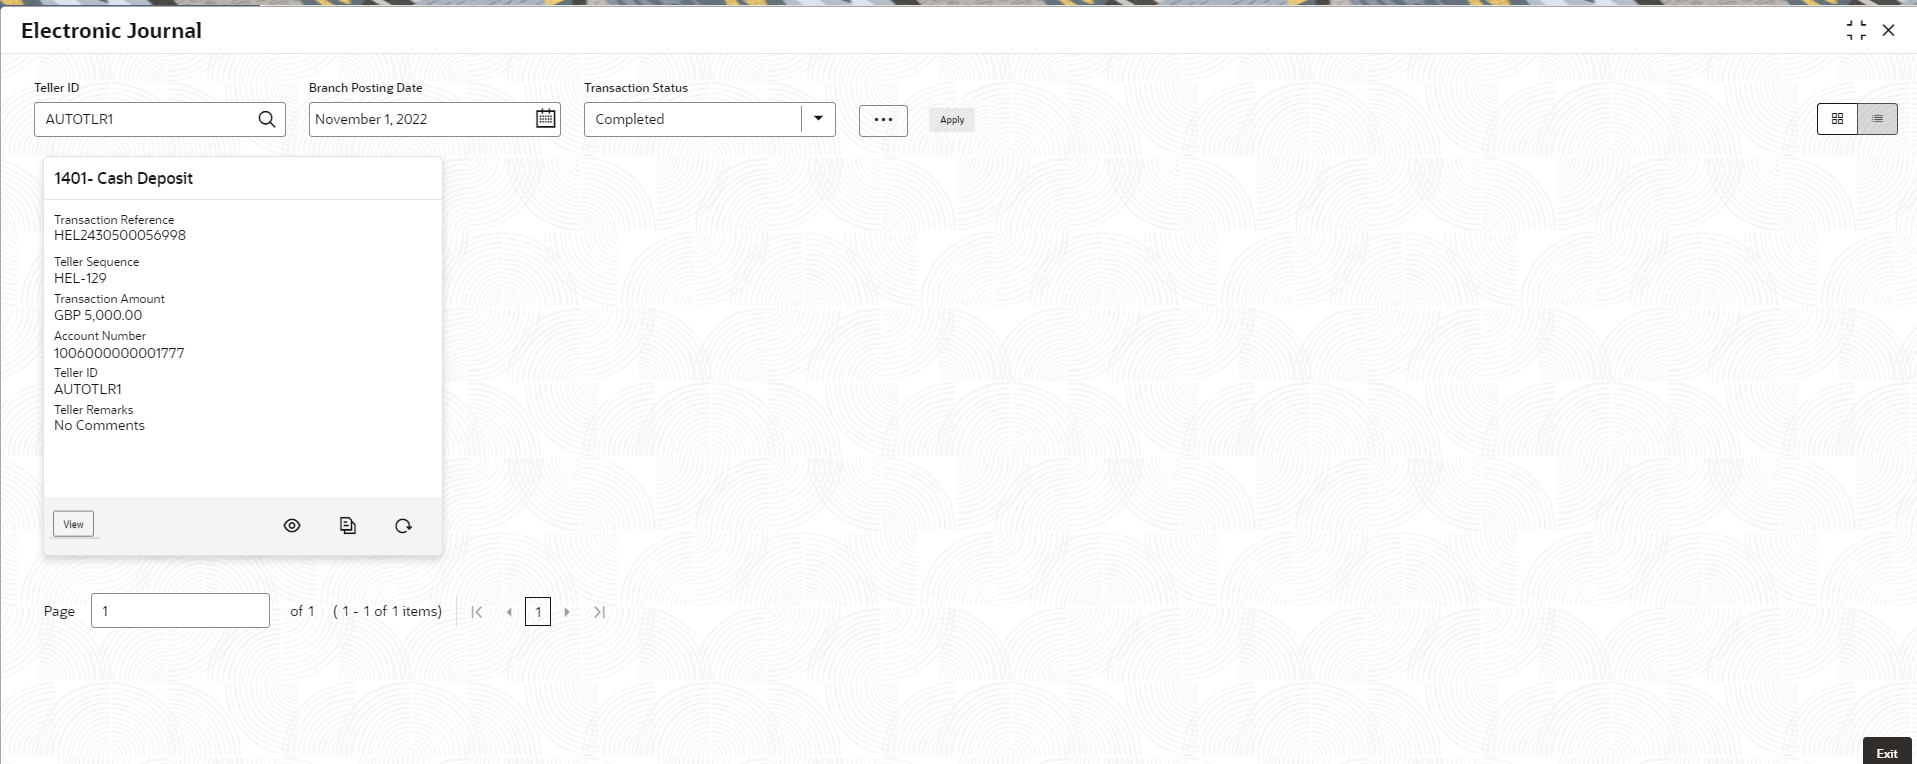
Figure 15-3 Electronic Journal (List View) - Completed Transaction Status
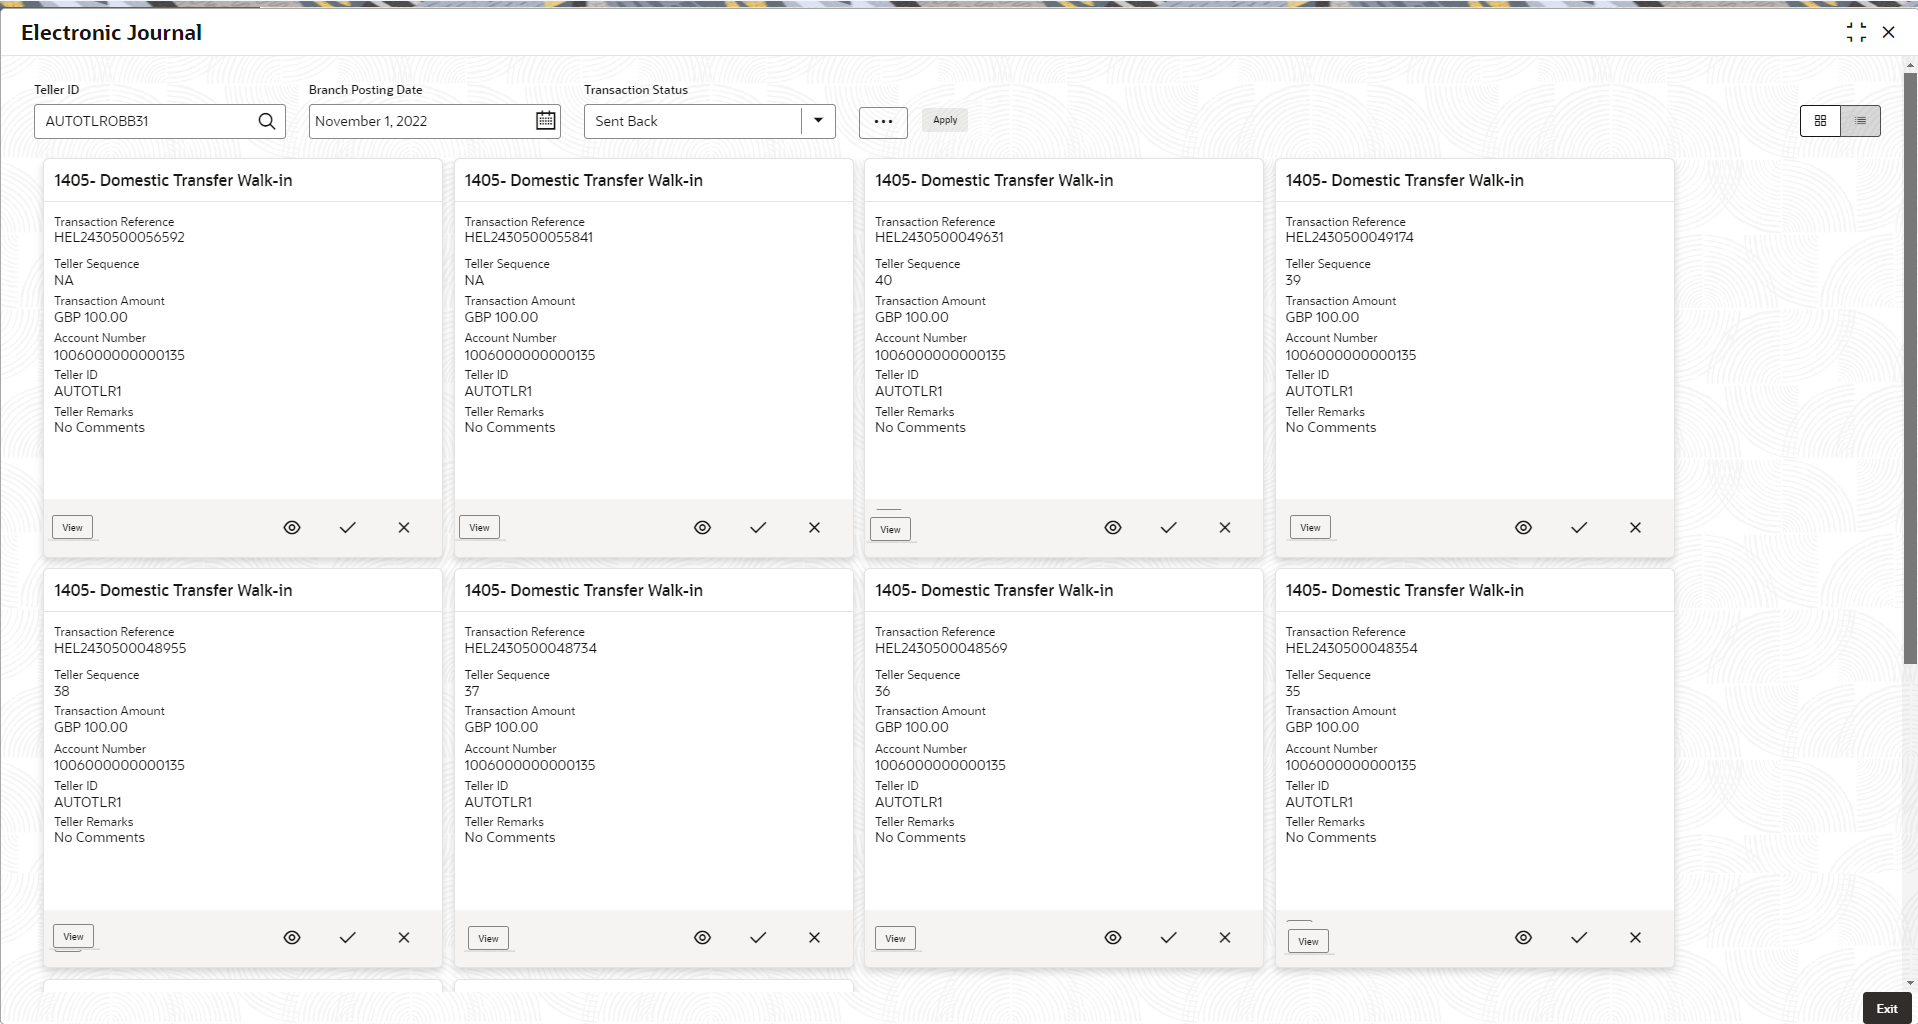
Figure 15-4 Electronic Journal (List View) - Sent Back Transaction Status
You can perform any of the following actions in this screen:- Click
 icon to view the transaction information. This screen provides the details of the transactions handed off to the external system.
The Transaction Info pop-up screen is displayed.
- Click View button to view the transaction details. The following details are displayed based on the transaction status in the filters:
- Transaction Reference
- Transaction Status
- Time Stamp
- Teller ID
- Teller Remarks
- Approval Time Stamp
- Supervisor ID
- Supervisor Remarks
- Override Info

Click Override Info icon to view the details for approval flow request.
- Click
 icon to submit the transaction.
- Click
 icon to discard the transaction.
- Click
 icon to view advice.
- Click
 icon to reverse the transaction.
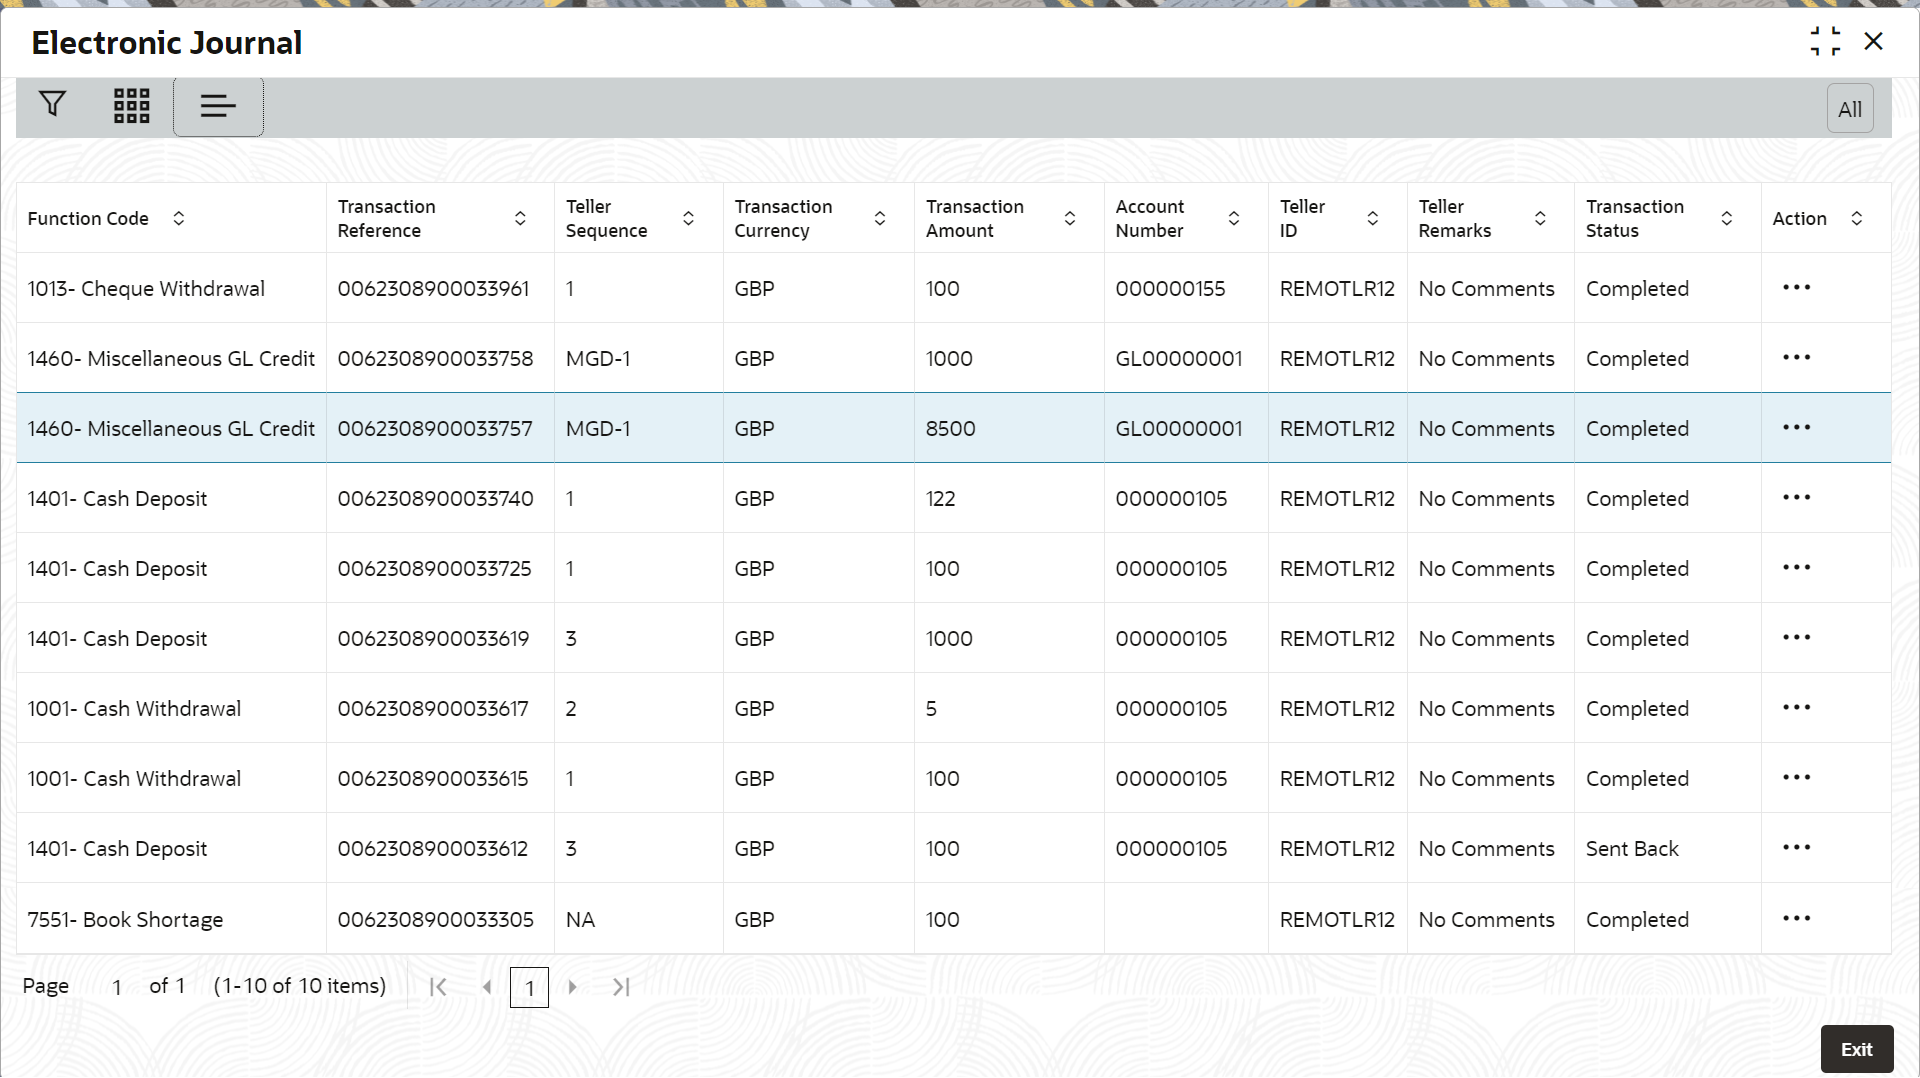
Figure 15-6 Electronic Journal (Grid View)
- Click
Parent topic: Journal Log


