- Receivables and Payables User Guide
- Manual Reconciliation
- Search
- Invoice/Debit Notes to Payments/Credit Notes Recon
7.1.1 Invoice/Debit Notes to Payments/Credit Notes Recon
This topic describes the systematic instruction to search the invoices/payments to reconcile or de-reconcile.
- On Home screen, click Cash Management. Under Cash Management, click Receivables & Payables.
- Under Receivables & Payables, click Manual Recon.The Manual Recon screen displays.
- In the Action field, select the action to be performed as Reconcile or De Reconcile.
- In the Recon Category list, select the category as Invoice/Debit Notes to Payment/Credit Notes.
- In the Branch list, select the branch for which reconciliation needs to be done. By default, the branch of the logged-in user is selected.
- Click Proceed to view the search parameters to search transactions.The Manual Recon - Search section displays.
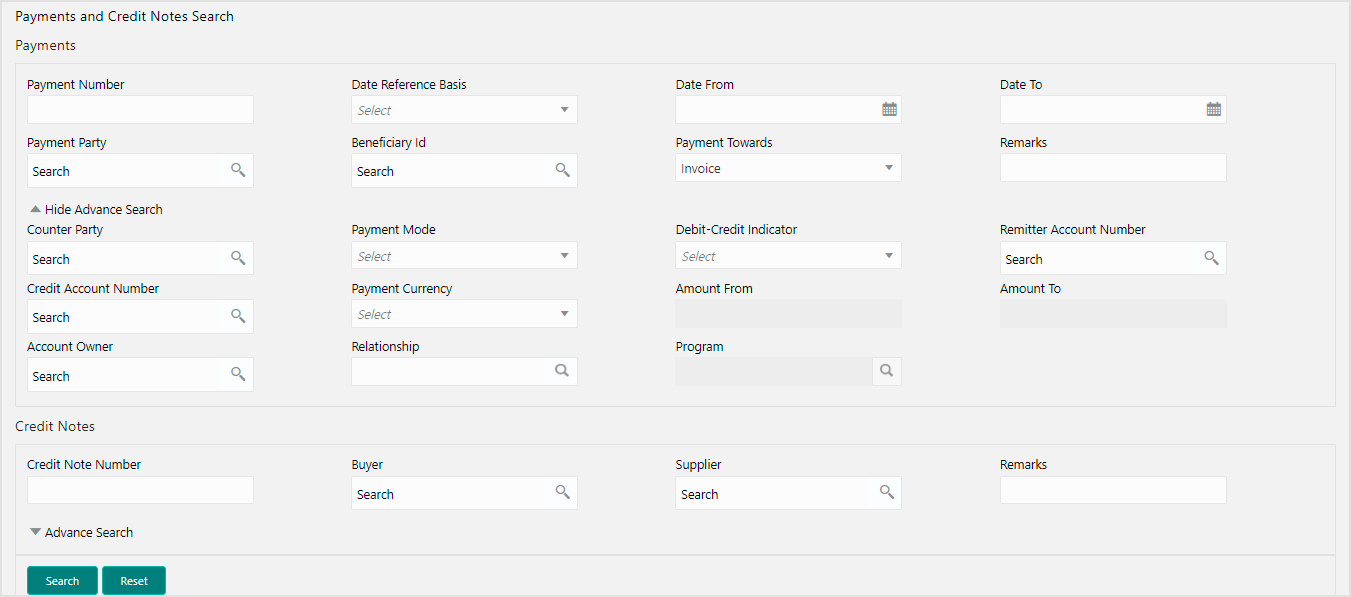
Figure 7-3 Payments and Credit Notes Search
- Specify the fields on Manual Recon - Search screen.For more information on fields, refer to the field description table.
Note:
The fields, which are marked with an asterisk, are mandatory.Table 7-1 Manual Recon - Field Description
Field Description Reconcile Method Specify whether the reconciliation was done by using ‘Auto’ or ‘Manual’ method. This field is displayed only when ‘Action’ is selected as ‘De Reconcile’.
Reconciliation Reference No Click the Search icon to select the reconciliation reference number. This field is mandatory and displayed for only ‘Manual’ de-reconciliation method.
Reconcile Date From Click the Calendar icon to specify start date of range within which record was reconciled. This field is displayed only when ‘Action’ is selected as ‘De Reconcile’.
Reconcile Date To Click the Calendar icon to specify end date of range within which record was reconciled. This field is displayed only when ‘Action’ is selected as ‘De Reconcile’.
Invoices Displays the following fields under the Invoices section. Buyer Click the Search icon to search buyer mentioned in the invoice. Supplier Click the Search icon to search supplier by whom invoice is generated. Invoice Number Specify the specific internal invoice reference number to search. Invoice Currency Specify the currency selected for Invoice. Date Reference Basis Select the value to specify the reference for date criteria. Date From Click the Calendar icon to specify the start date of range for selected date reference basis. Date To Click the Calendar icon to specify the end date of range for selected date reference basis. Relationship Click the Search icon to select the relationship code used in the transaction. Program Click the Search icon to select the program linked with the invoice. This field is applicable to only OBSCF system.
Amount Reference Basis Select the reference basis of the amount range as base invoice amount or net invoice amount. Amount From Specify the lowest amount of the range. Amount To Specify the highest amount of the range. Account Number Click the Search icon to select the account number. This field is enabled only after selecting supplier.
Payments Displays the following fields under the Payments section. Payment Number Specify the unique reference number generated while making a payment. Date Reference Basis Select the reference basis of the date range as payment date or value date. Date From Click the Calendar icon and select the start of the date-range. Date To Click the Calendar icon and select the end of the date-range. Payment Party Click the Search icon to select the party who made the payment. Beneficiary Id Click the Search icon to select the beneficiary id or name who received the payment. In case if supplier is selected in the ‘Invoice’ search parameter; then the same gets auto-populated here. Payment Towards Select the option that the payment is to be made towards. Remarks Specify the remarks added in the transaction. Counter Party Click the Search icon to select the counterparty. Payment Mode Select the mode by using which payment was done. For example: Account Transfer, NEFT etc.
Debit-Credit Indicator Select the value to specify whether the transaction is of debit or credit type. Remitter Account Number Click the Search icon and select the remitter account of the transaction. Credit Account Number Click the Search icon and select the account credited with the amount. Payment Currency Select the currency in which payment is done. Amount From Select the minimum amount of the payment range. Amount To Select the maximum amount of the payment range. Account Owner Click the Search icon and select the owner of the account. Relationship Click the Search icon to select the relationship code used in the transaction. Credit Notes Displays the following fields under the Credit Notes section. Credit Note Number Specify the unique reference number generated for the credit note. Buyer Click the Search icon to search buyer mentioned in the credit note. Supplier Click the Search icon to search supplier by whom credit note is generated. Remarks Specify the remarks added in the transaction. Currency Specify the currency selected for credit note. Amount From Select the minimum amount of the credit note range. Amount To Select the maximum amount of the credit note range. Relationship Click the Search icon to select the relationship code used in the transaction. Date Reference Basis Select the reference basis of the date range as payment date or value date. Date From Click the Calendar icon and select the start of the date-range. Date To Click the Calendar icon and select the end of the date-range. - Optional: Click Reset clear the selected values.
- Click Search to view the result.
Parent topic: Search


