3.8.1 Create Location

This topic describes the systematic instruction to map the locations with the location cluster, clearing network, and link the own branch, correspondent bank and outside network bank for clearing tie-up.

Newly created location codes take effect once authorized and cannot be modified thereafter.
Specify User ID and Password, and login to Home screen.
  1. On Home screen, click Cash Management. Under Cash Management, click Collections.
  2. Under Collections, click Maintenance. Under Maintenance, click Location.
  3. Under Location, click Create Location.
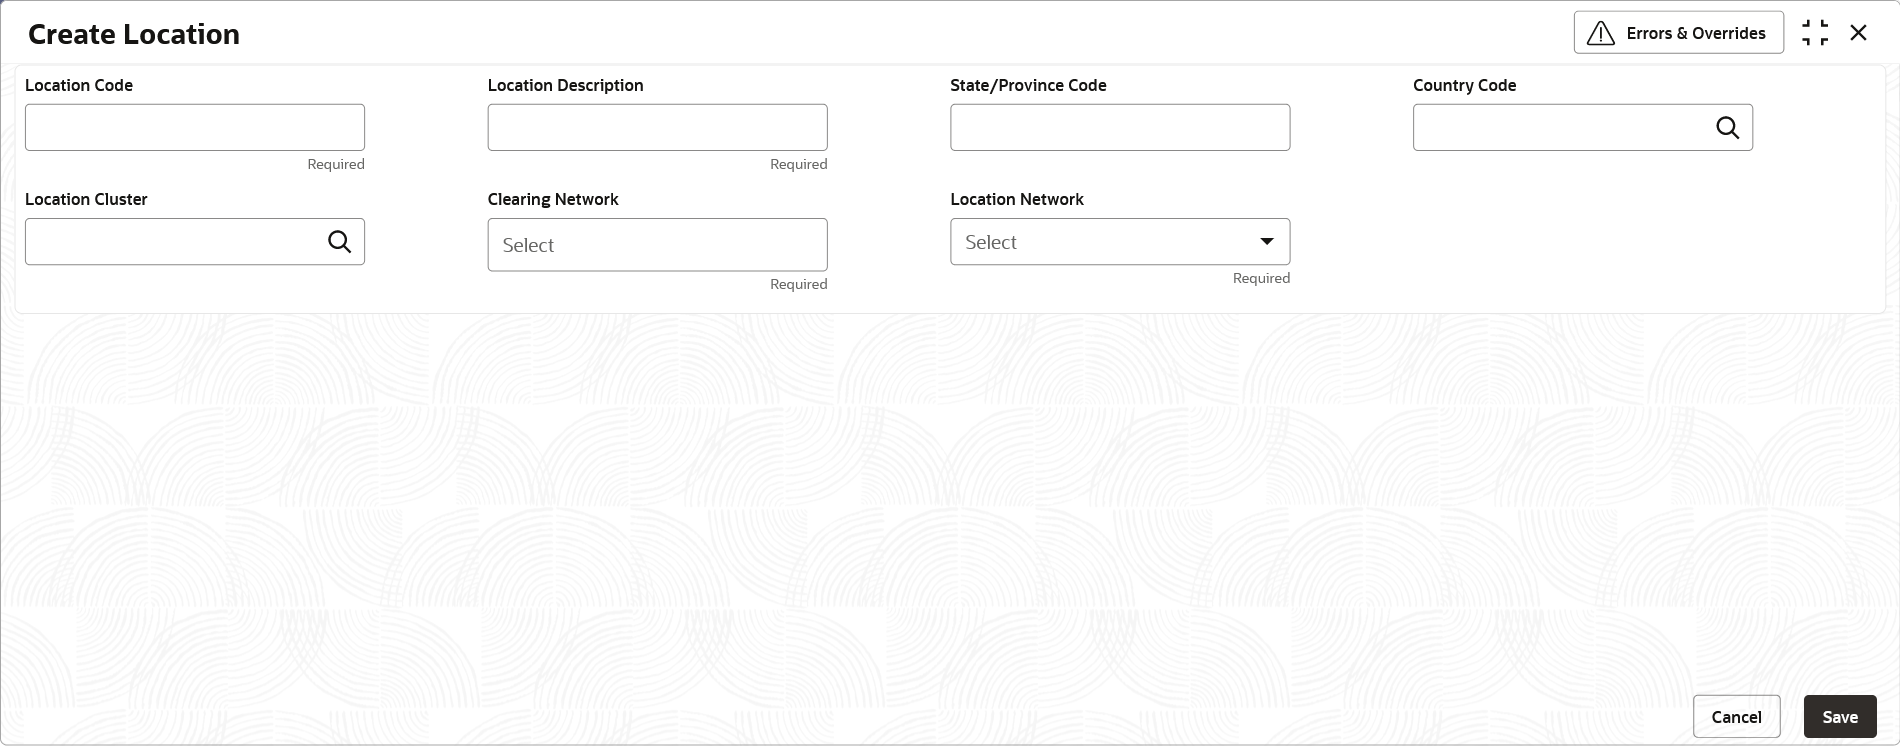
    The Create Location screen displays.
  4. Specify the fields on Create Location screen.

    Note:

    The fields marked as Required are mandatory.
    For more information on fields, refer to the field description table.

    Table 3-18 Create Location - Field Description

    Field Description
    Location Code Specify the unique code for the location.
    Location Description Specify the brief description for the specified location.
    State/Province Code Specify the unique state/province code of the specified location.
    Country Code Click the Search icon to view and select the country code of the specified location.
    Location Cluster Click the Search icon to view and select the location cluster to be mapped with the location.
    Clearing Network Select any of the following clearing networks in which the location can participate for cheque clearing:
    • MICR – Magnetic Ink Character Recognition
    • NON MICR – Non Magnetic Ink Character Recognition
    • ICCS – Image Cheque Clearing System
    • HOME – Home Network
    Location Network Select the location network from the drop-down list.
    The available options are:
    • Correspondent Banks
    • Outside Network Banks
    • Own Branches

    Based on the Location Network selection, the following sections displays.

Correspondent Banks:

Location where bank does not have any branch, however intend to offer CMS services by having an arrangement with other bank are maintained under ‘Correspondent Banks’ tab.

In the location maintenance, the user can map the Correspondent bank and its controlling branch with priority.

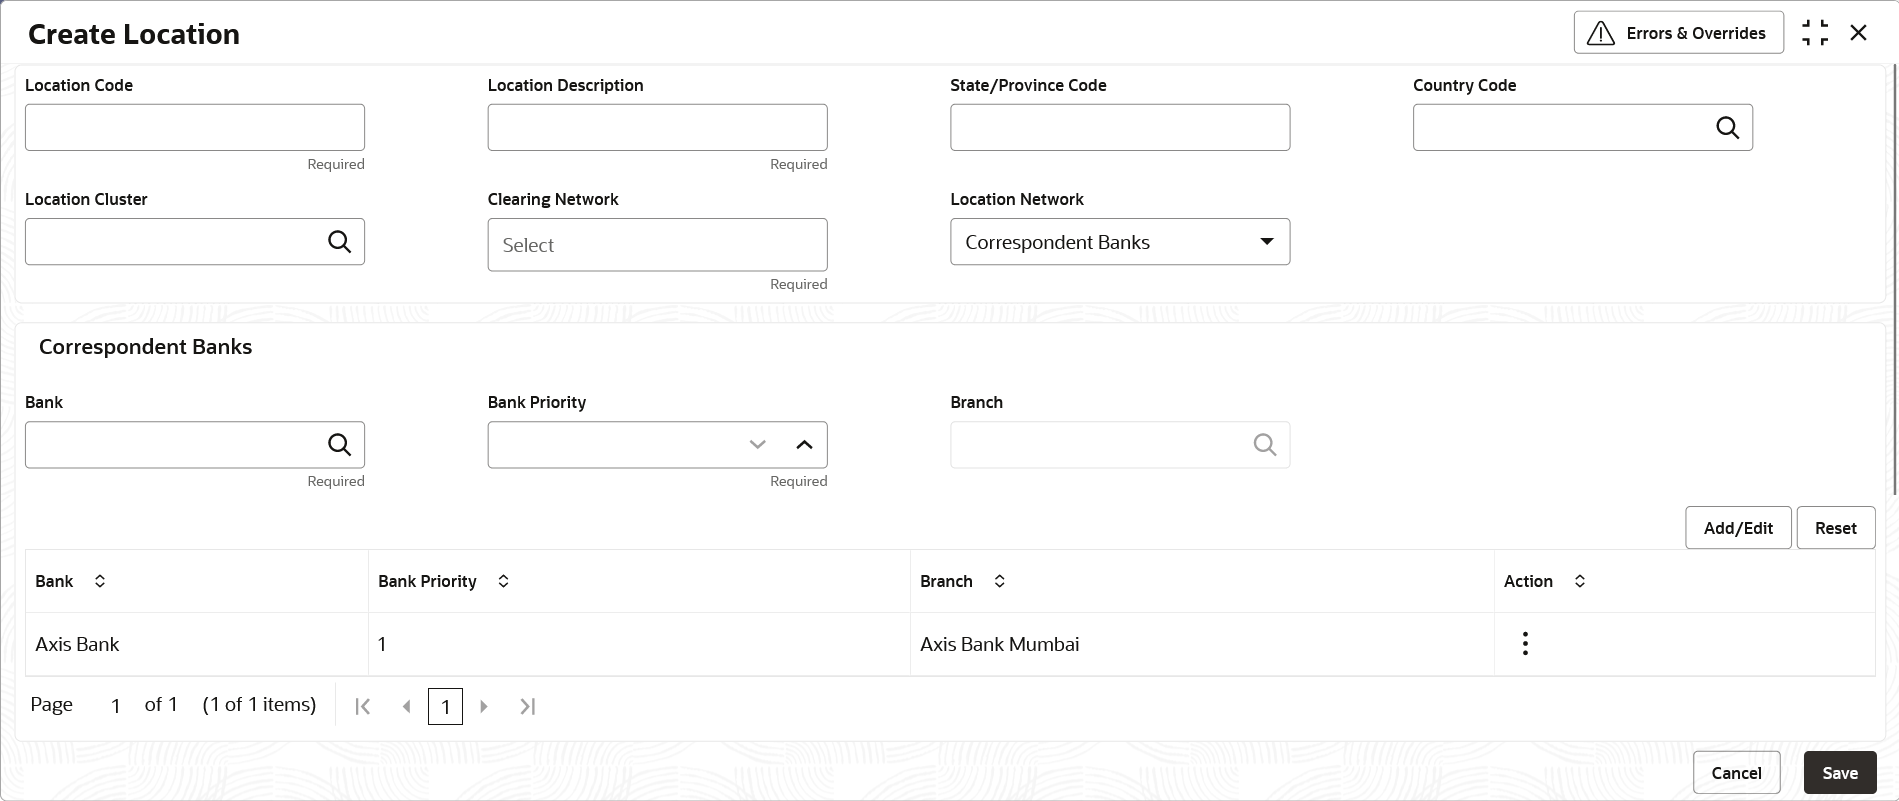
If the Location Network field is selected as Correspondent Banks, the system displays the extended section to add the correspondent bank details.The Create Location - Correspondent Banks screen displays.

Figure 3-33 Create Location - Correspondent Banks


  1. Specify the fields on Create Location - Correspondent Banks screen.

    Note:

    The fields marked as Required are mandatory.
    For more information on fields, refer to the field description table.

    Table 3-19 Correspondent Banks - Field Description

    Field Description
    Bank Click the Search icon to view and select the correspondent bank code to map with the location.
    Bank Priority Specify the priority of the correspondent bank for cheque collection and clearing at the mapped location.

    Two or more correspondent banks linked to the same location cannot have the same priority.

    Branch Click the Search icon to view and select a controlling branch for the correspondent bank for processing the cheques.

Outside Network Banks:

System bank can have tie-up with few outside network banks for cheque clearance for the location where the system bank neither have any branch nor have an arrangement or tieup with the correspondent bank.

In location maintenance, you can map the outside network bank and its controlling branch with priority.

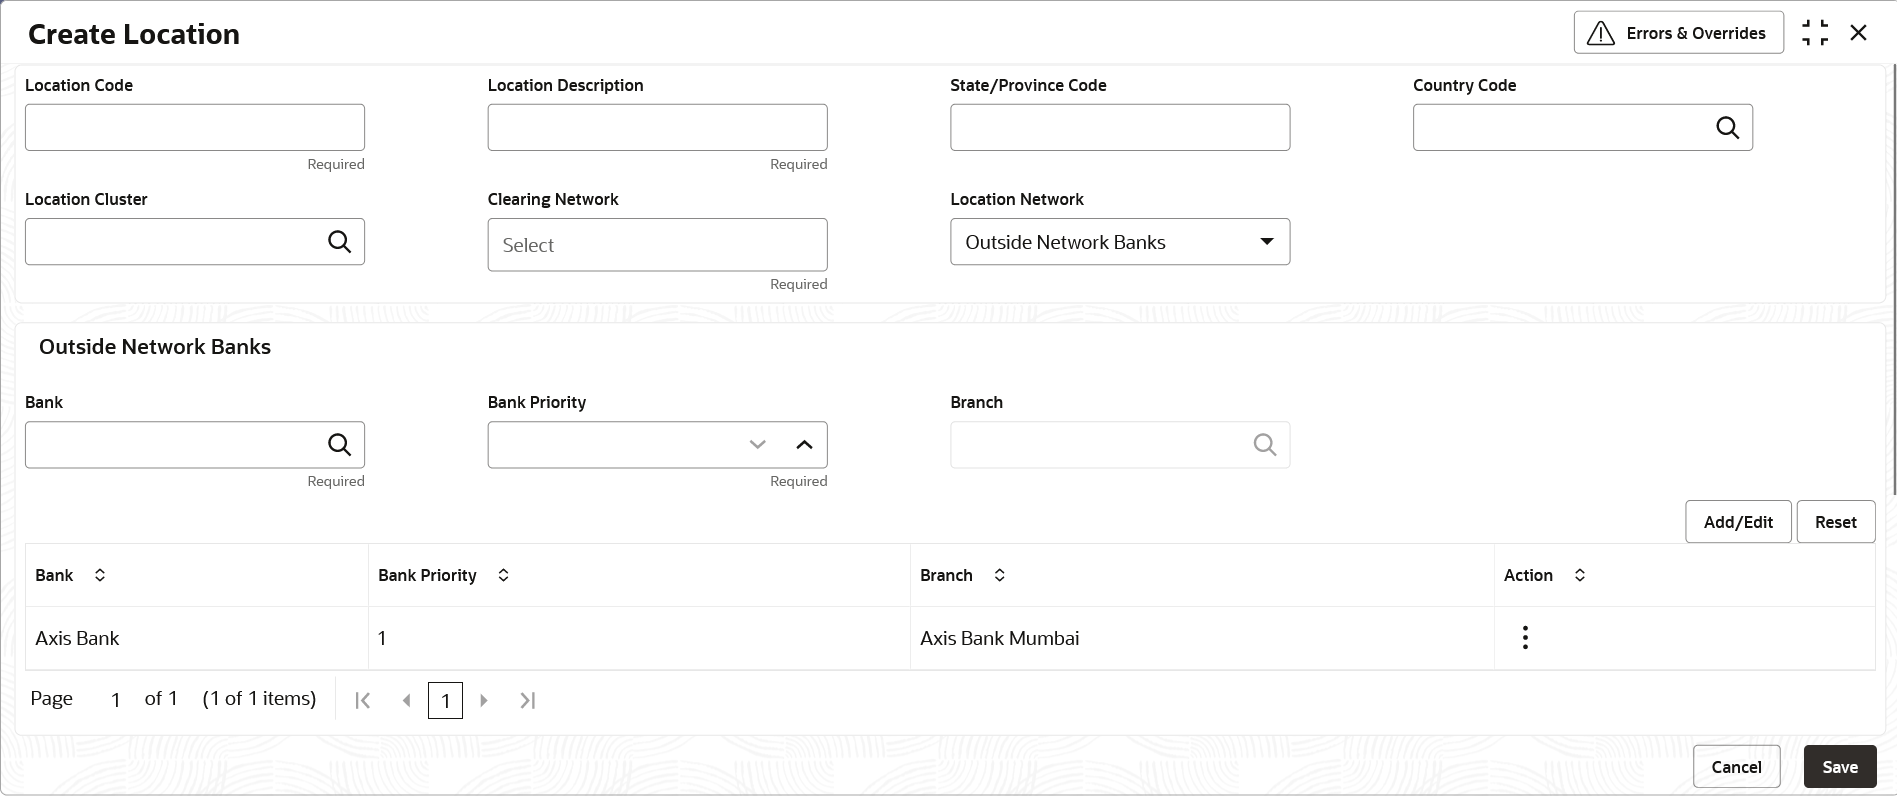
If the Location Network field is selected as Outside Network Banks, the system displays the extended section to add the Outside Network bank details.

The Create Location - Outside Network Banks screen displays.

Figure 3-34 Create Location - Outside Network Banks


  1. Specify the fields on Create Location - Outside Network Banks screen.

    Note:

    The fields marked as Required are mandatory.
    For more information on fields, refer to the field description table.

    Table 3-20 Outside Network Banks - Field Description

    Field Description
    Bank Click the Search icon to view and select the bank code to map with the location.
    Bank Priority Specify the priority of the outside network bank for cheque collection and clearing at the mapped location.

    Two or more outside network banks linked to the same location cannot have the same priority.

    Branch Click the Search icon to view and select a controlling branch of the outside network bank for processing the cheques.

Own Branches:

Location where the bank have their own branch, where the cheque can be sent for clearance locally. In Location maintenance, the user can map the own controlling branches with priority and routing number.

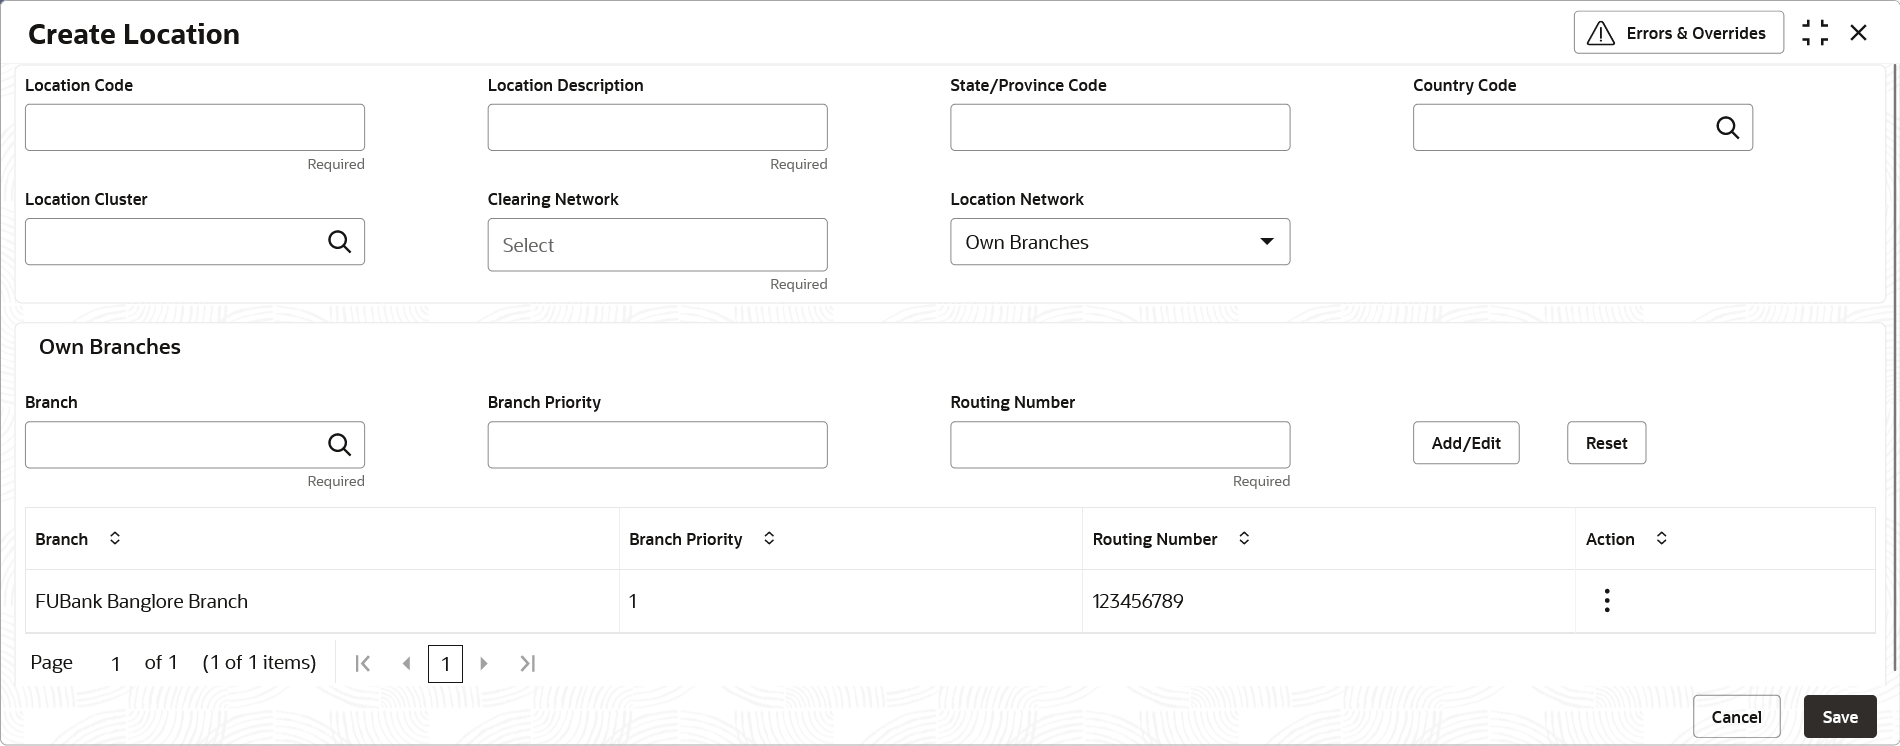
If the Location Network field is selected as Own Branches, the system displays the extended section to add the Own bank details.

The Create Location - Own Branches screen displays.

Figure 3-35 Create Location - Own Branches


  1. Specify the fields on Create Location - Own Branches screen.

    Note:

    The fields marked as Required are mandatory.
    For more information on fields, refer to the field description table.

    Table 3-21 Own Branches - Field Description

    Field Description
    Branch Click the Search icon to view and select a own controlling branches for processing the cheques.
    Branch Priority Specify the priority of the own branches for cheque collection and clearing at the mapped location.

    Two or more own branches linked to the same location cannot have the same priority.

    Routing Number Specify the unique routing number for the selected branch.
  2. Click Add/Edit to add the record to the grid or modify a selected record.
  3. Click the Kabab (More Options) icon under the Action column and then click Edit to modify records in the grid.
  4. Click the Kabab (More Options) icon under the Action column and then click Delete to delete the records in the grid.
  5. Click Reset to clear the selected values.
  6. Click Save to save the record and send it for authorization.