- Collections User Guide
- Maintenance for Collections
- Non System Bank Master
- Create Non System Bank Master
3.10.1 Create Non System Bank Master
This topic describes the systematic instruction to create a master list for the external banks with the bank, address and SWIFT/BIC code details.
Specify User ID and Password, and login to Home screen.
- On Home screen, click Cash Management. Under Cash Management, click Collections.
- Under Collections, click Maintenance. Under Maintenance, click Non System Bank Master.
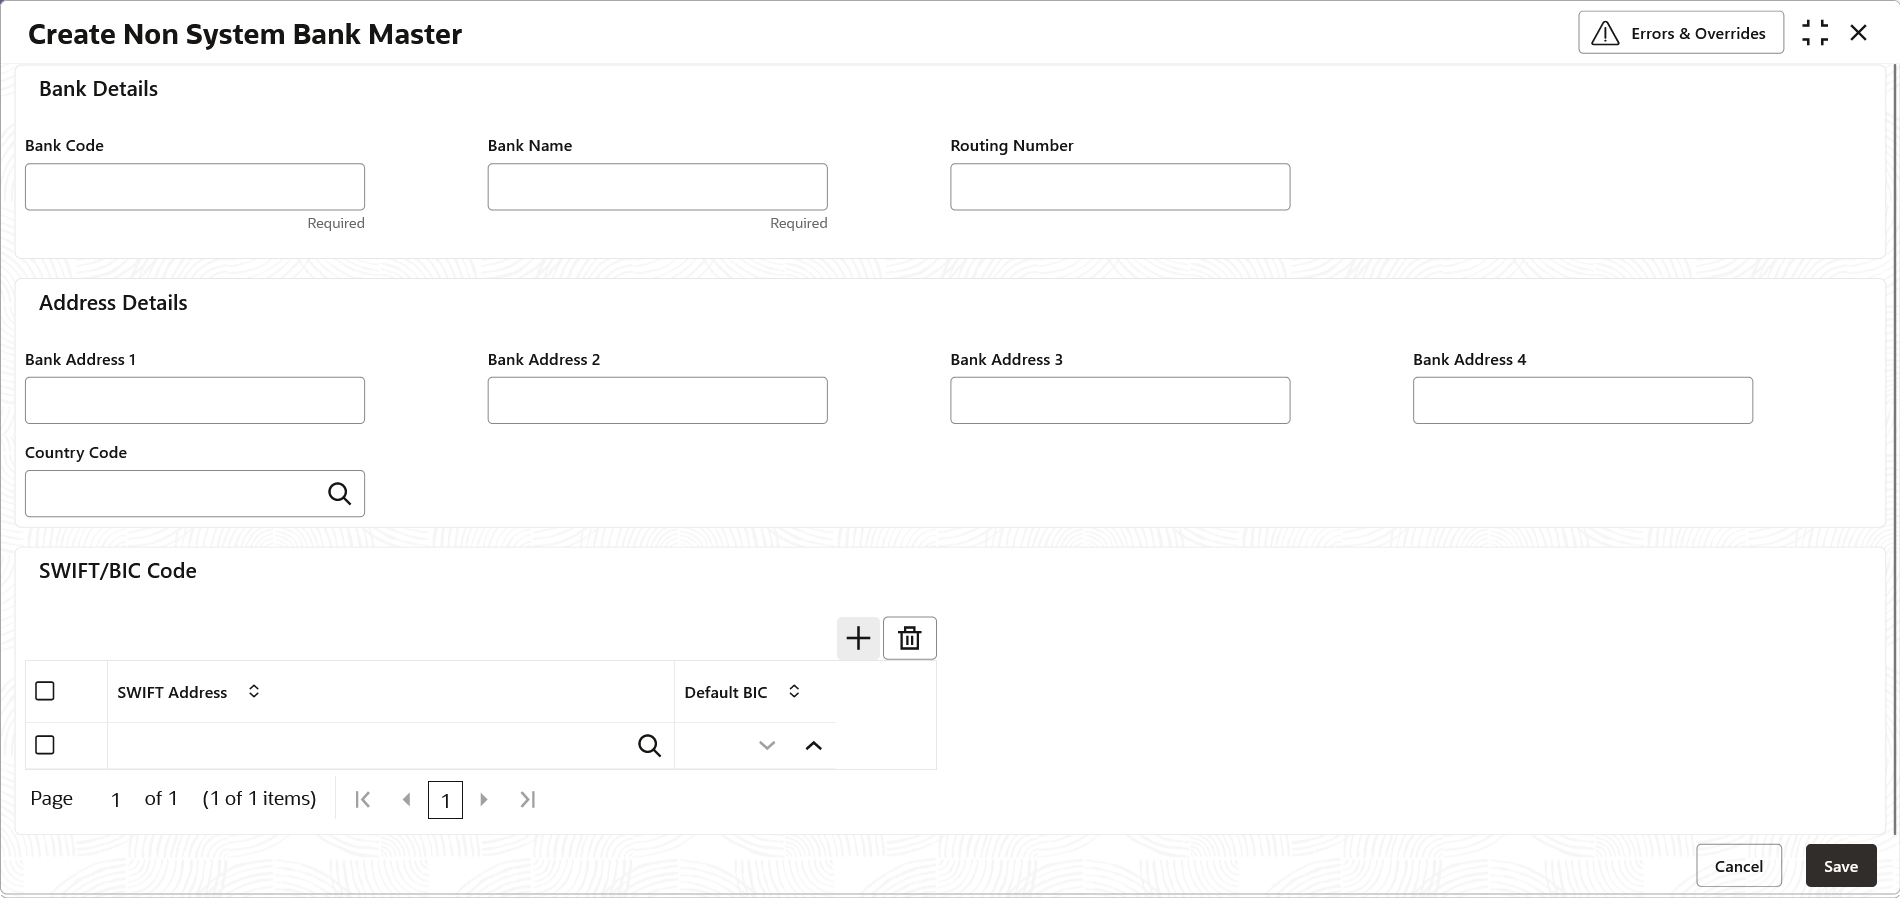
- Under Non System Bank Master, click Create Non System Bank Master.The Create Non System Bank Master screen displays.
- Specify the fields on Create Non System Bank Master screen.For more information on fields, refer to the field description table.
Note:
The fields marked as Required are mandatory.Table 3-23 Create Non System Bank Master - Field Description
Field Description Bank Details Specify the details of the external bank in the following fields. Bank Code Specify a unique code for the external bank. Bank Name Specify the name of the external bank. Routing Number Specify the unique routing number for the external bank. Address Details Specify the address details of the external bank in the following fields. Bank Address 1 Specify the address line 1 of the external bank. Bank Address 2 Specify the address line 2 of the external bank. Bank Address 3 Specify the address line 3 of the external bank. Bank Address 4 Specify the address line 4 of the external bank. Country Code Specify the country code of the external bank. SWIFT/BIC Code Select the SWIFT/BIC codes of the external bank in the following table grid. SWIFT Address Click the search icon to view and select the applicable SWIFT address from the list. Default BIC Specify the default BIC code for the selected SWIFT address. - Perform the following actions in the SWIFT/BIC Code table grid.
- Click Add icon to add the new row to the grid.
- Click Delete icon to delete the selected row.
- Click Save to save the record and send it for authorization.
Parent topic: Non System Bank Master
